Table of Contents
Advertisement
Advertisement
Table of Contents

Related Manuals for ClassicFlame Helen


Summary of Contents for ClassicFlame Helen
- Page 1 36HF320FGT, 48HF320FGT...
-
Page 2: Table Of Contents
TABLE OF CONTENTS/ÍNDICE/TABLE DES MATIÈRES Important Instructions/Instrucciones importante/Instructions Importantes...................3 Getting Started/Para empezar/Préparation.............................7 Product Specifications/Especificaciones del producto/Caractéristiques du produit..............7 Register your new purchase / Registrar su nueva compra/Inscrire votre nouvel achat ............8 Pre-Assembly/Preensamblaje/Pré-assemblage..........................9 Hardware Included/Tornillería incluida/Quincaillerie fournie ......................9 Tools Required/Herramientas necesarias/Outils requis........................10 Package Contents/Contenido del paquete/Contenu de l’emballage..................11 Installation Options/Opciones de instalación/Options d’installation...................12 Wall Hanging/Guindar en pared/Montage mural........................13... -
Page 3: Important Instructions/Instrucciones Importante/Instructions Importantes
IMPORTANT INSTRUCCIONES INSTRUCCIONES INSTRUCTIONS IMPORTANTE IMPORTANTE Cuando utilice Lors de l’utilisation When using electrical electrodomésticos, appliances, basic d’appareils électriques, siempre tome medidas de precautions should always pour éviter les risques precaución básicas para be followed to reduce d’incendie, d’électrocution evitar incendios, descargas the risk of fire, electrical et de blessures, toujours eléctricas... - Page 4 unless they have been por personas o niños d’une défaillance given supervision or con capacidades physique, sensorielle físicas, sensoriales o ou intellectuelle, ou instruction. mentales reducidas les personnes n’ayant 5. Always unplug this o sin experiencia pas l’expérience et appliance when not in ni conocimientos, les connaissances use.
- Page 5 power tap (outlet/power tomacorriente. commandes en position strip). d’arrêt, puis retirez la fiche 12. Conectar solamente de la prise. a una toma de corriente con conexión 12. Branchez cet appareil a tierra adecuada. seulement à une prise Este calentador debe de courant mise à...
- Page 6 16. This appliance has hot blandas, como una l’appareil sur une surface cama, donde las molle, comme un lit, car and arcing or sparking les ouvertures pourraient aberturas se puedan parts inside. Do not use it bloquear. se bloquer. in areas where gasoline, paint or flammable 16.
-
Page 7: Getting Started/Para Empezar/Préparation
GETTING STARTED PARA EMPEZAR PRÉPARATION 1. Remove the product identification 1. Remover la etiqueta de identidad 1. Retirez la vignette d’identification sticker from the front of the del frente de la chimenea. du produit de l’avant de la fireplace. cheminée. Product Identification Sticker Etiqueta de Identificación del Producto Autocollant d’identification du produit... -
Page 8: Register Your New Purchase / Registrar Su Nueva Compra/Inscrire Votre Nouvel Achat
REGISTER YOUR NEW PURCHASE online! i nscrire votre nouvel achat • registrar su nueva compra Thank you for purchasing our product. Please take a moment to visit tsicustomerservice.com to register your new purchase: Merci d’avoir acheté ce produit. Veuillez prendre un court instant pour vous rendre sur tsicustomerservice.com et enregistrer votre nouvel achat : Gracias por adquirir nuestro producto. -
Page 9: Pre-Assembly/Preensamblaje/Pré-Assemblage
PRE-ASSEMBLY PREENSAMBLAJE/PRÉASSEMBLAGE HARDWARE INCLUDED/TORNILLERÍA INCLUIDA/QUINCAILLERIE FOURNIE Part Description Part Number Quantity Quantity Pieza Descripción Número de pieza Cantidad Cantidad Pièce Description Référence Quantité Quantité (36HF320) (48HF320) Anchor Screw Tornillo de anclaje 3647HF-AA Vis d’ancrage Wall Anchor Taco fisher de pared 3647HF-BB Ancrage au mur Screw 4mm x 12mm (2 Pre-Attached) -
Page 10: Tools Required/Herramientas Necesarias/Outils Requis
PLANNING ASSEMBLY/CÓMO PLANIFICAR EL ENSAMBLAJE/PRÉPARATION DE L’ASSEMBLAGE Before beginning assembly of product, make sure all parts are present. Compare parts with Hard- ware Included and Package Contents lists. If any part is missing or damaged, do not attempt to assemble, install or operate the product. Contact customer service for replacement parts. Estimated Assembly Time: 60 Minutes Antes de empezar a ensamblar el producto, asegúrese de tener a mano todas las piezas. -
Page 11: Package Contents/Contenido Del Paquete/Contenu De L'emballage
PRE-ASSEMBLY (CONTINUED) ENSAMBLAJE PREVIO (CONTINUACIÓN) / PRÉASSEMBLAGE (SUITE) PACKAGE CONTENTS/CONTENIDO DEL PAQUETE/CONTENU DE L’EMBALLAGE Part Number Part Number Part Description Quantity Número de Pieza Número de Pieza Pieza Descripción Cantidad Numéro de pièce Numéro de pièce Pièce Description Quantité (36HF320) (48HF320) Mounting Bracket Soporte de montaje... -
Page 12: Installation Options/Opciones De Instalación/Options D'installation
INSTALLATION OPTIONS OPCIONES DE INSTALACIÓN/OPTIONS D’INSTALLATION The fireplace can be installed with 2 options: 1. Wall hanging with provided mounting bracket. 2. Built in construction. Follow installation instructions below based on installation preference. La chimenea se puede instalar con 2 opciones: 1. -
Page 13: Wall Hanging/Guindar En Pared/Montage Mural
INSTALLATION - WALL HANGING IONPSETARALATCIOIÓNN: COLGAR EN LA PARED/ INSTALLATION – MONTAGE MURAL WALL HANGING TO THE WALL WITH PROVIDED MOUNTING BRACKET Your new electric fireplace may be installed virtually anywhere in your home. However, when choosing a location be sure to follow the general instructions included. For best results, install out of direct sunlight. - Page 14 INSTALLATION - WALL HANGING INSTALACIÓN: COLGAR EN LA PARED/INSTALLATION – MONTAGE MURAL Removing the Mounting Bracket Choosing a Wall Location Retiro del soporte de montaje Elección de ubicación en la pared Retirer le support de montage Choisissez un emplacement sur le mur Choose a wall location to attach the Mounting Remove the Mounting Bracket (A) from the back Bracket (A).
- Page 15 Attaching the Mounting Bracket Hanging the Fireplace Fijación del soporte de montaje Colgar la chimenea Fixer le support de montage Fixez le séparateur de la sortie d’air inférieure Attach the Mounting Bracket (A) to the wall by Hang the Fireplace (C) on the hooks at the bottom fastening the six Anchor Screws (AA) into the wall of the Mounting Bracket (A) and push the Fireplace anchors.
-
Page 16: Built In Construction/Empotrado/Construction Intégrée
INSTALLATION - BUILT IN CONSTRUCTION INSTALACIÓN: CONSTRUCCIÓN INCORPORADA/INSTALLATION - CONSTRUCTION INTÉGRÉE This fireplace is a zero clearance design. No combustibles can be placed on the top surface of the fireplace. Combustibles may be installed to the edge of the unit. Insulation and vapor barrier should be placed a minimum of 2 in. - Page 17 INSTALLATION - BUILT IN CONSTRUCTION/INSTALACIÓN: CONSTRUCCIÓN INCORPO- RADA/INSTALLATION - CONSTRUCTION INTÉGRÉE (SUITE) Fastening the Upper Baffle & Lower Baffle. Fijar el deflector superior &deflector inferior. Fixation des plaques supérieures et inférieures. Use 10 Screws (DD) to fasten the Upper Baffle (B) & Lower Baffle (D) to the Fireplace (C). Utilice los 10 tornillos (DD) para fijar el deflector superior (B) y el deflector inferior (D) a la Chimenea (C).
- Page 18 Loosening the Strain Relief Bracket Removing the Power Cord Assembly. Retiración del conjunto de cables de Aflojar el soporte de alivio de tensión. alimentación. Desserrement du support de décharge de Enlèvement de l’unité de cordon contrainte. d’alimentation. Remove the two pre-attached Screws holding the Remove the power cord and strain relief assembly.
- Page 19 Connecting the Power Supply Wire. Conexión de cable de alimentación. Connexion du cordon d’alimentation. Connect the power supply wire. Please operate the fireplace to make sure all the functions of the fireplace are working well to avoid any re-work for mistaken connection. Conecte el cable de alimentación.
- Page 20 Hanging the Glass Front Frame. Colgar el marco delantero de vidrio. Suspension du cadre avant en verre. Hang the Glass Front Frame (E) on the Fireplace (C) with 1 Screw on each side of the fireplace. Cuelga el marco delantero de vidrio (E) en la Chimenea(C) insertando los 1 tornillos (CC) en los dos lados de la chimenea.
-
Page 21: Fuel Bed Setup Instructions/Configuración - Cama De Combustible/Instructions De Réglage De La Couche De Combustible
FUEL BED SETUP INSTRUCTIONS/INSTRUCCIONES DE INSTALACIÓN DE LA BASE DE COMBUSTIBLE/INSTRUCTIONS DE CONFIGURATION POUR LE LIT DE COMBUSTIBLE Placing Plastic Crystals, Rocks or Logset. Install Glass Panel. Colocación de cristales de plástico, rocas Instalación del panel de vidrio. o ajustes de registro. Installer le panneau en verre. -
Page 22: Operation/Funcionamiento/Utilisation
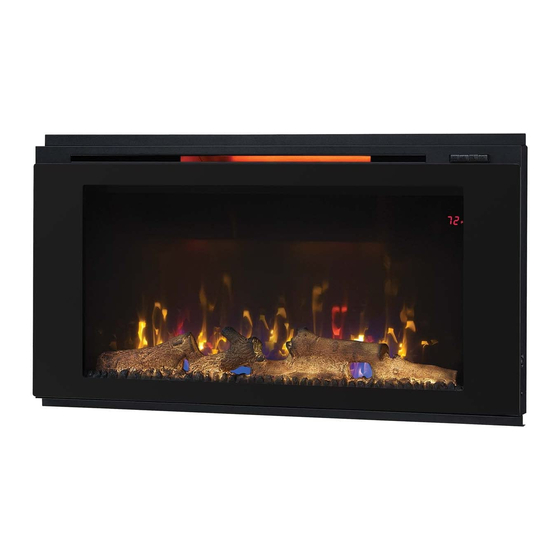
OPERATION/FUNCIONAMIENTO/UTILISATION The fireplace can be operated by either the remote control or the control panel. La chimenea se puede encender usando el control remoto o el panel de control. Le foyer peut être contrôlé avec la télécommande ou depuis le panneau de commande. B6352... - Page 23 FUNCTION ICON DESCRIPTION FUNCIÓN / FONCTION ICONO / ICÔNE DESCRIPCIÓN / DESCRIPTION The POWER button supplies power POWER to all the functions of the fireplace. Pressing the POWER button again will put the fireplace in standby mode. This will turn off all functions at once but will hold the settings in the memory.
- Page 24 To set the thermostat use the Heater button HEATER on the control panel to select the desired ▲ ▼ temperature. The thermostat setting range is 62 °F - 82 °F or 17 °C - 27 °C or continously ON. The thermostat is adjustable by 2°F or 1°C increments by pressing the Up or Down ▲▼...
- Page 25 There are six brightness levels that can be FLAME COLOR selected. Setting 6-4 decrease in Spectrafire brightness. Setting 3-1 decrease in Amber only flame brightness. Existen seis niveles de brillo que se pueden LLAMA seleccionar. Las configuraciones 6 a 4 disminuyen el brillo de Spectrafire.
- Page 26 Replacing the Remote Control Battery NOTE: Do not mix old and new Sustitución de la batería del control remoto batteries. Do not mix alkaline, standard Remplacement de la pile de la télécommande (carbonzinc), or rechargeable (nicad, nimh, etc) batteries. When the remote control stops operating or its range seems reduced, it is time to replace the battery with new ones.
- Page 27 Replacing the Remote Control Battery Using the Power Cord Correctly Desecho de baterías usadas Uso correcto del cable de alimentación Mise au rebut des piles Utiliser le cordon d’alimentation correcte- The battery may contain hazardous substances that could ment endanger the enviroment and human health. La batería puede contener sustancias peligrosas que This heater is for use on 120 volts.
-
Page 28: Fcc/Ic Information/Información De Fcc/Ic/Informations Relatives Aux Normes Fcc/Ic
FCC/IC INFORMATION INFORMACIÓN DE FCC/IC / INFORMATION CONCERNANT FCC/IC Warning: Changes or modifications Advertencia: Los cambios o Avertissement: Des changements to this unit not expressly approved by modificaciones en esta unidad, que ou modifications effectués sur the party responsible for compliance no sean aprobados directamente cet appareil, non expressément could void user’s authority to operate... -
Page 29: Care & Cleaning/Cuidado Y Limpieza/Entretien Et Nettoyage
incluida la interferencia que pudiese (1) Cet appareil ne doit provoquer causar la operación no deseada. aucune interférence nuisible; et Este instrumento digital clase B (2) Cet appareil doit accepter toute cumple con el ICES-003 de Canadá. interférence reçue, y compris les interférences pouvant entraîner un fonctionnement indésirable. - Page 30 WARNING:Keep electrical cords, drapery, furniture and other combustibles at least 3 ft (0.9 m) from the front of the heater and away from the sides. ADVERTENCIA: Mantenga cables eléctricos, paños, muebles y otros combustibles a 3 pies (0.9m) de distancia del frente del calentador y sus lados.
-
Page 31: Troubleshooting/Solución De Problemas/Dépannage
TROUBLESHOOTING SOLUCIÓN DE PROBLEMAS / DÉPANNAGE PROBLEM ROOT CAUSE CORRECTIVE ACTION PROBLEMA / PROBLÈME ORIGEN DE LA CAUSA / CAUSE PROBABLE MEDIDAS CORRECTIVAS / ACTION CORRECTIVE Display shows “ ”. The thermostat sensor is broken or Unplug the fireplace, remove the back panel of the fireplace and disconnected. - Page 32 Display shows “ ”. Manual Reset overheat protection Inspect the heater and check that the has triggered. air inlets and outlets are not blocked as this may cause overheating. Unplug the heater for 30 minutes and allow it to cool down.
- Page 33 Check that unit is plugged into a standard There is no power. There is no power to the unit. 120V outlet. Press the power button several times and make sure the power is set to the “ON” position. Verifique que la unidad esté enchufada No hay alimentación.
- Page 34 With the power on press and hold the Flame effect works but heater The heater is disabled. POWER button on the control panel function does not, and the flame for 10 seconds. Once re-enabled the effect flashes when the heater button flame effect will flash multiple times.
- Page 35 The noise when the heater is on a. The air intakes are dirty or a. Check the air intakes for obstructions is louder than normal. obstructed. or high dust build up. a. Las entradas de aire están sucias u a. Verifique las entradas de aire en obstruidas.
-
Page 36: Replacement Parts/Repuestos/Pièces De Rechange
REPLACEMENT PARTS PIÈCES DE REMPLACEMENT / PIEZAS DE REPUESTO INSTALADAS PART PART NAME PART NUMBER/ 36HF QTY. 48HF QTY. PIEZA NOMBRE DE LA PIEZA / NOM DE LA PIÈCE NúMERO DE PIEZA / NUMÉRO CANTIDAD 36HF CANTIDAD 47HF PIÈCE DE PIÈCE 36HF QTY. -
Page 37: Exploded View/Vista Desplegada /Vue Explosive
EXPLODED VIEW VISTA DESPLEGADA / VUE EXPLOSIVE NOTE: The scale and size of parts may be different depending on your exact model. NOTA: La escala y el tamaño de las piezas pueden ser distintos según el modelo exacto. REMARQUE: L’échelle et la taille des pièces peuvent être différents en fonction de votre modèle exact. -
Page 38: Warranty/Garantía/Garantie
1-YEAR LIMITED WARRANTY GARANTÍA LIMITADA DE 1 AÑO / GARANTIE LIMITÉE DE 1 AN The manufacturer warrants that your El fabricante garantiza que su nueva Le fabricant garantit que votre new Electric Fireplace is free from estufa eléctrica no presentará nouveau foyer électrique est exempt manufacturing and material defects defectos de fabricación ni materiales... - Page 39 7. All other warranties – expressed directos, indirectos o resultantes directs, indirects ou consécutifs or implied –with respect to the que surjan del uso del producto, découlant de l’utilisation de product, its components and o de la incapacidad para l’appareil, ou de l’incapacité accessories, or any usarlo, salvo que la ley estipule lo à...
-
Page 40: Customer Service/ Servicio Al Cliente / Service À La Clientèle
CUSTOMER SERVICE SERVICIO AL CLIENTE / SERVICE À LA CLIENTÈLE tsicustomerservice.com tsicustomerservice.com tsicustomerservice.com For Customer Service Para el servicio de atención Pour le Service Clientèle Appeler le al cliente llame 1-866-661-1218 Call 1-866-661-1218 1-866-661-1218 Questions? ¿Tiene preguntas? Questions? Our message centers are available Nuestro Centro de mensajes está...
Need help?
Do you have a question about the Helen and is the answer not in the manual?
Questions and answers