Table of Contents
Advertisement
Quick Links
Advertisement
Table of Contents

Related Manuals for Hitachi HILF65101


Summary of Contents for Hitachi HILF65101
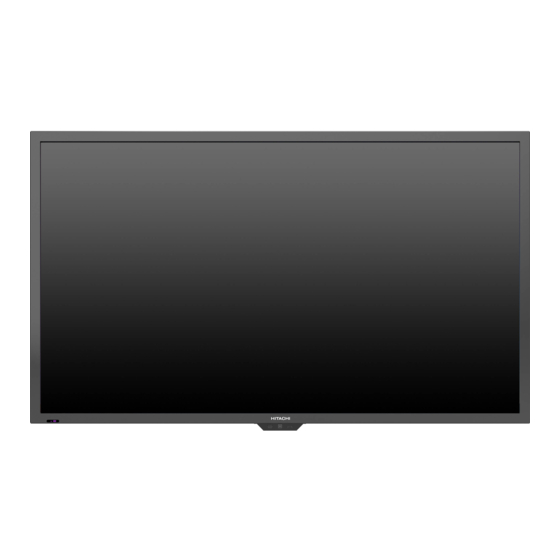
- Page 1 User Manual 65˝ (64.56˝) Model: HILF65101 65” Interactive LED/LCD...
-
Page 2: Table Of Contents
Contents 1. Important safety Instruction …………….………………………………………………………………. 3 1.1 Safety precautions 1.2 Maintenance 2. Introduction ………………….……………………………………….………………………………………… 8 3. Product Description ……………….…………………………….…………………………………………… 9 3.1 Front View 3.2 Rear View 3.3 Connection 4. Remote Control ……………………………………………………………………………….………………… 11 5. OSD menu Description ………………………….…………………………………………………………… 12 6. -
Page 3: Important Safety Instruction
1. Important Safety instructions [SAFETY WARNING] • To reduce the risk of fire or electric shock, do not expose this product to rain or moisture. • To prevent injury, this product must be securely attached to the floor/wall in accordance with the installation instructions. -
Page 4: Safety Precautions
1.1 SAFETY PRECAUTION Note) The color and design may different by each model and the product specification are subject to change without notice for performance enhancement. 1.1.1 Power [Warning] • Do not use damaged power cord, plug nor loose socket. It may cause electric shock or fire. •... - Page 5 • Please note than the product must be supported on proper stands or installed according to the manufacturer’s recommendations. The product that are inappropriately situated on unstable shelves, inclined planes, or vibrating places, etc., may fall over, resulting in injury. •...
- Page 6 1.1.4 General Usage [Warning] • To reduce the risk of electric shock, do not open the cover or back. No user serviceable parts inside. Refer to qualified service personnel. • Before moving or lifting the product, disconnect the power cord and all cables. •...
-
Page 7: Maintenance
※ The product must keep horizontal and upright position when moving. Hold the top and bottom of the frame firmly. Handles are only for the supporting purpose. ※ When attaching the stand to the set, place the screen facing down on a cushioned table or flat surface to protect the screen from scratches by more than 2 people, ※... -
Page 8: Introduction
2. Introduction ▶ Check your product box for the following items. If there are any missing accessories, contact the local dealer where you purchased your product. The illustrations in this manual may differ from the actual product and item. LCD/LED Display User Manual Warranty Card Accessory... -
Page 9: Product Description
3. Product Description 3.1 FRONT VIEW ①USB ②TOUCH ③HDMI 3.2 REAR VIEW ② ① ③ ④ ① ⓐ ⓑ ⓒ ⓓ ⓔ ⓕ ⓖ ⓗⓘ ⓙⓚ... - Page 10 ⓐ USB for Touch(Option) ⓑ USB for Touch ⓒ RS232C ⓓ HDMI 1 Input ⓔ HDMI 2 Input ⓕ DISPLAY PORT Input ⓖ VGA Input ⓗ PC AUDIO Input ⓘ AUDIO LINE Out ⓙ SPEAKER Out R. ( 10W , 8 Ohm ) ⓚ...
-
Page 11: Remote Control
4. Remote Contro Key Name Description Power ON/OFF. Activates OSD menu of input source selecting. SOURCE Navigates input source. Navigates upper menu in main OSD menu. ▲ Navigates input source. Navigates down menu in main OSD menu. ▼ Navigates input source ▶... -
Page 12: Osd Menu Description
5. OSD Menu Description 5.1 Menu Overview In this menu system, there are several ways to customize the menu settings provided. If you press the MENU button, only the first and second level of the menu system will appear on the monitor screen. - Page 13 Setup Menus ◆ Press the [MENU] Button. The OSD Main MENU will be shown. ◆ Entering the SETUP MENU Press the ▲/▼ buttons to highlight SETUP and press the OK Button. ◆ Change the OSD Language Press the ▷ buttons to select Language, and press the OK button to view and select available languages.
- Page 14 ◆ Internal PC Setting Internal PC will be automatically set up according to user PC type (OPS or Desktop, Laptop)
- Page 15 Input Menus ◆ Press the [MENU] Button. The OSD Main MENU will show. ◆ Entering the Input MENU Press ▲/▼ Button to highlight Input, Press the OK button to OK and view the available settings. ◆ Input source select Press the ▷ buttons to highlight either VGA/OPS/ HDMI2/HDMI1/DP.
- Page 16 Picture Menus ◆ Press the [MENU] Button. The OSD Main MENU will be shown. ◆ OK the PICTURE MENU Press the ▲/▼ buttons to move through options in the PICTURE Menu. When you have moved to the option you would like to adjust, press the OK button and you will OK its settings.
- Page 17 ◆ Picture Select mode Press ◁ or the Menu button to move or go back to the previous menu options. Press the ▲/▼ buttons to highlight PSM (Picture Status Mode), and press the OK button to see the available options. Press the ▷...
- Page 18 ◆ Sharpness Adjustment Press ◁ or the Menu Button to move or go back to the previous menu options. Press the ▲/▼ buttons to highlight Sharpness and press the OK button to change either of their settings. Press the ◁/▷ buttons to change the setting. Color mode and sharpness modes are available when you connect HDMI.
- Page 19 ◆ Equalizer Adjustment Press ◁ or the Menu Button to move or go back to the previous menu options. Press ▲/▼ Button to highlight the Equalizer Menu, press the OK button to view the settings. Press the ▷ buttons to highlight one of the 0.1/0.5/1.0/5.0/10kHz values.
- Page 20 ◆ Setup System OFF Time Press ◁ or the Menu Button to move or go back to the previous menu options. Press the ▲/▼ buttons to highlight Off Time, and press the OK button to select it. Press the ▷ buttons to highlight Off, and press the ▷ buttons to turn this feature on or off.
-
Page 21: Product Specifications
6. Product Specification Note: Product design and features without prior notice may be changed. LED PANEL Diagonal size 64.56"/ 163.9(cm) Display Resolution (Max.) 1,920 x 1,080 (FHD) Brightness (average) 350 cd/㎡ Viewing Angle H: 176° / V: 176° Contrast ratio 5000:1 (Typ.) Supported Colors 16.7M colors (8bit) - Page 22 SIGNAL CONNECTIVITY Connector Display Port x1, HDMI x2(Rear(1.3ver.) x 1, Inside OPS(1.3ver.) x 1), VGA x1 Audio Out Speaker Out (R/L) , Line out, VGA Audio in Communication Port RS-232C (D-sub 9-pin) or LAN(RJ45) Front Panel HDMI(1.3ver.) x1, USB-B(for Touch)x1, USB-Ax1 OPS Slot MECHANICAL Dimensions Landscape...
-
Page 23: Product Dimensions
7. Product Dimensions... -
Page 24: Troubleshooting
8. Troubleshooting 8-1 Product Self-Diagnosis • You can check if the product is working properly using the Self-Diagnosis function. • If a blank screen is displayed but the Power LED on even if the product and the PC are properly connected, perform the self-diagnosis function according to the procedures below. - Page 25 3) PROBLEMS RELATED TO REMOTE CONTROL A. The remote control buttons do not respond. » Check the battery polarities (+/-). » Check if the batteries have been exhausted. » Check if the power is on. » Check if the power cord is securely connected. »...
- Page 26 Rev 002...
Need help?
Do you have a question about the HILF65101 and is the answer not in the manual?
Questions and answers