
Related Manuals for 3nh NS810


Summary of Contents for 3nh NS810
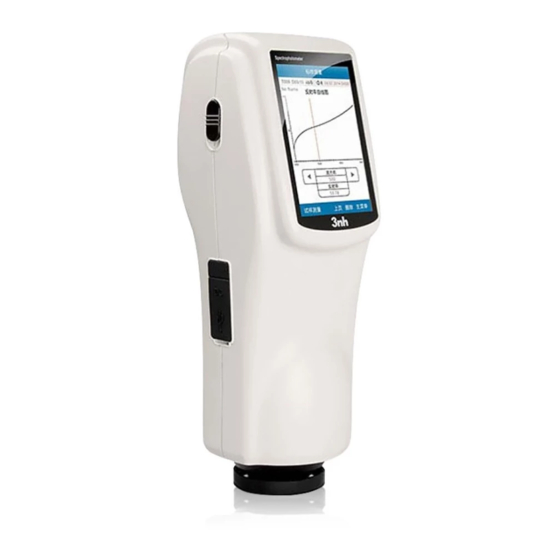
- Page 1 Espectrofotómetro NS810, Geometría de visualización: D/8 Apertura de medición 8 mm, 3NH 3N-NS810...
-
Page 2: Table Of Contents
CONTENTS INDUCTION ................................1 CAUTIONS ................................. 2 1. INTERFACE DESCRIPTION ..........................3 2 .BATTERY DESCRIPTION ............................ 3 3. BATTERY INSTALLATION ..........................4 4. OPERATING INSTRUCTION ..........................5 ..................................5 4.1T 4.1.1 Preparations ................................ 5 4.1.2 Turn On ................................5 ......................6 4.2 W HITE ALIBRATION AND... -
Page 3: Induction
Induction NS810 spectrophotometer is independently developed by 3nh which is in accordance with CIE (International Commission on Illumination) and CNS (China National Standards). The instrument features with touch screen and large screen display. It is configured with high-end color quality management software. Meanwhile it has characters of stable performance, precise measurement and easy to use. -
Page 4: Cautions
NS810 SPECTROPHOTOMETER OPERATING MANUAL Cautions ● The spectrophotometer is a precise measuring instrument. Please avoid dramatic changes of external environment when measuring. These changes, including the flicker of surrounding light and the rapid change of temperature, will affect measurement accuracy. -
Page 5: Interface Description
NS810 SPECTROPHOTOMETER OPERATING MANUAL 1. Interface Description Power Switch DC Power Port USB/RS-232 Port Figure 1 Instrument Structure Diagram Port Description 1. Power Switch: Push the switch to “1” to turn on the instrument. Push the switch to “0” to turn it off. -
Page 6: Battery Installation
NS810 SPECTROPHOTOMETER OPERATING MANUAL cause irreversible damage. 3. Please remove the battery if you don‟t use it for a long time. 4. When charging the battery, please connect power adapter or USB cable (to PC). Meanwhile, push the switch to “1” to turn it on, and then the battery will be charging. -
Page 7: Operating Instruction
NS810 SPECTROPHOTOMETER OPERATING MANUAL Li-ion Battery Battery Cover Figure 2 Battery Installation 4. Operating Instruction 4.1Turn On 4.1.1 Preparations Check whether it is powered by battery or adapter. 4.1.2 Turn On Push the power switch to “1”, the screen will light and display logo. After a few seconds, it will enter Standard Measurement interface automatically, and the default display is L*a*b*C*H as shown in Figure 3. -
Page 8: White Calibration And Black Calibration
NS810 SPECTROPHOTOMETER OPERATING MANUAL Figure 3 Standard Measurement 4.2 White Calibration and Black Calibration Click “Menu” to enter main menu interface as shown in Figure 4. - Page 9 NS810 SPECTROPHOTOMETER OPERATING MANUAL Figure 4 Main Menu Select “Calibration” to enter white and black calibration interface as shown in Figure 5.
-
Page 10: Measurement
NS810 SPECTROPHOTOMETER OPERATING MANUAL Figure 5 White and Black Calibration Click “White Calibration”, it will prompt you to put away the white board. Put the measuring aperture on white board. Make sure the measuring aperture is close to the white board. Click “OK” or press “Testing” key to perform white calibration. -
Page 11: Standard Measurement
NS810 SPECTROPHOTOMETER OPERATING MANUAL be done by observing the alignment between the cross and the sample, while moving the measuring aperture to adjust the position. 4.3.2 Standard Measurement Please enter “Standard Measurement” interface to perform measurements as shown in Figure 6. - Page 12 NS810 SPECTROPHOTOMETER OPERATING MANUAL 4.3.3 Sample Measurement After testing the standard, press “Sample Measure”, it will enter Sample Measurement interface as shown in Figure 7. Put the measuring aperture on the sample, press “Testing” key. The colorimeter will display color data of the sample.
-
Page 13: Measure And View Spectral Reflectance Graph
NS810 SPECTROPHOTOMETER OPERATING MANUAL 4.3.4 Measure and View Spectral Reflectance Graph Under standard or sample measurement interface, click “ ” to switch to next page. It will display the spectral reflectance curve. Click “ ”, it will display wavelength data and reflectance data of next wave band. Click “ ”, it will display wavelength data and reflectance data of previous wave band. -
Page 14: Print
NS810 SPECTROPHOTOMETER OPERATING MANUAL Figure 9 USB Communication Figure 10 Communicating 4.5 Print Connect the instrument to micro printer. It can print measurement data automatically under “Standard Measurement” or “Sample Measurement” interface. 5. System Function Description You can set the system function from main menu as shown in Figure 4. - Page 15 NS810 SPECTROPHOTOMETER OPERATING MANUAL Figure 11 Data Management 5.1.1 Check Record 1) Check Standard Record Select “Check Record” to enter “Standard Record” interface as shown in Figure 12. It‟s the standard data. You can check different standard data by clicking “↑”...
- Page 16 NS810 SPECTROPHOTOMETER OPERATING MANUAL Figure 12 Standard Record Figure 13 Sample Record Click “No Name”, it will enter “Edit Name” interface as shown in Figure 16. You can edit the name of the current standard.
-
Page 17: Check Spectral Reflectance Curve
NS810 SPECTROPHOTOMETER OPERATING MANUAL Click “D65”, it will enter “Light Source” interface as shown in Figure 19. You can set the light source of the current standard. Click “10”, you can switch the observer angle between 2° and 10° . -
Page 18: Editing Record Name
NS810 SPECTROPHOTOMETER OPERATING MANUAL 5.1.3 Editing Record Name Click “Operate” in record interface, popup a small menu as shown in Figure 15. Click “Edit Name” to enter figure 16. Click the characters or numbers on the virtual keyboard to edit current record name. -
Page 19: Deleting A Single Record
NS810 SPECTROPHOTOMETER OPERATING MANUAL Figure 16 Name Edit Interface 5.1.4 Deleting a Single Record In the popup menu under the standard record shown in Figure 15, click “Delete Record”. It will pop up a warning interface. Click “OK”, then the current standard and its sample records will be deleted. -
Page 20: Deleting All Records
NS810 SPECTROPHOTOMETER OPERATING MANUAL “Standard Entering” in “Record Operation Interface” pop-up menu. Then, the sample record will be transferred to measurement interface as a standard (Meanwhile, it will save as a new standard automatically.). Click “Sample Measure”, you can start to perform sample measurement. -
Page 21: Tolerance Setting
NS810 SPECTROPHOTOMETER OPERATING MANUAL Figure 17 Input LAB 2) Input XZY It is the same with “Input L*a*b” 5.2 Tolerance Setting Select “Tolerance” in main menu as shown in Figure 18. Click the virtual keyboard to input tolerance. Then click “OK” to save the settings and back to main menu. -
Page 22: Light Source Setting
NS810 SPECTROPHOTOMETER OPERATING MANUAL Figure 18 Tolerance Setting Tolerance is set by users according to their color management requirements. The instrument will judge whether the color difference ΔE is qualified or not. If ΔE is less than tolerance, the sample color is qualified. If ΔE is greater than tolerance, then sample color is unqualified. -
Page 23: Average Measurement
NS810 SPECTROPHOTOMETER OPERATING MANUAL Figure 19 Light Source Setting 5.4 Average Measurement Click “Average” in main menu to enter Figure 20. Click the virtual keyboard. Users can set the number of average measurements according to the requirements. Then click “OK” to save the settings and back to main menu. If set to “0” or “1”, the instrument will only do single measurement. -
Page 24: Color Options
NS810 SPECTROPHOTOMETER OPERATING MANUAL Figure 20 Average Measurement 5.5 Color Options Click “Color Options” in main menu to enter Figure 21. Users can select different “Color Space”, “Color Index”, “Observer Angle”, and “Color Parameter”. Select the options by “↑” and “↓”, and press “OK” to save all the settings. This selection will affect the display content in “Standard Measurement”... -
Page 25: Color Space
NS810 SPECTROPHOTOMETER OPERATING MANUAL Figure 21 Color Options 5.5.1 Color Space Click “Color Space” to enter Figure 22 interface. There are six color space modes in this instrument: “CIE LAB, LCh”, “CIE XYZ, Yxy”, “CIE LUV, LCh”, “LAB &WI &YI”, “Color Fastness”, “Staining Fastness”. - Page 26 NS810 SPECTROPHOTOMETER OPERATING MANUAL Figure 22 Color Space Figure 23 CIE XYZ Standard Measurement...
- Page 27 NS810 SPECTROPHOTOMETER OPERATING MANUAL Figure 24 CIE L*U*V* Standard Measurement Figure 25 LAB &WI &YI Standard Measurement...
- Page 28 NS810 SPECTROPHOTOMETER OPERATING MANUAL Figure 26 CIE XYZ Sample Measurement Figure 27 CIE L*U*V* Sample Measurement...
- Page 29 NS810 SPECTROPHOTOMETER OPERATING MANUAL Figure 28 LAB &WI &YI Sample Measurement Figure29 Color Fastness Measurement...
-
Page 30: Color Index
NS810 SPECTROPHOTOMETER OPERATING MANUAL Figure 30 Staining Fastness Measurement 5.5.2 Color Index Click “Color Index” to enter Figure 31. There are six color index modes in this instrument. “CIE1976 △E*ab”, “CIE94 △E*94”, “△E(Hunter)”, “△E*cmc(2:1)”, “△E*cmc(1:1)”, “CIE2000 △E*00”, “Metameric Index”, “Color Strength”. - Page 31 NS810 SPECTROPHOTOMETER OPERATING MANUAL Figure 31 Color Index Figure 32 Color Index CIE1976 Sample Measurement...
- Page 32 NS810 SPECTROPHOTOMETER OPERATING MANUAL Figure 33 Color Index CIE94 Sample Measurement Figure 34 Color Index Hunter Sample Measurement...
- Page 33 NS810 SPECTROPHOTOMETER OPERATING MANUAL Figure 35 Color Index cmc(2:1) Sample Measurement Figure 36 Color Index cmc(1:1) Sample Measurement...
- Page 34 NS810 SPECTROPHOTOMETER OPERATING MANUAL Figure 36 Color Index cmc(l:c) Sample Measurement Figure 38 Color Index CIE2000 Sample Measurement...
- Page 35 NS810 SPECTROPHOTOMETER OPERATING MANUAL Figure 39 Metameric Index Sample Measurement Figure 39 Color Strength Sample Measurement...
-
Page 36: Observer Angle
NS810 SPECTROPHOTOMETER OPERATING MANUAL 5.5.3 Observer Angle In accordance with CIE standard, the instrument has two observer angles: 2° and 10°. Click “Observer Angle” in color options interface to select it. 5.5.4 Color Parameter Color Parameter includes “Metameric Settings”, “CIE94 △E*94”, “△E*cmc(l:c)”... -
Page 37: Function Setting
NS810 SPECTROPHOTOMETER OPERATING MANUAL Figure 41 “Color Offset” and “Tolerance Prompt” Click “Screen Inversion” and turn on it, then all the display interfaces will be inversion display. 5.7 Function Setting Click „Settings” to set other functions as shown in Figure 42. -
Page 38: Auto Save
NS810 SPECTROPHOTOMETER OPERATING MANUAL Figure 42 Function Settings 5.7.1 Auto Save Click “Auto Save” in “Settings” interface. It has two options: “On” and “Off”. If select “Off”, you have to save the data manually when measuring. If select “On”, the instrument will save data automatically. - Page 39 NS810 SPECTROPHOTOMETER OPERATING MANUAL Figure 43 Time & Date Setting Figure 44 Set Time...
- Page 40 NS810 SPECTROPHOTOMETER OPERATING MANUAL Figure 45 Set Date Figure 46 Time Format...
-
Page 41: Language Selection
NS810 SPECTROPHOTOMETER OPERATING MANUAL Figure 47 Date Format 5.7.3 Language Selection Click “Language Selection” in “Settings” interface. Users can choose English or Chinese. 5.7.4 Backlight Time Click “Backlight Time” in “Settings”. Users can set the backlight time according to the requirement. -
Page 42: Buzzer Switch
NS810 SPECTROPHOTOMETER OPERATING MANUAL 5.7.6 Buzzer Switch Click “Buzzer Switch” in “Settings”. When click “Off”, it will not make a sound when measuring. When click “On”, it will make a sound when measuring. 5.7.7 Restore Factory Settings Click “Restore Factory Setting” in “Settings” as shown in Figure 44. Click “OK”, the instrument will restore to factory settings and all records will be cleared. - Page 43 NS810 SPECTROPHOTOMETER OPERATING MANUAL 2) Large screen (3.5 inch), high resolution (320*480), full-view display with clear image. 3) Aesthetic design perfectly combined with ergonomics structure. 4) D/8 geometrical optics structure, comply with CIE, ISO, ASTM, DIN standard. 5) Visible spectrum 400~700nm reflectance curve.
-
Page 44: Technical Specifications
NS810 SPECTROPHOTOMETER OPERATING MANUAL 6.2 Technical Specifications Model NS810 Illumination/observati D/8 (D iffused illumination, 8-degree viewing angle) Conforms to on system CIE No.15, GB/T 3978 Integrating sphere Size Φ58mm Light Source Combined LED sources Sensor Silicon photodiode array Wavelength range... - Page 45 NS810 SPECTROPHOTOMETER OPERATING MANUAL standard deviation within 0.1% (400~700nm: within 0.2%), Repeatability Spectral Colorimetric Value: Standard deviation within Delta E*ab Reflectance 0.04 Errors between each Within Delta E*ab 0.2 (Average for 12 BCRA Series II color instrument tiles) Dimension: (L*W*H)
Need help?
Do you have a question about the NS810 and is the answer not in the manual?
Questions and answers