Table of Contents
Advertisement
Available languages
Available languages
Quick Links
Questions, problems, missing parts? Before returning to the store,
call Hampton Bay Customer Service
8 a.m. - 7 p.m., EST, Monday - Friday, 9 a.m. - 6 p.m., EST, Saturday
1-855-HD-HAMPTON
HAMPTONBAY.COM
THANK YOU
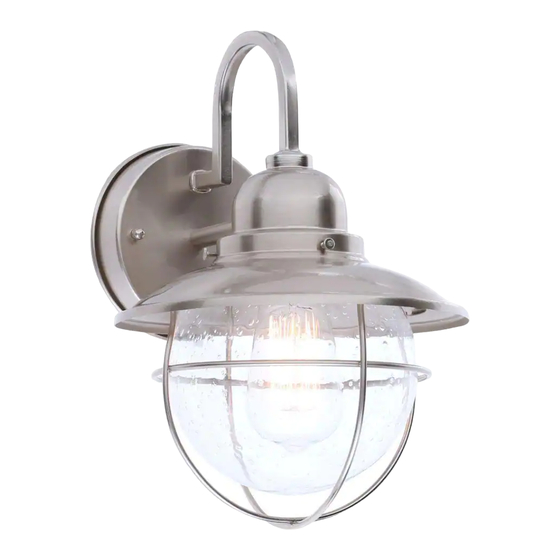
We appreciate the trust and confidence you have placed in Hampton Bay through the purchase of this outdoor wall lantern.
We strive to continually create quality products designed to enhance your home. Visit us online to see our full line of
products available for your home improvement needs. Thank you for choosing Hampton Bay!
Advertisement
Chapters
Table of Contents

Related Manuals for HAMPTON BAY BOA1691A-2/BN


Summary of Contents for HAMPTON BAY BOA1691A-2/BN
- Page 1 THANK YOU We appreciate the trust and confidence you have placed in Hampton Bay through the purchase of this outdoor wall lantern. We strive to continually create quality products designed to enhance your home. Visit us online to see our full line of...
-
Page 2: Table Of Contents
Tools Required ..........3 Hardware Included ........3 Package Contents ........4 What is Covered ........... 2 What is Not Covered ........2 Planning Installation ........3 : Carefully read and understand the information given in this manual before beginning the assembly and installation. -
Page 3: Planning Installation
PLANNING INSTALLATION Read all instructions before assembly. Before starting installation of this fixture or removal of a previous fixture, disconnect the power by turning off the circuit breaker or by removing the fuse at the fuse box. To avoid damaging this product, assemble it on a soft, non-abrasive surface such as carpet or cardboard. -
Page 4: Package Contents
PACKAGE CONTENTS Part Description Quantity Wall Plate Washer Lock Nut Canopy Socket Globe Decorative Frame... - Page 5 Attaching the cross bar to the Connecting the electrical wires outlet box □ Screw the mounting screws (DD) into the cross bar □ Wrap the ground wire from the fixture around the (AA). ground screw (BB) on the cross bar (AA). Use a wire connector (EE) to connect the ground wire □...
- Page 6 Attaching the globe Attaching the decorative frame □ Align the three slots on the globe (F) with the three □ Align the two grooved tips of the decorative frame divots located inside the canopy (D). (G) with the two slots underneath the canopy (D). □...
- Page 7 □ Clean the fixture with a soft, dry cloth. □ Do not use any cleaners with chemicals, solvents or hash abrasives. Before attempting to clean the fixture, disconnect the power to the fixture by turning the breaker off or removing the fuse from the fuse box. Problem Possible Cause Solution...
- Page 8 Questions, problems, missing parts? Before returning to the store, call Hampton Bay Customer Service 8 a.m. - 7 p.m., EST, Monday - Friday, 9 a.m. - 6 p.m., EST, Saturday 1-855-HD-HAMPTON HAMPTONBAY.COM Retain this manual for future use.
- Page 9 GRACIAS POR TU COMPRA Agradecemos la confianza que ha tenido en Hampton Bay a traves de de la compra de este aplique. Nos esforzamos para continuamente crear productos de calidad diseñados para mejorar tu hogar. Visítanos por Internet para ver nuestra línea...
-
Page 10: Lo Que Esta Cubierto
Herraminentas Necesarias ......11 Requiere de Hardware ....... 11 Contenido del Paquete ......12 Lo que esta Cubierto ........10 Lo que (no) esta Cubierto ......10 Planificación de la Instalatión ....11 Lea cuidadosamente y entienda la información dada en este manual antes de empezar el proceso de ensamble e instalación. -
Page 11: Planificación De La Instalatión
PLANIFICACIÓN DE LA INSTALLATIÓN Lee todas las instrucciones antes de ensamblar. Antes de comenzar la instalación o de quitar la instalación anterior, desconecte la alimentacion apagando el interruptor del circuito o quitando el fusible en la caja de fusible. Para evitar dañar el artículo, ensámblalo sobre una superficie suave, no abrasiva, como por ejemplo una alfombra o cartón. -
Page 12: Contenido Del Paquete
CONTENIDO DEL PAQUETE Pieza Descripción Cantidad Placa de la Pared Junta Tuerca de Cierre Dosel Portalámpara Sombra Marco Decorativo... - Page 13 Acoplar la barra cruzada a la caja Conectar los cables eléctricos de salida □ Atornille los tornillos de montaje (DD) en la barra □ Envuelva el cable de toma de tierra de la cruzada (AA). instalación alrrededor del tornillo de toma de tierra (BB) que hay en la barra cruzada (AA).
- Page 14 Asegurar la sombra Asegurar la marca decorativo □ At aliñe los tres espacios en la sombra(F) con □ Alinear las dos puntas de toma de tierra del marco decorative (G)con las dos ranuras debajo las tres marcas situado en el interior del dosel(D) . de la dosel (D).
- Page 15 □ Limpia la lámpara con un paño suave y seco. □ No uses limpiadores con químicos, solvents, o productos abrasivos. Antes de intentar limpiar la pieza, desconéctela o apague el interruptor o remueva el fusible de la caja de fusibles. Problema Causa Posible Solución...
- Page 16 Preguntas, problemas o piezas faltantes? Antes de regresar a la tienda, llama al Servicio al Cliente de Hampton Bay de Lunes a Viernes entre 8 a.m. y 7 p.m., El Sábado entre 9 a.m. y 6 p.m., (hora del Este de EE. UU.) 1-855-HD-HAMPTON HAMPTONBAY.COM...
- Page 17 MERCI Nous vous remercions de la confiance que vous avez place en Hampton Bay en achetant ce applique. Nous nous efforçons en permanence de créer des produits de qualité conçus pour perfectionner votre maison. Vous pouvez visiter notre site en ligne pour consulter notre gamme complète de produits pour vos besoins de rénovation résidentielle.
-
Page 18: Ce Qui Est Cuvert
Outils Requis ..........19 Materiel Requis ......... 19 Contenu de l'Emballag ......20 Ce qui est Cuvert ........18 Ce qui est Cuvert (et Pas) ......18 Planification de l’installation ..... 19 Veuillez soigneusement lire et comprendre les informations contenues dans ce manuel avant de commencer l’assemblage et l’installation. -
Page 19: Planification De L'installation
PLANIFICATION DE L'INSTALLATION Lisez toutes les instructions avant de procéder à l’assemblage. Avant de commencer à installer ce luminaire ou d’enlever l’ancien luminaire, déconnectez le courant en eteignant le disjoncteur ou en enlevant le fusible correspondent du coffret à fusibles. Pour éviter d’endommager ce produit, assemblez-le sur une surface molle et non abrasive telle qu’un tapis ou un carton. -
Page 20: Contenu De L'emballag
CONTENU DE L'EMBALLAG Pièce Description Quantité Plaque Murale Rondelle Écrou de Verrouillage Pavillon Douille Abat-jour Armature Décorative... - Page 21 Attacher la entretoise à la boîte de Brancher les fils électriques sortie □ Visser la vis de montage (DD) dans l’entretoise (AA). □ Enrouler le fil de terre du luminaire sur la vis de terre (BB) située sur la entretoise (AA). Connecter □...
- Page 22 Attacher la Abat-jour Attacher la Armature Décorative □ Alignez les trois fentes sur l’abat-jour (F) □ Alinear las dos puntas acanaladas del marco decorativo (G) con las dos ranuras debajo de la à l’aide des trois mottes situé à l'intérieur de pavillon (D).
- Page 23 □ Nettoyez la lampe avec un linge doux, sec. □ N'utilisez jamais de nettoyant contenant des produits chimiques, des solvants ou des abrasifs. Débrancher l’alimentation électrique avant de nettoyer le luminaire en enlevant les fusibles concernés ou en désactivant le disjoncteur. Problème Cause possible Solution...
- Page 24 Questions, problèmes, pièces manquantes? Avant de retourner au magasin, veuillez communiquez avec le service à la clientèle Hampton Bay Du lundi au vendredi : 8h – 19h, HNE; le samedi : 9h - 18h, HNE 1-855-HD-HAMPTON HAMPTONBAY.COM Conservez ce guide pour un usage ultérieur.
Need help?
Do you have a question about the BOA1691A-2/BN and is the answer not in the manual?
Questions and answers