Table of Contents
Advertisement
Available languages
Available languages
We appreciate the trust and confidence you have placed in Hampton Bay through the purchase of this LED light. We strive to continually create
quality products designed to enhance your home. Visit us online to see our full line of products available for your home improvement needs.
Use and Care GUide
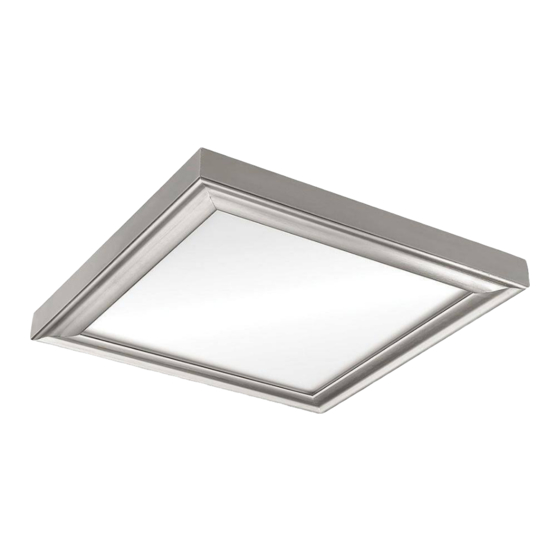
Low ProfiLe edGeLiT CeiLinG LiGhT
Questions, problems, missing parts? Before returning to the store,
call Hampton Bay Customer Service
8 a.m. – 7 p.m., EST, Monday - Friday
9 a.m. - 6 p.m., EST, Saturday
1-855-HD-HAMPTON
HAMPTONBAY.COM
Thank you for choosing Hampton Bay!
THANK YOU
item # 1003111317
1003124383
1003124384
Model # 54323111
54324111
54325111
Advertisement
Chapters
Table of Contents

Related Manuals for HAMPTON BAY 54323111


Summary of Contents for HAMPTON BAY 54323111
- Page 1 THANK YOU We appreciate the trust and confidence you have placed in Hampton Bay through the purchase of this LED light. We strive to continually create quality products designed to enhance your home. Visit us online to see our full line of products available for your home improvement needs.
-
Page 2: Table Of Contents
Table of Contents Table of Contents ........2 Installation . -
Page 3: Pre-Installation
Pre-installation PLANNING INSTALLATION Before beginning assembly, installation or operation of the product, make sure all parts are present. Compare parts with the package contents list. If any part is missing or damaged, do not attempt to assemble, install or operate the product. Contact customer service for replacement parts. -
Page 4: Installation
installation warninG: RISK OF ELECTRIC SHOCK. Ensure the electricity to the wires you are working on is shut off. Either remove the fuse or turn off the circuit breaker before removing the existing light fixture or installing the new one. With the power disconnected to the electrical box, remove the existing fixture. - Page 5 Mounting to drywall (continued) Toggle Bolt Wings Preparing to mount to a drywall mounting surface □ Loosen the electrical box screws (AA) and turn the mounting bracket (B) until the heads of the electrical box screws (AA) are in the large ends of the keyholes, to take down the mounting bracket (B).
- Page 6 The Side A marking and the safety cable(s) attached to the mounting bracket (B) will face down toward the fixture body (A). noTe: Model 54323111 does not have a safety cable. □ Slide the fixture body (A) brackets onto the mounting bracket (B) until they click into place.
-
Page 7: Mounting To Wood
installation - Mounting to wood warninG: RISK OF ELECTRIC SHOCK. Ensure the electricity to the wires you are working on is shut off. Either remove the fuse or turn off the circuit breaker before removing the existing light fixture or installing the new one. With power disconnected to the electrical box, remove the existing fixture. - Page 8 Mounting to wood (continued) Preparing to mount to a wood mounting Keyholes surface □ Loosen the electrical box screws (AA) and turn the mounting bracket (B) until the heads of the electrical box screws (AA) are in the large ends of the keyholes, to take down the mounting bracket (B). □...
- Page 9 The Side A marking and the safety cable(s) attached to the mounting bracket (B) will face down toward the fixture body (A). noTe: Model 54323111 does not have a safety cable. □ Slide the fixture body (A) brackets onto the mounting bracket (B) until they click into place.
-
Page 10: Adjusting The Color Temperature Of The Light
□ Press the spring loaded door on the side of the fixture body (A) to access the toggle switch to change the color of the light. □ Move the toggle switch to make your selection. noTe: The factory setting for the correlated color temperature (CCT) is 3000K, which is the warmest white light. Light distribution Model # 54323111 Model # 54324111 UNIT:cd UNIT:cd 1200 C0/180, 110.4... -
Page 11: Care And Cleaning
The wires are crossed or the Check the wire connections. circuit breaker trips when power wire is grounding out. Contact a qualified electrician or call Hampton Bay customer service 1-855-HD- the light is turned on. HAMPTON. HAMPTONBAY.COM Please contact 1-855-HD-HAMPTON for further assistance. - Page 12 Questions, problems, missing parts? Before returning to the store, call Hampton Bay Customer Service 8 a.m. - 7 p.m., EST, Monday - Friday 9 a.m. - 6 p.m., EST, Saturday 1-855-HD-HAMPTON HAMPTONBAY.COM Retain this manual for future use.
- Page 13 GRACIAS Apreciamos la confianza que ha puesto en Hampton Bay a través de la compra de esta luz LED. Nos esforzamos por crear constantemente productos diseñados para realzar su hogar. Visítenos en línea para ver nuestra gama completa de productos disponibles para sus necesidades...
-
Page 14: Contenido
Contenido Contenido ........14 Instalación . -
Page 15: Previo A La Instalación
Previo a la instalación PLANIFICACIÓN DE LA INSTALACIÓN Antes de comenzar el armado, la instalación o antes de operar el producto, asegúrese de que tiene todas las piezas. Compare las piezas con la lista de contenido. Si falta alguna pieza o si está dañada, no comience a armar, instalar ni operar el producto. Comuníquese con el servicio al cliente para el reemplazo de las piezas. -
Page 16: Instalación
instalación adVerTenCia: RIESGO DE DESCARGA ELÉCTRICA. Asegúrese de cortar el suministro eléctrico en los cables con los que trabajará. Extraiga los fusibles o apague el cortacircuitos antes de quitar el aparato de iluminación existente o instalar uno nuevo. Antes de retirar la lámpara existente, corte el suministro eléctrico hacia la caja eléctrica. Haga un diagrama del actual cableado (por color de los cables) o marque los cables con cinta de enmascarar y un lápiz. - Page 17 instalación - sobre panel mural en seco (continuación) Preparar a instalación sobre panel mural en seco Alas de perno de palanca □ Afloje los tornillos de la caja eléctrica (AA) y gire el soporte de montaje (B) hasta que las cabezas de los tornillos de la caja eléctrica (AA) estén en los extremos grandes de los orificios, para removeer el soporte de montaje (B).
- Page 18 La marca “Side A” y el o los cables de seguridad conectados al soporte de montaje (B) quedarán hacia abajo, hacia la caja de la lámpara (A). noTa: El modelo 54323111 no tiene un cable de seguridad. □ Deslice los soportes de la caja de lámpara (A) en el soporte de montaje (B) hasta que encajen en su lugar.
-
Page 19: Instalación Sobre Madera
instalación - sobre madera adVerTenCia: RIESGO DE DESCARGA ELÉCTRICA. Asegúrese de cortar el suministro eléctrico en los cables con los que trabajará. Extraiga los fusibles o apague el cortacircuitos antes de quitar el aparato de iluminación existente o instalar uno nuevo. Antes de retirar la lámpara existente, corte el suministro eléctrico hacia la caja eléctrica. - Page 20 instalación - sobre madera (continuación) Preparar a instalación sobre superficie de Orificios en la caja madera □ Afloje los tornillos de la caja eléctrica (AA) y gire el soporte de montaje (B) hasta que las cabezas de los tornillos de la caja eléctrica (AA) estén en los extremos grandes de los orificios, para removeer el soporte de montaje (B).
- Page 21 La marca “Side A” y el o los cables de seguridad conectados al soporte de montaje (B) quedarán hacia abajo, hacia la caja de la lámpara (A). noTa: El modelo 54323111 no tiene un cable de seguridad. □ Deslice los soportes de la caja de lámpara (A) en el soporte de montaje (B) hasta que encajen en su lugar.
-
Page 22: Ajustar La Temperatura Del Color Del Luz
□ Presione el panel con resorte en el lado de la caja de lámpara (A) para acceder al interruptor para cambiar el color de la luz. □ Mueva el interruptor para hacer su selección. noTa: El ajuste inicial de la temperatura de color correlacionada (CCT) es 3000k, que es la luz blanca cálida. distribución de la luz Modelo # 54323111 Modelo # 54324111 UNIDAD:cd UNIDAD:cd 1200 C0/180, 110.4... -
Page 23: Cuidado Y Limpieza
Verifique las conexiones de los cables. interruptor cuando se enciende la de suministro eléctrico no está lámpara. puesto a tierra. Comuníquese con un electricista calificado o llame al Centro de Atención al Cliente de Hampton Bay 1-855-HD-HAMPTON. HAMPTONBAY.COM Comuníquese al 1-855-HD-HAMPTON para solicitar asistencia. - Page 24 ¿Preguntas, problemas, piezas faltantes? Antes de devolver el producto a la tienda, llame al Centro de Atención al Cliente de Hampton Bay en el horario de 8 a.m. - 7 p.m., Hora del Este de EE.UU., de lunes a viernes.
Need help?
Do you have a question about the 54323111 and is the answer not in the manual?
Questions and answers