Table of Contents
Advertisement
Quick Links
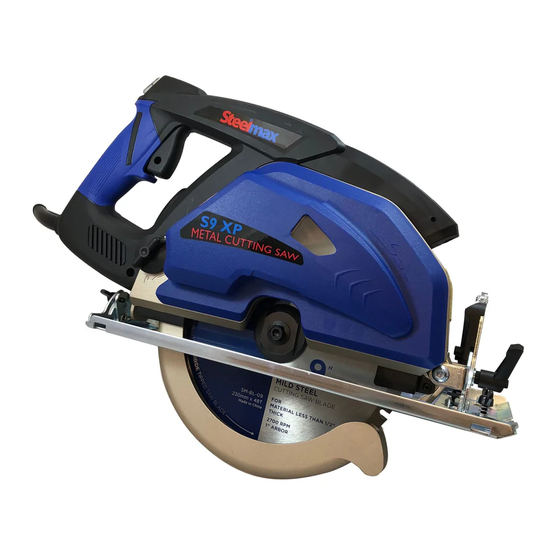
MODEL S9 XP
(Part Number: SM-S-9 XP)
9" METAL CUTTING CIRCULAR SAW
OPERATOR'S MANUAL
,
TO REDUCE THE RISK OF INJURY
READ AND THOROUGHLY UNDERSTAND THIS
.
OPERATOR'S MANUAL
Always Wear Eye and
Never Place Line Voltage
Ear Protection
Hands Near
Present
Cutting Area
WWW.STEELMAX.COM
SM-S-9 XP Operator's Manual
2017 Version 1.01
Advertisement
Table of Contents

Related Manuals for SteelMax S9 XP


Summary of Contents for SteelMax S9 XP
- Page 1 MODEL S9 XP (Part Number: SM-S-9 XP) 9” METAL CUTTING CIRCULAR SAW OPERATOR’S MANUAL TO REDUCE THE RISK OF INJURY READ AND THOROUGHLY UNDERSTAND THIS OPERATOR’S MANUAL Always Wear Eye and Never Place Line Voltage Ear Protection Hands Near Present Cutting Area WWW.STEELMAX.COM...
-
Page 2: Table Of Contents
® portable metal cutting saw. Please register your product on our web site at www.steelmax.com/product-registration. Doing so will validate your machine’s warranty period and ensure prompt service if needed. We sincerely thank you for selecting a product from Steelmax. CONTENTS Intended Use and General Safety Guidelines .................1... - Page 3 Steelmax within thirty (30) days of the purchase date. This warranty is void if the tool being returned has been used beyond the recommendations in this Operator’s Manual or if the machine has been damaged by accident, neglect, improper service, or other causes not arising out of defects in materials or workmanship.
-
Page 4: Intended Use And General Safety Guidelines
The Steelmax S9 XP Metal Cutting Saw is designed to rapidly cut mild steel and other similar materials without heating either the saw blade or the material being cut. The S9 XP can easily cut mild steel sheet metal up to ¼” (6 mm) thick. - Page 5 Personal Safety • Stay alert, watch what you are doing and use common sense when operating a power tool. Do not use tool while tired or under the influence of drugs, alcohol, or medication. A momen t of i natten ti on whil e op eratin g power tools may result in serious personal injury. •...
- Page 6 Service • Tool service must be performed only by qualified repair personnel. Service or maintenance performed b y unqualified personnel could result in a risk of injury. • When servicing a tool, use only identical replacement parts. Follow instructions in the Maintenance section of this manual.
-
Page 7: Specific Safety Rules For Metal Cutting Saws
Specific Safety Rules for Metal Cutting Saws • Only use Steelmax ® saw blades. Unauthorized blades may be dangerous! • Keep saw blades securely fastened. Check blade flanges for debris before installing a new blade. • Do not use dull or broken blades. Check blades often for condition and wear. - Page 8 whatever is in its path. Be aware of the time it takes for the blade to stop after switch is released. NEVER hold piece being cut in your hands or across your leg. It is important to support the • work properly to minimize body exposure, blade binding, or loss of control.
- Page 9 WARNING! NEVER AIM THE BEAM AT A WORKPIECE WITH A REFLECTIVE SURFACE. Highly polished or similar reflective surfaces are not recommended for laser use where eye exposure is possible due to reflection. These surfaces could reflect the beam back toward the operator or bystanders.
- Page 10 position. If saw is accidentally dropped, lower guard may be bent. Raise the lower guard with the retracting handle and make sure it moves freely and does not touch the blade or any other part, in all angles and depths of cut. Check the operation of the lower guard spring.
-
Page 11: Exploded Parts Diagram
S9 XP Parts Diagram SM-S-9 XP Operator’s Manual - 8 - 2017 Version 1.01... -
Page 12: Parts List
Steelmax S9 XP Parts List SM-S-9 XP Operator’s Manual - 9 - 2017 Version 1.01... - Page 13 Steelmax S9 XP Parts List (Cont’d) SM-S-9 XP Operator’s Manual - 10 - 2017 Version 1.01...
-
Page 14: Steelmax S9 Xp Operation
Remove all contents from the case and inspect to ensure no damage occurred during shipping. INCLUDED ITEMS DESCRIPTION PART NUMBER QUANTITY S9 XP METAL CUTTING SAW SM-S-9 XP 9” TCT SAW BLADE FOR MILD STEEL SM-BL-09 OPERATOR’S MANUAL CARRYING CASE... -
Page 15: Saw Blade Installation/Replacement
Steelmax blades designed for metal cutting saws. DO NOT USE ABRASIVE WHEELS OR WOOD SAW BLADES ON YOUR METAL CUTTING SAW. USE ONLY STEELMAX 9” METAL CUTTING SAW BLADES. USE OF ABRASIVE WHEELS, WOOD SAW BLADES OR SMALLER OR LARGER SAW BLADES WILL VOID YOUR PRODUCT WARRANTY AND MAY RESULT IN PERSONAL INJURY. - Page 16 3. Use the included open-end wrench and Allen wrench to loosen the shaft screw (counter-clockwise). Fig. 3. 4. Remove wrenches and open blade guard to remove arbor screw, flange and blade. Fig. 4. 5. Install the new blade, flange and arbor screw in proper order and check for proper blade orientation.
-
Page 17: Making Plunge Cuts
Making Plunge Cuts Plunge or pocket cuts are made in the middle of a work piece when a cut cannot be started at the edge of the workpiece. Make certain that there are no hidden hazards under the workpiece before making a plunge or pocket cut. -
Page 18: Setting Bevel Angle For Bevel Cuts
Setting Bevel Angle for Bevel Cuts Release the lock lever (A) and the wing nut (B) to change the bevel plate angle between 0˚ and 45˚. Once the angle is set, re-tighten the lock and lever and wing nut. Fig. 7. Laser Guide Use and Adjustment 1. -
Page 19: Aligning Laser Guide Line
2. Laser guide automatically follows bevel angle. The laser will align with notch (B) at 0˚ and will align with notch (C) at 45˚. Fig. 9. Aligning the Laser Guide Line DANGER: Laser radiation. Avoid direct eye contact with light source. WARNING: Use of controls or adjustments or performance of procedures other than those specified herein may resuit in hazardous radiation exposure. - Page 20 1. Adjusting the laser: Use an M2 Allen wrench to tighten or loosen the laser adjustment screw (A) to adjust the laser beam width. Fig.11 2. Use a small flat blade screw driver to tighten or lossen the the direction adjustment screw (B) to align the laser beam with the actual cut line.
-
Page 21: Using Led Light
Using the LED Light The LED ligth is used to illuminate the cutting area when working in low light conditions. Turn the LED light on by pressing the right switch (A) on the saw handle. Press the switch again to turn off the LED light. -
Page 22: Saw Trigger Switch Operation
Saw Trigger Switch Operation Press the stop button (A) and pull the Trigger Switch (B) at the same time to start saw motor. Saw stops automatically when Trigger Switch is released. Fig.17. Proper Saw Operation Use right hand to to hold the rear handle (A) and left hand (B) to hold the forward handle. -
Page 23: Overload Protection
Overload Protection If the saw motor becomes overloaded – by cutting to fast or material that is too thick or hard – the current consumption of the motor may exceed safe levels. The integrated overload protection circuitry will automatically stop the motor to prevent damge to the saw or injury to the operator. -
Page 24: Sighting Notch
Sighting Notch The sighting notch (A) near the front of the baseplate provides guidance during free-hand cuts. When performing cuts, the cutting line for the saw blade can be observed via a triangle shaped sighting notch at the front of the base plate. Align the cutting line on the workpiece with the triangle shaped sighting notch at the front of the Base Plate. -
Page 25: Saw Maintenance
Remove the power cord from the power supply before carrying out any adjustment, servicing or maintenance on your Steelmax saw. Keep the machine clean and never use a saw blade that is damaged or distorted. Replace the saw blade when it becomes dull. For service and replacement pieces see the exploded parts diagram and parts list. - Page 26 Replacing Carbon Motor Brushes ► Caution: Disconnect plug from power supply before servicing your saw. Your saw’s carbon motor brushes must be replaced when they are worn down to 6 mm or less in length from the brush spring. Be sure brushes are clean and slide freely in the brush holder. Always replace both carbon brushes at the same time.
-
Page 27: Troubleshooting
Check flange mating surfaces for flatness. Replace if excessive distortion exists. • Check to ensure flat washer is present between bolt head and outer blade drive flange. 5. Low Blade Life/Teeth Chipping ® Steelmax saw blades. • Wrong blade for the type of material. Use only the following ®... -
Page 28: Saw Specifications
• Check for missing teeth, bends or cracks in the blade 7. Laser Won’t Track • Adjust Laser alignment with laser turned on. STEELMAX S9 XP SPECIFICATONS Rated Voltage 120V, 60Hz, Single Phase Motor Power 1,800W (2.4 HP) No Load Motor Speed... -
Page 29: Warning Symbols And Precautions
WARNING SYMBOLS AND PRECAUTIONS Please read the instructions carefully before starting the machine. Wear hearing protection! Always wear eye protection when using the machine. Always keep hands away from the path of the saw blade. Always disconnect the plug from the power source before carrying out any work on the machine. - Page 30 PRODUCT INFORMAITON ® Thank you for purchasing a Steelmax product! Please record the following information and keep this page for your records. MODEL: S9 XP METAL CUTTING SAW SERIAL NUMBER: PURCHASE DATE: PURCHASED FROM: SM-S-9 XP Operator’s Manual - 27 -...
Need help?
Do you have a question about the S9 XP and is the answer not in the manual?
Questions and answers