Table of Contents
Advertisement
Available languages
Available languages
Quick Links
Advertisement
Table of Contents

Related Manuals for Encore ENKVM-USB


Summary of Contents for Encore ENKVM-USB
-
Page 1: User Guide
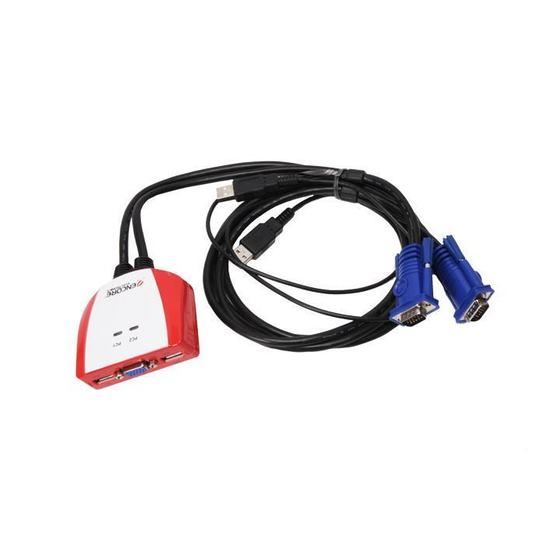
ENKVM-USB 2-Port USB KVM switch with built-in cables User Guide... -
Page 2: Package Contents
Package Contents • 1 USB KVM Switch with Attached Cables • 1 User Guide Requirements Console • A VGA, SVGA, or Multisync monitor capable of the highest resolution that you will be using on any computer in the installation •... -
Page 3: Installation
Installing your new ENKVM-USB involves the following steps: Plug your keyboard, monitor, and mouse into their ports on the ENKVM-USB. The keyboard and mouse ports are labeled with an icon to distinguish them. Note: When using a wireless composite keyboard and mouse, its USB cable must be plugged into the ENKVM-USB’s keyboard port for the Hotkeys to function. - Page 4 Auto Scan Interval While Auto Scan running, set up the interval to “n” second intervals - where “n” is a number from 1 – 4. Note: The “n” stands for the number of seconds that the focus dwells on a port before switching to the other one.
-
Page 5: Troubleshooting
Turn off the computers; wait 5 seconds; turn the computers back on. Select a lower resolution and/or bandwidth. ENKVM-USB Hotkey 1 x USB Type A Female (Black) 1 x HDB-15 Female (Blue) 1 x USB Type A Female (Black) -
Page 6: Keyboard Emulation Mapping
Keyboard Emulation Mapping The USB 101/104 key keyboard can emulate the functions of the Sun or Mac keyboard. The corresponding functions are shown in the table below. Sun Keyboard Note: When using [Ctrl] combinations, press and release the [Ctrl] key, then press and release the activation key. - Page 7 Mac Keyboard Note: When using key combinations, press and release the first key, then press and release the second key. USB Keyboard [Shift] [Ctrl] [Win] [Ctrl] [1] [Ctrl] [2] [Ctrl] [3] [Ctrl] [4] [Alt] [Prt_Sc] [Scroll Lock] [Desktop Menu] [Enter] [Back Space] [Ins] [Ctrl] [Win]...
-
Page 8: Manual Del Usuario
ENKVM-USB Concentrador KVM de tipo USB con 2 puertos Manual del usuario... -
Page 9: Presentación Del Hardware
Requisitos Consola • Un monitor VGA, SVGA o Multisync capaz de representar la resolución más elevada que vaya a usar con cualquiera de los ordenadores a instalar • Un teclado USB • Un ratón USB Ordenadores En cada ordenador que vaya a conectar al sistema se tienen que instalar los siguientes componentes: •... -
Page 10: Instalación
2. Para evitar daños en los dispositivos, verifi que estén conectados a tierra correctamente. La instalación del ENKVM-USB incluye los pasos siguientes: 1. Conecte el teclado, el ratón y el monitor a los puertos correspondientes del ENKVM-USB. Los puertos para teclado y ratón vienen marcados para su identifi cación. - Page 11 Funcionamiento Selección de puertos mediante teclas de acceso directo Para seleccionar un puerto mediante teclas de acceso directo, primero debe pulsar dos veces la tecla Bloq Despl. [Bloq Despl] [Bloq Despl] [Intro] Activa el modo de conmutación automática [Bloq Despl] [Bloq Despl] [A] [Intro] Intervalo de conmutación Establece el intervalo de búsqueda automática en “n”...
-
Page 12: Resolución De Problemas
Configuración de las teclas de acceso directo Después de activar el modo de teclas de acceso directo, pulse las teclas siguientes para ejecutar la función correspondiente: [Ctrl] + [F12] Touche Establece el operador plataforma del interfaz compatible. Establece el interfaz de teclado Mac compatible. Establece el interfaz de teclado Sun compatible. -
Page 13: Especificaciones
Carcasa Propiedades Peso físicas Dimensiones(L x An x Al) ENKVM-USB Teclas de acceso directo 1 conector USB hembra de tipo A (negro) 1 conector HDB hembra de 15 patillas (azul) 1 conector USB hembra de tipo A (negro) 2 conectores USB macho de tipo A (negro) - Page 14 EMULACION DE MAPA PARA TECLADO La tecla del conector USB 101/104 tiene la capacidad de emular las funciones de los teclados Sun o Mac, la combinación de la funciones se muestran en la tabla de abajo. Teclado Sun NOTA: Al usar la combinación de tecla [Ctrl], presione y libere la tecla [Ctrl], después presione y libere la tecla de activación.
- Page 15 Teclado Mac Nota: Al usar una combinación de teclas, debe presionar y liberar la primera tecla y después la segunda tecla. Teclado USB [Shift] [Ctrl] [Win] [Ctrl] [1] [Ctrl] [2] [Ctrl] [3] [Ctrl] [4] [Alt] [Impr Pant PetSis] [Bloq Despl Lock] [Desktop Menu] [Intro]...
Need help?
Do you have a question about the ENKVM-USB and is the answer not in the manual?
Questions and answers