Advertisement
Quick Links
Advertisement

Related Manuals for BROSA Cato Chest of Drawers


Summary of Contents for BROSA Cato Chest of Drawers
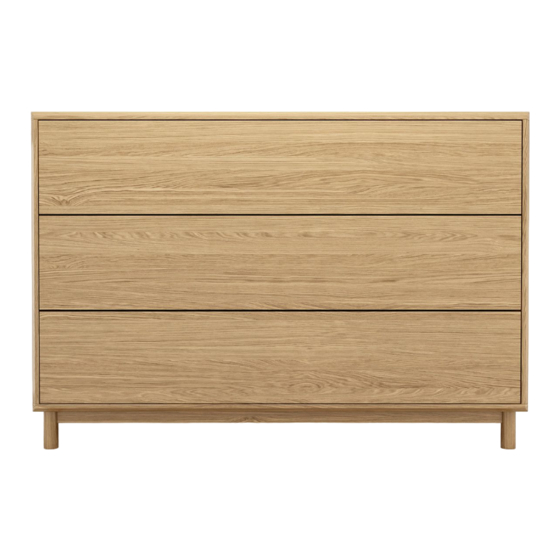
- Page 1 Cato Chest of Drawers A S S E M B LY G U I D E...
- Page 2 F O R Y O U R S A F E T Y Lift, don’t drag. This protects Check the assembly guide your floor and product. for required components. Assembly requires 2 people. Assembling this product on It's always easier with a a soft surface protects its friend.
- Page 3 Components Before you get started, check you have all of the pieces below. If anything’s missing, we’ll sort it out right away. Simply visit: www.brosa.com.au/pages/product-return-and-parts-request ① ② ③ ④ ⑤ ⑥ ⑦ ⑧ ⑨ ⑩...
- Page 4 Hardware x 24 x 24 x 12 (5#) (M8 x 60) (Ø8 x Ø14) (Ø6 x L28) (Ø12 x H9) (M3.5 x 35) x 40 x 12 x 24 (Ø6 x 30) (M6 x 8) (L400) (10g) x 12 (M3.8 x 12) What You Need...
- Page 5 Tips for Glue* Gluing is an optional step during assembly. Decide if you want to apply glue to wooden dowels based on the pros and cons below. Pro: Glued wooden dowels add to the stability of the structure. Con: Glued joint is not detachable any more. Follow the steps below to apply glue if needed.
- Page 6 Step 1 ⑩ Align a leg with the opening on the bottom of the body . Fit a washer to a bolt and then insert the bolt into the hole on the wooden block to connect it with the leg. Repeat this for the other hole.
- Page 7 Step 2 Align the runner with the pre-drilled holes on the inner side wall of the body and make sure the holes on the wall are aligned with the last top hole of each hole group on the runner. Insert the flat end screws into the pre-drilled holes and fix them with a screwdriver.
- Page 8 Step 3 With a screwdriver, drive a pointed end screw into a spare hole of each hole group to strengthen the connection between the runner and the side wall. Repeat this for all runners. Note: No pre-drilled holes are provided on the side walls for this step.
- Page 9 Step 4 ③ Align the small drawer side walls with the back wall ⑥. Fix them together with the long screws F. ③ ⑥...
- Page 10 Step 5 Insert the wooden dowels into the holes on the side. Insert the cam screws into the holes in the middle and fix them with a screwdriver.
- Page 11 Step 6 ⑧ Align a support panel with the cam screw and wooden dowels. Fit them together. Insert a cam lock into the hole on the support panel and twist it clockwise with a screwdriver to fix the connection. Press the cap into the cam lock hole.
- Page 12 Step 7 ⑨ Slide the bottom panel into the groove of the formed structure. Insert the wooden dowels into corresponding holes on the top of the support panels. ⑨...
- Page 13 Step 8 Fix the cam screws into corresponding holes of the small drawer front panel ①. ①...
- Page 14 Step 9 ① Fit the front panel to the structure formed in Step 7. Insert cam locks into the holes on the support panels and side walls. Twist all cam locks clockwise with a screwdriver to fix the front panel in place.
- Page 15 Step 10 Insert wooden dowels into the big holes on both sides of the big drawer back wall ⑦. ④ ⑤ Align the big drawer side walls with the back wall ⑦. Fix them together with the long screws F. ⑦...
- Page 16 Step 11 Insert the wooden dowels into the holes on the side. Insert the cam screws into the holes in the middle and fix them with a screwdriver.
- Page 17 Step 12 ⑧ Align a support panel with the cam screw and wooden dowels. Fit them together. Insert a cam lock into the hole on the support panel and twist it clockwise with a screwdriver to fix the connection. Press the cap into the cam lock hole.
- Page 18 Step 13 ⑨ Slide the bottom panel into the groove of the formed structure. Insert the wooden dowels into corresponding holes on the top of the support panels and side walls. ⑨...
- Page 19 Step 14 Fix the cam screws into corresponding holes of the big drawer front panel ②. ②...
- Page 20 Step 15 ② Fit the front panel to the structure formed in Step 13. Insert cam locks into the holes on the support panels and side walls. Twist all cam locks clockwise with a screwdriver to fix the front panel in place.
- Page 21 Step 16 Pull the lock button until it stops.
- Page 22 Step 17 Place the big drawer upon the runners. Slide the drawer so that the hooks in the back of the runners slide into the holes on the back wall of the drawer. ②...
- Page 23 Step 18 Fit the pins of the runners into the holes on the bottom of the drawer and then push the lock buttons to lock the drawer firmly.
- Page 24 Step 19 Repeat Step 16 to Step 18 to attach the other big drawer and the small drawer.
- Page 25 Step 20 Enjoy your new Cato Chest of Drawers!
-
Page 26: Anti-Tip Kit Installation
Anti-Tip Kit Installation It is not mandatory but strongly recommended to install anti-tip kit for safety. Hardware Wall Fixings Because of the variety of wall compositions, we can’t provide you with appropriate wall fixings. Please identify your wall composition and contact your local hardware store to get the appropriate fixings. - Page 27 What You Need Step 1 Attach the nylon strips to the back of the piece of furniture using the short screws and a screwdriver.
- Page 28 Instructions below demonstrate how to attach the strips to the wall using the wall plugs provided. But please do identify the type of your wall and choose the appropriate wall fixings. Step 2 Determine where the piece is to be placed and push it snug against the wall.
- Page 29 Warning 1. Serious or fatal crushing injuries can occur from furniture tip-over. Never allow children to climb or play on furniture. 2. The maximum loading weight for each drawer is 5kg. Staying within the weight limit keeps the drawers slide smoothly. MAX.
- Page 30 3. Pushing with both hands from both sides makes it easier to open the drawer.
-
Page 31: Troubleshooting
Troubleshooting 1. Follow the steps below to detach the drawer when needed. Step 1 Open the drawer and find the lock button underneath the drawer bottom panel. Pull the lock button. Repeat this for the opposite side. Step 2 Gently lift the front part of the drawer so that the pins of the runners are detached from the holes of the drawer. - Page 32 Step 3 Now you can remove the drawer from the carcass! Reverse the steps above to get the drawer attached again.
- Page 33 2. Upon receiving your product, you might find that the drawer doesn’t align well. Please note that it’s not a product flaw and can be adjusted following the instructions below. Step 1 Open the drawer. Step 2 Follow Step 1 and Step 2 in Troubleshooting part 1 to separate the drawer from the runners.
- Page 34 With that in mind, the following tips can help prolong the life of your Brosa veneer furniture to help them look beautiful for years to come. Assembly 1. Assemble furniture using our Assembly Guides. You can find them at support.brosa.com...
- Page 35 3. Do not use any abrasive cleaner or harsh detergent as this can damage the surface of the furniture. 4. Avoid using spray polishes as they contain silicones which may spoil the furniture’s surface. 5. Make sure all surfaces are protected from heat and liquids by mats and coasters.
Need help?
Do you have a question about the Cato Chest of Drawers and is the answer not in the manual?
Questions and answers