Table of Contents
Advertisement
Quick Links
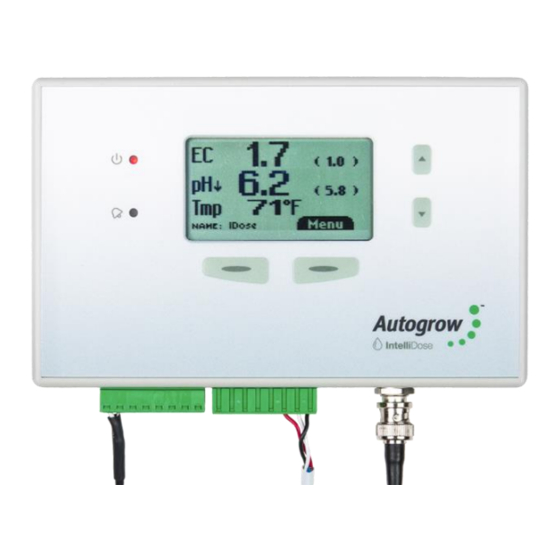
IntelliDose
Installation and User Guide
• Doses up to 9 part Nutrients, additives and pH
• Measures Conductivity, pH, Temperature
• Displays EC, CF, TDS,
o
o
C,
F, pH
• Connect to the via Internet Cloud Environment (subscription required)
• Variable ratios for nutrient part (change from vegetative to generative)
• Auto schedule of nutrient ratios and EC's
• Proportional Dosing (for rapid dosing between irrigations)
• Direct drive dosing pumps (keeps costs down)
• Irrigation with day/night control – precision timer
• Day/Night EC levels
• Water level control – to lower EC
1
Ver 5.6 IntelliDose Installation Guide (30 June 2020)
Copyright© 2020 Autogrow Systems Ltd
Advertisement
Table of Contents

Related Manuals for Autogrow IntelliDose


Summary of Contents for Autogrow IntelliDose
- Page 1 • Direct drive dosing pumps (keeps costs down) • Irrigation with day/night control – precision timer • Day/Night EC levels • Water level control – to lower EC Ver 5.6 IntelliDose Installation Guide (30 June 2020) Copyright© 2020 Autogrow Systems Ltd...
-
Page 2: Table Of Contents
Acids and alkalis should be diluted to a maximum strength of 2% or less. We recommend diluting your nutrients 1-part nutrient to 4 parts water while dialling in your dosing settings. Ver 5.6 IntelliDose Installation Guide (30 June 2020) Copyright© 2020 Autogrow Systems Ltd... - Page 3 Mount sample pot just above top of tank as many small pumps have low head pressure capability • Mount IntelliDose away from spray and humidity from tank and stock solution, preferably just outside grow room • Adjust the valve on inlet pipe to the sample pot to achieve a steady flow without excessive turbulence or air bubbles in the sample pot Clean the EC sensor and calibrate all sensors before use –...
- Page 4 Automatically manage your nutrient and pH levels, set remote alarms and data log your progress with this one simple machine. Please visit https://autogrow.com/our-products-solutions/intelligrow for more information. Ver 5.6 IntelliDose Installation Guide (30 June 2020) Copyright© 2020 Autogrow Systems Ltd...
-
Page 5: Section A
Section A - IntelliDose® Hydroponic Doser The IntelliDose hydroponic doser is the most advanced and user friendly doser on the market. It has a wide range of possible applications which we discuss briefly in this section. To keep the user interface as simple as possible, only the readings and settings relevant to the selected features are displayed on the controller’s LCD. - Page 6 This is useful in irrigating (drip) systems that do not re-circulate as it allows rapid dosing after each irrigation occurs. This feature is not available with more than a 2 part mix. Ver 5.6 IntelliDose Installation Guide (30 June 2020) Copyright© 2020 Autogrow Systems Ltd...
- Page 7 This could be used to operate lighting (instead of irrigation) for indoor crops. For more advanced irrigation settings, See section K. The IntelliDose sends a 24VDC signal to activate the irrigation pump. If you are in North America and have a 120V irrigation pump, you can utilize an Autogrow Twin Relay Box to run your pump from the IntelliDose.
- Page 8 Outputs The outputs voltages for dosing and irrigation control are all dependent on the power supply adapter used. The IntelliDose is supplied with a 24VDC power supply. We recommend using a 24VDC solenoid for irrigation Power supply The controller requires a power supply of 24V DC. Note: The outputs are limited to a current of 1.2A inductive load and 3A resistive load.
- Page 9 • Click on IG Starter/Standard Annual “Buy Now” button. • Fill in your details in the Order Summary and click subscribe User Email Address User Email Address Ver 5.6 IntelliDose Installation Guide (30 June 2020) Copyright© 2020 Autogrow Systems Ltd...
-
Page 10: Section B
2) Connect your IntelliDose to your gateway (computer or IntelliLink) 3) Ensure your IntelliDose shows as connected to your IntelliGrow account 4) Set the configuration of the controller to match the physical equipment. Print the wiring diagram and connect the dosing pumps accordingly. - Page 11 This allows you to quickly reset the controller to a previously saved setup that was known to work well, for a particular season. Ver 5.6 IntelliDose Installation Guide (30 June 2020) Copyright© 2020 Autogrow Systems Ltd...
- Page 12 Raise at certain growth stages. The IntelliDose can be configured to run no pH adjuster, pH raise, pH lower or both. If you choose to run both, you will be able to wire up a peristaltic pump to each raise and lower, but the system will only be able to dose in one direction at a time.
- Page 13 “greyed out” on the home page as they are derived from the entries on the schedule tab and cannot be altered here. If you need any help with setting Schedules, please contact Autogrow at support@autogrow.com and one of our experts will help you to build your perfect feed schedule.
- Page 14 Export the data You have the option to export the data as a .csv file if desired. Ver 5.6 IntelliDose Installation Guide (30 June 2020) Copyright© 2020 Autogrow Systems Ltd...
-
Page 15: Section B2
The setting order is the same as when using IntelliGrow and the settings that you will access are also the same, we suggest you use the previous pages on IntelliGrow settings, to guide you through the setting procedure. Ver 5.6 IntelliDose Installation Guide (30 June 2020) Copyright© 2020 Autogrow Systems Ltd... -
Page 16: Section C
Replace the shroud and then place in the calibrating solution. The solution supplied has an EC of 2.77mS/cm. To ensure the IntelliDose calibrates properly, you will need to use 2.77mS/cm solution to calibrate. Allow about 5 minutes for the temperature compensation to fully stabilize, press the menu button to reach the Calibration screen, press “Enter”... -
Page 17: Section D
(alkali). Set desired EC & pH Set Points - On IntelliDose Keypad • Navigate Menu > Dosing > EC > EC Set Point This should be set so that each dose raises the EC by 0.1mS/cm (1CF or 50ppm) -
Page 18: Proportional Dosing (Default Off)
4 or 5 Amps. Selecting sequential dosing a 2 Amp supply could be used. Ver 5.6 IntelliDose Installation Guide (30 June 2020) Copyright© 2020 Autogrow Systems Ltd... - Page 19 Section G - Installation The IntelliDose controller should be installed in a cool, dry place out of direct sunlight. Remove the screws holding the back, fit the mounting feet, then screw to the wall. If using the dry wall (plaster board) anchors, use the longer screws supplied. If fixing to a plywood back board use the shorter screws.
- Page 20 Installation for NFT with solenoid valve to automatically control water and Irrigation pump via contactor panel Ver 5.6 IntelliDose Installation Guide (30 June 2020) Copyright© 2020 Autogrow Systems Ltd...
- Page 21 • If the irrigation water is returned to the reservoir tank, allowance must be made for the level to rise a little above the float valve level. Ver 5.6 IntelliDose Installation Guide (30 June 2020) Copyright© 2020 Autogrow Systems Ltd...
- Page 22 The stock tanks should be on the ground, next to the reservoir. Important: Peri Pump mounting height should not exceed maximum 2.1 metres/7 feet measured from the bottom of the stock tank. Ver 5.6 IntelliDose Installation Guide (30 June 2020) Copyright© 2020 Autogrow Systems Ltd...
- Page 23 Ensure the controller, pump unit and power supply are kept clean and shielded from all water splashes and vapours. Ver 5.6 IntelliDose Installation Guide (30 June 2020) Copyright© 2020 Autogrow Systems Ltd...
-
Page 24: Fault Finding
(see pic), just making sure the bottom of the EC probe does not sit on the bottom of the sample pot. Ver 5.6 IntelliDose Installation Guide (30 June 2020) Copyright© 2020 Autogrow Systems Ltd... -
Page 25: Specification
0.1EC, 1CF, 50ppm or greater than 6.0EC, 60CF, 3000ppm • if pH below 4.5pH or above 8.0pH USB connection and software supports multiple controllers Ver 5.6 IntelliDose Installation Guide (30 June 2020) Copyright© 2020 Autogrow Systems Ltd... -
Page 26: Advanced Irrigation Features
Section K – Advanced Irrigation Features IntelliDose provides the ability to control up to 4 irrigation stations with an optional master pump. Each station is assigned its own duration, and control is either: • Sequential - where each station is run in turn (one after the other) all being triggered by a single trigger (day/night interval or time of day) or •... - Page 27 For example, if the interval is 1 hour and the duration is 20 minutes and irrigation begins at the start of the day at 6am then irrigations will be as follows: 0600-0620 0700-0720 Ver 5.6 IntelliDose Installation Guide (30 June 2020) Copyright© 2020 Autogrow Systems Ltd...
- Page 28 OR 'Irrigate during day only' For Independent irrigation, these settings can be set for each station The wiring diagram has been updated to accommodate the new irrigation scheme: Ver 5.6 IntelliDose Installation Guide (30 June 2020) Copyright© 2020 Autogrow Systems Ltd...
- Page 29 Each independent irrigation station can be set to use a different duration and trigger: When using single output or sequential irrigation then only one irrigation trigger can be specified. Ver 5.6 IntelliDose Installation Guide (30 June 2020) Copyright© 2020 Autogrow Systems Ltd...
- Page 30 IntelliGrow Knowledge Base Thank you for your purchase. Get the most out of your IntelliDose or IntelliClimate control systems with IntelliGrow. IntelliGrow is a cloud-based solution allowing you to access, set, monitor and manage your growing operation - anywhere, anytime.
- Page 31 Register online at www.autogrow.com/warranty-registration • Contact the distributor you bought the product from. • autogrow.com sales@autogrow.com North America (+1) 707 206 2220 Global (+64) 9 415 2380 Ver 5.6 IntelliDose Installation Guide (30 June 2020) Copyright© 2020 Autogrow Systems Ltd...
-
Page 32: Compliance Declaration
The end user of this product should be aware that any changes or modifications made to this equipment without the express approval of Autogrow Systems Ltd, could result in the product not meeting the Class A limits, in which the FCC could void the user's authority to operate the equipment.
Need help?
Do you have a question about the IntelliDose and is the answer not in the manual?
Questions and answers