Advertisement
Quick Links
INSTRUCTION MANUAL
MODEL
LC-44
IMPORTANT
READ AND UNDERSTAND INSTRUCTIONS BEFORE USING HEATER.
RETAIN INSTRUCTIONS FOR FUTURE REFERENCE.
SPECIFICATIONS ........................... 1
PART NAME .................................... 1
OPERATION .................................... 5
EMERGENCY MESSAGE .................. 11
LASER CLEAN
CONTENTS
ROUTINE MAINTENANCE ............... 12
TROUBLESHOOTING ..................... 13
LONG TERM STORAGE .................. 14
Advertisement

Related Manuals for Toyotomi LC-44


Summary of Contents for Toyotomi LC-44
-
Page 1: Table Of Contents
LASER CLEAN INSTRUCTION MANUAL MODEL LC-44 IMPORTANT READ AND UNDERSTAND INSTRUCTIONS BEFORE USING HEATER. RETAIN INSTRUCTIONS FOR FUTURE REFERENCE. CONTENTS SPECIFICATIONS ……………………… 1 ROUTINE MAINTENANCE …………… 12 PART NAME ……………………………… 1 TROUBLESHOOTING ………………… 13 OPERATION ……………………………… 5 LONG TERM STORAGE ……………… 14... -
Page 2: Specifications
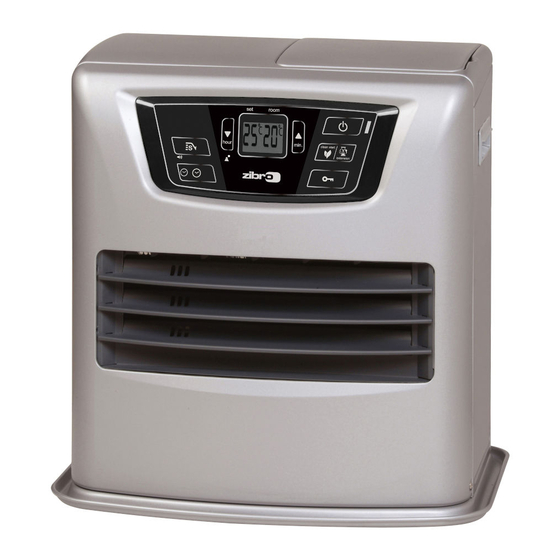
SPECIFICATIONS * Matching Room Size to HEAT RATING MODEL LC-44 • Because the “Heat Load” of an area to be High 14,300 BTU / 4.2 kW heated is influenced by so many factors, it is HEAT RATING impossible to specify a heater output to an 3,800 BTU / 1.1 kW... - Page 3 OPERATION PANEL Adjustment Keys ON/OFF Key/Lamp Save Key Extension Key Timer Key Key-lock Altitude button ON/OFF Lamp — flashing : Preheating mode constant : Heater in operation key-lock Indicator — constant : Childproof Lock is on. Temperature Indicator — constant : The Digital Indicator shows Set temperature and Room temperature.
- Page 4 UNPACKING AND PLACEMENT 1. Take out heater from box carefully to avoid damage. 2. Remove all packing materials from heater. 3. Make sure all screws are tight and all parts intact. NOTE : Save shipping carton and all packing materials for future storage of your heater. 4.
- Page 5 FUELING WARNING : Use only water-clear kerosene (paraffin). Never use gasoline or other flammable liquids. ALWAYS extinguish heater before refill heater fuel tank. Fuel heater outside the living area. 1. Open the fuel tank lid on the top of heater cabinet and lift out the removable fuel tank.
-
Page 6: Operation
OPERATION CAUTION : Always make sure that there is sufficient ventilation. SET CLOCK It is only possible to set the correct time, when the heater is connected to the mains and not burning. 1. Use the Adjustment Keys (t hour / s min.) to set the time. 2. - Page 7 TIMER IGNITION Your heater can be arranged to ignite automatcally at a chosen time by use of a pre-set “Timer”. This “Timer” can only be set after the clock setting has been completed. 1. Press the key and then the “Timer” key immediately after that.
- Page 8 TEMPERATURE REGULATION 1. U s e t h e A d j u s t m e n t key s ( th o u r/sm i n.) to a d j u s t t h e temperature. 2. Adjust the temperature using the key on the right (smin.) to set the temperature to a higher setting and the key on the left (thour) to lower the temperature.
- Page 9 CHILDPROOF LOCK The childproof lock can be used to prevent children accidentally changing the heater settings. When the heater is burning and the childproof lock is on, the heater can only be switched off. Other functions are blocked then. If the heater has already been switched off, the childproof lock also prevents accidental ignition of the heater.
- Page 10 AUTOMATIC CLEANING MODE When the heater has been burning continuously for two hours at its highest setting, the burner will automatically star t an autoclean procedure. The display will show the autocleaningcode running back to . The procedure takes 5 minutes, during which the heater will burn at its lowest setting, while the burner autocleans.
- Page 11 SET ALTITUDE 1. If the heater is used at a height of 800 m to 1300 m, use the altitude mode 1. Push the altitude button with thin rod like a clip and plug into the outlet simultaneously. Then “ 1 ”...
-
Page 12: Emergency Message
EMERGENCY MESSAGE In the event that heater should extinguish itself, without any action or your part, you should look to the digital indicator for any of the following messages. MESSAGE MESSAGE MEANING (Digital Indicator) e- - 0 Temperature within the heater too high. f- - 0 Power interrupted. -
Page 13: Routine Maintenance
ROUTINE MAINTENANCE CAUTION : Be sure to unplug heater before performing any checks or cleaning. CAUTION : Do not remove any parts from the heater except removable fuel tank, fuel acceptance fitting and air filter. WARNING : Allow heater to cool completely before cleaning or maintenance. 1. -
Page 14: Troubleshooting
TROUBLESHOOTING Should problems arise during operation or ignition, use this chart to determine the cause and the proper steps to take. Be sure to unplug heater and allow to cool completely before taking corrective measures. PROBLEM CAUSE SOLUTION POWER LAMP FAILS —Disconnected power plug —Plug into 230V AC outlet. -
Page 15: Long Term Storage
LONG TERM STORAGE At the end of the heating season, you must store the heater in a dust-free plece, if possible in its original packaging. The following procedures are recommended. 1. Drain Fuel Tank Remove any kerosene (paraffin), dust or water remaining in the Fuel acceptance fitting fuel sub tank and removable fuel tank to prevent rusting. - Page 16 New 08/18 Printed in Japan 4879001921...
Need help?
Do you have a question about the LC-44 and is the answer not in the manual?
Questions and answers