Table of Contents
Advertisement
Advertisement
Table of Contents

Subscribe to Our Youtube Channel
Summary of Contents for Nucamp Cirrus 620 2021
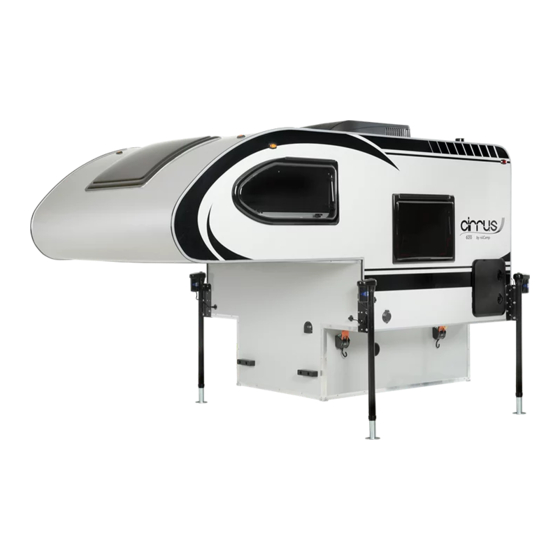
- Page 1 2021 OWNER’S MANUAL Cirrus 620 nucamprv.com...
-
Page 2: Disclaimers
Therefore, no legal claims may be filed against nuCamp based on the contents of this manual. nuCamp is not responsible for the observance or nonobservance of this instruction manual. -
Page 3: Introduction
OUR MISSION At nuCamp we are firstly a group of men and women that care deeply for one another, honor one another, are transparent, build relationships to change people’s lives, esteem one another higher than ourselves and live out servant leadership. -
Page 4: Table Of Contents
Safety Messages ........10 Battery(s) ..........37 SERVICE & WARRANTY Fire Safety ........10-11 Battery Disconnect Switch ....38 Fire Extinguisher ......11 -12 nuCamp Warranty Information ..57-60 Power Distribution Center ....39 Replacement Parts .......60 Emergency Exit ........12 Converter..........39 Aftermarket Alterations ......60 Carbon Monoxide ........12 Ground Fault Circuit Interrupter ..39... -
Page 5: Foreword
All operating procedures in this manual are designed as typical under normal conditions. Safe operation and use of any nuCamp camper is the sole responsibility of the owner. nuCamp will not be liable for any injury or loss sustained from the observance or non-observance of any procedures or safety warnings supplied in this manual or in any third-party manuals or guides supplied within the unit. -
Page 6: Getting Started
1. Perform a Pre-Delivery Inspection (PDI). The inspection must include the testing of all systems and components installed in your new camper. Your camper must pass the PDI test before it is eligible to be sold to you. nuCamp does not control dealer actions and is not responsible for an incomplete PDI. -
Page 7: Owner Packet
Most installed appliances, features and components included with your camper will have a warranty of some type and some may be eligible for coverage under the nuCamp One Year Limited Warranty. Refer to the included user manuals in your Owner’s Packet for any information the supplier has listed. -
Page 8: Emergencies
EMERGENCIES Emergency Preparation. Keep an emergency first aid kit in your camper. A separate kit with essential tools and supplies should also be compiled. These may come in handy in some emergencies as well as for any type of troubleshooting that may arise. The tools suitable for your needs may depend largely on how much boondocking or cold weather camping you do. - Page 9 Roadside Emergencies. Roadside emergencies can occur at any given time while traveling. The following guidelines will help you resume travel faster in the case of a roadside emergency: 1. To obtain service, locate your nearest authorized nuCamp dealer using our “Find a Dealer” www.nucamprv.com feature on the website at 2.
-
Page 10: General Safety
GENERAL SAFETY SAFETY CERTIFICATIONS All nuCamp campers have been designed to conform with, or exceed, SAFETY LABEL DESCRIPTIONS the National Fire Protection Association (NFPA) 1192 standard, American National Standards Institute (ANSI) 1192 standards, Canadian Standards Association (CSA) Z-240 standard (for Canadian units), and applicable CAUTION federal motor vehicle standards. -
Page 11: Fire Extinguisher
Cultivate these safety habits in recreation to minimize fire safety hazards: • Teach all occupants Fire Safety Practices. Consult your www.nfpa.org local Fire Department and the NFPA ( ) for COMMON SENSE more information. • DO NOT leave a burning fire of any kind unattended. While many things can be construed as •... -
Page 12: Emergency Exit
EMERGENCY EXIT The Emergency Exit Window in all nuCamp campers is recognized by the “EXIT” label and its red handles. This exit serves as a secondary means of escape if the main door entrance gets blocked during an emergency. The... -
Page 13: Smoke Alarm
SMOKE ALARM Your camper is equipped with a smoke alarm. The alarm will only sound when smoke reaches it. Read the user manual for the smoke alarm to find all needed information regarding its operation. WARNING Important Information: Test carbon monoxide alarm for proper •... - Page 14 How to test alarm for proper operation: (Unit must be powered on for at least three minutes before testing) 1. Press the “TEST” button until the alarm sounds. 2. All LEDs will light up and alarm will sound twice. 3. The LED flashes red and returns to normal operation displaying a flashing green LED every 8 seconds.
-
Page 15: Loading & Hauling
The options listed are items that were specifically designed by nuCamp to be installed on your truck camper by your dealer: 1. Side Awning Option adds a maximum of 45 lbs. -
Page 16: Speed
Weight (GW), maximum Gross Vehicle Weight Rating (GVWR) and Payload Capacity. • As always, your nuCamp dealer will have lots of experience to assist you in matching your truck and camper. Rely on their expertise to guarantee compatibility. Your dealer can also assist with setting your camper in proper position on your truck bed. -
Page 17: Rig Dynamics
RIG DYNAMICS When hauling a camper, you will encounter: Increased Stopping Distances. To compensate for increased • stopping distances, while following another vehicle on the highway, stay one rig length away from the vehicle in front of you for every 10 mph of your speed. WARNING Decreased Rear View Visibility. -
Page 18: Electric Jack System
If the jacks are in operation and no longer respond to the remote, push the control switch and the light will go out. The jacks should disengage. If they continue to operate, unplug the jack(s) from their exterior plug and contact your nuCamp dealer for servicing. •... -
Page 19: Additional Equipment
• Ratings are maximum limits that under no circumstance should be exceeded. These limits are established by nuCamp and our part manufacturers in the design of the trailer. • Weight and Load are generally interchangeable terms. Weight is measured by putting a vehicle, trailer, cargo, or other components on a scale. -
Page 20: Carrying Cargo
CARRYING CARGO When loading this camper, store heavy gear first, keeping it on or close to the camper floor. Place heavy things far enough forward to keep the loaded camper’s center of gravity within the zone recommended by the truck manufacturer. Store only light objects on high shelves. Distribute weight to obtain even side-to-side balance of the loaded vehicle. -
Page 21: Connector Plug
Step by step instructions for loading your camper: 1. Extend each jack no more than four inches at once. Start with the front jacks, keeping the camper level always. Repeat this process until the camper clears the truck body bed by approximately three inches. -
Page 22: Stabilizing & Setup
RV Industry Standard 7-Way Plug Charge Tail/Running Lights CAUTION (BLACK) (GREEN) Right Turn/Stop Left Turn/Stop While the trailer is connected via the (BROWN) (RED) 7-way connector plug, your camper may draw power from the vehicle battery for Backup Lights (Yellow) Brakes/Open Ground 12V power functions unless 110V shore... -
Page 23: Heating & Cooling
HEATING & COOLING ALDE HEATING SYSTEM ® Most nuCamp campers are equipped with the Alde Hydronic Heating System. This system is ® designed to provide warmth and comfort in all weather conditions. Advantages of the Alde System: ® • It provides a much quieter, gradual warmth that spreads through the camper, as opposed to loud blasts of air from regular RV furnaces. -
Page 24: Air Conditioning (If Equipped)
5. If you have checked all the above, you are ready for operation. Power on the Alde monitor ® mounted in the nuCamp control panel, select a power source, adjust to your desired temperature and enjoy the warmth and comfort of the Alde Heating System. -
Page 25: Fan Ventilation
To reduce heat gain and increase air conditioner cooling in high temperature weather: • Seek shaded areas to park your camper, such as beneath trees. • Close all windows, shades and curtains. For an extra heat shield, insert an automotive windshield sun shade, cut to size, into each of the windows. -
Page 26: Water System Information & Safety
PLUMBING & WINTERIZATION WATER SYSTEM INFORMATION & SAFETY Your camper is equipped with a two-part plumbing system – fresh water and waste water. The freshwater system includes: • Fill Level Monitor Screen WARNING • Freshwater Holding Tank • Water Pump & Filter •... -
Page 27: Monitor Screen
PLUMBING CONTROL PANEL The plumbing control panel feature is designed to simplify use of the plumbing systems onboard. Three-way switches in the nuCamp monitor Water holding tanks should always be panel and a switch on the plumbing control panel offer dual controls for completely drained when camper is not the water pump. -
Page 28: Fresh Water Tank
There are two 3-way switches for the water pump. One is located on the Never run the water pump dry. Damage nuCamp monitor panel and the other on the Nautilus Plumbing Control may occur and your pump may be panel. Either one can be used to control the pump. When the pump is ruined. -
Page 29: Exterior Wash Station
EXTERIOR WASH STATION The wash station is intended for uses such as washing up before entering the camper. A sprayer, resembling a shower, serves as the outlet and is connected into the fresh water system. 1. Before using the sprayer make sure the fresh water system is turned on and working properly. 2. -
Page 30: Toilet
RV antifreeze When getting the camper ready for camping season in spring you must winterizing method as a safer option. cleanse the potable fresh water system to remove all the antifreeze. This If you wish to try the blowout method process is called de-winterizing or sanitizing. - Page 31 While the Nautilus system instructions are generalized instructions, the following steps outline more detailed instructions for winterizing the fresh water & waste water plumbing systems in your camper: 1. Empty all black and gray tanks into an appropriate disposal. They must be as completely empty as possible.
- Page 32 11. When the water is all drained out of the lines and all openings are closed, turn off and disconnect the air hose. 12. Turn the handles to Winterize mode as shown in the on the Nautilus Panel Instructions. 13. Turn the Alde Bypass valve in the Nautilus compartment to the “Bypass”...
-
Page 33: Propane Gas
PROPANE GAS SYSTEM LP SAFETY Propane gas, also known as LP or liquefied petroleum, is a naturally odorless, highly flammable fuel stored in gas cylinders (commonly called LP tanks) used by appliances such as the stove top, refrigerator, and Alde ®... -
Page 34: Propane Regulator
• Only approved DOT propane gas cylinders may be used for the camper. • Fill LP tanks at authorized propane fueling facilities only. DANGER • It is illegal to fill LP tanks inside the compartment or inside your camper. Remove LP tanks from the camper to fill them. •... -
Page 35: Propane System Maintenance
If parts need replaced, consult your system inspected by a nuCamp dealer or nuCamp dealer for proper parts of the same type and rating. other qualified service technician. PROPANE USAGE Propane usage fluctuates so there is no real way to accurately measure propane usage. -
Page 36: Electrical
ELECTRICAL ELECTRICAL SAFETY & INFORMATION Two electrical systems are outfitted on your camper – the primary 12V DC and 120V AC shore power. These electrical systems are engineered to efficiently provide power to the various appliances and features in the camper. -
Page 37: 12V Dc System
• To check fill levels of battery charge, tap the tank fill/battery monitor screen on the nuCamp control panel twice. The approximate voltage of your battery will displayed. • Always make sure the battery is secured in place while traveling. -
Page 38: Battery Disconnect Switch
One or more fuses may be specified at 30-amp. This is the only place a 30-amp fuse should be used. • Replacement fuses must be the same type and amp rating as originally supplied by the nuCamp factory. Replacing it with an improper size fuse could result in malfunction. •... -
Page 39: Power Distribution Center
CONVERTER The converter is built into the power distribution center where the breakers and fuses are. Converter function: • The converter transforms 120V AC into 12V DC and enables you to use the interior lights, fans, pumps, and 12V appliances, whether operating on 12V battery power or 120V shore power. -
Page 40: Nucamp Control Panel(S)
NUCAMP CONTROL PANEL(S) The nuCamp control panel is located near the main entrance door. On it you will find a tank fill level, battery charge level indicator, along with master switches to power lights, and the water pump. The switch buttons will light up when activated. -
Page 41: Appliances
APPLIANCES RANGE/COOKTOP DANGER The range is fueled by propane gas and functions very much like your range at home. Some functions may be slightly different because of being powered by propane gas. Do not use gas cooking appliances for Important Safety Information you must know and understand: comfort heating. -
Page 42: Microwave (If Equipped)
MICROWAVE (If equipped) The microwave operates much like other household microwaves. General Information pertaining to the microwave: • The microwave oven will only operate on 120V shore power or an appropriately sized generator. • Even on shore power, the microwave and air conditioner may trip circuit breakers if they are operated at the same time. -
Page 43: Equipment & Hardware
EQUIPMENT & HARDWARE LAGUN DINETTE/BED CONVERSION To convert the dinette to a bed: 1. Press the button and turn the handle to unlock the table’s horizontal bracket and dis-assemble it from the vertical bracket. Set the table WARNING aside on the cushions. 2. -
Page 44: Awning (If Equipped)
AWNING (If Equipped) Basic awning operating instructions: 1. Locate the awning controls inside the main entrance door. 2. Turn the awning power switch to ON. 3. Press the RETRACT or EXTEND to operate the awning. 4. A switch to control the lights on the side awning is on the switchboard located inside the entry door. -
Page 45: Interior Environment
INTERIOR ENVIRONMENT PROLONGED OCCUPANCY All nuCamp campers are designed for short-term occupancy and recreational use such as camping. If the camper is used as long-term living quarters, the warranty may be voided due to increased abnormal wear and tear since it was not designed for long-term living purpose. Premature degradation of structure and interior materials such as fabrics, drapes, curtains flooring, carpeting and even finished surfaces can occur. -
Page 46: Condensation
CONDENSATION When the air temperature cools, it increases the water saturation in the air. Humidity is the amount of water in the air expressed as a percent. Condensation begins when the air has reached 100% humidity. Generally, condensation in a camper is from improper air flow. Most campers are compactly constructed, giving limited air space volume into which moisture can be assimilated. -
Page 47: Mold
OUT-GASSING Like most of the RV industry, nuCamp uses innovative products in developing camper product lines to serve the desires and needs of their customers. Carpet, linoleum, insulation, particle board, composites, plywood and upholstery are some common products that are used in the construction of most campers. -
Page 48: Formaldehyde
Low levels of formaldehyde are also released from smoking, cooking and household products, including paints, cleaning agents and cosmetics. nuCamp campers contain composite wood products that follow the California Air Resource Board (CARB) formaldehyde emission standards as outlined by California Code of Regulations §... -
Page 49: Maintenance
MAINTENANCE CLEANING CARE Frequent maintenance and cleaning of your camper will contribute to the dependability, reliability, aesthetics and value of your unit. Interior Cleaning: Cabinetry & Finished Wood Products. Remove dust with a damp, clean cloth. Apply a quality furniture polish and buff with a soft dry cloth. DO NOT use ammonia-based products or silicone oils. - Page 50 Exterior Cleaning: Road Debris. The exterior of your camper is comprised of many different materials including fiberglass, metal, rubber, plastics, aluminum, glass and sealant. Road debris from traveling may accumulate on these materials and result in corrosion, staining, or chemical spotting. Frequent washings of the exterior will help protect from damage.
-
Page 51: Storage Preparation
STORAGE PREPARATION Unless you live in the sunny south, you will need to prepare your camper each fall to face the cold winter months. It is very important that you follow the instructions in this section to properly care for your camper. -
Page 52: Camping Season Preparation
12. Put a new battery into the smoke alarm if required. Ensure all safety alarms are working properly. 13. Remember to follow manufacturer instructions for each component’s startup and operation. 14. If any issues are found in your trailer and you cannot perform the maintenance yourself, consult your authorized nuCamp dealer for assistance. Truck Campers • nucamprv.com... -
Page 53: Maintenance Schedule
Maintenance Schedule ITEM PROCEDURE See appropriate sections for specific procedure instructions Tie-Downs Inspect and secure if necessary Appliances Check for obstruction on exterior vents CO/LP Detector Test Doors Check seals, lubricate hinges Exterior Lighting Verify proper operation of all lighting Fire Extinguisher Check fill level Jack Brackets... -
Page 54: Maintenance Record
Maintenance Record DATE DESCRIPTION SERVICE CENTER... -
Page 55: Troubleshooting
This section is a collection of tried and true answers to the most popular troubleshooting questions posed to the nuCamp Customer Service team. These are not final answers to any issues you might have since individual product manufacturers are the final authority in determining the cause of issues. -
Page 56: Electrical System
ELECTRICAL SYSTEM 1. No 12V power a. Check your battery circuit breaker to make sure it is not tripped. b. Check your battery connections to make sure all leads are tight and properly connected. c. Check your battery fuse located in the 55-amp converter. d. -
Page 57: Nucamp Warranty Information
April 30, 2018. TRANSFERRABLE In addition to our 1-Year Limited Warranty, nuCamp agrees to warrant the structural integrity of the camper/trailer (roof, floors, front walls, rear walls, sidewalls, and hatch door, where applicable) for up to three (3) years from the date of purchase (Warranty Period). -
Page 58: Service & Warranty
(1) pay you an amount equal to nuCamp’s determination of the diminution in value of the RV that was caused by the defect, or (2) provide a similar replacement RV, less a reasonable allowance for the owner’s use of the original RV,... - Page 59 • Misuse, abuse, collision, improper repairs, overloading, neglect or lack of maintenance which results in damage. • Alteration or installation of equipment, not approved by nuCamp, that results in damage. This includes, but is not limited to electrical, gas, plumbing or structural issues.
-
Page 60: Replacement Parts
No action may be brought against nuCamp for breach of this Limited Warranty, any applicable implied warranty, or for any other claim arising out of or relating to a nuCamp trailer, more than thirty (30) days after: (1) expiration of the one year (12) month Limited Warranty period;... -
Page 61: Dealer Service Center
As a general policy, nuCamp prefers customers bring questions to their dealer first and foremost. nuCamp strives to provide excellence in customer service for the nuCamp Family. It may be tempting to take advantage of the convenience; however, your dealer is equipped to answer all your questions and offers vast experience in the field. -
Page 62: Reporting Safety Defects
If the NHTSA receives multiple complaints of similar defects, they may open an investigation and a recall and remedy solution may be launched. The NHTSA will not become involved in your individual case. Individual cases will be negotiated between you, your dealer and nuCamp. NHTSA Contact Information: Website: www.safercar.gov... -
Page 63: Glossary
GLOSSARY BALL HEIGHT: Height to top of tongue coupler when unit is leveled and on level surface. Calculated to the nearest whole inch, the very top of the ball hitch on your towing vehicle should be at this height as well to tow your trailer on a level. - Page 64 DEPARTURE ANGLE: Also called a rear ramp angle, it is the maximum ramp angle from which the trailer/vehicle can descend to a level surface without damage. To the nearest whole degree, rounded down. DRY C.O.G.: Center of Gravity on a truck camper. This is the point measured from the exterior front wall to the point where the camper is balanced- the center, when the unit has weights defined as dry.
- Page 65 (Note: nuCamp defines wet weight as different from Curb weight. nuCamp’s wet weight takes a full fresh water tank into consideration, while federal regulation defines water in tanks as cargo and curb weight is “the weight of a trailer/motor vehicle with standard equipment, including the...
- Page 66 1-844-823-9112 • nucamprv.com • ©nuCamp. Rights reserved. Information deemed accurate as possible at time of creation. nuCamp reserves the right to make refinements during the model year without notice. All weights, capacities, dimensions are approximate. It is the owner’s responsibility to select proper tow vehicle/equipment for proper and safe operation. CIR620-MAN-002...
Need help?
Do you have a question about the Cirrus 620 2021 and is the answer not in the manual?
Questions and answers
I currently have only one 12v battery on cmper. I plan to upgrade to two golf cart batteries and install dc/dc charger and inverter. I need the wiring diagram for this camper ( 2021 cirus 620 )
@Joe velasquez