Table of Contents
Advertisement
Available languages
Available languages
Quick Links
SEC.
WORK
BRAND
F8K5XNK3
21
LG
F8K5XNK4
150
1
2
3
4
REV. NO.
REVISION DESCRIPTION
REF. NO.
MODEL
P/NO.
MFL70280521
150
DATE
PREPARED
APPROVED
모조지 80g OFFSET 인쇄
F8K5XNK3.ABWPGST
1
F8K5XNK4.ASSPGST
(무선제본)
1. Material, printing and exterier size are refer to work tables.
2. Printing, text size and line are based on LG design film.
3. Exterier size on the drawing is cutting line.
4. Before product controlled by criteria sample.
should comply with LG standard of LG(63)-A-5501-34
TRIG.
MODELING
DESIGNED
주 연 수
17.10.17
LG Electronics Inc.
PAGE
LANGUAGE
GST
EN+TH
92
SCALE N
UNIT
mm
S
MANUAL,OWNER'S
T
REVIEWED
CHECKED APPROVED
I
T
전 종 묵
이 갑 선
김 현 석
L
DRUM-EXPORT 1/1
E
17.10.17
17.10.17
17.10.17
RELATED DWG.
MFL70280521
DWG.
No.
RELEASING THIS DRAWING
WITHOUT PERMISSION LG
Electronics SHOULD BE
ACCUSED ACCORDING TO THE
LAWS AND COMPANY RULES.
REMARK
24inch Mini washer
2kg
작업처 : 인쇄물개발파트
양산처 : 국제인쇄
DR COMPLETED
PDF
ILLUSTRATOR
Advertisement
Chapters
Table of Contents

Subscribe to Our Youtube Channel
Related Manuals for LG MFL70280521


Summary of Contents for LG MFL70280521
- Page 1 양산처 : 국제인쇄 1. Material, printing and exterier size are refer to work tables. 2. Printing, text size and line are based on LG design film. 3. Exterier size on the drawing is cutting line. 4. Before product controlled by criteria sample.
- Page 2 Before beginning installation, read these instructions carefully. This will simplify installation and ensure that the product is installed correctly and safely. Leave these instructions near the product after installation for future reference. TG2402NTWW 1463-2556 www.lg.com MFL70280521 Copyright © 2017 LG Electronics Inc. All Rights Reserved. Rev.00_101617...
-
Page 4: Table Of Contents
TABLE OF CONTENTS This manual may contain images or content different from the model you purchased. This manual is subject to revision by the manufacturer. SAFETY INSTRUCTIONS ............4 IMPORTANT SAFETY INSTRUCTIONS .............4 INSTALLATION ..............10 Parts ......................10 Accessories ....................11 Specifications ....................11 Installation Place Requirements ..............12 Stacking Mini Washer ................13 Connecting the Supply Hose ..............15... -
Page 5: Safety Instructions
SAFETY INSTRUCTIONS The following safety guidelines are intended to prevent unforeseen risks or damage from unsafe or incorrect operation of the appliance. The guidelines are separated into ‘WARNING’ and ‘CAUTION’ as described below. This symbol is displayed to indicate matters and operations that can cause risk. - Page 6 Installation •Never attempt to operate the appliance if it is damaged, malfunctioning, partially disassembled, or has missing or broken parts, including a damaged cord or plug. •This appliance should only be installed and transported by two or more people holding the appliance securely. •Do not install the appliance in a damp and dusty place.
- Page 7 •If the power cord is damaged or the hole of the socket outlet is loose, do not use the power cord and contact an authorized service centre. •This appliance must not be installed behind a lockable door, a sliding door or a door with a hinge on the opposite side to that of the appliance, in such a way that a full opening of the appliance door is restricted.
- Page 8 Improper use can cause fire or explosion. •In case of flood, disconnect the power plug and contact the LG Electronics customer information centre. •Do not push down the drawer excessively, when the appliance...
- Page 9 •Do not touch the door during a high temperature programme. •Do not use flammable gas and combustible substances (benzene, gasoline, thinner, petroleum, alcohol, etc.) near the appliance. •If the drain hose or inlet hose is frozen during winter, use it only after thawing.
- Page 10 Maintenance •Securely plug the power plug in the socket outlet after completely removing any moisture and dust. •Disconnect the power cord before cleaning the appliance. •Never unplug the appliance by pulling on the power cable. Always grip the power plug firmly and pull straight out from the socket outlet.
-
Page 11: Installation
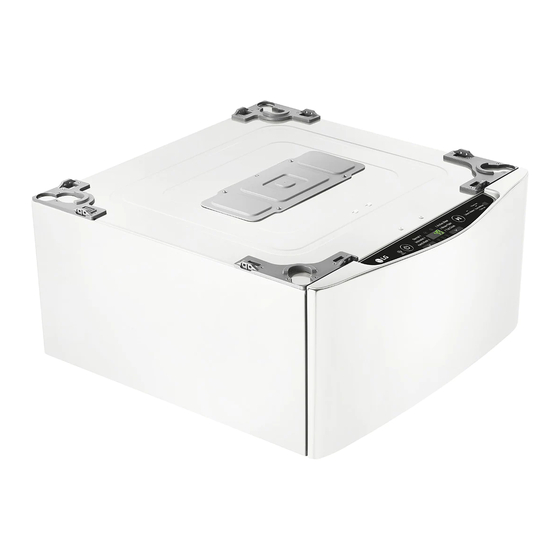
INSTALLATION Parts Door Water Supply Hose Drum Power Plug Control Panel Water Drain Hose Drawer Leveling Feet... -
Page 12: Accessories
Accessories Water supply hose Connecting Water drain hose Water supply hose Water drain hose (for cold water) supply hose connector connector Anti-slip sheets Detergent Brackets (front) Brackets (back) Spanner (2 EA) measuring (2 EA) (2 EA) * Screws Cable ties Band clamps Remote control Type A (37 EA) -
Page 13: Installation Place Requirements
Installation Place • Do not install the appliance in rooms where freezing temperatures may occur. Frozen Requirements hoses may burst under pressure. The reliability of the electronic control unit may be Location impaired at temperatures below freezing point. • Ensure that when the appliance is installed, it 135 cm is easily accessible for an engineer in the 123 cm... -
Page 14: Stacking Mini Washer
Stacking Mini Washer Type 1. The bottom part of the Main Washer is silver in color. • First assemble the stacking holder using 2 type A screws included in the accessory box of the Mini Washer, then each bracket Brackets (front) using 7 type A screws included in the accessory box of the Mini Washer. - Page 15 Pull and save the foam block for future use. Place Main Washer on top of Mini Washer. • If the washing machine must be moved in • Make sure the 4 legs are totally locked the future, the foam block will help prevent and the holes of Mini Washer align with damage to the washing machine during the holes of Main Washer.
-
Page 16: Connecting The Supply Hose
Connecting the Supply Hose Connecting Hose to Water Tap • Water supply pressure must be between 0.1 Connecting Screw-Type Hose to Tap MPa and 0.8 MPa (1.0‒8.0 kgf/cm with Thread • Do not overtighten the water supply hose. Screw the hose connector onto the water •... - Page 17 Push the adapter onto the end of the tap so Remove the guide plate if the tap is too that the rubber seal forms a watertight large to fit the adapter. connection. Tighten the four fixing screws. Guide plate Push the supply hose vertically upwards so that the rubber seal within the hose can Push the adapter onto the end of the tap so adhere completely to the tap and then...
- Page 18 Connecting Hose to Two Washing Connect the additionally provided water supply hose of Main Washer to the water Machines supply hose connector and water tap. Water supply hose Connect the water supply hose connector to connector the water supply hose of Main Washer. Open the accessory package for Mini Washer installation.
-
Page 19: Installing The Drain Hose
Installing the Drain Hose Using the Drain Hose Connector • The drain hose should not be placed higher Connect the drain hose of Main Washer than 100 cm above the floor. Water in the and Mini Washer to the drain connector. appliance may not drain or may drain slowly. -
Page 20: Leveling The Appliance
• If Mini Washer is installed on a raised platform, it must be securely fastened in order NOTE to eliminate the risk of falling off. • You can obtain anti-slip sheets from the LG Service Centre. -
Page 21: Operation
OPERATION Using the Appliance Choose the desired washing cycle. • Press the cycle button repeatedly until the desired cycle is selected. Sort laundry and load items. • Sort laundry by fabric type, soil level, colour and load size as needed. Open the door and load items into the washing machine. -
Page 22: Sorting Laundry
Sorting Laundry Caring before loading. • Do not wash 'memory wire' on female Look for a care label on your clothes. inner wear (such as a brassiere) as it may damage other clothes or the washing • This will tell you about the fabric content machine and create noise. -
Page 23: Closing The Door And Drawer
Provide • Forcing the drawer or the door to open can the power again or contact the LG service cause part damages and safety problems. centre. • Closing the drawer before having closed the •... -
Page 24: Adding Cleaning Products
Adding Cleaning Products Adding Detergent Measure the detergent with the detergent Detergent Dosage dispenser and pour it into the tub. • Detergent should be used according to the instruction of the detergent manufacturer and selected according to type, colour, soiling of the fabric and washing temperature. - Page 25 Adding Softeners Adding Water Softener • A water softener, such as anti-limescale (e.g. Calgon) can be used to cut down on the use Adding Fabric Softener of detergent in extremely hard water areas. CASE 1. When the machine chimes: Dispense according to the amount specified on the packaging.
-
Page 26: Control Panel
Control Panel Power Button Start/Pause Button • Press the Power button to turn the • This Start/Pause button is used to start washing machine on. the wash cycle or pause the wash cycle. • If a temporary stop of the wash cycle is needed, press the Start/Pause button. -
Page 27: Programme Table
Programme Table Washing Programme Maximum Programme Description Note Load Use this programme to wash lightly soiled normal • To change the setting during Light Soil items, except delicate washing, change the setting after 2.0 kg pressing Start/Pause button. fabrics such as wool or silk. -
Page 28: Option Programme
Option Programme Child Lock Use this option to disable the controls. This Spin Only feature can prevent children from changing cycles or operating the appliance. Use this option to spin-dry. Locking the Control Panel Tub Clean Press and hold the Tub Clean and Rinse+ button at the same time for three seconds. -
Page 29: Smart Functions
• To verify the Wi-Fi connection, check that Wi-Fi icon on the control panel is lit. Installing Smart ThinQ • LG SmartThinQ is not responsible for any network connection problems or any faults, Search for the LG SmartThinQ application from malfunctions, or errors caused by network the Google Play Store or Apple App Store on a connection. - Page 30 NOTE • Once the Remote Start mode is enabled, you can start a cycle from the LG SmartThinQ smartphone application. If the cycle is not started, the machine will wait to start the cycle until it is turned off remotely from the application or the Remote Start mode is disabled.
- Page 31 In addition to the source code, all referred license terms, warranty disclaimers and copyright notices are available for download. LG Electronics will also provide open source code to you on CD-ROM for a charge covering the cost of performing such distribution (such as the cost of media, shipping, and handling) upon email request to opensource@lge.com.
-
Page 32: Using Smart Diagnosis
Customer Information Centre transmitted for analysis. Use this function if you need an accurate diagnosis by an LG Electronics customer NOTE information center when the appliance • The Smart Diagnosis™ function depends on malfunctions or fails. -
Page 33: Maintenance
MAINTENANCE Cleaning the Interior WARNING • Unplug the washing machine before cleaning • Use a towel or soft cloth to wipe around the to avoid the risk of electric shock. Failure to washing machine door opening and door follow this warning may result in serious injury, glass. -
Page 34: Cleaning The Drum
Cleaning the Drum Cleaning the Water Inlet Filter Use the Tub Clean option to keep the drum • Turn off the stopclock if the washing machine clean. is to be left for any length of time (e.g. holiday), especially if there is no floor drain Press the Power button. -
Page 35: Cleaning The Lint Filter
Insert the lower part of the filter into the drum and close the cap until you hear a click sound. NOTE • When the lint filter is damaged, contact LG service centre. • Do not operate the washing machine without the lint filter. - Page 36 How to Handle Freezing Step 3. When the Drain Pump is Frozen icon may blink on the display when • drain pump problems occur, take the following Step 1. When the Door is Frozen measures. • Thaw out the door using a hot water cloth. Pour 15 ℓ...
-
Page 37: Troubleshooting
TROUBLESHOOTING The appliance is equipped with an automatic error-monitoring system to detect and diagnose problems at an early stage. If the appliance does not function properly or does not function at all, check the following before you call for service: Diagnosing Problems Symptoms Reason... - Page 38 Symptoms Reason Solution • Always wash dark colors separately from light colors and whites to prevent Clothes were not properly Staining discoloration. sorted. • Never wash heavily soiled items washed with lightly soiled items. Supply hose connection is • Check hoses and drain hose connectors loose at the tap, washing for leaks, cracks and splits.
- Page 39 Symptoms Reason Solution Control panel has powered • This is normal. Press the Power button off due to inactivity. to turn the washing machine on. Washing machine is • Make sure cord is plugged securely into unplugged. a working outlet. Water supply is turned off.
- Page 40 Symptoms Reason Solution • Make sure the inlet filters on the fill Filter clogged. valves are not clogged. Refer to the filter cleaning instructions. Supply hoses may be kinked. • Check that supply hoses are not kinked or clogged. • Make sure that the cold water tap is Insufficient water supply.
-
Page 41: Error Messages
Error Messages Symptoms Reason Solution • Close the drawer and press Start/Pause button to start the cycle. Drawer is not closed • If the drawer is closed and the drawer properly. lock error message is displayed, call for service. • Open the drawer and make sure the latch area is free of clothing or other obstructions. - Page 42 • The product is for use only in combination with LG authorized Stacking switch is not appliances. Call the customer information working properly. centre to check out LG authorized appliances. • Thaw out the supply hose using a hot Drain hose, supply hose or water cloth.
- Page 43 Memo...
- Page 44 Memo...
- Page 45 Memo...
- Page 48 อย่ า งถู ก ต้ อ งและปลอดภ ัย และกรุ ณ าเก็ บ ค� า แนะน� า เหล่ า นี ้ ไ ว้ ใ กล้ ก ับ ผลิ ต ภ ัณฑ์ ห ล ังจากการติ ด ต ั ้ งส � า หร ับการอ้ า งอิ ง ในอนาคต TG2402NTWW 1463-2556 www.lg.com MFL70280521 Copyright © 2017 LG Electronics Inc. All Rights Reserved. Rev.00_101617...
- Page 50 สารบ ัญ คู ่ ม ื อ ฉบั บ นี ้ อ าจมี ร ู ป ภาพหรื อ เนื ้ อ หาที ่ แ ตก ต่ า งจากรุ ่ น ที ่ ค ุ ณ ซ ื ้ อ คู ่ ม ื อ นี ้ อ าจถู ก แก ้ไขเปลี ่ ย นแปลงโดยผู ้ผลิ ต ค�...
-
Page 51: ค� า แนะน� า ด้ า นความปลอดภ ัย
ค� า แนะน� า ด้ า นความปลอดภ ัย แนวทางปฏิ บ ัติ เ พื ่ อ ความปลอดภ ัยต่ อ ไปนี ้ ม ี จ ุ ด มุ ่ ง หมายเพื ่ อ ป ้ องก ัน ความเส ี ่ ย งที ่ ไ ม่ ค าดหมายหรื อ ความเส ี ย หายจากการใช ้ ง านผลิ ต ภ ัณฑ์ ที... - Page 52 การติ ด ต ั ้ ง •หากเครื ่ อ งใช ้ ได ้รั บ ความเส ี ย หาย ช � า รุ ด ถู ก ถอดช ิ ้ น ส ่ ว นบางส ่ ว น หรื อ มี ช ิ ้ น ส...
- Page 53 •หากสายไฟได ้รั บ ความเส ี ย หายหรื อ ช ่ อ งของเต ้ารั บ ซอคเก็ ต หลวม อย่ า ใช ้ งานสายไฟและติ ด ต่ อ ศู น ย์ บ ริ ก ารที ่ ไ ด ้รั บ อนุ ญ าต •ต...
- Page 54 ไม่ เ หมาะสมสามารถท� า ให ้เกิ ด ไฟไหม ้หรื อ การระเบิ ด ได ้ •ในกรณี น � ้ า ท่ ว ม ให ้ถอดปลั ๊ ก ไฟและติ ด ต่ อ ศู น ย์ ข ้อมู ล ของลู ก ค ้าของ LG อิ...
- Page 55 •ห ้ามส ั ม ผั ส ประตู ใ นช ่ ว งโปรแกรมที ่ ม ี อ ุ ณ หภู ม ิ ส ู ง •ห ้ามใช ้ ก๊ า ซไวไฟและสารที ่ ต ิ ด ไฟ (เบนซ ิ น ก๊ า ซโซลี น ทิ น เนอร์ , น� ้ า มั น , แอลกอฮอล์...
- Page 56 การบ� า รุ ง ร ักษา •เส ี ย บปลั ๊ ก ไฟในเต ้ารั บ หลั ง จากที ่ ข จั ด ส ิ ่ ง สกปรกและความช ื ้ น หมดแล ้ว •ถอดสายไฟก่ อ นท� า ความสะอาดเครื ่ อ งใช ้ ไฟฟ้ า •ห...
-
Page 57: การติ ด ต ั ้ ง
การติ ด ต ั ้ ง ช ิ ้ น ส ่ ว น ท่ อ ส ่ ง น� ้ า ฝา ถั ง ซ ั ก ปลั ๊ ก ไฟ แผงควบคุ ม ท่ อ ระบายน� ้ า ลิ ้ น ช ั ก ขาปรั... -
Page 58: อุ ป กรณ์ เ สริ ม
อุ ป กรณ์ เ สริ ม ท่ อ ส ่ ง น� ้ า เช ื ่ อ มต่ อ ท่ อ ระบายน� ้ า ข ้อต่ อ ข ้อต่ อ (ส � า หรั บ น� ้ า เย็ น ) ท่... -
Page 59: ข ้อก� า หนดส � า หรั บ สถานที ่ ต ิ ด ตั ้ ง
ข้ อ ก� า หนดส � า หร ับสถานที ่ ต ิ ด ต ั ้ ง • ห ้ามติ ด ตั ้ ง เครื ่ อ งใช ้ ในห ้องที ่ อ าจมี อ ุ ณ หภู ม ิ ท ี ่ จุ... -
Page 60: เครื ่ อ งซ ั ก ผ ้าขนาดเล็ ก ชนิ ด ตั ้ ง ซ ้ อน
เครื ่ อ งซ ั กผ้ า ขนาดเล็ ก ชนิ ด ต ั ้ ง ประเภท 1 ด้ า นล่ า งของเครื ่ อ งซ ั กผ้ า หล ักเป ็ น ส ี เ งิ น ซ ้ อ น •... - Page 61 ดึ ง และเก็ บ รั ก ษาบล็ อ กโฟมส � า หรั บ การใช ้ ใน ตั ้ ง เครื ่ อ งซ � ก ผ ้าหลั ก ไว ้บนเครื ่ อ งซ ั ก ผ ้าขนาดเล็ ก อนาคต • ตรวจดู ใ ห ้แน่ ใ จว่ า ขาทั ้ ง 4 นั ้ น ล็ อ กแน่ น หนาแล ้ว •...
-
Page 62: การเช ื ่ อ มต่ อ ก ับท่ อ น� ้ า ประปา
การเช ื ่ อ มต่ อ ก ับท่ อ น� ้ า ประปา ท� า การต่ อ ท่ อ ก ับก๊ อ กน� ้ า • ความดั น น� ้ า ประปาต ้องอยู ่ ร ะหว่ า ง 0.1 MPa and 0.8 การเช... - Page 63 กดอะแดปเตอร์ เ ข ้ากั บ หั ว ก๊ อ กเพื ่ อ ให ้ซ ี ล ยางรั ด กั น ถอดจานน� า หากก๊ อ กใหญ่ เ กิ น ไปที ่ จ ะต่ อ กั บ อะแดป น� ้ า เข ้าออก ขั น สกรู ย ึ ด ทั ้ ง ส ี ่ ต ั ว ให ้แน่ น เตอร์...
- Page 64 การเช ื ่ อ มต่ อ ท่ อ ไปย ังเครื ่ อ งซ ั กผ้ า 2 เช ื ่ อ มต่ อ ท่ อ ส ่ ง น� ้ า ของถั ง ซ ั ก หลั ก ที ่ ใ ห ้เพิ ่ ม มากั บ หน...
-
Page 65: การติ ด ตั ้ ง ท่ อ ระบาย
การใช ้ ข ้ อ ต่ อ ท่ อ ระบายน� ้ า การติ ด ต ั ้ งท่ อ ระบาย • ไม่ ค วรวางท่ อ ระบายสู ง จากพื ้ น เกิ น กว่ า 100 ซม. น� ้ า ช ื ่ อ มต่ อ ท่ อ ระบายน� ้ า ทิ ้ ง ของถั ง ซ ั ก หลั ก และเครื ่ อ ง ในเครื... -
Page 66: การปร ับระด ับเครื ่ อ งใช
ต ้องได ้รั บ การยึ ด อย่ า งแน่ น หนาเพื ่ อ ก� า จั ด ความเส ี ่ ย ง หมายเหตุ ต่ อ การหล่ น • ท่ า นสามารถขอรั บ แผ่ น กั น ลื ่ น ได ้จากศู น ย์ บ ริ ก าร LG... -
Page 67: การใช ้ ง าน
การใช ้ ง าน การใช ้ ง านเครื ่ อ งใช ้ เลื อ กโปรแกรมการซ ั ก ที ่ ต ้องการ • กดปุ่ มรอบซ � ้ า จนกระทั ่ ง ถึ ง รอบการใช ้ งานที ่ ต ้องการ แยกผ ้าและเอาเส ื ้ อ ผ ้าใส ่ ถ ั ง •... -
Page 68: คั ด แยกเส ื ้ อ ผ ้าที ่ ซ ั ก
ค ัดแยกเส ื ้ อ ผ้ า ที ่ ซ ั ก การดู แ ลรั ก ษาก่ อ นใส ่ เ ครื ่ อ ง • ห ้ามซ ั ก โครงลวดในชุ ด ช ั ้ น ในผู ้หญิ ง (เช ่ น มองหาฉลากการดู... -
Page 69: การปิ ดประตู แ ละลิ ้ น ช ั ก
การปิ ดประตู แ ละลิ ้ น ช ั ก หมายเหตุ • การล็ อ คประตู อ าจท� า ไม่ ไ ด ้หากมี เ ส ื ้ อ ผ ้าที ่ ซ ั ก มากเกิ น ไปในเครื ่ อ งหรื อ หากประตู ป ิ ด ไม่ ส นิ ท ดั... -
Page 70: การใส ่ ผ ลิ ต ภ ัณฑ์ ท � า ความสะอาด
การใส ่ ผ ลิ ต ภ ัณฑ์ ท � า ความสะอาด การใส ่ ผ งซ ั กฟอก วั ด ปริ ม าณผงซ ั ก ฟอกด ้วยเครื ่ อ งจ่ า ยผงซ ั ก ฟอกและเท ปริ ม าณน� ้ า ยาซ ั กผ้ า ลงในอ่... - Page 71 ใส ่ น � ้ า ยาท� า ให้ ผ ้ า นุ ่ ม การเติ ม สารแก้ น � ้ า กระด้ า ง • สารแก ้น� ้ า กระด ้าง เช ่ น ป้ อ งกั น คราบหิ น ปู น (เช ่ น แคลกอน) สามารถน�...
-
Page 72: แผงควบคุ ม
แผงควบคุ ม ปุ ่ ม เปิ ด/ปิ ด ปุ ่ ม เริ ่ ม /พ ัก • กดปุ่ ม แหล่ ง จ่ า ยไฟ เพื ่ อ เปิ ด ใช ้ งานเครื ่ อ งซ ั ก • ปุ่ ม เริ ่ ม /พ ัก ใช ้ ในการเริ ่ ม ต ้นรอบซ ั ก หรื อ หยุ ด รอบซ... -
Page 73: ตารางโปรแกรม
ตารางโปรแกรม โปรแกรมการซ ั ก ปริ ม าณการ โปรแกรม ค� า อธิ บ าย หมายเหตุ ซ ั กสู ง สุ ด ใช ้ โปรแกรมนี ใ นการซ ั ก • หากต ้องการเปลี ่ ย นการตั ้ ง ค่ า ในขณะซ ั ก เส... -
Page 74: โปรแกรมต ัวเลื อ ก
โปรแกรมต ัวเลื อ ก Child Lock (ป ้ องก ันเด็ ก ) ใช ้ ตั ว เลื อ กนี ้ เ พื ่ อ ปิ ด การใช ้ งานการควบคุ ม คุ ณ ลั ก ษณะ Spin Only (ปั ่ น อย่ า งเดี ย ว) นี... -
Page 75: ฟั ง ก์ ช ั นสมาร์ ท
การติ ด ต ั ้ ง Smart ThinQ • LG SmartThinQ ไม่ ร ั บ ผิ ด ชอบปั ญ หาใดๆ เกี ่ ย วกั บ ปั ญ หาในการเช ื ่ อ มต่ อ เครื อ ข่ า ย หรื อ ความผิ ด พลาด... - Page 76 กดปุ่ ม Remote Start ค ้างไว ้ 3 วิ น าที เพื ่ อ เปิ ด ใช ้ งานฟั ง ก์ ช ั น เริ ่ ม ต ้นโปรแกรมซ ั ก จากแอปพลิ เ คช ั ่ น LG SmartThinQ บนสมาร์ ท โฟนของคุ ณ...
- Page 77 ใช ้ งานฟั ง ก์ ช ั น นี ้ ห ากคุ ณ ต ้องการการวิ น ิ จ ฉั ย ที ่ แ ม่ น ย� า โดยศู น ย์ ข ้อมู ล ลู ก ค ้าของ LG Electronics เมื ่ อ...
-
Page 78: การใช ้ Smart Diagnosis
หมายเหตุ ศู น ย์ บ ริ ก ารข ้อมู ล ลู ก ค ้า LG Electronics เมื ่ อ เครื ่ อ งใช ้ • ฟั ง ก์ ช ั น Smart Diagnosis™ ขึ ้ น อยู ่ ก ั บ คุ ณ ภาพการ... -
Page 79: การบ� า รุ ง ร ักษา
การบ� า รุ ง ร ักษา การท� า ความสะอาดภายใน ค� า เตื อ น • ถอดปลั ๊ ก เครื ่ อ งซ ั ก ผ ้าของคุ ณ ก่ อ นการท� า ความ • ใช ้ ผ ้าขนหนู ห รื อ ผ ้านุ ่ ม เพื ่ อ เช ็ ด ช ่ อ งเปิ ด ฝาเครื ่ อ งซ ั ก สะอาดเพื... -
Page 80: การท� า ความสะอาดถ ังซ ั ก
การท� า ความสะอาดถ ังซ ั ก การท� า ความสะอาดต ัวกรองท่ อ น� ้ า เข้ า ใช ้ ตั ว เลื อ กล ้างถั ง ซ ั ก ผ ้าเพื ่ อ รั ก ษาความสะอาดของถั ง ซ ั ก • ปิ ด นาฬ ิ กาจั บ เวลาหากทิ ้ ง เครื ่ อ งซ ั ก ผ ้าไว ้ช ่ ว งเวลา หนึ... -
Page 81: ท� า ความสะอาดตั ว กรองผ ้าส � า ล
• เมื ่ อ ตั ว กรองผ ้าส � า ลี ไ ด ้รั บ ความเส ี ย หาย ให ้ติ ด ต่ อ ศู น ย์ บริ ก ารของ LG • ห ้ามใช ้ งานเครื ่ อ งซ ั ก ผ ้าโดยไม่ ม ี ต ั ว กรองผ ้าส � า ลี... - Page 82 วิ ธ ี ก ารร ับมื อ การเป ็ นน� ้ า แข็ ง ข ั ้ นที ่ 3 เมื ่ อ ปั ๊ ม ท่ อ ระบายน� ้ า แข็ ง ต ัวเนื ่ อ งจาก ความเย็ น จ ัด ข...
-
Page 83: การแก้ ไ ขปั ญ หาเบื ้ อ งต้ น
การแก้ ไ ขปั ญ หาเบื ้ อ งต้ น เครื ่ อ งใช ้ มี ร ะบบการตรวจสอบข ้อผิ ด พลาดโดยอั ต โนมั ต ิ ใ นการตรวจสอบและวิ น ิ จ ฉั ย ปั ญ หาในระยะเริ ่ ม ต ้น ถ ้าเครื ่ อ ง ใช... - Page 84 อาการ สาเหตุ การแก้ ไ ข • ซ ั ก ผ ้าส ี เ ข ้มแยกต่ า งหากจากผ ้าส ี อ ่ อ นและผ ้า ขาวเพื ่ อ ป้ อ งกั น การตกส ี ไม่ แ ยกเส ื ้ อ ผ้ า ให้ เ หมาะสม ส...
- Page 85 อาการ สาเหตุ การแก้ ไ ข แผงควบคุ ม ปิ ดเนื ่ อ งจากไม่ ม ี ก าร • นี ่ เ ป็ นส ิ ่ ง ปกติ กดปุ่ ม ก� า ล ังไฟเพื ่ อ เปิ ด เครื ่ อ ง ใช...
- Page 86 อาการ สาเหตุ การแก้ ไ ข • ตรวจสอบให ้แน่ ใ จตั ว กรองน� ้ า เข ้าวาล์ ว เติ ม ไม่ ต ัวกรองอุ ด ต ัน ถู ก อุ ด ตั น ดู ค � า แนะน� า การท� า ความสะอาดตั ว กรอง...
-
Page 87: ข ้อความข ้อผิ ด พลาด
ข้ อ ความข้ อ ผิ ด พลาด อาการ สาเหตุ การแก้ ไ ข • ปิ ด ลิ ้ น ช ั ก แล ้วกดปุ่ ม เริ ่ ม /พ ัก เพื ่ อ เริ ่ ม รอบการ ท� า งาน ลิ ้ น ช ั กปิ ดอย่ า งไม่ เ หมาะสม •... - Page 88 ชุ ด สวิ ต ช ์ ท ี ่ ม ี ก ารเรี ย งสวิ ต ช ์ แ บบ ไฟฟ้ า LG ที ่ ไ ด ้รั บ อนุ ญ าตเท่ า นั ้ น โทรติ ด ต่ อ...
- Page 89 บ ันทึ ก...
- Page 90 บ ันทึ ก...
- Page 91 บ ันทึ ก...
Need help?
Do you have a question about the MFL70280521 and is the answer not in the manual?
Questions and answers