Table of Contents

Related Manuals for Onkyo HT-S5910


Summary of Contents for Onkyo HT-S5910
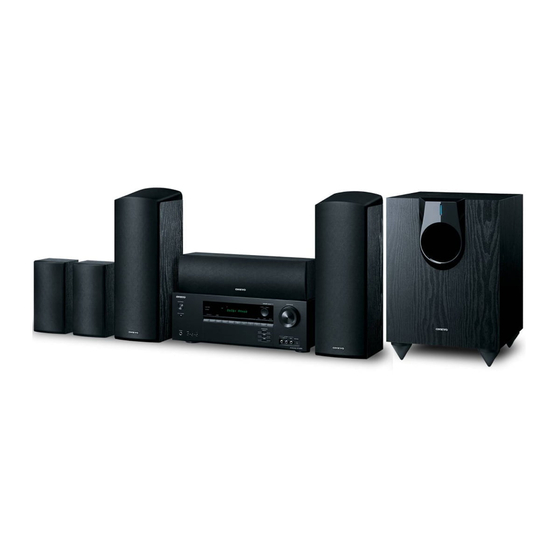
- Page 1 5.1.2-CHANNEL HOME THEATER SYSTEM ≫ Table of contents HT-S5910 ≫ Connections Instruction Manual ≫ - Connecting Speakers ≫ Playback ≫ Setup ≫ Troubleshooting ≫ Appendix ≫ Supplementary Information Front Panel≫ Rear Panel≫ Remote≫...
- Page 2 Contents Connections Playback Setup ≫ ≫ ≫ ≫ What’s in the box Connecting an AV Component in a Separate Room (ZONE B Connection) Additional Function (Firmware Update) Connecting a Pre-main Amplifier (ZONE B) Update Information of the firmware Connecting Antennas Operation of added new functions Connecting the Power Cord Firmware Update Procedure...
- Page 3 Contents Connections Playback Setup ≫ ≫ ≫ ≫ Appendix Listening Mode Effects Input Formats and Selectable Listening Modes About HDMI Setup General Specifications Switching the HDMI 4K Signal Format Input and Output by this Unit Setup Menu Menu list Menu operations 1.
- Page 4 Contents Connections Playback Setup ≫ ≫ ≫ ≫ What’s in the box 1. Main unit (HT-R495) (1) 2. Remote controller (RC-970R) (1), Batteries (AAA/R03) (2) 3. Speaker setup microphone (1) • Used during Initial Setup. 4. Indoor FM antenna (1) 5.
- Page 5 Contents Connections Playback Setup ≫ ≫ ≫ ≫ Additional Function (Firmware Update) This unit is equipped with a function to update the firmware via USB port when the firmware update is announced after purchase. This enables various functions to be added and operations to be improved.
-
Page 6: Firmware Update Procedure
Contents Connections Playback Setup ≫ ≫ ≫ ≫ Firmware Update Procedure Approx. 30 minutes are required for updating. Existing settings are kept after Update updating. 1. Connect the USB storage device to your PC. 2. Download the firmware file from the our company's website to your PC and Disclaimer: The program and accompanying online documentation are furnished unzip. - Page 7 Contents Connections Playback Setup ≫ ≫ ≫ ≫ 6. Select "6. Miscellaneous" - "Firmware Update" - "Update via USB" with the Connect the USB storage device to an external power source if it has its own cursors in order, then press ENTER. power supply.
-
Page 8: Part Names
Contents Connections Playback Setup ≫ ≫ ≫ ≫ Part Names Front Panel ‰ For details, see ( Front Panel≫ Rear Panel≫ Remote≫... - Page 9 Contents Connections Playback Setup ≫ ≫ ≫ ≫ ON/STANDBY button 2. MUSIC OPTIMIZER button: Turns on/off the MUSIC OPTIMIZER function that improves the quality of the compressed audio. 3. BLUETOOTH indicator: Lights up when this unit and a BLUETOOTH-enabled device are connected. 4.
- Page 10 Contents Connections Playback Setup ≫ ≫ ≫ ≫ Display 1. Speaker/Channel display: Displays the output channel that corresponds to the selected listening mode. 2. Displays the audio output destination. A: Outputs audio only to the main room (ZONE A). B: Outputs audio only to the separate room (ZONE B). AB: Outputs audio to both the main room (ZONE A) and separate room (ZONE 3.
-
Page 11: Rear Panel
Contents Connections Playback Setup ≫ ≫ ≫ ≫ Rear Panel ‰ For details, see ( p12) Front Panel≫ Rear Panel≫ Remote≫... - Page 12 Contents Connections Playback Setup ≫ ≫ ≫ ≫ 1. HDMI OUT jacks: Transmit video signals and audio signals with an HDMI cable connected to a TV. 2. HDMI IN jacks: Transmit video signals and audio signals with an HDMI cable connected to an AV component.
-
Page 13: Remote Controller
Contents Connections Playback Setup ≫ ≫ ≫ ≫ Remote Controller ON/STANDBY button 2. Input selector buttons: Switches the input to be played. 3. Play buttons: Used for playback operation of a BLUETOOTH-enabled device. If the unit is switched to "CEC MODE" using the MODE button, an HDMI CEC ... - Page 14 Contents Connections Playback Setup ≫ ≫ ≫ ≫ AM/FM stations ( p51). Also, when an HDMI CEC function-enabled AV component is connected to this unit, you can switch "3. Play buttons" between "CEC MODE" and "RCV MODE" (normal mode). Front Panel≫ Rear Panel≫ Remote≫...
- Page 15 Contents Connections Playback Setup ≫ ≫ ≫ ≫ Speaker/Subwoofer Front & Height Speakers The supplied Front & Height Speakers are designed as a system with Dolby enabled speakers, a type of height speaker, added to their top panels. Dolby enabled speakers are special speakers designed to face the ceiling, so that the sound is heard from overhead by bouncing the sound off the ceiling.
- Page 16 Contents Connections Playback Setup ≫ ≫ ≫ ≫ 3. Speaker jack (for Front Speaker): Use the included speaker cable to connect to the main unit. • Do not place objects on the speaker system. The speaker system may drops or fall over by losing balance and may cause an injury. ‰...
-
Page 17: Center Speaker
Contents Connections Playback Setup ≫ ≫ ≫ ≫ Center Speaker The grille net cannot be removed. 1. Speaker jack: Use the included speaker cable to connect to the main unit. 2. Wall mount hole: The speaker system may be mounted to a wall by suspending speakers on wooden screw using the wall mount hole. -
Page 18: Surround Speakers
Contents Connections Playback Setup ≫ ≫ ≫ ≫ Surround Speakers The supplied Surround Speakers have left and right designations. The grille net cannot be removed. 1. Wall mount hole: The speaker system may be mounted to a wall by suspending speakers on wooden screw using the wall mount hole. •... - Page 19 Contents Connections Playback Setup ≫ ≫ ≫ ≫ Powered Subwoofer LINE INPUT OUTPUT LEVEL LINE INPUT 1. Status indicator 3. OUTPUT LEVEL control: This control is used to adjust the volume of the Lights off: Subwoofer in standby mode or disconnected from power source. subwoofer.
-
Page 20: Maintenance
Contents Connections Playback Setup ≫ ≫ ≫ ≫ Notice Maintenance • Do not place objects on the speaker system. The speaker system may drops Periodically wiped the top and side surfaces of this product with a soft cloth. or fall over by losing balance and may cause an injury. When particularly dirty, soak the cloth in a diluted neutral cleaning solution and •... - Page 21 Contents Connections Playback Setup ≫ ≫ ≫ ≫ Connections Connecting speakers Connecting the TV Connecting Playback Devices Connecting an AV Component in a Separate Room (ZONE B Connection) Connecting Antennas Connecting the Power Cord Front Panel≫ Rear Panel≫ Remote≫...
-
Page 22: Connecting Speakers
Contents Connections Playback Setup ≫ ≫ ≫ ≫ Connecting speakers You can select the layout of speakers to be installed from various patterns when using this unit. Use the following flow chart to select the speaker layout that suits your speakers and usage environment. - Page 23 Contents Connections Playback Setup ≫ ≫ ≫ ≫ Speaker Installation „ 5.1 Channel System Front speakers output the front stereo sound, and a center speaker outputs the sound of the center of the screen, such as dialogs and vocals. Surround speakers create the back sound field.
- Page 24 Contents Connections Playback Setup ≫ ≫ ≫ ≫ „ 7.1 Channel System Front speakers output the front stereo sound, and a center speaker outputs the sound of the center of the screen, such as dialogs and vocals. Surround speakers create the back sound field. Powered subwoofer reproduces the bass sound, and creates the rich sound field.
- Page 25 Contents Connections Playback Setup ≫ ≫ ≫ ≫ „ 5.1.2 Channel System When height speakers are combined with a 5.1 Channel System, you create a 5.1.2 Channel System that has a rich sound field above the listener. You can select from the following 4 types according to the type of height speakers to be used and the usage environment.
- Page 26 Contents Connections Playback Setup ≫ ≫ ≫ ≫ ‰ Example installation when the entire supplied This is a 5.1.2 channel system where the entire supplied speaker system is connected. speaker system is connected The Front & Height Speakers have Dolby enabled speakers, which are types of height speakers, built into the top part of them, and they face the ceiling so that sound is heard after bouncing off the ceiling so that sound appears to be coming from overhead.
- Page 27 Contents Connections Playback Setup ≫ ≫ ≫ ≫ ‰ Example installation when using separately This is a 5.1.2 Channel System that combines the supplied speaker system with separately available front high speakers or rear high speakers. available front high speakers/rear high The front speakers should be positioned at ear height while the surround speakers speakers should be positioned just above ear height.
- Page 28 Contents Connections Playback Setup ≫ ≫ ≫ ≫ ‰ Example installation when using separately This is a 5.1.2 Channel System that combines the supplied speaker system with separately available top front speakers, top middle speakers, or top rear available ceiling speakers speakers.
- Page 29 Contents Connections Playback Setup ≫ ≫ ≫ ≫ ‰ Example installation when using separately This is a 5.1.2 Channel System that uses the supplied center speaker and powered subwoofer in combination with a separately available speaker system. available Dolby Enabled speakers (Dolby Dolby enabled speakers, which are types of height speaker, are special speakers Speakers) designed to face the ceiling so that sound is heard after bouncing off the ceiling...
- Page 30 Contents Connections Playback Setup ≫ ≫ ≫ ≫ Speaker Connections and "Speaker Setup" Settings Connections „ (Note) Speaker Impedance When using all supplied speakers, setup explained in this section is not required. When using speakers sold separately, use speakers with impedance of 4 Ω to 16 Ω. If any of the speakers to be connected has an impedance of 4 Ω...
- Page 31 Contents Connections Playback Setup ≫ ≫ ≫ ≫ „ Connect the Subwoofer LINE INPUT a Subwoofer cable Connect a supplied powered subwoofer with this unit using a subwoofer cable. Up to two powered subwoofers can be connected (Purchase a second powered subwoofer separately).
- Page 32 Contents Connections Playback Setup ≫ ≫ ≫ ≫ „ 5.1 Channel System "Speaker Setup" settings during „ Initial Setup ( p95) Speaker Setup Speaker Channels 5.1 ch Subwoofer Height Speaker - - - Select how many speakers you have. Next ENTER •...
- Page 33 Contents Connections Playback Setup ≫ ≫ ≫ ≫ „ 5.1 Channel System + ZONE B SPEAKER MAIN ROOM (ZONE A) "Speaker Setup" settings during „ Initial Setup ( p95) Speaker Setup Speaker Channels 5.1 ch Subwoofer Height Speaker - - - Select how many speakers you have.
- Page 34 Contents Connections Playback Setup ≫ ≫ ≫ ≫ „ 5.1 Channel System (Bi-Amping the Speakers) "Speaker Setup" settings during „ Initial Setup ( p95) Speaker Setup Speaker Channels 5.1 ch Subwoofer Height Speaker - - - Select how many speakers you have. Next ENTER •...
- Page 35 Contents Connections Playback Setup ≫ ≫ ≫ ≫ „ 7.1 Channel System "Speaker Setup" settings during „ Initial Setup ( p95) Speaker Setup Speaker Channels 7.1 ch Subwoofer Height Speaker - - - Select how many speakers you have. Next ENTER •...
- Page 36 Contents Connections Playback Setup ≫ ≫ ≫ ≫ „ 5.1.2 Channel System (Using the entire supplied speaker system) "Speaker Setup" settings during „ Initial Setup ( p95) Speaker Setup Speaker Channels 5.1.2 ch Subwoofer Height Speaker Bundled Dolby Speaker Select how many speakers you have. Next ENTER •...
- Page 37 Contents Connections Playback Setup ≫ ≫ ≫ ≫ „ 5.1.2 Channel System (Using separately available height speakers) "Speaker Setup" settings during „ Initial Setup ( p95) Speaker Setup Speaker Channels 5.1.2 ch Subwoofer Height Speaker Front High Select how many speakers you have. Next ENTER •...
- Page 38 Contents Connections Playback Setup ≫ ≫ ≫ ≫ Speaker combinations • Up to two powered subwoofers can be connected in either combination. SURROUND ZONE B Speaker Channels FRONT CENTER SURROUND HEIGHT Bi-AMP BACK (ZONE SPEAKER) 2.1 ch (*1) (*1) 3.1 ch (*1) (*1) 4.1 ch...
-
Page 39: Connecting The Tv
Contents Connections Playback Setup ≫ ≫ ≫ ≫ Connecting the TV Connect this unit between a TV and AV component. Connecting this unit with the TV can output the video and audio signals of the AV component to the TV, or play the audio of the TV on this unit. - Page 40 Contents Connections Playback Setup ≫ ≫ ≫ ≫ To ARC TV If the TV supports the ARC (Audio Return Channel) function (*), use only the HDMI cable to connect with the TV. Use the ARC-compatible HDMI IN jack of the TV for connection.
- Page 41 Contents Connections Playback Setup ≫ ≫ ≫ ≫ To Non-ARC TV If the TV does not support the ARC (Audio Return Channel) function (*), connect an HDMI cable and digital optical cable. • If you use a cable set-top box, etc. connected to the input jack of this unit to watch TV (without using a TV’s built-in tuner), connection with a digital optical cable or analog audio cable is not required.
-
Page 42: Connecting Playback Devices
Contents Connections Playback Setup ≫ ≫ ≫ ≫ Connecting Playback Devices Connecting an AV Component with HDMI Jack Mounted This is a connection example of an AV component equipped with an HDMI jack. When connecting with an AV component that conforms to the CEC (Consumer Electronics Control) standard, you can use the HDMI CEC function (*) that enables linking with input selectors, etc. - Page 43 Contents Connections Playback Setup ≫ ≫ ≫ ≫ adjusting the volume using the remote controller of a CEC-compliant TV, and automatically switching this unit to standby when the TV is turned off. Front Panel≫ Rear Panel≫ Remote≫...
-
Page 44: Connecting An Audio Component
Contents Connections Playback Setup ≫ ≫ ≫ ≫ Connecting an Audio Component This is a connection example of an audio component. Connect a CD player using a digital coaxial cable or analog audio cable. a Analog audio cable, b Digital coaxial cable Front Panel≫... - Page 45 Contents Connections Playback Setup ≫ ≫ ≫ ≫ Connecting an AV Component in a Separate Room (ZONE B Connection) Connecting a Pre-main Amplifier (ZONE B) While performing playback in the main room (ZONE A), you can enjoy 2-ch audio of the same source in the separate room (ZONE B) at the same time. Use an analog cable to connect the ZONE B PRE/LINE OUT jack of this unit and the LINE IN jack of the pre-main amplifier or power amplifier in the separate room.
-
Page 46: Connecting Antennas
Contents Connections Playback Setup ≫ ≫ ≫ ≫ Connecting Antennas Connect the antenna to this unit, and set up the antenna at the best position for listening while receiving radio signals. Attach the indoor FM antenna to the wall using push pins or adhesive tape. a Indoor FM antenna, b AM loop antenna Front Panel≫... -
Page 47: Connecting The Power Cord
Contents Connections Playback Setup ≫ ≫ ≫ ≫ Connecting the Power Cord Connect the power cord after all the connections are completed. • Also connect the power cord of the supplied powered subwoofer. The supplied powered subwoofer does not have a power switch and will come on when the power cord is connected. - Page 48 Contents Connections Playback Setup ≫ ≫ ≫ ≫ Playback AV Component Playback BLUETOOTH Playback ® Listening To the AM/FM Radio ZONE B Playback Convenience functions Listening Mode Front Panel≫ Rear Panel≫ Remote≫...
-
Page 49: Av Component Playback
Contents Connections Playback Setup ≫ ≫ ≫ ≫ AV Component Playback You can play the audio from AV components, such as Blu-ray disc players through this unit. Basic Operations Perform the following procedure when this unit is on. 1. Switch the input on the TV to the input connected to the unit. TV’s REMOTE 2. -
Page 50: Bluetooth ® Playback
If a password is requested, enter "0000". • This unit is displayed as "Onkyo HT-R495 XXXXXX". • To connect another BLUETOOTH-enabled device, press and hold the BLUETOOTH button until "Now Pairing..." is displayed, and then perform step 2. -
Page 51: Listening To The Am/Fm Radio
Contents Connections Playback Setup ≫ ≫ ≫ ≫ Listening To the AM/FM Radio You can receive AM and FM radio stations on this unit with the built-in tuner. Tuning into a Radio Station Perform the following procedure when this unit is on. Tuning Automatically 1. -
Page 52: Tuning Manually
Contents Connections Playback Setup ≫ ≫ ≫ ≫ When FM broadcasts reception is poor: Perform the procedure for "Tuning Manually" ( p52). Note that if you tune manually, the reception for FM broadcasts will be monaural rather than stereo, irrespective of the sensitivity of the reception. -
Page 53: Presetting A Radio Station
Contents Connections Playback Setup ≫ ≫ ≫ ≫ Presetting a Radio Station Registration Procedure You can preset up to 40 of your favorite AM/FM radio stations. After tuning in to the AM/FM radio station you want to register, perform the following procedure. -
Page 54: Selecting A Preset Radio Station
Contents Connections Playback Setup ≫ ≫ ≫ ≫ Selecting a Preset Radio Station 1. Press TUNER. 2. Press the cursors to select a preset number. Deleting a Preset Radio Station 1. Press TUNER. 2. Press the cursors to select the preset number to delete. 3. -
Page 55: Playing Back
Contents Connections Playback Setup ≫ ≫ ≫ ≫ ZONE B Playback While performing playback in the main room (ZONE A), you can enjoy the audio of the same source in the separate room (ZONE B) at the same time. Playing Back 1. - Page 56 Contents Connections Playback Setup ≫ ≫ ≫ ≫ 3. If the unit is connected to the pre-main amplifier in the separate room, adjust the volume on the pre-main amplifier. If the unit is connected to the power amplifier or ZONE speaker in the separate room, adjust the volume on the remote controller.
-
Page 57: Convenience Functions
Contents Connections Playback Setup ≫ ≫ ≫ ≫ Convenience functions Displaying Your Favorite Video on TV While Playing Music While listening to the music from a CD or BLUETOOTH-enabled device, you can display video on TV from an AV component such as a Blu-ray Disc player. TV’s REMOTE •... -
Page 58: Adjusting The Tone
Contents Connections Playback Setup ≫ ≫ ≫ ≫ Adjusting the tone Adjusting TREBLE/BASS You can adjust the sound quality of the front speakers. 1. Press TREBLE or BASS to select the setting to adjust. TREBLE: Enhances or moderates the high-tone range of the front speakers. BASS: Enhances or moderates the low-tone range of the front speakers. -
Page 59: Sleep Timer
Contents Connections Playback Setup ≫ ≫ ≫ ≫ Sleep Timer You can allow the unit to enter standby automatically when the specified time has elapsed. Press SLEEP button on the remote controller to select the time from "30 min", "60 min"... -
Page 60: Selecting A Listening Mode
Contents Connections Playback Setup ≫ ≫ ≫ ≫ Listening Mode This unit is equipped with a variety of listening modes, and you can select the optimum listening mode by pressing STEREO, MOVIE/TV or MUSIC. Selecting a Listening mode 1. Press one from among STEREO, MOVIE/TV and MUSIC during playback. 2. - Page 61 Contents Connections Playback Setup ≫ ≫ ≫ ≫ Checking the input format and listening mode Pressing button on the remote controller or INFO button on the main unit repeatedly will switch the display of the main unit in the following order. •...
- Page 62 Contents Connections Playback Setup ≫ ≫ ≫ ≫ Speaker Layouts and Selectable Listening Modes See the following table for selectable listening modes for each speaker layout. Speaker layout Listening mode 2.1 ch 3.1 ch 4.1 ch 5.1 ch 6.1 ch 7.1 ch 2.1.2 ch 3.1.2 ch...
- Page 63 Contents Connections Playback Setup ≫ ≫ ≫ ≫ Speaker layout Listening mode 2.1 ch 3.1 ch 4.1 ch 5.1 ch 6.1 ch 7.1 ch 2.1.2 ch 3.1.2 ch 4.1.2 ch 5.1.2 ch (*3) (*3) (*3) ES Discrete (DTS-ES Discrete) ES Matrix (DTS-ES Matrix) DTS 96/24 (*3) (*3)
- Page 64 Contents Connections Playback Setup ≫ ≫ ≫ ≫ Listening Mode Effects In alphabetical order – Atmos 7.0/7.1: When front speakers, center speaker, surround speakers and surround back speakers are installed „ AllCh Stereo – Atmos 2.0.2/2.1.2: When front speakers and height speakers are installed –...
- Page 65 Contents Connections Playback Setup ≫ ≫ ≫ ≫ DSur (Dolby Audio - Surr) audio output on the player to Bitstream output. „ „ DSD This listening mode expands 2 ch or 5.1 ch input signals to 5.1 ch, 7.1 ch or 5.1.2 ch.
- Page 66 Contents Connections Playback Setup ≫ ≫ ≫ ≫ audio format. to create spacious 3D sound including audio from up above without connecting DTS Express is an optional audio format based on 5.1 ch for Blu-ray Discs. It is height speakers. possible to record a maximum of 7.1 channels with additional channels such as This mode can be selected in any speaker layout such as front speakers-only the surround back channel.
- Page 67 Contents Connections Playback Setup ≫ ≫ ≫ ≫ audio output on the player to Bitstream output. by enhancing the entire surround sounds, and creates a realistic acoustic image. „ Full Mono „ Unplugged In this mode, all speakers output the same sound in mono, so the sound you hear Suitable for acoustic instruments, vocals and jazz.
- Page 68 Contents Connections Playback Setup ≫ ≫ ≫ ≫ Input Formats and Selectable Listening Modes „ MOVIE/TV button You can select a variety of listening modes Input Format Listening Mode according to the audio format of the signal to be Multich PCM Direct input.
- Page 69 Contents Connections Playback Setup ≫ ≫ ≫ ≫ Input Format Listening Mode Input Format Listening Mode Input Format Listening Mode Direct Direct DTHD Direct DTHD *1 *2 *1 *2 *1 *2 DSur DSur DSur DTS Neural:X TV Logic TV Logic DTS Virtual:X AllCh Stereo AllCh Stereo...
- Page 70 Contents Connections Playback Setup ≫ ≫ ≫ ≫ Input Format Listening Mode Input Format Listening Mode Input Format Listening Mode DTS 96/24 Direct DTS-HD HR Direct DTS-ES Direct DTS 96/24 DTS-HD HR *1 *2 *1 *2 DTS Neural:X DTS Neural:X ES Matrix DTS Virtual:X DTS Virtual:X...
- Page 71 Contents Connections Playback Setup ≫ ≫ ≫ ≫ „ MUSIC button Input Format Listening Mode Input Format Listening Mode Multich PCM Direct Direct Input Format Listening Mode Stereo Stereo Analog Direct Multich *1 *2 Stereo DSur DSur DSur DTS Neural:X DTS Neural:X DTS Neural:X DTS Virtual:X...
- Page 72 Contents Connections Playback Setup ≫ ≫ ≫ ≫ Input Format Listening Mode Input Format Listening Mode Input Format Listening Mode Direct DTHD Direct DTS 96/24 Direct Stereo Stereo Stereo DTHD DTS 96/24 *1 *2 *1 *2 *1 *2 DSur DSur DTS Neural:X Orchestra Orchestra...
- Page 73 Contents Connections Playback Setup ≫ ≫ ≫ ≫ Input Format Listening Mode Input Format Listening Mode Input Format Listening Mode DTS Express Direct DTS-HD MSTR Direct DTS-ES Direct Stereo Stereo Stereo DTS Express DTS-HD MSTR *1 *2 *1 *2 DTS Neural:X DTS Neural:X ES Matrix DTS Virtual:X...
- Page 74 Contents Connections Playback Setup ≫ ≫ ≫ ≫ Input Format Listening Mode DTS:X Direct Stereo DTS:X DTS Virtual:X *1 *2 Orchestra Unplugged Studio-Mix AllCh Stereo Full Mono Cannot be selected if "Speaker Virtualizer" is set to "Off". Cannot be selected when height speakers are installed. Surround speakers or height speakers need to be installed.
- Page 75 Contents Connections Playback Setup ≫ ≫ ≫ ≫ Switching the HDMI 4K Signal Format Input and Output by this Unit When the AV Component connected to this unit, such as a TV or player, and the 2. To exit the settings, release your finger. After a few seconds, the display goes HDMI cable (*) supports the high-definition 4K signal formats (4K 60p 4:4:4, 4:2:2 out and the switching is complete.
-
Page 76: Setup Menu
Contents Connections Playback Setup ≫ ≫ ≫ ≫ Setup Menu Menu list p78) You can configure advanced settings to have a more enjoyable experience with this unit. For operation details, refer to "Menu operations". ( 1. Input/Output 1. TV Out / OSD Make settings for TV output and On-Screen Displays (OSD) that appear on the TV. - Page 77 Contents Connections Playback Setup ≫ ≫ ≫ ≫ 5. Hardware 1. HDMI Change the settings for the HDMI functions. 2. Bluetooth Change the settings for the Bluetooth function. 3. Power Management Change the settings for the power-save function. 6. Miscellaneous 1.
-
Page 78: Menu Operations
Contents Connections Playback Setup ≫ ≫ ≫ ≫ Menu operations Use the on-screen displays (OSD) that appear on the TV to make the settings. Press on the remote controller to display the Setup menu. Setup 1. Input/Output Assign 1. TV Out / OSD 2. -
Page 79: Input/Output Assign
Contents Connections Playback Setup ≫ ≫ ≫ ≫ 1. Input/Output Assign Setting Item Default Value Setting Details Mini Player OSD Always On You can display on the TV the images from another „ 1. TV Out / OSD input selected last while playing the audio from BLUETOOTH input. - Page 80 Contents Connections Playback Setup ≫ ≫ ≫ ≫ „ 2. HDMI Input Setting Item Default Value Setting Details "HDMI 1" to "HDMI 4": Assign a desired HDMI IN Change input assignment between the input selectors and HDMI IN jacks. jack to the TV button. If you do not assign a jack, select "---".
- Page 81 Contents Connections Playback Setup ≫ ≫ ≫ ≫ „ 3. Digital Audio Input „ 4. Analog Audio Input Change input assignment between the input selectors and DIGITAL IN COAXIAL/ Change input assignment between the input selectors and AUDIO IN jacks. If you OPTICAL jacks.
- Page 82 Contents Connections Playback Setup ≫ ≫ ≫ ≫ 2. Speaker Setting Item Default Value Setting Details Zone B Output Fixed Select whether to adjust the volume on the premain „ 1. Configuration Level amplifier in the separate room or on this unit when outputting to Zone B.
- Page 83 Contents Connections Playback Setup ≫ ≫ ≫ ≫ „ 2. Crossover Setting Item Default Value Setting Details Surround 100 Hz Select the crossover frequency from "40 Hz" to Change the settings of crossover frequencies. "200 Hz" to start outputting frequencies for each channel.
- Page 84 Contents Connections Playback Setup ≫ ≫ ≫ ≫ „ 3. Distance „ 4. Level Calibration Set the distance from each speaker to the listening position. Adjust the volume level of each speaker. Setting Item Default Value Setting Details Setting Item Default Value Setting Details Front Left...
- Page 85 Contents Connections Playback Setup ≫ ≫ ≫ ≫ 3. Audio Adjust „ 5. Dolby Enabled Speaker Change the settings of Dolby Enabled Speakers. „ 1. Multiplex/Mono Setting Item Default Value Setting Details Change the settings of multiplex audio playback. Dolby Enabled 6.0 ft Set the distance between the Dolby Enabled Speaker to Ceiling...
- Page 86 Contents Connections Playback Setup ≫ ≫ ≫ ≫ „ 2. Dolby „ 4. LFE Level Change the setting of when Dolby signals are input. Set the low-frequency effect (LFE) level for Dolby Digital series, DTS series, Multichannel PCM, and DSD signals. Setting Item Default Value Setting Details...
- Page 87 Contents Connections Playback Setup ≫ ≫ ≫ ≫ 4. Source „ Audio Select Select the priority for input selection when multiple audio sources are connected „ 1. IntelliVolume to one input selector. The setting can be made for each input selector button. Select the input selector to make the setting.
- Page 88 Contents Connections Playback Setup ≫ ≫ ≫ ≫ 5. Hardware Setting Item Default Value Setting Details PCM Fixed Mode Select whether to fix input signals to PCM (except „ 1. HDMI multi-channel PCM) when you select "HDMI", "COAXIAL", or "OPTICAL" in the "Audio Select" Change the settings of the HDMI function.
- Page 89 Contents Connections Playback Setup ≫ ≫ ≫ ≫ Setting Item Default Value Setting Details Setting Item Default Value Setting Details HDMI Standby When this is set to anything other than "Off", Audio TV Out You can enjoy audio through the speakers of the Through you can play the video and audio of an HDMI- TV while this unit is on.
- Page 90 Contents Connections Playback Setup ≫ ≫ ≫ ≫ „ 2. Bluetooth Setting Item Default Value Setting Details Pairing You can initialize the pairing information stored on Change the settings for the Bluetooth function. Information this unit. Pressing ENTER when "Clear" is displayed Setting Item Default Value Setting Details...
- Page 91 Contents Connections Playback Setup ≫ ≫ ≫ ≫ 6. Miscellaneous Setting Item Default Value Setting Details Auto Standby This setting allows the unit to enter standby mode „ 1. Tuner automatically after 20 minutes of inactivity without any video or audio input. (When "USB Power Out Change the frequency step for the tuner.
-
Page 92: Quick Menu
Contents Connections Playback Setup ≫ ≫ ≫ ≫ Quick Menu Menu operations You can quickly adjust the settings you frequently use, such as tone adjustments, etc. You can make the settings on the TV screen during playback. Press Q on the remote controller to display the Quick Menu. - Page 93 Contents Connections Playback Setup ≫ ≫ ≫ ≫ „ Audio • If you set the unit to the standby mode, the adjustments you made will be restored to the previous statuses. Music Optimizer: Improve the quality of the compressed audio. Playback sound of lossy compressed files such as MP3 will be improved.
-
Page 94: Initial Setup With Auto Start-Up Wizard
Contents Connections Playback Setup ≫ ≫ ≫ ≫ Initial Setup with Auto Start-up Wizard Operations When you turn the unit on for the first time after purchase, the Initial Setup screen is automatically displayed on the TV to allow you to make settings required for TV’s REMOTE startup using simple operations following on-screen guidance. - Page 95 Contents Connections Playback Setup ≫ ≫ ≫ ≫ „ 1. Speaker Setup • If the power of this unit suddenly turns off, the wires in the speaker cables have touched the rear panel or other wires, and the protection circuit is 1.
-
Page 96: Troubleshooting
Contents Connections Playback Setup ≫ ≫ ≫ ≫ Troubleshooting „ Tuner „ BLUETOOTH function Before starting the procedure „ ZONE B function Problems may be solved by simply turning the power on/off or disconnecting/ „ Remote Controller connecting the power cord, which is easier than working on the connection, setting and operating procedure. -
Page 97: When The Unit Is Operating Erratically
Contents Connections Playback Setup ≫ ≫ ≫ ≫ When the unit is operating erratically ‰ Try restarting the unit Restarting this unit may solve the problem. Set the main unit to standby, then after waiting for 5 seconds or more, press and hold the ON/STANDBY button of the main unit for at least 5 seconds, and then restart the unit. - Page 98 Contents Connections Playback Setup ≫ ≫ ≫ ≫ Troubleshooting „ Power ‰ When the power is turned on, "AMP Diag Mode" appears on the display of the main unit. • The protection circuit function may have operated. If the unit suddenly enters the standby state and "AMP Diag Mode" appears on the display of the main unit when the power is turned on again, this function is diagnosing whether or not the main unit is malfunctioning or there is an abnormality with the speaker cable connection.
- Page 99 Contents Connections Playback Setup ≫ ≫ ≫ ≫ ‰ No sound from the TV • Change the input selector on this unit to the position of the terminal to which the TV is connected. • If the TV does not support the ARC function, along with the connection by an HDMI cable, connect the TV with this unit using a digital optical p41) cable.
- Page 100 Contents Connections Playback Setup ≫ ≫ ≫ ≫ ‰ Noise can be heard • Using cable ties to bundle audio pin cables, power cords, speaker cables, etc. may degrade the audio performance. Do not bundle the cords. • An audio cable may be picking up interference. Change the position of the cables. ‰...
- Page 101 Contents Connections Playback Setup ≫ ≫ ≫ ≫ „ Video • Confirm that the connection between the output jack on the connected device and the input jack on this unit is correct. • Make sure that none of the connecting cables are bent, twisted, or damaged. •...
-
Page 102: X84; Bluetooth Function
Contents Connections Playback Setup ≫ ≫ ≫ ≫ „ Tuner ‰ Poor reception or much noise • Recheck the antenna connection. p46) • Move the antenna away from the speaker cord or power cord. • Move the unit away from your TV or PC. •... - Page 103 Contents Connections Playback Setup ≫ ≫ ≫ ≫ „ ZONE B function ‰ Cannot ZONE B-output the audio of externally connected AV components • To output audio to ZONE B, set the audio output destination to "ZONE A+B" or "ZONE B". p55) „...
- Page 104 Contents Connections Playback Setup ≫ ≫ ≫ ≫ ‰ The POWER OUT jack cannot supply power to smart phones/tablets or other devices • The POWER OUT jack on the rear panel is only intended to supply power (5 V/1 A) to the Streaming media player connected to HDMI IN jack of this unit with a USB cable.
-
Page 105: About Hdmi
Maximum 7.1 channels, 32 kHz, 44.1 kHz, 48 kHz, 88.2 kHz, 96 kHz, 176.4 kHz, Operation has been confirmed on the following devices: (As of January 2019) 192 kHz, 16/20/24 bit Toshiba brand televisions; Sharp brand televisions; Onkyo and Integra brand Bitstream: RIHD-compatible players; Toshiba brand players and recorders; Sharp brand... -
Page 106: Supported Resolutions
Contents Connections Playback Setup ≫ ≫ ≫ ≫ Supported resolutions HDMI IN1 to IN4: • Copyright protection technology: HDCP1.4/HDCP2.2 • Color space (Color Depth): – 720×480i 60 Hz, 720×576i 50 Hz, 720×480p 60 Hz, 720×576p 50 Hz, 1920×1080i 50/60 Hz, 1280×720p 24/25/30/50/60 Hz, 1680×720p 24/25/30/50/60 Hz, 1920×1080p 24/25/30/50/60 Hz, 2560×1080p 24/25/30/50/60 Hz, 4K (3840×2160p) 24/25/30 Hz, 4K SMPTE (4096×2160p) 24/25/30 Hz : RGB/YCbCr4:4:4 (8/10/12 bit), YCbCr4:2:2 (12... -
Page 107: General Specifications
Contents Connections Playback Setup ≫ ≫ ≫ ≫ General Specifications „ Amplifier Section 10 Hz - 100 kHz „ Tuner Section Rated Output Power (FTC) With 8 ohm loads, both channels driven, from 20-20,000 Hz; rated 80 watts FM Tuning Frequency Range per channel minimum RMS power, with no more than 0.08% total harmonic 87.5 MHz - 107.9 MHz distortion from 250 milliwatts to rated output. - Page 108 Contents Connections Playback Setup ≫ ≫ ≫ ≫ „ Supported input resolutions devices, magnetic fields around a microwave oven, static electricity, cordless phone, reception sensitivity, antenna's performance, operating HDMI input system, software application, etc. 4K, 1080p/24, 1080p, 1080i, 720p, 480p/576p „...
- Page 109 Contents Connections Playback Setup ≫ ≫ ≫ ≫ „ Front & Height Speaker (SKF-596) Output Sound Pressure Level 86 dB/W/m Speaker Type Maximum Input Power (Front) 2-Way Bass-Reflex 130 W (Height) Full-Range Acoustic Suspension Crossover Frequency Drivers 6 kHz (Front) Woofer : 5" (12 cm) Cone, Tweeter : 1" (2.5 cm) Balanced dome Normal Impedance (Height) Woofer : 3-1/4"...
-
Page 110: License And Trademark
Contents Connections Playback Setup ≫ ≫ ≫ ≫ Spring type color coded Other Non-magnetic shielding „ Subwoofer (SKW-593) Speaker Type Bass Reflex Input sensitivity/Impedance 540 mV/20 kΩ Drivers 10" (25 cm) Cone Frequency Response 25 Hz - 150 Hz Dimensions (W × H × D) (Including terminal projections) 317.5 mm ×... - Page 111 SN 29403779_EN (C) Copyright 2019 Onkyo & Pioneer Corporation Japan. All rights reserved. F1907-0...
Need help?
Do you have a question about the HT-S5910 and is the answer not in the manual?
Questions and answers