Table of Contents
Advertisement
Quick Links
Advertisement
Table of Contents

Related Manuals for Blastrac 1-9 DEZ


Summary of Contents for Blastrac 1-9 DEZ
- Page 1 MODEL 1-9 DEZ 8-17-05...
- Page 2 FORWARD Blastrac is pleased that you have selected this Blast Cleaning System for your surface preparation requirements. This environmentally safe, closed-cycle, surface preparation machine has been designed and built for abrasive blast cleaning of horizontal surfaces. This manual has been prepared to assist the operator and the maintenance personnel in understanding the machine so that it may be operated in the most efficient manner and maintained in the best condition.
- Page 3 Receipt of Machine Examine the shipment carefully for possible damage that might have occurred while in transit. If any damage is noted, notify the transportation carrier immediately and advise Blastrac.
-
Page 5: Table Of Contents
Operating Instructions 1-9DEZ Table of Contents Page Number Safety Precautions Safety Instructions Mechanical Ventilation Operator Responsibilities Operator Responsibilities Description and Function Blast Unit – General Figure 3.1.1 Blast Unit – Abrasive Cleaning Head Blast Unit – Abrasive Control Valve Blast Unit – Rebound Chamber (Plenum) Blast Unit –... - Page 6 Operating Instructions 1-9DEZ Table of Contents Equipment Calibration Equipment Calibration Wear Parts Wear Parts Replacing Grinder Motor Figure 8.1.1 Maintenance Log Blast Wheel Replacement Blast Wheel Replacement Troubleshooting 10.1 Troubleshooting 10.2 Ventilation System (4-54SP Dust Collector) 10.3 Vacuum Adjustment Specifications 11.1 Blast Unit Recommended Spare Parts...
- Page 7 Operating Instructions 1-9DEZ Safety Precautions August 2005 Section 1 Safety Instructions Safety – Mechanical Safety - Ventilation...
-
Page 8: Safety Precautions
AND UNDERSTAND ALL OF THE OPERATING INSTRUCTIONS PRIOR TO OPERATING OR MAINTAINING THE 1-9DEZ. These Blastrac® operating instructions have been specifically prepared for operating and maintenance personnel working with the Model 1-9DEZ shot-blasting system. The information in this manual is intended to provide an understanding of the 1-9DEZ to minimize safety risks and maximize 1-9DEZ performance. -
Page 9: Mechanical
Operating Instructions 1-9DEZ Safety Precautions August 2005 1.1 Cont’d Before actual shotblasting can begin, the operator should be certain that the 1-9DEZ will clear all obstructions in the work area. Work areas must be dry and clean (no loose debris) before cleaning can begin. WARNING: LOOSE DEBRIS MAY CAUSE A CATASTROPHIC FAILURE OF THE BLAST WHEEL RESULTING IN SERIOUS INJURY. - Page 10 Removal of sticky and/or rubber ® surfaces should be avoided when using the Blastrac 1-9DEZ. Always drain unused abrasive from the 1-9DEZ and empty the dust collector hopper before transporting the...
-
Page 11: Ventilation
Operating Instructions 1-9DEZ Safety Precautions August 2005 1.3 Ventilation The 1-9DEZ will not operate correctly without a dust collector. The dust collector aids in the recovery of the abrasive and removes potentially hazardous dust from the air stream. If the machine is leaving shot on the ground or emitting dust, make sure your dust collector is operating correctly. - Page 12 Operating Instructions 1-9DEZ Owner/Operator Responsibilities August 2005 Section 2 Owner/Operator Responsibilities...
- Page 13 1. The owner/operator is responsible for the observance of all safety precautions expressed in this manual. 2. The owner/operator should be trained by a Blastrac Technician for the operation and maintenance of Blastrac equipment. 3. The owner/operator should provide the necessary blasting media in accordance with the recommendations of a Blastrac Technician so that the 1-9DEZ will operate at its maximum efficiency.
-
Page 14: Description And Function
Operating Instructions 1-9DEZ Description and Function August 2005 Section 3 Blast Unit – General Blast Unit – Abrasive Cleaning Head Blast Unit – Abrasive Control Valve Blast Unit – Rebound Chamber (Plenum) Blast Unit – Deflector Plate / Hopper Blast Unit – Abrasive Seals Blast Unit –... -
Page 15: Blast Unit - General
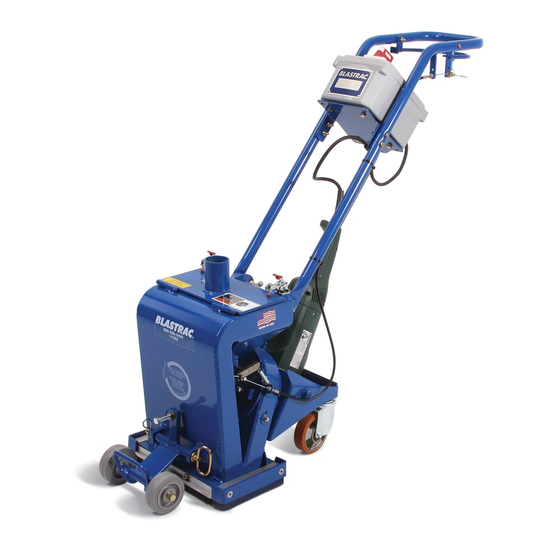
Description and Function August 2005 3.1 Blast Unit – General ® The Blastrac equipment series described herein includes the 1-9DEZ Blast Unit. This model is used in conjunction with the Turbo II Dust Collector (Please refer to section 1.3 ventilation). - Page 16 Operating Instructions 1-9DEZ Description and Function August 2005 STEERING HANDLE ELECTRIC CONTROL BOX ABRASIVE CONTROL VALVE HANDLE STEERING HANDLE GRINDER TRIGGER STEERING HANDLE HEIGHT ADJUSTMENT KNOB 2" VACUUM PORT - CONNECT TO TURBO VAC II (200 CFM) DEFLECTOR PLATE - HOPPER SEE FIGURE 3.1.4 PAGE 16 REBOUND CHAMBER (PLENUM) SEEE FIGURE 3.1.4 PAGE 16...
-
Page 17: Blast Unit - Abrasive Cleaning Head
Operating Instructions 1-9DEZ Description and Function August 2005 3.2 Blast Unit – Abrasive Cleaning Head This section (3.2) refers to 3.1.2 on page 14. The center of the patented abrasive cleaning head is the four bladed, six-inch blast wheel that accelerates the abrasive towards the surface being cleaned. This center fed blast wheel propels the abrasive by centrifugal force at a speed of more than 200 mph. -
Page 18: Blast Unit - Rebound Chamber (Plenum)
Operating Instructions 1-9DEZ Description and Function August 2005 3.4 Blast Unit – Rebound Chamber (Plenum) Once the abrasive has impacted the work surface, the shot is directed into the rebound plenum. This curved portion of the plenum absorbs a large percentage of the force exerted by the high velocity abrasive and helps dissipate the heat generated by the blast process. -
Page 19: Blast Unit - Chassis
The 1-9DEZ is designed to operate with abrasive in sizes S-110 through S-330. The selection of proper abrasive is very important to the performance of the Blastrac shot cleaning system. Your Blastrac representative can help with the proper selection of abrasive for your particular application. - Page 20 Operating Instructions 1-9DEZ Description and Function August 2005 BLAST WHEEL POLYURETHANE SEAL FEED SPOUT/ CONTROL CAGE CLAMP GRINDER ADAPTER PLATE FEED SPOUT ARBOR NUT CONTROL CAGE DRIVE HUB Abrasive Cleaning Head FIGURE 3.1.2...
- Page 21 Operating Instructions 1-9DEZ Description and Function August 2005 SPRING HOPPER LEVER CABLE ANCHOR ABRASIVE CONTROL VALVE CONTROL CABLE PIVOT FEED SPOUT CLOSED OPEN 90° CLOSED OPEN Abrasive Control Valve FIGURE 3.1.3...
- Page 22 Operating Instructions 1-9DEZ Description and Function August 2005 AIR OUTLET VACUUM DEFLECTOR LID ASSEMBLY CLAMP HINGE VACUUM SLOT SCREEN STORAGE HOPPER REBOUND PLENUM ABRASIVE VALVE ANCHOR ABRASIVE VALVE ABRASIVE/ CONTAMINANTS IN AIR Rebound Chamber – Deflector Plate – Hopper FIGURE 3.1.4...
-
Page 23: Blast Cleaning
Operating Instructions 1-9DEZ Start-Up, Operation, and Shut-Down Procedures August 2005 Section 4 Start-Up Blast Cleaning Shut-Down... - Page 24 IN ADDITION, BLASTRAC HIGHLY RECOMMENDS THAT ALL OPERATING AND MAINTENANCE PERSONNEL RECEIVE TRAINING FROM AN AUTHORIZED BLASTRAC REPRESENTATIVE BEFORE ATTEMPTING TO OPERATE OR MAINTAIN THE 1-9DEZ. 1. The 1-9DEZ and the dust collector should be moved to the cleaning site. Both machines can be hand-towed or moved by a lift truck.
- Page 25 Operating Instructions 1-9DEZ Start-Up, Operation, and Shut-Down Procedures August 2005 4.1 Cont’d should reach the bottom of the screen. Do not overfill; blast unit will malfunction. Replace the separator lid and secure clamps (see figure 3.1.4, page 16). 11. Check the magnetic seals on the bottom of the blast unit for metallic contaminants such as nuts, bolts, etc.
- Page 26 Operating Instructions 1-9DEZ Start-Up, Operation, and Shut-Down Procedures August 2005 4.2 Cont’d 5. The blast unit and the dust collector should be arranged so that the dust collector is centrally located. Blasting in straight lines will always give the best, most consistent results.
- Page 27 Operating Instructions 1-9DEZ Setting The Correct Blast Pattern August 2005 Section 5 Setting the Correct Blast Pattern...
-
Page 28: Setting The Correct Blast Pattern
1. Wheel Rotation - The blast wheel must be rotating in the proper direction indicated ® on the housing that surrounds the blast wheel. Most Blastrac machines rotate in a clockwise direction when looking at the machine from the operator’s position. - Page 29 Operating Instructions 1-9DEZ Setting The Correct Blast Pattern August 2005 5.1 Cont’d 5. The initial setting of a machine rotating in a counter-clockwise direction should be between 8:30 and 10:30 as indicated in Figures B and C. The resultant-cleaning path will determine the final setting. These settings will vary with the abrasive size and the surface being cleaned.
- Page 30 Operating Instructions 1-9DEZ Edging Mode August 2005 Section 6 Changing to the Edging Mode...
-
Page 31: Edging Mode
Operating Instructions 1-9DEZ Edging Mode August 2005 6.1 Changing to the Edging Mode This section (6.1) refers to Figure 6.1.1 on page 26. The model 1-9DEZ is capable of cleaning surfaces within 1/2 inch of vertical obstructions. (This is along the side of the machine. The 1-9DEZ can be pushed as close as 1-1/2 inches from the front of the machine.) Performing the following steps sets up the edging mode: 1. - Page 32 Operating Instructions 1-9DEZ Edging Mode August 2005 FRONT/REAR BRUSH P004063 FRONT RIGHT FRONT MAGNET P004060 FRONT/REAR BRUSH SIDE MAGNET P004063 9697800 LEFT SIDE MAGNET SEAL SIDE SEAL RETAINER 676279 681154 This magnet and seal illustration shows how the machine is set during the right side edging mode.
-
Page 33: Equipment Calibration
Operating Instructions 1-9DEZ Equipment Calibration August 2005 Section 7 Equipment Calibration... -
Page 34: Equipment Calibration
4. Exhaust Hose Length - 25 feet of 2” I.D. exhaust hose; longer or shorter sections of hose may affect abrasive consumption or abrasive cleaning. Contact your Blastrac representative before changing the exhaust hose length. 5. Dust Collector – Inspect Dust Collector at 15-minute intervals to see how quickly the dustbin is being filled. -
Page 35: Wear Parts
Operating Instructions 1-9DEZ Wear Parts August 2005 Section 8 Wear Parts Replacing Grinder Motor Maintenance Log... - Page 36 Operating Instructions 1-9DEZ Wear Parts August 2005 8.1 Wear Parts Certain portions of the blast unit are continuously exposed to high velocity abrasive. These areas and their corresponding parts must be periodically inspected for wear and erosion to keep from damaging components that are not normally exposed to the abrasive blast.
- Page 37 Operating Instructions 1-9DEZ Wear Parts August 2005 8.2 Replacing Grinder Motor The grinder motor supplied with your 1-9DEZ was specially designed for this machine; do not substitute with alternate brands. Substitution may case the assembly to fail resulting in mechanical failure and possible injury. Always follow the below specifications when replacing the grinder motor.
- Page 38 Operating Instructions 1-9DEZ Wear Parts August 2005 ITEM QUANTITY CATALOG DESCRIPTION NUMBER 451476 CONTROL CAGE/ 55 DEG. 459556 WHEEL/ 6-1/2" OPEN FACE 497307 LINER/TOP - SLL 681154 RETAINER/SIDE 681155 SKIRT/SIDE P004061 LINER/L.H. SIDE - SLL P004062 LINER/R.H. SIDE - SLL P004063 BRUSH/FRONT-REAR P001125...
- Page 39 Thin at Wheel Entry Remove and replace Remove and replace; Control Cage 5 Hrs. Eroded Edges adjust pattern ® Rebound Thin Sections; Contact Blastrac 50 Hrs. Chamber Wear on Welds. Service Center ® Abrasive Thin Sections; Contact Blastrac 20 Hrs.
-
Page 40: Maintenance Log
Operating Instructions 1-9DEZ Wear Parts August 2005 8.3 Maintenance Log MAINTENANCE LOG Liners – Inspect for wear Checked Change Blast wheel/cage - Inspect for wear Checked Change Filters - Inspect - clean or replace Checked Change Power Cords - Inspect for splits or cuts Checked Change Shot valve –... - Page 41 Operating Instructions 1-9DEZ Blast Wheel Replacement August 2005 Section 9 Blast Wheel Replacement...
-
Page 42: Blast Wheel Replacement
Operating Instructions 1-9DEZ Blast Wheel Replacement August 2005 9.1 Blast Wheel Replacement WARNING: THE 1-9DEZ MUST BE PLACED IN THE MAINTENANCE MODE (SEE SECTION 1.2) PRIOR TO ATTEMPTING TO INSPECT, CHANGE, OR ADJUST THE BLAST WHEEL. See Section 3 and drawing 421-0001 for parts identification 1. - Page 43 Description and Function in addition to a full parts breakdown in drawing 421-0001. Original Blastrac wheels are designed and dynamically balanced for use at high speeds. Use of any other blast wheel may cause damage to the 1-9DEZ and/or injury to...
- Page 44 Operating Instructions 1-9DEZ Mechanical Troubleshooting August 2005 Section 10 10.1 Blast Unit – Mechanical Troubleshooting 10.2 Dust Collector – Ventilation System 10.3 Vacuum Adjustment – Operating Tips...
-
Page 45: Blast Wheel Replacement
Operating Instructions 1-9DEZ Mechanical Troubleshooting August 2005 10.1 Mechanical Troubleshooting WARNING: ALL OPERATORS AND MAINTENANCE PERSONNEL SHOULD READ AND UNDERSTAND ALL OF THE OPERATING INSTRUCTIONS PRIOR TO OPERATING OR MAINTAINING THE 1- 9DEZ. FAILURE TO ADHERE TO THESE RECOMMENDATIONS COULD RESULT IN EQUIPMENT DAMAGE, SERIOUS INJURY OR DEATH. -
Page 46: Ventilation System (4-54Sp Dust Collector)
Operating Instructions 1-9DEZ Mechanical Troubleshooting August 2005 10.1 Cont’d Trouble Possible Cause Remedy Increased cleaning time. a. Low abrasive in a. Check abrasive level. storage hopper. b. Abrasive may contain b. Contaminated substantial percentage of fines abrasive. and contaminants. Check c. -
Page 47: Vacuum Adjustment
10.3 Vacuum Adjustment – Operating Tips For normal concrete surfaces, Blastrac does not recommend using more than the 25 feet of exhaust hose supplied with the blast system. Adding additional hose can cause insufficient suction, which will allow unwanted dust and contaminants to accumulate in the abrasive, thereby causing premature wear to the blast wheel and liners. - Page 48 Operating Instructions 1-9DEZ Specifications August 2005 Section 11 11.1 Specifications – Blast Unit...
-
Page 49: Specifications
Operating Instructions 1-9DEZ Specifications August 2005 11.1 Specifications – Blast Unit 1-9DEZ MECHANICAL DATA Recommended Dust Collector Turbo Vac II (200 CFM) Length (Base) 24 inches Length (including handle in normal position) 45 inches Height (excluding handle) 19.5 inches Height (including handle in normal position) 38 inches Width... - Page 50 Operating Instructions 1-9DEZ Recommended Spare Parts August 2005 Section 12 12.1 Recommended Spare Parts List...
-
Page 51: Recommended Spare Parts
Operating Instructions 1-9DEZ Recommended Spare Parts August 2005 12.1 Recommended Spare Parts List ITEM QUANTITY CATALOG DESCRIPTION NUMBER 451476 CONTROL CAGE/ 55 DEG. 459556 WHEEL/ 6-1/2" OPEN FACE 497307 LINER/TOP - SLL 681154 RETAINER/SIDE 681155 SKIRT/SIDE P004061 LINER/L.H. SIDE - SLL P004062 LINER/R.H.
Need help?
Do you have a question about the 1-9 DEZ and is the answer not in the manual?
Questions and answers