Table of Contents
Advertisement
Advertisement
Table of Contents

Related Manuals for Wasp DR5


Summary of Contents for Wasp DR5
- Page 1 DR5 Rugged Handheld Computer User's Manual Version 1.0...
-
Page 2: Table Of Contents
Table of Contents Chapter 1 - Overview ................1 1.1 Package ....................1 1.2 Product Detail ..................2 1.3 Specifications ..................5 1.4 Getting Started ..................10 Chapter 2 – Installation & Operation ..........18 2.1 Barcode Setting ..................18 2.2 HF Setting .................... -
Page 3: Chapter 1 - Overview
Chapter 1 - Overview 1.1 Package Please make sure the following contents are in the DR5 gift box. If something is missing or damaged, please contact your Wasp representative. The basic package contents DR5 Terminal Battery Hand Strap ... -
Page 4: Product Detail
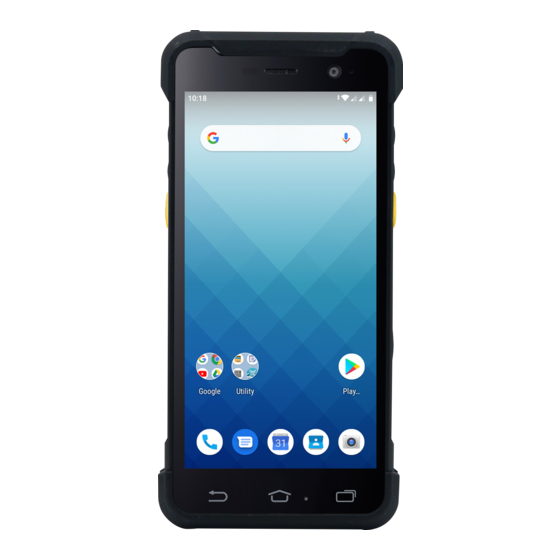
1.2 Product Detail DR5 Front View Receiver LED indicator Front camera Back button Background APP button Microphone Home screen button... - Page 5 DR5 Rear View Barcode scanner window Hand strap hole Pogo Pin connector for Rear camera extension modules Flash LED Microphone for noise cancellation Battery knobs Hand strap hole Speaker Cradle connector...
- Page 6 DR5 Left and Right View Volume Power key up/down Function key Scanner Scanner trigger key trigger key USB Type C connector...
-
Page 7: Specifications
1.3 Specifications System Features 2.2 GHz, Qualcomm Snapdragon™ 660 Octa Core Processor, 64bits Memory 4 GB RAM 64GB Flash Expanded slot MicroSD, up to 128GB Android 10 (Guaranteed security updates to Sep., 2024) Languages supported English, Simplified Chinese, Traditional Chinese, Japanese, Spanish, German, French and more Display Gorilla GlassⅢ... - Page 8 Engines SE655 Illumination/AIMER : LED 630 ± 30 nm Optical Resolution : 5 mil (minimum readable bar code module size) Scan Repetition Rate : Nominally 50 scans/second Print Contrast : 20% (minimum print contrast) Ambient Light Immunity Light Source : 4845(lux) ± 5% Symbologies : UPC-A/E, EAN-8/13, Codabar, Code 39, Code 39Full ASCI, Code 93, Code 32, Interleaved &...
- Page 9 CE, FCC, NCC, BSMI, VCCI, TELEC, CCC, SRRC, RoHS, DoC, BQB, GMS, N-Mark compliance Communication USB OTG Type C Connector for PC/USB drive POGO PIN connector for Cradle WLAN IEEE802.11 a/b/g/n/ac/d/h/i/r, support fast roaming, MIMO(2x2) Bluetooth ® WWAN FDD: Band 1(2100), Band 2(1900), Band 3(1800), Band 4(1700), Band 5(850), Band 7(2600), Band 8(900), Band 17(700bc), Band 20(800), Band 28(700) TDD: Band 38(2600), Band 39(1900), Band 41(2500)
- Page 10 Maximum Output Radio type / Description Transmitter Frequency Power GSM850 824 – 849MHz 32.5dBm EGSM900 880 – 915MHz 32.5dBm DCS1800 1710-1785MHz 29.5dBm PCS1900 1850 – 1910MHz 29.5dBm FDD 1 1920-1980MHz 23dBm FDD 2 1850 – 1910MHz 23dBm UMTS FDD 5 824 –...
- Page 11 5150-5350MHz 14dBm IEEE 802.11n 5470-5725MHz 14dBm 5150-5350MHz 13dBm IEEE 802.11ac 5470-5725MHz 13dBm Bluetooth ® Bluetooth ® 2400-2483.5MHz 9dBm RFID 13.56MHz Note: The device is restricted to indoor use only when operating in the 5150 to 5350 MHz frequency range. AT BE BG HR CY CZ DK FR DE EL HU LU MT NL PT RO SK...
-
Page 12: Getting Started
1.4 Getting Started 1.4.1 Remove / Install the Battery Cover To unlock the battery by turning up the two knobs. And pull the battery up to remove it. To lock the battery by turning down the two knobs. Make sure the battery is securely closed, or you may be unable to turn on the terminal. - Page 14 1.4.2 Charging the Battery If the battery has been discharged for several days, you may need to charge for several minutes before powering it on. Use only the adapter and the USB type C cable that came with this device to charge the battery.
- Page 15 1.4.3 Turning on the terminal for the first time It is recommended to fully charge DR5 before first use. You can now start up your device to set up the languages, WLAN setting, and date and time. Power-On Button Turn ON your device by pressing the power button on the right side of the terminal.
- Page 16 1.4.5 Using the Micro SD/ Nano SIM Card The DR5 has 1 x micro SD and 2 x nano SIM card slots inside the battery compartment. Note: Before inserting or removing micro SD card or nano SIM card, please TURN OFF DR5 for the first step.
- Page 17 To lock the battery by turning down the two knobs. Make sure the battery is securely closed, or you may be unable to turn on the terminal. Checking DR5 storage Please go to Settings and tap Storage to check the DR5 storage.
- Page 18 1.4.6 Battery Status The DR5 provides battery info for users to check the battery status, history view and also set up users preferences. On the main screen, scroll the screen from down to top to reach the APPS, and tap Settings and then tap BatteryInfo.
- Page 19 1.4.7 BatteryInfo Health Service BatteryInfo health service information will display on both DR5 lock screen and the notification bar. ■ When the battery health is higher than 80% : ■ When the battery health is higher than 60%: ■ When the battery health is lower than 60% : (Battery should be replaced)
-
Page 20: Chapter 2 - Installation & Operation
Chapter 2 – Installation & Operation 2.1 Barcode Setting On the main screen, scroll down to reach the APPS, and tap Settings and then tap USS (scan service). Or from the notification bar to tap USS (scan service). You are now entering the ScanService application. - Page 21 2.1.1 Settings on the screen to see all the settings of USS. Please tap...
- Page 22 2.1.2 Barcode Scan Please tap Start Scan to get ready for barcodes scan service. For Save / Load Settings, and Factory Default , and then tap Save / Load Settings, and Factory Please tap Default.
- Page 23 To save settings, you can also tap Save on the screen and input path then tap OK. The saved data is stored in File Manager. (Please see 3.2 File Manager...
-
Page 24: Hf Setting
Tap Connection Preferences to enable NFC Make sure that both devices are unlocked and have NFC turned on. Also make sure that the NFC antenna area of DR5 and the other phone's NFC area are close to one another. Slightly moving the phones until a... -
Page 25: Uhf Setting
2.3 UHF Setting Current model is not available. -
Page 26: Wwan Setting
2.4 WWAN Setting 1. Turn off the terminal to insert the SIM card. Note : • For the instruction, please refer to 1.4.5 Using the Micro SD/ Nano SIM Card. • It only applies to the device which supports WWAN. 2. - Page 27 Tap Mobile network for more network settings. To choose different network type, please tap Preferred network type.
-
Page 28: Wlan Setting
2.5 WLAN Setting On the main screen, scroll the screen from down to top to reach the APPS, and tap Settings and then tap Network & internet. To see available networks, turn WLAN ON. And tap to choose the available networks. - Page 29 Choose the available networks, and enter the Password and tap Connect. If the wireless network that you want is not listed, tap + Add network to manually add it. When enabled, the icon is displayed on the status bar.
- Page 30 2.5.1 WLAN Advanced WLAN advanced can enhance the roaming behavior when the device is in areas of particularly low coverage or losing its connection to the network infrastructure and provides the power save mode to control the power consumption setting. WLAN advanced will help users to manage the seamless roaming.
- Page 31 ● Power Save Mode Tap to enable the power save mode to set the WLAN module to its optimum power consumption setting. ● Roaming Trigger (Default : -78 dBm Range : -40 dBm ~ - 90 dBm) Roaming trigger will help users to look for a better and stronger signal strength (in dBm) by scanning many access points.
- Page 32 2.5.1.1 Other options for more options to import / export the current data from the device. Initialize is able to restore the default settings.
-
Page 33: Pan Setting
2.6 PAN Setting On the main screen, scroll the screen from down to top to reach the APPS, and tap Settings and then tap Connected devices. Tap Connection Preferences to enable Bluetooth Tap ON / OFF to enable / disable Bluetooth ®... -
Page 34: Gps Setting
2.7 GPS Setting On the main screen, scroll the screen from down to top to reach the APPS, and tap Settings and then tap Security & location. Tap Location. Tap ON/OFF for the permission to use your location information. -
Page 35: Pc Setting
2.8 PC Setting Connect DR5 to your computer with the USB type C cable. Your computer will recognize it is USB charging. Slide down from top, the system will show as follow picture, then you can select File transfers. -
Page 36: Camera Setting
2.9 Camera Setting Camera on the main screen. Or scroll the screen from down to top to reach the APPS, and tap Camera. - Page 37 2.9.1 Camera Settings For the first time turn on, the screen will show a brief introduction about camera settings. Camera switch...
- Page 38 2.9.1.1 Scene Mode Setting 2.9.1.2 Camera filter effects...
- Page 39 2.9.1.3 Settings...
- Page 40 2.9.2 Record Videos Once tap the record button, it will start recording.
-
Page 41: Performing A Hardware Reset
2.10 Performing a Hardware Reset You may have to perform a reset if the device freezes (i.e., the terminal no longer responds to the buttons or tapping on the screen). Long press and hold Power button around 10 seconds to restart the device. -
Page 42: Performing Factory Data Reset
2.11 Performing Factory data reset 1. On the main screen, scroll the screen from down to top to reach the APPS, and tap Settings and then tap System. 2. Tap Advanced for more options, and then tap Reset options. 3. You can reset the system on Reset options. When you select Erase all data (factory reset), it will erase all folders. -
Page 44: Programmable Keys
2.12 Programmable Keys The DR5’s keys can be programmed for users to be able to perform different functions or applications. 2.12.1 Programming a key 1. On the main screen, scroll the screen from down to top to reach the APPS, and tap Settings. - Page 45 3. Tap one of KEYCODES or APPS that lists the available functions or applications and select one shortcut to map to the key. 4. The key is successfully mapped to a key code.
- Page 46 2.12.2 Enable/ Disable wakeup After the key is mapped to a key code, check the Enable wakeup checkbox to wake DR5 by pressing the programmable keys when DR5 is in sleep mode. Note: This function only applies to KEYCODES.
- Page 47 2.12.3 Export / Import a Programmable Key Configuration file ■ Export file 1. Tap 2. Select Export 3. Tap OK Programmable keys exported successfully...
- Page 48 The Programmable Key configuration can be exported to a text file or imported into DR5. Note: The configuration file (keys_config.txt) is saved in File Manager. (For File Manager setting, please refer to 3.2 File Manager...
- Page 49 ■ Import file Before importing the file, please make sure the configuration file (keys_config.txt) is in File Manager. 1. Tap 2. Select Import 3. Tap Ok Programmable keys imported successfully The new configuration will be applied immediately after import.
- Page 50 ■ Reset default 1. Tap 2. Select Reset to default...
-
Page 51: Battery Swap
Swap. 2. The LED indicator will start showing red light. Please swap the battery after the LED red light goes off. Please do not turn on DR5 during the battery swap. Note: When the battery level is extremely low (lower than 15 %), the termial LED will start blinking red light constantly before and after the battery swap signal (the solid LED red light). - Page 52 2.14 Split Screen Split screen function allows you to have two apps work side by side on the same screen. Please follow the steps to enable split screen multitasking. Note: Some apps may not work with split-screen. 1. Tap Background APP button until you see those background apps on the screen.
- Page 53 the two APPs to expand the app that you would like to keep in full screen.
-
Page 54: Chapter 3 - Introduction To Applications
APPS, and tap Settings and then tap USS ( Wasp scan service ). Or from the notification bar to tap USS ( Wasp scan service ). You are now enter the Wasp scan service application. Note : For more Scan Service settings, please refer to... - Page 56 3.1.1 How to scan 1. Aim the Barcode Scan Engine to the barcode and press one of two scan trigger keys or tap Start Scan button. Barcode Scan Engine Scanner trigger keys...
- Page 57 2. After scanning the barcodes, the barcode information is as shown below. 3. To save the scanned data, tap Save and enter the path and filename, then tap OK. ■ More Options For more options and settings, please tap...
- Page 58 3.1.2 Multi Decode Scan Mode Multi decode scan function allows users to scan multiple barcodes at once. , Choose Scanner Settings 2. Enable Multi Decode Mode, and input the barcode decode count and start multi decode scan.
- Page 59 3.1.3 Picklist Mode Picklist mode enables DR5 to decode only barcodes that are aligned under the laser crosshair or LED aiming dot. For picklist mode demonstration, please click on our youtube channel for more information : https://www.youtube.com/watch?v=QjT2E6hxD_k , Choose Scanner Settings 2.
-
Page 60: File Manager
3.2 File Manager On the main screen, scroll the screen from down to top to reach the File Manager. APPS, and tap : Settings : Return to the previous page : Main page : Refresh : Folder arrangement : Folder Information : Flash Storage... -
Page 61: App Update Center
3.3 APP Update Center On the main screen, scroll the screen from down to top to reach the APPS, and tap Settings and then tap App Update Center. To update or check the latest version of each application, you will need to do it manually. -
Page 62: Stagego
When device users receive the barcode printouts (or the script file) from the IT admins, they can then run the StageGO app on their DR5, scan all the barcodes on the printouts (or load the script file). When all barcodes are... - Page 63 scanned, StageGO is ready to begin self-configuration. StageGO can also be configured for 1-click auto configuration. On the main screen, scroll the screen StageGO. from down to top to reach the APPS, and tap...
-
Page 64: Mobolink
3.5 MoboLink MoboLink is a software platform that helps Wasp customers to remote manage their purchased devices and applications. The core of the MoboLink platform provides functionalities in the MDM (Mobile Device Management) and MAM (Mobile Application Management) domains, and then further extends into other management functions such as alert notification management and account management. - Page 65 , go to Settings. In the Settings section, go to MoboLink Server URL to setup MoboLink server URL. Enter MoboLink Server URL. Save the URL setting 3.5.1 More about MoboLink For detailed operation, solution and usage, please refer to MoboLink user’s guide. ( http://mobolink.tw.ute.com/support...
Need help?
Do you have a question about the DR5 and is the answer not in the manual?
Questions and answers