Table of Contents
Advertisement
Advertisement
Table of Contents

Related Manuals for Wasp WDT92


Summary of Contents for Wasp WDT92
- Page 1 WDT92™ Rugged Mobile Computer with 1D/2D Imager User’s Manual...
- Page 2 Wasp Barcode Technologies ("Wasp") reserves all rights with respect to its trademarks, service marks, logos, and other indicia ("Marks"). Any unauthorized use of any Wasp-owned Mark, or any use of a mark that is confusingly similar to, or likely to cause confusion with, an Wasp-owned Mark, would constitute infringement of Wasp’s exclusive trademark rights.
-
Page 3: Table Of Contents
Table of Contents Introduction ............... 1 Conventions ..................1 Product Presentation ..............2 Out of the Box ................3 General View .................4 Battery ................7 Install the Battery ................7 Charge the Battery ...............8 Charge with USB ..............8 Charge with the Single Slot Dock ........9 Replace the Battery .............. - Page 4 Bluetooth® Manager Device Setup ..........55 Enable Bluetooth® .............55 Connect to Other Bluetooth® Devices ......57 Configure or Unpair Bluetooth® Devices ......61 Persistent Registry ..............62 Wasp Applications ............65 Quick Buttons ................65 Add a New Button ..............66 Triggers ................67 Application Switcher ............68 Wasp Desktop Utility ..............69...
- Page 5 RS232 Dock Connection ..........116 WLAN Connection ..............117 WPAN Connection ..............118 Wireless and Radio Frequencies Warnings ......120 Technical Features ............123 Technical Data ................. 123 Decode Distances ..............128 WDT92 Imager 1D Linear CCD ........128 User’s Manual...
- Page 6 WDT92 Imager 2D ............128 Test Codes..............130 Maintenance..............138 Cleaning the Device ..............138 Dock Contacts Cleaning Procedure ....... 138 Ergonomic Recommendations ..........141 Safety and Regulatory Information ......142 General Safety Rules .............. 142 Power Supply ................143 Laser Safety ................
-
Page 7: Introduction
Introduction Conventions This manual uses the following conventions: "Mobile computer" and "WDT92" refer to WDT92 mobile computer. "Single Dock" refers to the WDT92 Single Slot Dock. The label artworks may be only a draft. Refer to the product labels for more precise information. -
Page 8: Product Presentation
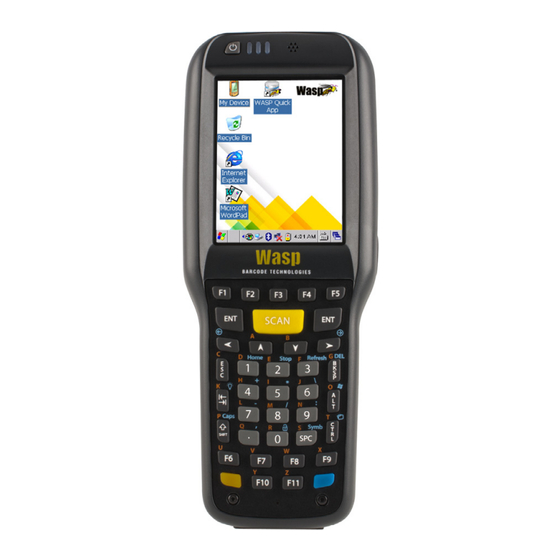
Equipped with the largest high-visibility color graphics display (3.2 in.) in its class, the WDT92 mobile computer helps users work more efficiently. With a choice of Windows Embedded or Android™ Operating Systems, the WDT92 mobile computer delivers the ultimate in ergonomics, intuitive user interface, computing and data capture technologies, combined with best-in-class ruggedness. -
Page 9: Out Of The Box
Introduction Out of the Box The WDT92 package contains: • WDT92 mobile computer • Rechargeable battery pack • Terminal emulation overlay • Belt clip (handheld models only) • Belt clip pivot (handheld models only) • Hand-strap • Lanyard (for pistol grip models only) •... -
Page 10: General View
General View Front View Back View Receiver Speaker LEDs ON/OFF Power Key Laser Safety Label Micro USB Connector Color Display Trigger Button Loudspeaker (for use with the optional pistol trigger) Product Label Front Scan Reset Key MicroSD Card Slot Keyboard WDT92... - Page 11 Introduction Top View Bottom View HandyLink™ connector Data Capture Window (host/device) User’s Manual...
- Page 12 Introduction NOTES WDT92...
-
Page 13: Battery
Battery Install the Battery To install the battery pack, i nsert the battery' s alignment lugs into the recesses, then press firmly until the battery latch clicks twice: User’s Manual... -
Page 14: Charge The Battery
You can use a standard micro USB to USB cable in conjunction with a power supply adapter to charge the WDT92 from a power outlet. The Micro-USB port can also be used to charge the WDT92 battery pack from any self-powered USB hub or USB port on a computer. -
Page 15: Charge With The Single Slot Dock
Charge with the Single Slot Dock You can also charge an additional battery pack by inserting it into the rear slot of the dock. The WDT92 may get warm during charging; this is normal and does not mean a malfunction. NOTE By default, the battery pack is disconnected at the factory to avoid damage due to excessive draining. - Page 16 CAUTION Close to the limits of the working temperature, some battery performance degradation may occur. The WDT92 should be charged at an ambient temperature between 0 - 35º C (32 to 95 ºF) to achieve the maximum charging rate. Never charge the device battery in a closed space where CAUTION excessive heat can build up.
-
Page 17: Replace The Battery
Battery Replace the Battery To replace the battery pack, follow the steps below: 1. Turn off the WDT92 (press the power key and wait for device power off). 2. Press the latch release button and pull the battery latch down: 3. - Page 18 Use specified charger only. Risk of explosion if the battery is replaced by an incorrect type. Dispose of CAUTION batteries as required by local authorities. Use only Wasp approved batteries and accessories for battery charging. Risk of explosion if battery is replaced by an incorrect type.
- Page 19 To power the cradle, use only a Wasp approved power supply. The use of an alternative power supply will void the product warranty, may cause product damage and may cause heat, an explosion, or fire.
- Page 20 Do not expose the battery pack to liquids. Avoid any knocks or excessive vibrations. If the device or the battery is dropped, especially on a hard surface, you should take it to the nearest Authorised Repair Centre for inspection before continuing to use it. WDT92...
- Page 21 Battery If your device stops working for any reason, do not use its battery on other electronic devices without a prior check and approval by an Authorised Repair Centre. Do not replace the battery pack when the device is WARNING turned on.
- Page 22 Battery NOTES WDT92...
-
Page 23: Sd Card
SD Card Install the MicroSD Card WDT92 supports microSD memory cards. To access the microSD card slot and insert the card follow the steps below: 1. Turn off the WDT92. 2. Remove the battery pack (see Replace the Battery on page steps 1 to 3). - Page 24 Follow proper ESD precautions to avoid damaging the microprocessors in the WDT92 or the microSD card itself. Proper ESD precautions include, but are not limited to, working on an ESD mat and ensuring that the CAUTION operator is properly grounded.
-
Page 25: Getting Started
Getting Started Power On The WDT92 turns on when the battery pack or the external supply is inserted and the ON/OFF Power button is pressed. As soon as the mobile computer is on, the Windows Embedded Compact 7 desktop will appear on the screen. Wait a few seconds before starting any activity so that the mobile computer completes its startup procedure. -
Page 26: Desktop Window
Compact 7 desktop appears on the screen. Wait a few seconds before starting any activity so that the mobile computer completes its startup procedure. Windows Embedded Compact 7 Desktop Taskbar Icons Descriptions The Start button opens the Start Menu. WDT92... -
Page 27: Using The Stylus Pen
Getting Started ActiveSync connection icon is displayed when connected to ActiveSync or Windows Mobile Device Center either by USB, RS232, or Bluetooth®. Double-tap it to open a status dialog box that will let you disconnect the ActiveSync session without physically disconnecting the device from the PC. It is the only way to disconnect a Bluetooth®... -
Page 28: Wec7 Touch Screen Calibration
WEC7 Touch Screen Calibration At the very first WDT92 startup, after any cold boot (if the user skipped stylus calibration earlier) or following a clean boot, a Welcome Wizard with Stylus Calibration comes up. - Page 29 Getting Started User’s Manual...
- Page 30 2. Carefully press and briefly hold the stylus on the center of the target. Repeat as the target moves around the screen. 3. By completing the calibration procedure you implicitly accept the new calibration settings. 4. The new calibration settings are persistently saved in the Registry. WDT92...
-
Page 31: Keyboards
Getting Started Keyboards Alphanumeric Keypad (38 Keys) User’s Manual... - Page 32 Blue modifier (one shot key): when pressed before a standard key, it enables the character or function printed in blue above the key. The ON/OFF Power button powers the WDT92 ON or OFF. It is placed on the upper left side of the terminal. Special Function Icons...
- Page 33 Getting Started Icon Function After a Blue modifier key press, the Backlight key turns the backlight on and off. After a Blue modifier key press, the blue arrows allow moving forwards or backwards within the Internet Explorer browser pages. User’s Manual...
-
Page 34: Resetting The Terminal
It clears the working RAM, but the file system is preserved. The Registry is restored from persistent memory. A clean boot restores the WDT92 to a clean configuration: both the Registry and the file system returns to a clean status that conforms to factory default. -
Page 35: Clean Boot
Getting Started Clean Boot To perform a clean boot, do the following steps: 1. Perform a Cold Boot (see Cold Boot). 2. Press and hold down the ‘Esc’ + ‘0’ keys simultaneously, promptly after resetting: A dialog box will appear asking for confirmation. Press the Enter Key. -
Page 36: Led Indicators
Light changes to green when a good Green decode is completed. * The Good Read LED has also a "Suspend LED" feature. The decode LED will glow red when the device begins to suspend, and will turn off when the suspend completes successfully. WDT92... -
Page 37: Settings
Settings Control Panel From the Start menu, tap Settings > Control Panel. Below is an expanded view of the Control Panel showing all of the applets. User’s Manual... -
Page 38: Data Capture Configuration
Decoding Properties window. The menu options will change to reflect the items most recently selected. General Decoding Properties Tap Configure > General and select the desired configuration from the options shown in the figure below: WDT92... - Page 39 Settings Notification Use it to set the number, the duration and the interval of notifications (LED, green spot, beep or vibration) the scanner emits on a good read. You can also set the volume and tone of the beeps. Good Read Use it to enable/disable good read notifications (LED, Green Spot, LED).
- Page 40 Settings Formatting Allows to format the barcode text by enabling and configuring the use of prefix, suffix and data separator. Scroll the Add special drop-down list to select a special character to be added in the current cursor position. WDT92...
- Page 41 When AIM IDs Before is enabled, the AIM ID is inserted at the beginning of the decoded barcode. DL ID is a Wasp specific character identifier. User ID is a user specific character identifier you can set in the related symbology settings menu.
- Page 42 Settings Decoding Options Use it to configure the User ID for symbologies, Redundancy and Aggressive Decoding (if supported by the decoding module). Select a symbology to view or change the available properties settings. WDT92...
- Page 43 Settings Imager Options It allows to customize the 2D imager behavior. It is only available on devices equipped with 2D decoding engines. Enable illumination If selected, it causes the scanner to turn on the illumination to aid decoding. Read from display It improves capability to read barcodes from LCD screen (e.g.
- Page 44 Release Scan Scanning takes place after the scan button is released. Drag the Timeout slider to set the scanning timeout after releasing the scan button. Enable target after aiming It enables aiming before scanning. WDT92...
- Page 45 Settings Multi Scan If enabled, the device goes on scanning until the number of Labels for good read is reached. Select Enable indicators for each label to get an intermediate notification for each label decoded. Keyboard Wedge Use it to enable or disable the keyboard wedge for barcode scanner: User’s Manual...
-
Page 46: Symbology Settings
Settings Symbology Settings Each barcode symbology can be customized with additional settings that may affect that specific barcode decoding. Tap Configure and use the 1D barcode/ 2D barcode drop-down menus to configure symbology decoding options: WDT92... -
Page 47: Decoding Settings
Settings Refer to the sample symbology control panels for examples of the types of fields and options you can modify. The sample below shows the settings of a Code 128 barcode symbology: Tap the left and right arrow keys to navigate the different pages of the barcode symbology pages. - Page 48 Settings settings to a persistent storage, you need to save the Registry using the Persistent Registry applet in the Control Panel. WDT92...
-
Page 49: Wcu (Wireless Configuration Utility)
Settings WCU (Wireless Configuration Utility) Wireless Configuration Utility (WCU) is a user-mode application that provides an interface for configuring and operating an installed wireless network interface card (wireless adapter). Tap Start > Programs > WLink > WCU to open the WCU screen: Create a New Profile Select Add from the menu bar and enter information for the SSID, Security Type and Encryption Type:... - Page 50 Open authentication allows any device to authenticate and then attempt to communicate with the access point. Using open authentication, any wireless device can authenticate with the access point, but the device can communicate only if its Wired Equivalent Privacy (WEP) keys match the access point's WEP keys. WDT92...
- Page 51 Settings Security Type: WPA2-Personal In case of pre-shared key (PSK) authentication, the access point sends an unencrypted challenge text string to any device that is attempting to communicate with the access point. The device that is requesting authentication encrypts the challenge text and sends it back to the access point.
- Page 52 To create a profile with EAP authentication, follow the steps below: 1. Select the Security Type as WPA2-Enterprise 2. Select the Encryption Type 3. Tap settings. The PEAP Properties screen appears, where you can configure connection properties, source of user credentials and authentication properties (inner method) to be used: WDT92...
- Page 53 Settings 4. Tap the User Credentials tab to enter the EAP methods user credentials: 5. Tap the Authentication tab to select the EAP inner method: User’s Manual...
- Page 54 Tap OK to complete: The new profile now appears in the WCU profile list: Each EAP profile can be either "Pairwise Master Key Caching (PMK)" or Opportunistic Key Caching (OKC). By default, OKC radio button is enabled for each of WLAN profile. WDT92...
-
Page 55: Edit A Profile
Settings Edit a Profile Select a profile in WCU profile list and tap Edit on the navigation menu bar: Delete a Profile Select a profile in WCU profile list and tap Delete on the navigation menu bar: User’s Manual... -
Page 56: Connect To A Profile
Tap the Status tab to display the connection status: Disconnect from a Profile Select a connected profile in WCU profile list and tap Disconnect on the navigation menu bar. Tap the Status tab to display the connection status: WDT92... -
Page 57: Browse Nearby Wireless Networks
Settings Browse Nearby Wireless Networks The Browse Nearby Wireless Networks window shows the scan list entries of the WLAN driver. It is automatically refreshed periodically, without sending an explicit scan request to driver. Tap Scan List in the Options menu. A window appears, that shows all the detected networks. - Page 58 Settings Refresh Tap Refresh to manually refresh the scan list. Each click on this button triggers a scan request to driver. WDT92...
-
Page 59: Audio Settings
Settings Audio Settings There are two applets that control volume: Audio and Volume & Sounds. Audio The Audio Properties window allows to set the volume for the speaker and the microphone. From the control panel main window, double-tap the Audio icon: The audio control panel can be used to independently set the playback or recording volume for different types of audio inputs and outputs, such as a headset or the internal speakers and... -
Page 60: Volume & Sounds
Settings Volume & Sounds From the control panel main window, double-tap the Volume & Sounds icon: The Volume & Sounds applet configures audio features of all speakers and headphones. WDT92... -
Page 61: Bluetooth® Manager Device Setup
Settings Bluetooth® Manager Device Setup To create a Bluetooth® pairing between your device and another device that has Bluetooth® capabilities, ensure that the two devices are turned on, discoverable, and within close range. By default, Bluetooth® is turned off. If you turn it on, and then turn off your device, Bluetooth®... - Page 62 Settings 3. If you’re going to connect a serial device (i.e. a scanner) to the WDT92, use the Port control to select a virtual COM port to use for the connection. 4. Tap Find Me if you want to make the WDT92 discoverable to other Bluetooth®...
-
Page 63: Connect To Other Bluetooth® Devices
2. Search for available Bluetooth® devices by tapping the button for the type of device you want (Printer, Serial or All) or tap Discovery > Discover to skip this step. The WDT92 will search for Bluetooth® devices within range. If you attempt to set up a connection when the Bluetooth®... - Page 64 Settings Icon Service Dialup Networking Printer Object Push (OPP) Object Exchange (OBEX) ActiveSync Human Interface Device (HID) - Keyboard Serial Personal Area Network (PAN) Modem Headset Handsfree WDT92...
- Page 65 Settings 3. Once searching is complete, Bluetooth® device profiles will be displayed in the Discovery tab. Flick the list and select a device to set up a connection and then tap Connect. 4. Select a service and configure any encryption, authentication, or virtual port options required by the service selected.
- Page 66 PIN. Use the Input Panel or the keyboard to type the PIN. Tap OK to complete. The dialog box will also appear when an authentication request is received from another device. You can also select Encrypt or Authenticate from the Settings tab of the Bluetooth Manager control panel. NOTE WDT92...
-
Page 67: Configure Or Unpair Bluetooth® Devices
Settings Configure or Unpair Bluetooth® Devices Once you have set up a pairing, you can view and edit the pairing settings by double-tapping the paired device from the Connections tab. Use the Virtual Port drop-down menu to change the Virtual Port. Tap Sync to initiate a Sync (available only if the service is an ActiveSync connection). -
Page 68: Persistent Registry
To persist the Registry settings between boots, follow the steps below: 1. From the Control Panel main window, double-tap the Persistent Registry icon. 2. Tap Persist. 3. Tap OK to exit. WDT92... - Page 69 Settings To change the Persistent Registry timing: 1. From the Persistent Registry window, select a time interval from the menu. 2. Tap OK to save and exit. To cancel the Persistent Registry timing: 1. From the Persistent Registry window, deselect the Persist Registry settings check box 2.
- Page 70 Settings NOTES WDT92...
-
Page 71: Wasp Applications
Wasp Applications Quick Buttons You can use the Quick Buttons tab to associate specific keys, such as <F1>-<F10>, with specific applications. From the control panel main window, double tap the Quick Buttons icon to open the Quick Buttons tab. Customize the program hardware buttons to launch your most used applications. -
Page 72: Add A New Button
Wasp Applications Command Description Assign a function This drop-down list shows the available functions. Application Displays the path to the selected application. to browse for application files. You can associate Browse an executable program with the specified button. Type the command-line arguments that are needed for the specified application. -
Page 73: Triggers
Wasp Applications Make sure you do not attempt to add a button that is already defined. NOTE The keyboard wedge can activate assigned buttons using alphanumeric characters. Barcodes containing characters associated with assigned buttons will trigger the action or application assigned to that CAUTION button. -
Page 74: Application Switcher
Wasp Applications Application Switcher The application switcher provides the same functionality as the standard Windows® "Alt + Tab" function. This allows the user to switch between the various open applications. The application switcher is activated via an assigned shortcut key... -
Page 75: Wasp Desktop Utility
• Create quick access hot keys and configure trigger actions. To open the WDU, double-tap the Wasp Desktop Utility icon on the Control Panel: You can also open the WDU by pressing the appropriate key shortcut. The default is "Alt + 6". -
Page 76: Administrative Options (Admin Tab)
Wasp Applications You can change the key combination and specific keys Quick (such as <F1>-<F10>) by using Quick Buttons. See Buttons on page 65 for more information. NOTE Administrative Options (Admin tab) Command Description Enable Wasp Select to activate the WDU functions such as Windows Desktop Access Restrictions and Application Selector. - Page 77 4. Tap OK to close the Password Set dialog box. Be sure to record the Password for future reference. NOTE Tap "Set Password" before exiting WDU in order to store and activate your new password. It is not necessary to select Enable Wasp Desktop. NOTE User’s Manual...
- Page 78 To remove a password: 1. Enter blank in both password fields. 2. Tap Set Password. Password Request Dialog Box Once the password is set, the next time you launch the Wasp Desktop Utility, the WDU password dialog box opens: WDT92...
-
Page 79: Locked Web Browser Options (Lockedweb Tab)
Wasp Applications 1. Type in your password using either the keypad on the unit, or using the stylus on the soft input panel (SIP). If you enter an incorrect password, the system will prompt you to input the correct one. - Page 80 Wasp Applications Error Page Redirection Use the Error redirection option to provide customized recovery from common errors. When an error occurs, the browser can redirect access to a specified error page with instructions on how to recover from the problem.
- Page 81 Wasp Applications When selected: • all key presses will be trapped by the Locked Web Browser to prevent the user from accessing unsafe parts of the sys- tem. For example, pressing "Ctrl + O" to open a file will not work;...
- Page 82 Wasp Applications Advanced Settings Advanced Locked Web Browser Options General Enable Locked Enables the Locked Web Browser when Internet Explorer is Web Browser launched. Prevents the browser from loading the local intranet page from Disable Cache cache instead of navigating to the Network Disconnected error redirection page.
- Page 83 Wasp Applications Advanced Locked Web Browser Options Enable Allows for alternant method of capturing user keypresses to optimize lockdown experience. See also WDU LockedWeb tab Alternate Key Trap Keys Trap option. Better choice is web page dependent. Allows to change the password required to exit the Locked Web...
-
Page 84: Status Icons Options (Status Tab)
Wasp Applications Advanced Locked Web Browser Options Proxy Settings Enable proxy server to act as connection portal for access to a Use Proxy remote server. Address IP address of proxy server. Port Port of proxy server to use (default 80). -
Page 85: Windows Controls (Win Tab)
Wasp Applications Status Icons Options Icon size Sets the status icons’ size. Icon locations Selects the preferred location for each status icon. Windows Controls (Win Tab) Tap the Win tab to allow or restrict access to Windows system functions. You can disable normal Windows functions such as the taskbar, leaving nothing but a blank workspace. -
Page 86: Appselector Options (Appselect Tab)
Wasp Applications Windows Controls Start menu Select to display the Start Menu. This option is only available enabled when Taskbar enabled is selected. AutoSIP enabled Enables the AutoSIP Windows feature. Select to display horizontal and vertical scroll bars to help Scroll bars view large web pages which do not fit the screen. - Page 87 Wasp Applications Application Selector Options Enable Application Select to enable the application selector. Selector Status Icons Select to enable the status icons view (see Show status Options (Status Tab) on page 78 ). The status icons can icons be configured on the Status tab of WDU.
- Page 88 Wasp Applications Command Description Type the name of the application in the way it should Application Title appear on screen for the end-user. Executable Displays the path for the executable file you want to run. to browse for the desired executable file. You can associate an executable program with the specified button.
-
Page 89: App Selector (Application Selector)
80. Additionally, the page template can be modified to display a different background. Contact your Wasp representative for more information on this feature. To run an application, tap its name. To exit the Application Selector, press "ALT + 6", deselect the Enable Application Selector check box on the AppSelect Tab and press OK to exit WDU. -
Page 90: Locked Web Browser
Wasp Applications Locked Web Browser The Locked Web Browser is a browser helper object for Internet Explorer. It allows an administrator to define a restricted internet usage environment. Once in the restricted environment, a password is required to exit. This means users can only access web applications and websites set by the administrator. -
Page 91: Locked Web Browser Special Metatags
Wasp Applications In the restricted environment, the user can navigate by using the following keyboard shortcuts: Home Ctrl + 7 Refresh Ctrl + 8 Cancel Ctrl + 9 Exit Ctrl + 0 For firmware versions 1.60 and greater, the following command line arguments are supported: •... - Page 92 Also, the head tag set must be complete within the first 15K of the web page. The Wasp Locked Web Browser defines some special metatags that allow the web application to interact with the device: In particular, the special metatags allow it to: •...
- Page 93 Wasp Applications Reboot – Warm Boot Device Metatag DL_Reboot – Warm boot device. Content – "OnPageLoad" – Warm boot immediately upon page load. Example: <meta http-equiv="DL_Reboot" content=" OnPageLoad "> Exit Metatag DL_Exit – Exit the Locked Web Browser. Content – "OnPageLoad" – Exit immediately upon page load. If "Exit password"...
- Page 94 Wasp Applications Decoding Metatags Each decoding metatag has a possible content of "Enable" or "Disable". The settings are valid for the entire page (enables/disables each symbology). DL_Code_39 DL_Code_128 DL_Code_I25 DL_Code_S25 DL_Code_M25 DL_Code_CODABAR DL_Code_93 DL_Code_UPCA DL_Code_UPCE DL_Code_EAN13 DL_Code_EAN8 DL_Code_MSI DL_Code_MSR DL_Code_GS1_14...
- Page 95 Wasp Applications Key Press Metatags The key press metatags can be used to call JavaScript functions. They have the name structure: "DL_Key_xxx" where xxx is the VKey code. Example: <meta http-equiv="DL_Key_13" content="Javascript:CheckEnter();"> Assigning a key press via a DL_Key metatag overrides its use on the page.
- Page 96 Wasp Applications Scanning Metatags DL_Scan – Captures scan results and sends barcode/tag value to a javascript function on the web page. If the "content=" value is a javascript function the device will be taken out of keyboard wedge mode and start listening for scan events. A scanned barcode/tag result will be used as an argument to that javascript function which is then invoked.
-
Page 97: Pal And Pal Communicator
Wasp Applications PAL and PAL Communicator Pal is an easily customizable program that is ready-to-use for data entry needs. Pal Communicator is a PC application that allows you to manage the data transfer between a host computer and mobile devices. -
Page 98: Autostart
(with optional command line arguments) to run automatically after loading CAB files. AutoStart launches each time the WDT92 is rebooted executing each line with the specified command line arguments. It will take into account any AutoStart options at the beginning of the line. -
Page 99: How Autostart Uses Wceload
Wasp Applications How AutoStart Uses Wceload If you intend to create highly interactive installers, you should either install the CABs manually or review the Interactive CAB Install on page 94 section NOTE In certain environments, CAB files will be deleted after execution. -
Page 100: Interactive Cab Install
PreAuto.ini is identical to that of Autostart.ini. Autostart.ini is a text file that AutoStart will run upon startup of the WDT92, and after any CAB files are installed. This file should be placed in the \flashDisk folder. AutoStart will run the Autostart.ini file on each reboot of the device. - Page 101 Wasp Applications Line Formatting Each line of the Autostart.ini can consist of Autostart options, an executable, and any command line arguments. < Autostart option(s)> <full path executable> <command line arguments> Sample: - \windows\pword.exe \file.doc The following table breaks down the sample Autostart.ini line:...
- Page 102 Wasp Applications If the executable path is in a folder that contains spaces in the name, quotes are required to distinguish what the actual executable name is. The following is an example of this: "\Program Files\ScannerApp.exe" /run (valid) \Program Files\ScannerApp.exe /run...
- Page 103 Wasp Applications AutoStart Options The table below shows the options you can use when writing a line in the Autostart.ini file. Description Character Comments This may only be used as the first character of the line. If the Comment: This line will not ‘#’...
- Page 104 Wasp Applications Combining Options Autostart options can be combined together as shown in the following sample: ?- \Windows\Pword.exe This line would: • request confirmation before executing the line. The next line would not be processed before the confirmation is answered;...
- Page 105 Wasp Applications The fields may be broken up into multiple lines (as shown in the example) due to limited space in the dialog box. NOTE AutoStart Query Options Parentheses are used to surround the given field and make clear what the value of the field is.
- Page 106 Wasp Applications Autostart.ini Samples The next table is a collection of sample Autostart.ini lines: Line Description This will confirm the execution of ? \windows\wceload.exe "\My \Windows\wceload.exe with specified Documents\Sample.cab" argument "\My Documents\Sample.cab" (invalid) This will execute \Program with the \Program Files\App.exe argument Files\App.exe.
-
Page 107: Tools
Tools Windows Embedded Compact 7 SDK The latest version of the Windows CE SDK can be downloaded from http://www.Wasp.com on the WDT92 product page. This installer includes a detailed help file and sample applications. Prerequisites • ActiveSync 4.5 for Windows XP computers: http://www.microsoft.com/download/en/details.aspx?id=15... - Page 108 Handheld 6.5 devices using C, C++, C# languages. Go to this link to download the file: http://www.microsoft.com/en-us/download/details.aspx?id =6135 • Windows Mobile 6 Professional Development Kits Refresh is also required for Windows CE devices using C, C++, C# languages when developing on a Windows 7 64-bit computer. WDT92...
-
Page 109: Data Capture
Data Capture Data Capture The WDT92 has an integrated imager that collects data by scanning barcodes. Data Capture Configuration on page 32 for instructions on configuring the scanner settings. Imager 1D Data Capture The imager uses digital camera technology to take a digital picture of a barcode, the image is stored in memory and software decoding algorithms are executed to extract the data from the image. - Page 110 2. Point the scan window at the barcode from a distance within the reading range. 3. Press the scan key or the pistol trigger. The green lighted band emitted by the imager must completely cross the barcode as shown in the figure on the next page. WDT92...
- Page 111 Scan symbols with smaller bars or elements (mil size) closer to the unit and those with larger bars or elements (mil size) farther from the unit. Hold the WDT92 between two and nine inches (depending on symbol density) from the symbol.
-
Page 112: Imager 2D Data Capture
To scan a barcode symbol: 1. From the Decoding Properties window, tap the barcode icon to open the Decoded Data window. From the WEC7 desktop, double-tap the Microsoft WordPad icon: WDT92... - Page 113 Data Capture 2. Point the scan window at the barcode from a distance within the reading range. 3. Press the scan key or the pistol trigger. The imager projects a laser aiming pattern similar to those used on cameras. The aiming pattern is used to position the barcode or object within the field of view.
- Page 114 Scan symbols with smaller bars or elements (mil size) closer to the unit and those with larger bars or elements (mil size) farther from the unit. Hold the WDT92 between two and nine inches (depending on symbol density) from the symbol, centering the aiming pattern cross hairs on the symbol.
-
Page 115: Connections
Connections Connections There is more than one way to connect the WDT92 to a host PC running Windows. Each requires specific connections in order to function properly. Windows Mobile® Device Center The desktop application Windows Mobile® Device Center allows you to synchronize information between a desktop computer and your WDT92. - Page 116 The WDT92 running WEC7 does not come equipped with Microsoft Office Outlook or any other application that allows users to view contact, calendar, e-mail, or task data. Users can view files copied to the WDT92 by WMDC's file NOTE synchronization feature.
-
Page 117: Usb Connection
Connections USB Connection USB Direct Connection You can use any standard USB charge/communication cable to directly connect the WDT92 to a host computer and transfer data through the USB interface. Host Computer WDT92 Standard USB cable Connection through the cable complies to USB 2.0 standard. -
Page 118: Usb Handylink™ Connection
Connections USB HandyLink™ Connection You can use the Wasp HandyLink cable 94A051970 to directly connect the WDT92 to a host computer to transfer data through the USB interface. Host Computer WDT92 94A051970 HandyLink USB Client Cable The HandyLink cable complies to USB 2.0 standard. -
Page 119: Usb Dock Connection
USB Dock Connection The Single Dock can be connected to the host computer by means of the Micro-B USB cord 94A051968. Once the host computer has been turned on, insert the WDT92 mobile computer into the dock. Host Computer WDT92 Single Slot Dock... -
Page 120: Connection To Usb Peripherals
Connections Connection to USB Peripherals You can connect the WDT92 to a standard 101-key USB keyboard or to a standard USB flash memory device. Connect the terminal to a standard USB cable or to the Wasp 94A051971 HandyLink Micro-USB host cable (together with a standard USB cable if needed). - Page 121 Connections Connect the Single Slot Dock to the peripheral by means of a Micro-A USB cord, or use a Micro-A to Std-A receptacle USB adapter such as Wasp 94A051969 (together with a standard USB cable needed). WDT92 Single Slot Dock...
-
Page 122: Rs232 Connection
Connections RS232 Connection You can use the Wasp 94A051972 cable to directly connect the WDT92 to a host computer to transfer data through the RS232 interface. Host Computer WDT92 94A051972 HandyLink Micro RS232 Client Cable RS232 Dock Connection The Single Slot Dock can be connected to the Host by means of a standard null modem cable such as Wasp 94A051020 CAB-427 for 9-pin connections. -
Page 123: Wlan Connection
Connections WLAN Connection WDT92 802.11 a/b/g/n radio models can communicate with the host using the on-board Wi-Fi radio and an Access Point connected to a network. For more information on this utility, refer to WCU (Wireless Configuration Utility) on page... -
Page 124: Wpan Connection
Connections WPAN Connection WDT92 Bluetooth® models can communicate with a Bluetooth® device, such as a printer, within a range of 10 m, using the on-board Bluetooth® module. Bluetooth® Printer WDT92 To extend battery life, the Bluetooth® module is off by default. - Page 125 Connections Area coverage and Bluetooth® radio performance may vary, due to environmental conditions or interference caused by other devices (microwave ovens, radio transmitters, etc.). NOTE User’s Manual...
-
Page 126: Wireless And Radio Frequencies Warnings
Most modern electronic equipment is shielded from RF signals. However, certain electronic equipment may not be shielded against the RF signals generated by WDT92. Wasp recommends persons with pacemakers or other medical devices to follow the same recommendations provided Health... - Page 127 Connections In case of doubt concerning the use of wireless devices with an implanted medical device, contact your doctor. Turn this device OFF in health care facilities when any WARNING regulations posted in these areas instruct you to do so. Hospitals or health care facilities may use equipment that could be sensitive to external RF energy.
- Page 128 Areas with a potentially explosive atmosphere are WARNING often, but not always, clearly marked or shown. Sparks in such areas could cause an explosion or fire, resulting in injury or even death. WDT92...
-
Page 129: Technical Features
Technical Features Technical Features Technical Data Physical Characteristics Handheld: 19.3 x 7.6 x 4.2 cm (6.1 x 3.5 cm at keyboard) / 7.6 x Dimensions 3.0 x 1.3 in (2.4 x 1.4 in at keyboard) Pistol Grip: 19.3 x 7.6 x 15.6 cm / 7.6 x 3.0 x 6.2 in Handheld (with standard battery): 388 g / 13.7 oz Handheld (with hi-cap battery): 422 g / 14.9 oz Weight... - Page 130 Bluetooth v2.1 + EDR (WEC7 models) Interfaces Main connector with USB 2.0 High Speed Host (480 Mbps) and Client, RS-232 up to 115.2 Kbps Interfaces MicroUSB port for power and communications Ethernet: via single dock (external module) or multi-slot dock WDT92...
- Page 131 Flash Memory: 8 GB (partially used for firmware and reserved data) Software Applications Pal Application Library pre-licensed 42 Gears SureLock pre-licensed for device, SOTI Configuration & MobiControl, Wasp Desktop Utility (WDU) pre-licensed for Maintenance device lockdown Development Wasp Windows SDK™, MCL-Collection™ Browser SureLock locked web browser pre-licensed...
- Page 132 2500 pixel sensor; Sharp green LED scan line. Optical Resolution: 2.5 mils (linear codes). 1D Imager Depth of Field: 4.0 to 74 cm / 1.5 to 29.1 in (13 mil/EAN), depending on bar code density and type. WDT92...
- Page 133 Technical Features Safety & Regulatory The product meets necessary safety and regulatory Agency Approvals approvals for its intended use. Enviromental Complies to EU RoHS. Compliance VLD - Class 2 IEC/EN60825-1; Compliant with 21 CFR Laser Classifications 1040.10 except for deviations pursuant to laser notice No.
-
Page 134: Decode Distances
Technical Features Decode Distances WDT92 Imager 1D Linear CCD Resolution (mils)/ Far Typical Working Ranges Barcode Type 3 mils 6.30 in Code 39 16 cm 5 mils 11.81 in Code 39 30 cm 10 mils 19.69 in Code 128 50 cm 13 mils 25.20 in... - Page 135 Technical Features 13 mils 25.59 in EAN13 65 cm 15 mils 13.78 in Datamatrix 35 cm 20 mils 39.37 in Code 39 100 cm User’s Manual...
-
Page 136: Test Codes
Test Codes Test Codes High Density Codes - 0.25 mm (10 mils) Code 39 17162 Interleaved 2/5 0123456784 Code 128 test WDT92... - Page 137 Test Codes High Density Codes (continued) - 0.25 mm (10 mils) EAN 13 EAN 8 User’s Manual...
- Page 138 Test Codes Medium Density Codes - 0.38 mm (15 mils) Code 39 17162 Interleaved 2/5 0123456784 Code 128 test WDT92...
- Page 139 Test Codes Medium Density Codes (continued) - 0.38 mm (15 mils) 100% EAN 13 100% EAN 8 User’s Manual...
- Page 140 Test Codes Low Density Codes - 0.50 mm (20 mils) Code 39 17162 Interleaved 2/5 0123456784 Code 128 test WDT92...
- Page 141 Test Codes Low Density Codes (continued) - 0.50 mm (20 mils) 120% EAN 13 120% EAN 8 User’s Manual...
- Page 142 Test Codes 2D Codes Datamatrix ECC200 Example Inverse Datamatrix ECC200 Example WDT92...
- Page 143 Test Codes NOTES User’s Manual...
-
Page 144: Maintenance
Maintenance Maintenance Cleaning the Device Periodically clean the WDT92 device using a soft cloth slightly dampened with only water or Isopropyl Alcohol (70%). Do not use any other cleaning agents (e.g. different alcohol, abrasive or corrosive products, solvents) or abrasive pads to clean the device. - Page 145 Maintenance Do not use abrasive or aggressive cleaning agents or abrasive pads to clean electric contacts, scan windows or plastics. CAUTION Cleaning the Dock Contacts 1. Remove the power cable before cleaning the contacts. 2. Use a soft dry cloth as suggested above. If the product is very dirty, moisten the cloth in a non-aggressive cleaning solution or diluted isopropyl alcohol solution (20% maximum).
- Page 146 If the plastic parts of the equipment are very dirty, slightly dampen the cloth with only water. 5. Repeat steps 2, 3 and 4 using a clean dry cloth. 6. Allow the cleaning solution to fully evaporate before powering up the product. WDT92...
-
Page 147: Ergonomic Recommendations
Maintenance Ergonomic Recommendations In order to avoid or minimize the potential risk of ergonomic injury follow the recommendations below. Consult with your local Health & Safety Manager to ensure that you are adhering to your company’s safety CAUTION programs to prevent employee injury. •... -
Page 148: Safety And Regulatory Information
Use only the components and accessories supplied by the manufacturer for the specific WDT92 being used. • Do not attempt to disassemble the WDT92, as it does not contain parts that can be repaired by the user. Any tampering will invalidate the warranty. -
Page 149: Power Supply
UL Listed/CSA Certified Power Unit LPS/SELV which supplies power via the power connector of the cable. Any changes or modifications to equipment, not expressly approved by Wasp could void the user's authority to operate the equipment. User’s Manual... -
Page 150: Laser Safety
Safety and Regulatory Information Laser Safety The following information applies to Laser Aiming System, used on WDT92 variants with 2D imager. The laser light is visible to the human eye and is emitted from the window indicated in the figure below. - Page 151 Safety and Regulatory Information Scan Window Laser Warning Label Marks Label Printed Data Label User’s Manual...
- Page 152 EMISE: 630~680 nm 630~680 nm CONFORME A EN ENTSPR. EN 60825-1 CONFORME A EN CONFORME A 60825-1 (2007) E EN (2007) UND EN 60825-1 (2007) ET EN 60825-1 60825-1 (2014) 60825-1 (2014) EN 60825-1 (2014) (2007) Y EN 60825-1 (2014) WDT92...
- Page 153 Safety and Regulatory Information ENGLISH The following information is provided to comply with the rules imposed by international authorities and refers to the correct use of your device. STANDARD LASER SAFETY REGULATIONS This product conforms to the applicable requirements of both CDRH 21 CFR 1040 and EN 60825-1 at the date of manufacture.
- Page 154 Safety and Regulatory Information Use of optical systems with the scanner will increase eye hazard. Optical instruments include binoculars, microscopes, eye glasses and magnifying glasses. WARNING WDT92...
- Page 155 Safety and Regulatory Information ITALIANO Le seguenti informazioni vengono fornite dietro direttive delle autorità internazionali e si riferiscono all’uso corretto del terminale. NORMATIVE STANDARD PER LA SICUREZZA LASER Questo prodotto risulta conforme alle normative vigenti sulla sicurezza laser alla data di produzione: CDRH 21 CFR 1040 e EN 60825-1.
- Page 156 Safety and Regulatory Information L’uso di strumenti ottici assieme allo scanner può aumentare il pericolo di danno agli occhi. Tali strumenti ottici includono cannocchiali, microscopi, occhiali e lenti di ingrandimento. ATTENZIONE WDT92...
- Page 157 Safety and Regulatory Information DEUTSCH folgenden Informationen stimmen Sicherheitshinweisen überein, die von internationalen Behörden auferlegt wurden, und sie beziehen sich auf den korrekten Gebrauch vom Terminal. NORM FÜR DIE LASERSICHERHEIT Dies Produkt entspricht am Tag der Herstellung den gültigen EN 60825-1 und CDRH 21 CFR 1040 Normen für die Lasersicherheit.
- Page 158 Safety and Regulatory Information Die Verwendung von Optiksystemen mit diesem Scanner erhöht die Gefahr einer Augenbeschädigung. Zu optischen Instrumenten gehören unter anderem Ferngläser, Mikroskope, Brillen ACHTUNG Vergrößerungsgläser. WDT92...
- Page 159 Safety and Regulatory Information FRANÇAIS Les informations suivantes sont fournies selon les règles fixées par les autorités internationales et se réfèrent à une correcte utilisation du terminal. NORMES DE SECURITE LASER Ce produit est conforme aux normes de sécurité laser en vigueur à sa date de fabrication: CDRH 21 CFR 1040 s et EN 60825-1.
- Page 160 Safety and Regulatory Information L’utilisation d’instruments optiques avec le scanneur augmente le danger pour les yeux. Les instruments optiques comprennent les jumelles, les microscopes, les lunettes et les verres grossissants. ATTENTION WDT92...
- Page 161 Safety and Regulatory Information ESPAÑOL Las informaciones siguientes son presentadas en conformidad con las disposiciones de las autoridades internacionales y se refieren al uso correcto del terminal. NORMATIVAS ESTÁNDAR PARA LA SEGURIDAD LÁSER Este aparato resulta conforme a las normativas vigentes de seguridad láser a la fecha de producción: CDRH 21 CFR 1040 y EN 60825-1.
-
Page 162: Led Class
El uso de sistemas ópticos con el escáner aumentará el riesgo de daños oculares. Los instrumentos ópticos incluyen binoculares, microscopios, lentes y lupas. ATENCIÓN LED Class LED illuminators integrated in the 1D and 2D imager are classified as "EXEMPT RISK GROUP" according to IEC62471. User’s Manual... -
Page 163: Fcc/Ic Labeling
This device is restricted to indoor use when operated in the 5.15 to 5.25 GHz frequency range. Changes or modifications made to this equipment not expressly approved by Wasp may void the FCC authorization to operate this equipment. NOTE: This equipment has been tested and found to comply with the limits for a Class B digital device, pursuant to Part 15 of the FCC Rules. - Page 164 • Increase the separation between the equipment and receiver. • Connect the equipment into an outlet on a circuit different from that to which the receiver is connected. • Consult the dealer or an experienced radio/TV technician for help. WDT92...
-
Page 165: Ised Compliance
ISED Compliance NOTICE: This device complies with Industry Canada licence-exempt RSS standard(s). Operation is subject to the following two conditions: (1)this device may not cause harmful interference, and (2)this device must accept any interference received, including interference that may cause undesired operation. Le présent appareil est conforme aux CNR d'Industrie Canada applicables aux appareils radio exempts de licence. - Page 166 (ii) les utilisateurs de radars de haute puissance sont désignés utilisateurs principaux (c.-à-d., qu’ils ont la priorité) pour les bandes 5 250-5 350 MHz et 5 650-5 850 MHz et que ces radars pourraient causer du brouillage et/ou des dommages aux dispositifs LAN-EL. WDT92...
-
Page 167: Radiofrequency Radiation Exposure Information
Safety and Regulatory Information Radiofrequency Radiation Exposure Information This device was tested for handheld and body-worn conditions, according to international Standards covering human exposure to electromagnetic fields from radio devices. More information about the relevant Standards for SAR measurement methods and procedures may be found in the CE DoC included product user... -
Page 168: Radio Technologies And Frequency Bands
Safety and Regulatory Information Radio Technologies and Frequency Bands WDT92 incorporates the following radio technologies and supports the corresponding Frequencies and Radio-Frequency transmitted power, as specified below: Radio Technology Frequency Bands WLAN IEEE 802.11b/g/n • SISO 20MHz channels bandwidth (HT-20) 2.4GHz Frequency Bands:... -
Page 169: Reference Documentation
Reference Documentation Reference Documentation For further information regarding WDT92 refer to the SDK Help on-line. Support Through the Website WASP provides several services as well as technical support through its website. Please check our website at www.waspbarcode.com under Support &... - Page 170 Reference Documentation NOTES WDT92...
-
Page 171: Glossary
Glossary Access Point A device that provides transparent access between Ethernet wired networks and IEEE 802.11 interoperable radio-equipped mobile units. Hand-held mobile computers, PDAs or other devices equipped with radio cards, communicate with wired networks using Access Points (AP). The mobile unit (mobile computer) may roam among the APs in the same subnet while maintaining a continuous, seamless connection to the wired network. - Page 172 Character A pattern of bars and spaces which either directly represents data or indicates a control function, such as a number, letter, punctuation mark, or communications control contained in a message. WDT92...
- Page 173 Glossary Decode To recognize a barcode symbology (e.g., Codabar, Code 128, Code 3 of 9, UPC/EAN, etc.) and convert the content of the barcode scanned from a visual pattern into electronic data. Density (Barcode Density) The number of characters represented per unit of measurement (e.g., characters per inch).
- Page 174 2.4, 3.6 and 5 GHz frequency bands. They are created and maintained by the IEEE LAN/MAN Standards Committee. Local area network. A radio network that supports data communication within a local area, such as within a warehouse of building. WDT92...
- Page 175 Glossary Laser Light Amplification by Stimulated Emission of Radiation.The laser is an intense light source. Light from a laser is all the same frequency, unlike the output of an incandescent bulb. Laser light is typically coherent and has a high energy density. Light Emitting Diode (LED) A low power electronic light source commonly used as an indicator light.
- Page 176 Light source (laser or photoelectric cell) - illuminates a barcode. • Photodetector - registers the difference in reflected light (more light reflected from spaces). • Signal conditioning circuit - transforms optical detector output into a digitized bar pattern. Software Development Kit. WDT92...
- Page 177 Glossary Symbol A scannable unit that encodes data within the conventions of a certain symbology, usually including start/stop characters, quiet zones, data characters and check characters. Symbology The structural rules and conventions for representing data within a particular barcode type (e.g. UPC/EAN, Code 39, PDF417, etc.). Toggle key Pressing a toggle key activates the state.
- Page 178 - in which the connections are wireless. Typically, a wireless personal area network uses some technology that permits communication within about 10 meters - in other words, a very short range. WDT92...
- Page 179 Glossary NOTES User’s Manual...
- Page 180 ©2018 Wasp Barcode Technologies. All rights reserved. Logo of Wasp and Wasp "bug" are registered trademarks. Wasp Barcode Technologies S.r.l. 1400 10th Street Plano, TX 75074 Telephone: 866-547-9277 Fax: 214-547-4101 822002990 Rev. A December 2018...
Need help?
Do you have a question about the WDT92 and is the answer not in the manual?
Questions and answers