Table of Contents
Advertisement
Available languages
Available languages
Quick Links
Advertisement
Table of Contents

Subscribe to Our Youtube Channel
Related Manuals for Majestic RS 131


Summary of Contents for Majestic RS 131
- Page 1 RADIO SVEGLIA FM SINTONIA ELETTRONICA PLL DOPPIO ALLARME MOD. RS 131 Manuale d’istruzioni La New Majestic SpA dichiara che il prodotto è rispondente al D.M. 548 del 28.08.95 ed in particolare a quanto indicato nell’art. 2 comma 1...
-
Page 2: Funzioni E Comandi
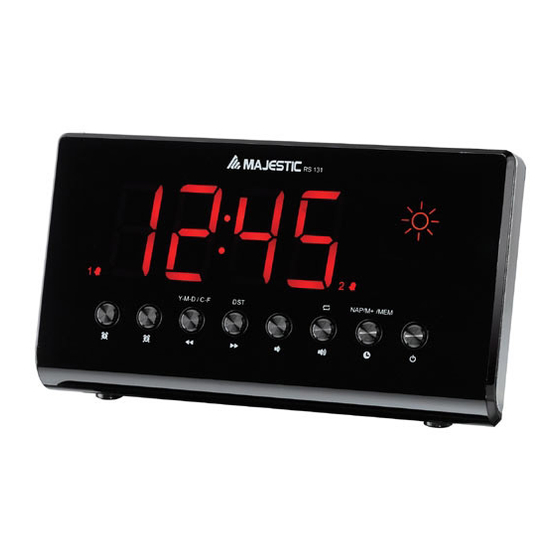
FUNZIONI E COMANDI 1. SNOOZE / SLEEP / DIMMER 2. DISPLAY 3. INDICATORE PM 4. INDICATORE SPEGNIMENTO AUTOMATICO DISPLAY 5. INDICATORE ALARM 1 6. IMPOSTAZIONE ALARM 1 ON / OFF 7. IMPOSTAZIONE ALARM 2 ON / OFF 8. << / SINTONIA - / ANNO/MESE/GIORNO / TEMPERATURA/ UMIDITA’... - Page 3 MODALITA’ DISPLAY LED Indicatore Ora Indicatore Anno Indicatore Mese Indicatore Giorno Indicatore Temperatura Indicatore Umidità...
-
Page 4: Impostazione Allarme
ALIMENTAZIONE Inserire il cavo alimentazione AC nella presa di corrente domestica AC. Questo apparechio è dotato un sistema di back up , che richiede l’utilizzo di una batteria 3V CR2032 piatta al litio (batteria non inclusa). Inserire la batteria nell’apposito scomparto , accertarsi che le polarità... - Page 5 impostazione allarme (6/7) per variare il ciclo modalità come segue : Normale → Ora ALARM 1 → Minuti ALARM 1 → Allarme settimanale ALARM 1 → sveglia con beep ALARM 1→ sveglia con radio ALARM 1 → sveglia con volume radio ALARM 1→Normale. Normale →...
-
Page 6: Funzione Snooze
FUNZIONE SNOOZE - Quando l’allarme suona, premere il tasto Snooze (1) per sospendere l’allarme e per attivare la funzione Snooze, il Beep e l’allarme Radio si arresteranno. Dopo 9 minuti l’allarme suonerà di nuovo. Premere ancora il tasto SNOOZE, l’allarme verrà... - Page 7 (10) per 3 secondi, l’indicatore display LED si spegnerà per cancellare la funzione. Funzione NAP (timer conto alla rovescia) A Radio spenta, premere il tasto MEMORY SET / MEMORY+ / NAP (12) per attivare la modalità NAP. La funzione NAP verrà mantenuta per 5 secondi, entro 5 secondi premere il tasto MEMORY.SET / MEMORY+ / NAP (12) per cambiare la durata da 90 min a 10 min.
- Page 8 Indicatore Mese Indicatore Giorno Contenuto con intervallo di 5 secondi Indicatore Temperatura Contenuto con intervallo di 5 secondi Indicatore Umidità Contenuto con intervallo di 5 secondi MODALITA’ RADIO Nota: Accertarsi che l’antenna FM sia completamente estesa al fine di ottenere una ricezione ottimale in FM. Premere il tasto Radio ON/OFF(13) per accendere l’apparecchio.
- Page 9 Per impostare / richiamare le stazioni radio 1) Premere il tasto Stand By (13) per accendere l’apparecchio. 2) Usare i tasti Tune + o Tune – per selezionare la stazione radio desiderata. 3) Tenere premuto il tasto memory / memory + (12) « P01 » lampeggerà...
- Page 10 Nota : per un uso ottimale della stazione barometrica, posizionare l’apparecchio in un luogo in cui possa circolare l’aria, per esempio vicino a una finestra aperta. Posizionare l’apparecchio in un luogo provvisto di aria condizionata potrebbe variarne l’accuratezza. Una volta che la stazione barometrica è stata attivata, richiede un periodo di tempo di circa 3 ore per stabilizzarsi.
-
Page 11: Specifiche Tecniche
SPECIFICHE TECNICHE Gamma di Frequenza : FM 87.5 – 108 MHz Batteria di Backup : 3V (1 x CR2032 batteria piatta al litio) non inclusa. Power supply : AC 230V 50Hz Gamma Temperatura Interna : 0 a + 50°C oppure 32 a 122 °F Gamma Umidità... - Page 14 PLL FM CLOCK RADIO DUAL ALARM MOD. RS 131 Instruction Manual La New Majestic SpA dichiara che il prodotto è rispondente al D.M. 548 del 28.08.95 ed in particolare a quanto indicato nell’art. 2 comma 1...
-
Page 15: Function And Controls
FUNCTION AND CONTROLS 1. SNOOZE / SLEEP / DIMMER 2. DISPLAY 3. PM INDICATOR 4. DISPLAY LIGHT AUTO OFF INDICATOR 5. ALARM 1 INDICATOR 6. ALARM 1 ON / OFF SET 7. ALARM 2 ON / OFF SET 8. << / TUNE - / YEAR/MONTH/DAY / C-F 9. -
Page 16: Led Display Mode
LED DISPLAY MODE TIME Indicator YEAR Indicator MONTH Indicator DAY Indicator TEMPERATURE Indicator HUMIDITY Indicator... -
Page 17: Power Connection
POWER CONNECTION Plug the AC power cord to a household outlet AC source. This unit is equipped with a battery back up system, it requires a 3V CR2032 flat lithium battery (not included). Insert the battery in the battery compartment, making certain that the positive and negative (+ and -) battery terminals are attached to the corresponding terminals on the plate in the battery compartment. -
Page 18: Snooze Function
Alarm → ALARM 1 wake beep → ALARM 1 wake radio → ALARM 1 wake radio volume →Normal. Normal → ALARM 2 Hour → ALARM 2 Min → ALARM 2 weekday Alarm → ALARM 2 wake beep → ALARM 2 wake radio → ALARM 2 wake radio volume →Normal. -
Page 19: Sleep Operation
- If you want to disable the SNOOZE function and stop alarm completely, press Standby button (13). If you don’t press any button, the alarm will ring during 30 minutes & stop automatically. - Icon of ALARM 1 and ALARM 2 will blink as long as Snooze function is still operating. - Page 20 DAYLIGHT SAVING TIME (DST) MODE For countries with daylight saving time (DST) (one hour of difference between summer time and winter time), this clock radio offers you DST option to adjust summer time. In standby mode press and hold for 2 seconds the >>/TUNE+/DST button (9).
-
Page 21: Radio Mode
TEMPERATURE Indicator Contents in 5-second intervals HUMIDITY Indicator Contents in 5-second intervals RADIO MODE Note: Ensure that the FM antenna is completely unrolled and extended to have the best FM reception. Press the Radio ON/OFF button (13) to turn the unit on. Use the Tune - (8) or Tune + (9) button to select the desired radio station. - Page 22 Repeat steps 2 through 5 to set more presets. The unit can preset 10 stations totally for FM. When “P01-P10” is blinking, press the Tune+ or Tune- button to select the preset number. When recalling preset stations, press memory / memory + button to select the preset number.
-
Page 23: Specifications
Weather station predicts possible weather, thus symbols could not agree with current weather. Forecast: SUNNY for night means cloudless sky. Humidity sensor specification: Operating temperature range : 10 ~ 50 °C Operating humidity range : 30 ~ 95% If temperature is below 10°C or higher than 50°C, The LED display will show - - % for humidity and not show the weather forecast. - Page 24 objects filled with liquids, such as vases, shall be placed on the apparatus. 6. Do not connect FM antenna to outside antenna. 7. The unit should not be exposed to direct sunlight, very high or low temperature, moisture, vibrations or placed in dusty environment.
Need help?
Do you have a question about the RS 131 and is the answer not in the manual?
Questions and answers