Table of Contents

Related Manuals for Majestic RS 135


Summary of Contents for Majestic RS 135
- Page 1 RADIO SVEGLIA DISPLAY LED Mod : RS 135 MANUALE D’ISTRUZIONI LEGGERE ATTENTAMENTE IL SEGUENTE MANUALE D’ISTRUZIONI PRIMA DELL’UTILIZZO DELL’APPARECCHIO E CONSERVARLO PER UN EVENTUALE UTILIZZO FUTURO.
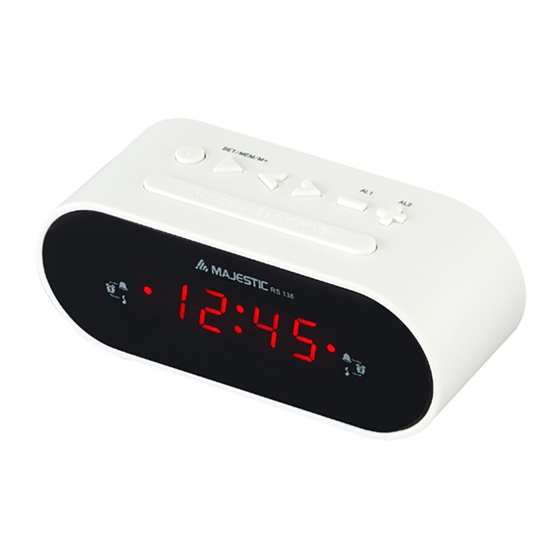
- Page 2 POSIZIONE DEI COMANDI FUNZIONI E COMANDI 1. TASTO ON – OFF / ALLARME OFF 2. CLK.ADJ./ MEMORY / M+ 3. << SINTONIA - / ORA 4. >> SINTONIA + / MIN 5. VOLUME - / ALLARME 1 IMPOSTAZIONE ON-OFF 6. VOLUME + / ALLARME 2 IMPOSTAZIONE ON-OFF 7.
- Page 3 ALIMENTAZIONE 1. Questo apparecchio funziona con alimentazione AC230V~ 50Hz. Inserire il cavo alimentazione AC nella presa di corrente domestica. 2. Il display mostrerà l’ora lampeggiante 0:00 fino a quando verrà impostata quella esatta. INSTALLAZIONE/SOSTITUZIONE BATTERIA DI BACK-UP Questo apparecchio è dotato di sistema a batteria di back-up, al fine di mantenere le impostazioni dell’ora e le preselezioni radio in caso si verificasse una mancanza di corrente.
-
Page 4: Impostazione Manuale Dell'ora
Non gettare le batterie nel fuoco, potrebbero perdere liquido ed esplodere. ATTENZIONE NON INGERIRE LA BATTERIA, RISCHIO DI USTIONI CHIMICHE Tenere le batterie lontano dalla portata dei bambini. Se il vano batterie non è chiuso correttamente, si raccomanda di non usare l’apparecchio e tenerlo lontano dalla portata dei bambini. -
Page 5: Impostazione Allarme
3. Premere il tasto << TUNE DOWN / HOUR per aumentare l’ora. 4. Premere il tasto >> TUNE UP / MIN per aumentare i minuti. 5. Premere il tasto VOLUME DOWN / ALARM 1 ON-OFF SET per salvare l’impostazione. 6. Per scegliere tra la modalità Buzzer e Radio, premere il tasto VOLUME DOWN / ALARM 1 ON-OFF SET fino a che l’opzione desiderata apparirà... -
Page 6: Funzione Snooze
FUNZIONE SNOOZE 1. Quando l’allarme (buzzer o radio) è innescato, premere il tasto SNOOZE/SLEEP/DIMMER. L’allarme ripartirà approssimativamente dopo 9 minuti. 2. Per cancellare la funzione SNOOZE, premere il tasto POWER ON – OFF / ALARM OFF. ASCOLTO DELLA RADIO SUGGERIMENTI PER OTTENERE UNA RICEZIONE OTTIMALE Per ottenere il massimo dalla ricezione FM, srotolare ed estendere completamente il cavo antenna esterna FM. - Page 7 OPERAZIONI TIMER SLEEP Il Timer Sleep consente la riproduzione musicale delle stazioni radio preselezionate per un certo lasso di tempo che va dai 90 minuti ai 10 minuti. Questa funzione è prevalentemente usata da coloro che preferiscono addormentarsi a suon di musica. 1.
-
Page 8: Specifiche Tecniche
SPECIFICHE TECNICHE Frequenza : FM 87.5 – 108 MHz Batteria di backup : 1 x 3V CR2032 batteria piatta al litio (non inclusa) Alimentazione : AC 230V ~ 50Hz, 5W ATTENZIONE 1. Nessuna sorgente di fiamma nuda, come la candela, deve essere posizionata sopra l’apparecchio. - Page 11 Gentile Cliente, La ringraziamo per il Suo acquisto e Le ricordiamo che il prodotto risponde alle normative vigenti in fatto di costruzione e di sicurezza. Nel caso si dovessero riscontrare anomalie o difetti del prodotto, la New Majestic S.p.A. offre una Garanzia convenzionale soggetta alle condizioni qui riportate (precisando che la Garanzia convenzionale lascia impregiudicati i diritti del consumatore di cui al D.
- Page 12 LED ALARM CLOCK RADIO Mod : RS 135 USER MANUAL La New Majestic SpA dichiara che il prodotto è rispondente al D.M. 548 del 28.08.95 ed in particolare a quanto indicato nell’art. 2 comma 1 BEFORE USING THE PRODUCT READ THE INSTRUCTION MANUAL...
- Page 13 LOCATION OF CONTROLS FUNCTION AND CONTROLS 1. POWER ON – OFF / ALARM OFF 2. CLK.ADJ./ MEMORY / M+ 3. << TUNE DOWN / HOUR 4. >> TUNE UP / MIN 5. VOLUME DOWN / ALARM 1 ON-OFF SET 6. VOLUME UP / ALARM 2 ON-OFF SET 7.
-
Page 14: Power Connection
POWER CONNECTION 1. This product operates on AC230V~ 50Hz power supply. Plug the AC power cord into a household outlet AC source. 2. Clock display will flash 0:00 until set to correct time. INSTALLING/REPLACING THE BACK-UP BATTERY This unit is equipped with a battery back-up system, requiring one DC3V CR2032 lithium battery (not included) to maintain the time settings and radio presets during AC power outage. -
Page 15: Power On/Standby
WARNING DO NOT INGEST BATTERY, CHEMICAL BURN HAZARD This product contains a coin/button cell battery. If the coin/button cell battery is swallowed, it can cause severe internal burns in just 2 hours and can lead to death. Keep new and used batteries away from children. If the battery compartment does not close securely, stop using the product and keep it away from children. - Page 16 button to set ALARM 1. The alarm time will flash on the display. 3. Press the << TUNE DOWN / HOUR button to increase the HOUR. 4. Press the >> TUNE UP / MIN button to increase the MINUTES. 5. Press the VOLUME DOWN / ALARM 1 ON-OFF SET button to save the set up 6.
-
Page 17: Snooze Function
7. Once alarm is set, press the VOLUME UP / ALARM 2 ON-OFF SET button to stop the alarm. SNOOZE FUNCTION 1. When the alarm (buzzer or radio) is triggered, press the SNOOZE/SLEEP/DIMMER button. The alarm will turn on approximately after 9 minutes. 2. -
Page 18: Sleep Timer Operation
SLEEP TIMER OPERATION The sleep timer allows you to play music for a preset amount of time ranging from 90 minutes to 10 minutes. It is commonly used by people who prefer to go to sleep to music. 1. In radio mode, Press the SNOOZE/SLEEP/DIMMER button. The display will show 90 minutes, your clock radio will turn off in 90 minutes. - Page 19 WARNING 1. No naked flame sources, such as lighted candles, should be placed on the apparatus. 2. Do not place the product in closed bookcases or racks without proper ventilation. 3. The mains plug is used as the disconnect device, the disconnect device shall remain readily operable.
Need help?
Do you have a question about the RS 135 and is the answer not in the manual?
Questions and answers