
Related Manuals for GILMAN gemini GVC12


Summary of Contents for GILMAN gemini GVC12
- Page 1 Car & HOMEUSE HaNDHELD VaCUUM CLEaNEr WITH DUST MITES rEMOVEr 汽車及家用手提式 吸塵機配滾動拍打 除塵蟎電動刷 MODEL NO 型號: GVC12 A GILMAN GROUP BRAND...
-
Page 2: Safety Instructions
Safety inStructionS Read all safety warnings and all instructions. Failure to follow the warnings and instructions may result in electric shock, fire and/or serious injury. • This appliance can be used by children aged from 8 years and above and persons with reduced physical, sensory or mental capabilities or lack of experience and knowledge if they have been given supervision or instruction concerning use of the appliance in a safe way and understand the hazards involved. - Page 3 • Do not clean any parts in a dishwasher. • Do not use a wet cloth of thinner, benzene or other volatile substance to clean the unit. • Do not immerse the motor housing, cable or charger in water or any other liquid. •...
-
Page 4: Product Overview
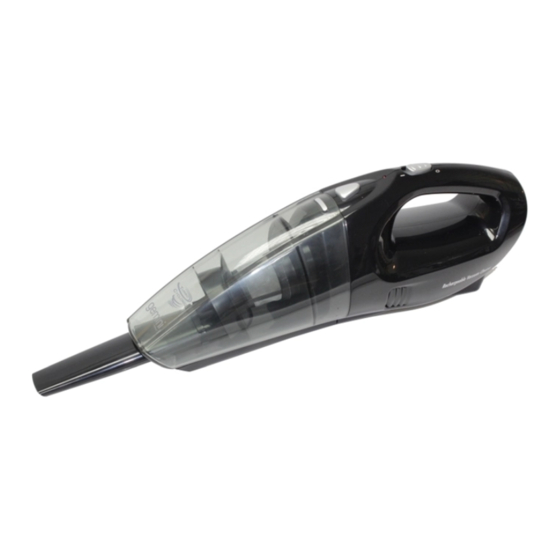
ProDuct oVerVieW Back of handheld 15 16 1. Detachable dust container 9. Carpet brush 2. Cyclone filter 10. Dust mites remover brush 3. Filter 11. Adaptor 4. Dust container 12. Car plug connector A (to cigarette lighter socket) release button 13. Car plug 5. Charging indicator 14. Car plug connector B (to handheld) 6. ON/OFF switch 15. Socket of adaptor 7. Handle 16. Socket of car plug 8. Crevice tool... - Page 5 inStruction for uSe Before using your vacuum cleaner for the first time, allow the battery to charge for approx.14-16 hours. Recommended to use adaptor for charging. cHarGinG Make sure the vacuum cleaner have switch off. The adaptor should be connected to a 200-240V~50/60Hz power supply.
-
Page 6: Using The Appliance
uSinG tHe aPPLiance Leave the adaptor in the wall socket and always connect the vacuum cleaner to the power supply after use even if the battery is still fully charged. The vacuum cleaner can be used for vacuuming dust and dirt. It is ideal for removing dirt and dust from upholstered and un-upholstered furniture with accessories provided, it can also be used for giving woollens, blankets, mattresses, clothing and carpets a quick clean. - Page 7 car PLuG With the car plug you can connect the vacuum cleaner to the cigarette lighter socket in your car and use it as long as necessary without having to recharge it. DIRECT USE Insert the car plug connector B in the car plug socket of the handheld and insert the car plug connector A into the cigarette lighter socket of your car.
- Page 8 Dust mites remover brush Carry out the maintenance if any waste threads or hair gets tangled in the brush. • regular Maintenance Slowly rotate the dust mites remover brush manually and remove any foreign objects tangled around the brush. Take out the wastes Maintenance when the rotating brush cannot be manually rotated.
-
Page 9: Care And Maintenance
care anD Maintenance The performance of the cleaner is depend on the condition of the dust container and the filter. The dust container should be emptied and cleaned regularly. Cleaning the dust filter and dust container: • Check that the vacuum cleaner is switched off. •... - Page 10 重要事項 閱讀所有的警告提示和指示。如未確實遵循警告提示和指示,可能導致電擊、 火災或其他嚴重傷害。 - 本產品原本並不是設計提供給兒童以及身體、感官或心智能力有缺陷或是缺 乏相關經驗及知識的人士使用。八歲以上兒童以及身體、感官或心智能力有缺 陷,或是缺乏相關經驗及知識的人士,只要在他人照看下或接受過如何安全處 置此吸塵器的指導,並充份瞭解相關危險,即可使用該吸塵器。否則可能會造 成操作上的錯誤以及受傷危險。 - 第一次使用本產品前,請徹底閱讀本產品說明書。讀後,請妥善保存說明書。 - 本產品不可給於兒童玩弄。 - 本產品不是玩具 - 如本產品功能良好及運作正常,請定期檢查及保養本產品。 - 本產品只限於室內及家居使用,請遵從說明書上的使用方法使用。生產商/供 貨商概不負責因任何不正當或錯誤使用而造成的任何損失。 - 請按照產品上及充電器上的電源標籤連接電源,否則會造成損壞。 - 必須看管好處於運作狀態的吸塵機。 - 不可在低於0℃或高於40℃的溫度情況下進行充電。 - 不可吸入任何可能產生泡沫的洗滌劑或水溶液。 - 產品運作時,不可拆開本產品。 - 確保塵網組件安裝好,才可使用本產品,否則可能造成損壞。 - 吸入口與通風口不得遮蓋或堵塞。不可阻塞所有開口,開口被阻塞時不可使 用,需移除阻塞物才能使用。 - 不可讓本產品吸入任何正在燃燒/燃點的物品,如燃點的香煙或煙灰。不可 吸入任何爆炸性物質、易燃性物品、可燃性液體、高溫物品、毒性物質、有機 溶劑、腐蝕性或強酸性物質。 - 不可吸入如玻璃碎片、釘子、石頭、針頭或刀片等邊緣銳利的物品。以免過濾 器受損。...
- Page 11 - 如沒有正確安裝塵網組件時,不可使用本產品。 - 不可使用本產品吸入任何水分或液體。 - 不可使用本產品吸入易燃物體,不可吸入燃點的香煙或煙灰,直至完全冷卻。 - 在清理或組裝塵網組件前,必須將本產品的充電器移除。清潔或儲存前必須待 本產品完全冷卻。 - 當本產品運作時,不要把本機靠近眼睛、耳朵或口。 - 使用前,必須確保集塵箱安裝妥當。...
- Page 12 配件表 手提吸塵機背部 15 16 1. 集塵箱 9. 地毯塵刷 2. 前塵網 10. 滾動拍打除塵蟎電動刷 3. 塵網 11. 充電器 4. 集塵箱開關按鈕 12. 汽車線插連接頭A (連接汽車煙插) 5. 充電指示燈 13. 汽車線插 6. 開關制 14. 汽車線插連接頭B (連接吸塵機) 7. 手柄 15. 充電器連接口 8. 縫隙吸咀 16. 汽車線插連接口...
- Page 13 使用前 第一次使用前,請把吸塵機充電約14- 16 小時至滿電狀態。 建議使用充電器充電。 充電器 確保吸塵機已關上。 充電器應該連接 200–240V ~ 50/60Hz 電源。把充電器的插頭插入吸充電器 連接口,之後把充電器插上電源。充電指示燈會亮起,這表示吸塵機正在充電 中。直至完成充電,充電指示燈仍會一直亮著。當用完清潔後待下次使用時, 請將本產品充電,以確保下次使用時的最佳清潔效果。 注意: 充電時,請確保環境溫度在 0° C至 40° C之間。充電時充電器表面會產生熱力, 這是正常情況。 充電時的注意事項 如連續使用本產品一段長時間後,電池會比較熱,這時不要立即充電,待大約 30分鐘後才可充電。 本產品充電時表面可能會比較熱,這是正常情況。充電時,嚴禁把出風口、吸 風口或本產品覆蓋下充電。...
- Page 14 使用吸塵機 每次使用後都應把本產品插上充電器充電,即使本產品倘餘電量。 本產品可以吸取塵埃和小垃圾,也適合清潔家具、毛料、毛毯、床墊、衣服和 地毯等。 使用前請拔掉充電器, 開啟:將On/Off (I/0)開關往前推至“I”位置; 關閉:放開On/Off (I/0)開關。 配件 本產品附有以下配件工具: 地毯塵刷-用於清潔細微表面。 縫隙吸咀-用於清潔難到地方。 滾動拍打除塵蟎電動刷-用於清潔梳化、窗廉布及床單。 地毯塵刷 縫隙吸咀 滾動拍打除塵蟎 電動刷 釋放按鈕 將滾動拍打除塵蟎電動刷 按下釋放按鈕並將 插入手提機的集塵箱吸咀 電動塵刷移除 安裝方法 拆缷方法...
- Page 15 汽車線插 汽車線插可連接吸塵機和汽車煙插,可使吸塵機以汽車電池作為電源使用。 使用方法 使用前,把汽車線插連接頭 B接上吸塵機,汽車線插連接頭 A 插入汽車的煙插。 使用後,把汽車插由煙插拔出,吸塵機一端需先按下釋放鈕後把插頭拔出。拔 出時,請不要只拉汽車線,以避免損壞本產品。 連接汽車線插 拔出汽車線插 汽車煙插 釋放鈕 使用前 使用後...
- Page 16 滾動拍打除塵蟎電動刷 如果頭髮和毛線糾纏於電動刷內,請用下列方法清理電動刷。 一般清理方法 用手把旋轉毛刷慢慢轉動,把頭髮和線取出 如旋轉毛刷不能自行轉動 1.按下電動刷底部的釋放按鈕, 2. 把毛刷門位置一邊的旋轉毛刷提 及移除毛刷門。 高,並把旋轉毛刷上的轉動帶拉開。 3.把旋轉毛刷取出,用手把頭髮 4.清理後,把旋轉毛刷裝回電動刷 等雜物清理。如垃圾糾纏難以清 機體內,並把轉動帶套回,然後 理,可使用小刀或美工刀,沿毛 裝上毛刷門及扣實原位。 刷軸上的坑糟把雜物清理。...
- Page 17 清潔集塵箱和塵網 - 吸塵機的操作表現是根據集塵箱和塵網的清潔程度而定。集塵箱需經常保持清 潔及清理內��塵埃。 - 清潔前,請確保吸塵機已關上。 - 吸塵機機頭向下。 - 按下集塵箱開關按鈕,把集塵箱和吸塵機分離。 - 把集塵箱內的塵埃和垃圾清理,如果過於污穢,可溫柔地用清水清洗塵網。 - 把塵網放回集塵箱,再把它們放回機身,使用吸塵機前必須確保塵網已安裝。 - 確保塵網和集塵箱乾透才可以放回機身。 注意:所有本產品的零件及配件都不能在洗衣機清洗。 產品規格 產品型號 : GVC12 工作電壓 : 12V DC 電池 : 12V 充電電池 充電器資料 : 200-240V~ 50/60Hz 18V, 200mA DC 充電時間 : 14 - 16 小時 工作溫度...
- Page 20 太平家庭電器...
Need help?
Do you have a question about the gemini GVC12 and is the answer not in the manual?
Questions and answers