Advertisement
Quick Links
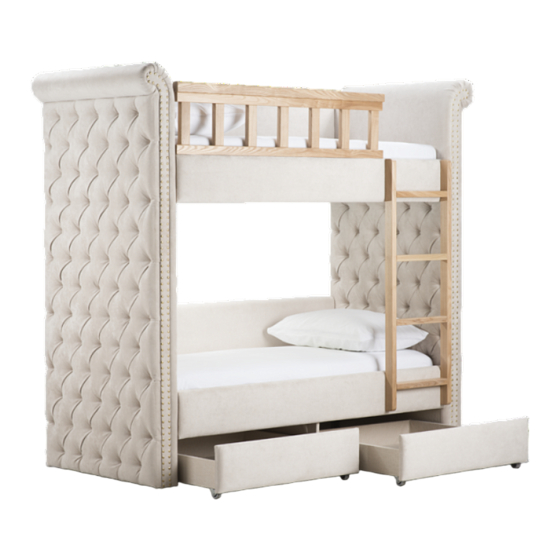
All Restoration Hardware bunk beds are designed to meet the highest safety
standards and comply with all U.S. and Canadian Bunk Bed regulations.
Assembly Instructions Bu
n
Model No: RH58KBK
Restoration Hardware Baby & Child
11640 Harre remove ektra 1 Street Suite B
Mira Loma, CA 91752
www.rhbabyandchild.com
Distributed in Canada by:
Restoration Hardware Canada, Inc.
1500-1005 West Georgia Street,
Vancouver, British Columbia V6E 4N7
!
WARNING: Read all instructions before assembling
this product. KEEP INSTRUCTIONS FOR FUTURE USE.
CUSTOMER SERVICE
If you are missing parts or have any questions about this product, contact us first. You
can also order parts writing to the address above. Include the product model number,
color, and a brief description of the part. Call 1-800-762-1751
CARE AND CLEA
NINGCAGCARE AND CLEANING
DO NOT use abrasive chemicals for cleaning. Dust often using a clean, soft dry cloth add
period & Dab spills quickly with a soft cloth. Vacuum to remove dust.
If the Bunk Bed is to be stored, store in a cool dry place andcarefully package all original
hardware to protect from loss.
Page 1 of 12
Advertisement

Summary of Contents for baby&child Chesterfield RH58KBK
- Page 1 All Restoration Hardware bunk beds are designed to meet the highest safety standards and comply with all U.S. and Canadian Bunk Bed regulations. Assembly Instructions Bu Model No: RH58KBK Restoration Hardware Baby & Child 11640 Harre remove ektra 1 Street Suite B Mira Loma, CA 91752 www.rhbabyandchild.com Distributed in Canada by:...
- Page 2 IMPORTANT SAFETY INFORMATION FOR BUNK BED Follow the information on the WARNINGS appearing on the upper bunk end structure and on the carton. Do not remove warning label from bed Always use the specified size mattress, to help prevent the likelihood of entrapment or falls Surface of mattress must be at least 5 inches below the upper edge of guardrails on top bunk Do not allow children under 6 years of age to use upper bunk.
- Page 3 PARTS INCLUDE 4 pcs Page 3 of 12...
-
Page 4: Hardware List
HARDWARE LIST HARDWARE LIST TOOLS NEEDED: Screwdriver Phillips (Not included) ASSEMBLY INSTRUCTION Note: -Bed must be assembled by at least two people. -Please read instructions carefully before assembling bed. -Use the above parts and fittings list to identify each component. -Keep all packing materials until assembly is complete to avoid loss of smaller parts. - Page 5 Process: Step 1: Insert the Allen Head Bolt (N) into the holes on the Left Bunk End (1) and Right Bunk End (2) Standard the Left Bunk End (1) and Right Bunk End (2) upright and attached Bottom Side Rail (3). Page 5 of 12...
- Page 6 Step 2: Attach Top Side Rail (4) to Left Bunk End (1) and Right Bunk End (2). Insert the Threaded Rods (A) into the holes on the end of Top Side Rail (4), and insert Curved Washers (B), Spring Washers (C), and Nuts (D) onto the Threaded Rods (A) to attach theLeft Bunk end (1) and Right Bunk End (2).
- Page 7 Step 3: Attach Back Guard Rail (5) to Left Bunk End (1) and Right Bunk End (2), by using the Allen Key (I) to tighten Allen Head Bolts (J) and Big Flat Washers (K); Step 4: Attach Front Guard Rail (6) with Allen Head Bolts (J) and Big Flat Washers (K). For Bunks with Ladder on Left side, attach Front Guard Rail (6) to the Right Bunk End (2), so ladder sits on Left.
- Page 8 Step 6: Attached the Storage (10) to the Left Bunk End (1) and Right Bunk End (2) by using Allen Key (I) to tighten Allen Headbolts(0). Page 8 of 12...
- Page 9 Step 7: Lay the Slat Roll (9) in between the Top Side Rail(4) &Bottom Side Rail(3), then tighten with Big Screw (F). -The webbing on the slats should be on the bottom side. -Numbers on the slat roll show the locations to tighten the Big Screws Page 9 of 12...
- Page 10 Step 8: Lay the Twin Panels (8) on top of the Slat Roll (9), and tighten with Medium Screws (G) - Numbers on the panel show the locations to tighten the Medium Screws. Page 10of 12...
- Page 11 Step9: Attach Ladder (7) to Front Side Rail (4) and tighten with Small S crews (L) and Small Flat Washers (M). Page 11 of 12...
- Page 12 Step1: Install Bedding: Step1 : BEDDING SPECIFICATION: The following size mattress and Foundation are specified for use with this Bunk bed; MATTRESS:53-1/2”W×74” to 75”L×Maximum 7”H PLATFORM PANEL:CONSISTING OF 4 PANELS(74.8”W×26.6”L×0.7”H) Note: MATTRESS AND PLATFORM PANEL MUST NOT EXCEED 9” TOTAL THICKNESS Be sure to adhere to these BEDDING SPECIFICATIONS in order to avoid the possibility of failing or entrapment.


Need help?
Do you have a question about the Chesterfield RH58KBK and is the answer not in the manual?
Questions and answers