Advertisement
Advertisement
Table of Contents

Subscribe to Our Youtube Channel
Related Manuals for Western Shelter Systems WS-D FIELD SHOWER


Summary of Contents for Western Shelter Systems WS-D FIELD SHOWER
- Page 1 ASSEMBLY INSTRUCTIONS...
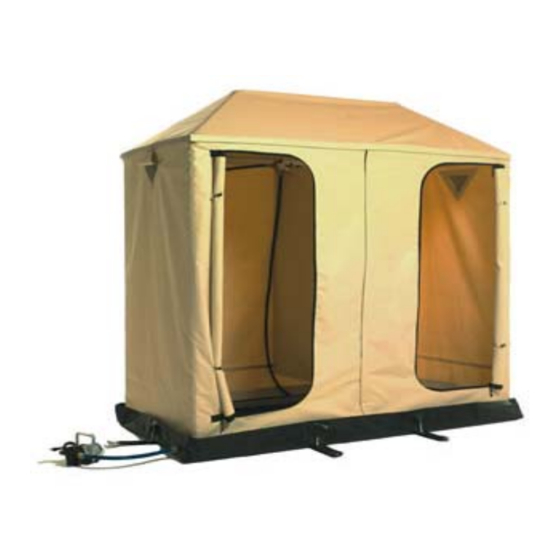
- Page 2 ASSEMBLY INSTRUCTIONS MODEL WS-D FIELD SHOWER Unpack the field bag and inventory the following components: 4 ea. Leg assemblies 1 ea. Roof assembly 2 ea. Short eave bars with Velcro 2 ea. Long eave bars with Velcro 2 ea. Short base bars 2 ea.
- Page 3 Lay two leg assemblies on the ground about 8 feet apart. Connect one long base bar to the corner blocks at the base of the leg assemblies. Connect the Eave (Velcro) bar to the top of the leg assembly. side of the corner Connect two of the short Eave and Leg bars to the other block on the leg assembly.
- Page 4 Stand the frame in the up position. Install the roof assembly by inserting the angle corners in the pockets at the top of the leg assemblies. At this point you can also install the (optional) clothes hook assembly. Slide it over one of the long eave bars.
- Page 5 Begin attaching the wall panel to the shower frame, starting at the center of the long eave bar opposite the shower manifold and stretching tight around the perimeter of the frame until the end of the wall panel meets and attaches to its other end.
- Page 6 Attach the pump suction hose to the ¾” GHT fitting on the outside of the basin opposite the suction strainer hose. The pump will evacuate the water from the containment and will not be damaged if run dry. Disassembling is a reverse procedure of the assembly process. A brief overview of this process is as follows.
Need help?
Do you have a question about the WS-D FIELD SHOWER and is the answer not in the manual?
Questions and answers