Table of Contents
Advertisement
Quick Links
Advertisement
Table of Contents

Related Manuals for JAMAR Technologies TRAX I


Summary of Contents for JAMAR Technologies TRAX I
- Page 2 TRAX I User’s Manual If you have any questions about the use of the TRAX I, please call the following number: 215-491-4899 Monday - Friday 8:00 AM to 5:00 PM Eastern time You may also contact us by fax at:...
-
Page 3: Quick Setup Guide For The Trax I
9. After selecting your type of study, you will be prompted to select a tube layout. Refer to the descriptions on the TRAX I or to Chapter 4 for the appropri- ate selection. TAB to your selection and press the DO key to select it. -
Page 4: Table Of Contents
TRAX I User’s Manual Table of Contents Technical Support ..............ii Quick Setup Guide for the TRAX I ..............iii Introduction to the TRAX I ............... 1-1 What is the TRAX I? ............... 1-2 How is the TRAX I Powered? ............1-3 Power On, DO and TAB Functions ........... -
Page 5: Introduction To The Trax I
Chapter 1 — Introduction to the TRAX I Chapter 1 Introduction to the TRAX I... -
Page 6: What Is The Trax I
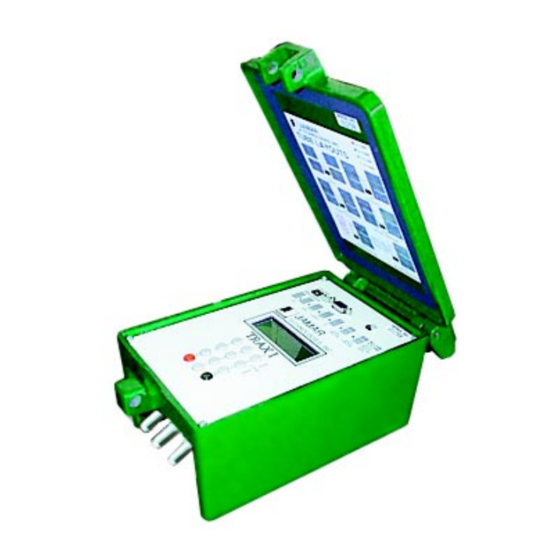
The TRAX I can store up to 32 different studies. It stores the type of study done, the date and time, a site code and the data for the study. At any convenient time, you can transfer the data to your computer or a data mod- ule through the RS-232 serial port and process the data. -
Page 7: How Is The Trax I Powered
The TRAX I displays the battery voltage when it is first turned on. This allows you to determine if there is enough battery power to complete a study. - Page 8 TRAX I User’s Manual This page was intentionally left blank.
-
Page 9: Operation Of The Trax I
Chapter 2 — Operation of the TRAX I Chapter 2 Operation of the TRAX I... -
Page 10: Start-Up Screens
TRAX I, the amount of memory the counter contains, the amount of memory remaining for new studies, the number of counts stored in memory, the status of the battery and the time and date that is set in your TRAX I. Tube spacing: 8.0 ft... -
Page 11: Main Menu
***** MAIN MENU ****** Press DO to Count. TAB changes option The Main Menu is the starting point for all of the options in the TRAX I. The options on this screen are: COUNT Program a new count. When Count is selected you can choose from BASIC, VOLUME ONLY, PER VEH(icle) or BINNED. -
Page 12: Utilities Menu
COM port on the TRAX I. The module has a memory capacity of four MB, and can hold multiple files from several different counters. -
Page 13: Defaults
Chapter 2 — Operation of the TRAX I fore the clearing process is finished will result in a file error in the counter. DEFAULTS INT SPACE DATE UNITS NOTE: The nonvolatile DT DTX DBV VEH EXIT memory in the TRAX I will re-... -
Page 14: Time/Date
Finally, TAB to year and enter the year. When completed, press the DO button. NOTE: The real time clock in the TRAX I uses a 24-hour military format; i.e. 5:00 P.M. is 17:00. -
Page 15: Tests
To test the DISPLAY, press DO after the various screens that are displayed. KEYS Press any of the keys and the TRAX I will display the key you pressed. Press DO to exit. SER. PORT Plug a test connector into your serial port. The connecter must short the 2 &... -
Page 16: Count Menu
TRAX I User’s Manual Count Menu BASIC VOLUME ONLY PER VEH BINNED EXIT When you select COUNT from the Basic Data Main Menu, the screen shown above is displayed. The options on Press DO to accept this sub-menu are: Basic The most complex of the studies, Basic (Raw) data collection involves time stamping every axle hit. -
Page 17: Tube Layout Selection
Chapter 2 — Operation of the TRAX I Use this screen to select the types of data you want to collect. The default setting is for Class, Speed and Gap. To change this setting, press the TAB key until Change CONT CLASS SPEED GAP is flashing and press DO. -
Page 18: Site Code
12 characters using the numbered keys on the TRAX I. If you do not wish to use a Site Code, TAB until NONE is flashing and press DO. NOTE: Pressing DO while EXIT is flashing will exit you out of the count setup and back to the Main Menu. -
Page 19: Count Start-Up Menu
Chapter 2 — Operation of the TRAX I Count START STAT SET TIMES TEST EXIT Start-up Menu Press DO to select The Count Start-Up menu allows you to immediately begin a count, check the status of the setup, program start and stop times for the count, or set the TRAX I into test mode. -
Page 20: Test
However, this data is not being recorded in the memory of the TRAX I. If you TAB through the status screens, you will see in one of the screens the word “Wait” in the upper right hand corner. This is telling you that the TRAX I is waiting until it reaches the start time to begin storing data. -
Page 21: Start
The third line tells you what the tube spacing is set for in the TRAX I (SP: 8.0 ft.). The fourth line tells you what the dead time (or D-bounce) is set for (DT:25ms). The top line of this screen... -
Page 22: Volume Only Status Screens
(A and B). As the tires from an axle strike the tubes, an asterisk is recorded in the appropriate channel. The bot- tom line tells you what number count this study is in the TRAX I (CNT:02), the percentage of memory available (MEM:99%) and the battery voltage (6.4v). -
Page 23: Per Veh Status Screens
Chapter 2 — Operation of the TRAX I The top line of this screen TD 07:19:50 02/13/98 gives the date and time as NO START/STOP TIMES they are set in the TRAX I. The next two lines are used SITE ID:... -
Page 24: Binned Status Screens
The third line tells you the distance be- tween vehicles that has been programmed into the TRAX I (DBV: 36.0) and the spacing of the tubes that has been programmed (8.0 ft). The fourth line tells you the dead time, or D-Bounce, that has been programmed (DT: 25ms). - Page 25 The third line tells you the distance between vehicles that has been programmed into the TRAX I (DBV: 36.0) and the spacing of the tubes that has been programmed (8.0 ft). The fourth line tells you the dead time, or D-Bounce, that is programmed (DT: 25ms) and the interval length that has been pro- grammed (Intv: 15min).
-
Page 26: Ending A Count
Ending a Count To end a count, turn the TRAX I off. The count will be stored in the TRAX I’s internal memory. Additional studies can then be conducted with the unit. The TRAX I can hold up to 32 different studies in its memory. -
Page 27: Road Tube Installation
Chapter 3 — Road Tube Installation Chapter 3 Road Tube Installation... - Page 28 (A & C) and 50 feet for the long tubes (B & D). The short tubes will be installed over only one lane (12 feet), leaving 26 feet of tube back to the TRAX I. The long tubes will be...
- Page 29 (24 feet), but since they are 50 feet long, you will still have 26 feet back to the TRAX I. For round tube, the lengths would be 48 feet for the short tubes and 60 feet for the long tubes.
- Page 30 TRAX I User’s Manual Round Tube Installation Clamp, Clamp, End Plate, End Plate, Chinese Chinese Finger or Finger or Mastic Figure 8 Figure 8 TRAX MASTIC: 6” Lengths are TUBE: 60 ft. lengths are recommended. satisfactory Coil any excess tube near the counter.
- Page 31 Chapter 3 — Road Tube Installation Webbing can be used to secure the tube at each end of the road- way. You may tie a knot at the far end of the tube instead of using an end plug or PK nail. Since the mini tube is light and low profile, you may use duct tape or two-inch mastic to secure the tube to the roadway.
- Page 32 TRAX I User’s Manual This page was intentionally left blank.
-
Page 33: Road Tube Layouts
Chapter 4 — Road Tube Layouts Chapter 4 Road Tube Layouts... - Page 34 • To collect class or speed data, a minimum of eight feet of tube spac- ing is required to achieve accurate results. • For counts done in the volume only mode, the TRAX I will either do a straight axle count or use the divide-by-two technique, in which ev- ery two axle hits will increment the TRAX I by one.
- Page 35 L1 ó Two Channels ó A, B ó Basic, Volume In this layout, channel “A” and channel “B” record independently. When in Volume mode the TRAX I can do either a straight axle count or use the divide-by-two technique. EXAMPLE: The TRAX I has been programmed to use the divide-by-two technique.
- Page 36 At the end of each interval the A channel is subtracted from the B channel and then each channel’s total is stored in memory. When in Volume mode the TRAX I can do either a straight axle count or use the divide-by-two technique.
- Page 37 Channel A and channel B record independent of each other. When one tube is hit, the next hit is ignored. When in Volume mode the TRAX I can do either a straight axle count or use the divide-by-two technique.
- Page 38 In this layout, one tube is extended across the lanes to be counted. When in Volume mode the TRAX I can do either a straight axle count or use the divide-by-two technique. This layout can be used with single direction or bidirectional traffic;...
- Page 39 The tubes should be spaced eight feet apart and be of equal length. 36 ft. Round 26 ft. Mini 24 ft. TRAX I 8 ft. L7 ó Four Lanes ó A, B, C, D ó Basic, Volume This layout is the same as the L1 layout, but with four tubes over four separate lanes rather than two tubes over two lanes.
- Page 40 TRAX I User’s Manual L8 ó Four Lanes with Lane Separation A, B minus A, C, D minus C ó Basic, Volume This layout is the same as the L2 layout, but with four tubes over four lanes rather than two tubes over two lanes. Refer to the L2 description for more information.
- Page 41 C tube should be spaced six inches from the D tube. Remem- ber, vehicles must always strike the short tube first. 36 ft. Round 26 ft. Mini 24 ft. 6 inch spacing from A to B and from C to D TRAX I 8 ft. 12 ft.
- Page 42 TRAX I User’s Manual L12 ó Two Directions With Lane Separation A to C, D to B ó Basic, Per Veh, Binned (Class, Speed, Gap) This layout is the same as the L11 layout, but for bidirectional traffic. Re- fer to the L11 layout for further information.
-
Page 43: Downloading The Trax I
Chapter 5 — Downloading the TRAX I Chapter 5 Downloading the TRAX I... - Page 44 If you have to unplug a device from the serial port to plug your TRAX I in, or if you are using a switch box, be sure that the device does not have a driver running in memory.
- Page 45 4096 bytes of data. Once the data has been transferred to the computer, you may turn the TRAX I off. Do not clear the data out of the unit until you are certain that it has been downloaded successfully to...
- Page 46 TRAX I User’s Manual This page was intentionally left blank.
-
Page 47: Battery Care
Chapter 6— Battery Care Chapter 6 Battery Care... - Page 48 3. The battery will discharge faster than normal during storage under no load. With this in mind, leave your battery in the TRAX I until the voltage dis- charges to 6.0 or 5.9 volts under normal use, then recharge the battery to its highest potential (normally from 6.4 volts and up).
- Page 49 Chapter 6— Battery Care sonable charge time. Charge time will vary with the level of the battery voltage. Usually, a battery of 5.9 volts can be charged to its highest potential in 12 hours or less. After a battery has been charged, allow it to sit for at least 8 hours and check the voltage again to determine if the battery maintained its charge.
- Page 50 TRAX I User’s Manual This page was intentionally left blank.
-
Page 51: Low Speed Counting
Chapter 7— Low Speed Counting Chapter 7 Low Speed Counting... - Page 52 TRAX I User’s Manual Low Speed Counting (Below 10 mph) The TRAX I is capable of recording vehicle data as low as idle speeds and above with a high degree of accuracy. Tube length, tube placement, and the air switch D-bounce (DT) setting are important factors in achieving excel- lent results from this type of application.
-
Page 53: Troubleshooting
Chapter 8— Troubleshooting Chapter 8 Trouble shooting... - Page 54 The battery voltage may have gone too low to power the display. Connect the TRAX I to a battery charger and charge for 12 hours, then see if the display comes up. If the unit was in the field collecting data when this problem occurred, turn the unit off, return it to your office and charge.
- Page 55 One simple condition check of a tube that is laid out in the field is to disconnect the tube from the TRAX I and hold the end to your cheek. You should feel the air pulse as tires cross the tube. If you do not, there may be a tear in the tube or it may be blocked.
- Page 56 TRAX I User’s Manual This page was intentionally left blank.
-
Page 57: Menu Tree & Specifications
Chapter 9— Menu Tree & Specifications Chapter 9 Menu Tree & Specifications... - Page 58 TRAX I User’s Manual BASIC COUNT SIGN-ON STATUS VOL. ONLY PER VEH BINNED UTILITIES CLEAR DEFAULTS MENU TREE TIME/DATE TESTS STAT...
- Page 59 Chapter 9— Menu Tree & Specifications LAYOUTS SITE CODE START-UP OPTIONS CONFIRM SPACE DATE UNITS MEMORY DISPLAY KEYS SER. PORT...
- Page 60 TRAX I User’s Manual TRAX I Specifications Size — 9” X 6.5” X 4.5” Weight — approximately 7 lbs. in a cast aluminum housing Sensor Inputs — Two or four air switches Memory — 1024 KB internal memory backed up by lithium battery Power —...
-
Page 61: Appendix
Appendix Appendix... - Page 62 TRAX I User’s Manual FHWA Type F Vehicle Classification Scheme Class 1 - Motorcycles. This class includes all two- or three-wheeled motorized vehicles. These vehicles typically have a saddle-type of seat and are steered by handlebars rather than a steering wheel.
- Page 63 The TRAX I also collects data for Class 14 - Unclassified Vehicles. This class includes all vehicles which the TRAX I could not process into one of the existing 13 classes. This data can be retained in your reports, or it can be redistributed by the software into the existing 13 classes based on the percentages in each of those classes.
- Page 64 TRAX I User’s Manual We are pleased that you have chosen the JAMAR TRAX I for your traffic analysis needs. We have strived to develop a unit that is easy to use and has the options that our customers require. The TRAX I has undergone exten- sive testing to verify the accuracy of its operations, and each unit is road tested before it leaves our facility.
Need help?
Do you have a question about the TRAX I and is the answer not in the manual?
Questions and answers