Table of Contents
Advertisement
QUICK FIND
Air Filter..................................................
Blades ....................................................
Contact Honda .......................................
Cutting Height ..........................................
CONTENTS
WELCOME .............................................
FOR YOUR SAFETY ..............................
PARTS AND CONTROLS ......................
INITIAL MOWER SETUP........................
List of Parts .........................................
Adjust the Handlebar...........................
Add Engine Oil ....................................
Attach the Spark Plug Cap ..................
Assemble the Grass Bag.....................
Before Using Your Lawn Mower..........
BEFORE EACH OPERATION ................
Check Your Mower..............................
Check Your Mowing Area....................
Clip Director®......................................
Rear Shield..........................................
Grass Bag ...........................................
Cutting Height Adjustment...................
Check the Oil Level .............................
Add Fuel ..............................................
OPERATION...........................................
Safe Mowing Practices........................
Operating the Controls ........................
Starting the Engine..............................
Illustrations in this manual are for instructional purposes only and may not be exact representations. All information contained in this manual is
based on the latest product information available at the time of publication. Honda Australia Motorcycle and Power Equipment Pty. Ltd. reserves
the right to make changes at any time without notice. No part of this publication may be reproduced, stored in a retrieval system, or transmitted
in any form by any means, electronic, mechanical, photocopying, recording or otherwise, without the prior written permission of Honda Australia
00X32VR8 A102
13
Find a Dealer..........................................
12
Fuel ..........................................................
20
Fuel System Maintenance......................
6
Maintenance Schedule...........................
Stopping the Engine ............................
2
Mowing Tips ........................................
2
SERVICING YOUR MOWER................
3
Maintenance Safety...........................
3
Maintenance Schedule......................
3
Blade Inspection................................
3
Blade Mounting Bolt Inspection.........
4
Blade Replacement ...........................
4
Oil Change ........................................
4
Air Filter .............................................
4
Spark Plug.........................................
4
Spark Arrester (optional part) ............
4
Blade Control Check .........................
4
TRANSPORTING .................................
5
5
STORAGE ............................................
5
Fuel ...................................................
6
Oil ......................................................
6
Cleaning ............................................
7
Storage Location ...............................
Handlebar..........................................
7
Removing From Storage ...................
7
8
9
Motorcycle and Power Equipment Pty. Ltd. This includes text, figures and tables.
Honda Australia Motorcycle and Power Equipment Pty. Ltd.
ABN 96 006 662 862 (trading as Honda MPE).
© 2020 American Honda Motor Co., Inc.-All Rights Reserved
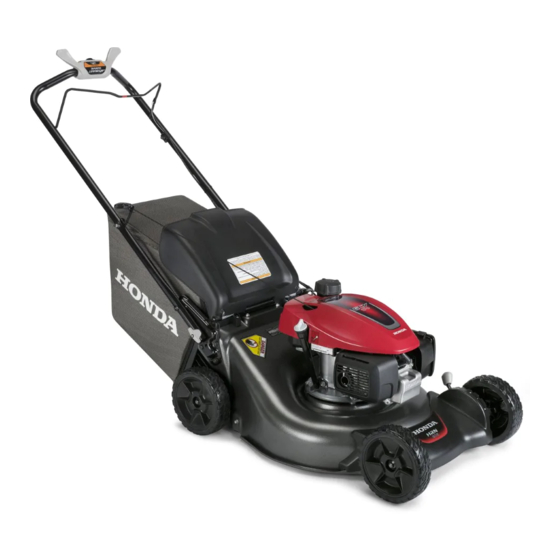
OWNER'S MANUAL
LAWN MOWER
Before operating the mower for the first time, please read this
Owner's Manual. Even if you have operated other mowers,
take time to become familiar with how this mower works and
practice in a safe area until you build up your skills.
20
Oil Change................................................
7
Oil Level Check...........................................
19
Spark Plug ................................................
11
Warranty Coverage...................................
9
TROUBLESHOOTING..............................
9
Engine Will Not Start .............................
10
Loss of Power........................................
10
Vibration ................................................
Mowing and Bagging Problems.............
11
12
TECHNICAL INFORMATION ...................
12
Serial Number Locations .......................
12
High Altitude Operation .........................
13
Specifications ........................................
13
14
14
CUSTOMER INFORMATION ...................
14
Dealer Locator Information....................
14
How to Contact Honda ..........................
15
15
SERVICE RECORD..................................
15
15
LIMITED WARRANTY ..............................
15
15
16
HRN216VKU
13
6
14
23
16
16
16
16
16
17
17
17
18
19
20
20
20
20
20
21
23
Advertisement
Table of Contents

Related Manuals for Honda HRN216VKU


Summary of Contents for Honda HRN216VKU
-
Page 1: Table Of Contents
Illustrations in this manual are for instructional purposes only and may not be exact representations. All information contained in this manual is based on the latest product information available at the time of publication. Honda Australia Motorcycle and Power Equipment Pty. Ltd. reserves the right to make changes at any time without notice. -
Page 2: Welcome
Important Message to Parents WELCOME The safety of children and adolescents is important to Honda. Lawn mowers are powerful tools, not toys. As with any equipment, bad judgments can result in serious injuries. Please ensure before any Congratulations on your selection of a Honda lawn mower! We are... -
Page 3: Parts And Controls
With help from an assistant, carefully remove the mower and loose parts from the carton and compare the loose parts against the HANDLEBAR following list. Contact the authorised Honda dealer from whom you purchased the mower if any of the loose parts shown are not included FUEL TANK CAP (P. -
Page 4: Add Engine Oil
• BEFORE EACH OPERATION (page into the oil filler opening. • OPERATION (page All Honda engines are run at the • MAINTENANCE SCHEDULE (page factory prior to packaging. Most of the oil is removed prior to shipment; BEFORE EACH OPERATION however, some oil remains in the engine. -
Page 5: Clip Director
If the rear shield is excessively worn, have it replaced by your authorised Honda servicing dealer. Mulching Release the lock and then move the Clip Director lever into the MULCH position . -
Page 6: Cutting Height
Inspection To adjust the cutting height, move the rear cutting height adjustment lever first. Grasp the handlebar and lift the mower up slightly, and then During use, the grass bag material is subject to normal wear and tear. pull the adjustment lever toward the wheel and move it into the desired height. -
Page 7: Add Fuel
Add Fuel OPERATION This engine is certified to operate on regular petrol with a pump octane rating of 86 or higher. For your safety, avoid starting or operating the engine in an enclosed Never use stale or contaminated petrol or an oil/petrol mixture. Avoid area, such as a garage. -
Page 8: Operating The Controls
Keep Shields in Place Never direct discharged material toward anyone. Avoid discharging material against a wall or obstruction. Material may ricochet back Guards and shields are designed to protect you from being hit by toward the operator. The best way to prevent potential injury from thrown objects and from hot engine parts and moving components. -
Page 9: Starting The Engine
Adjusting the Smart Drive Control Cutting Height Consult a local nursery or lawn and garden center for cutting height The Smart Drive control can be recommendations and advice about specific types of grasses and adjusted up or down into any one growing conditions in your area. -
Page 10: Servicing Your Mower
Mowing Patterns SERVICING YOUR MOWER Your Honda mower will work most efficiently if you use the following mowing patterns as much as possible. Mower deck and equipment design, and the direction in which the blade rotates, cause these Proper maintenance is essential for safe, economical, and mowing patterns to provide the best results. -
Page 11: Maintenance Schedule
(2) Change engine oil every 25 hours when used under heavy load or in high outside air temperatures. (3) These items should be serviced by an authorised Honda servicing dealer unless you have the proper tools and are mechanically proficient. Refer to the Honda shop manual for service procedures. -
Page 12: Blades
NORMAL WORN BENT CRACKED SPECIAL WASHER If a blade is bent, take the lawn mower to an authorised Honda DIRECTION servicing dealer for inspection. 8. Tighten the blade bolts with a torque wrench. Wear thick leather Blade Mounting Bolt Inspection... -
Page 13: Air Filter
We recommend the use of a Honda Genuine air filter to ensure it the mower on its right side. seals and performs as designed. Using a non-Honda air filter can... -
Page 14: Spark Plug
Check local laws and regulations. An optional USDA Fold the handlebar so the mower will take up less space (page 15). approved spark arrester is available from an authorised Honda servicing dealer. See “Parts, Accessories, and Service Items” on page 20 for the part number. -
Page 15: Storage
NOTICE STORAGE Using a garden hose or pressure washing equipment can force water into the air filter. Water in the air cleaner will soak the paper element and can enter the carburetor or engine cylinder, causing damage. Proper storage preparation is essential for keeping your lawn mower Water contacting a hot engine can cause damage. -
Page 16: Removing From Storage
Fuel filter clogged, Take the mower to an authorised Engine Will Not Start carburetor malfunction, Honda servicing dealer for repair. ignition malfunction, valves Possible Cause Correction stuck, etc. Blade control not engaged... -
Page 17: Technical Information
High Altitude Operation TECHNICAL INFORMATION At high altitudes, the standard carburetor air-fuel mixture will be too rich. Performance will decrease, and fuel consumption will increase. A very rich mixture will also foul the spark plug and cause hard starting. Serial Number Locations Operation at an altitude that differs from that at which this engine was certified, for extended periods of time, may increase emissions. -
Page 18: Specifications
Page Mower Features Fuel Unleaded petrol with a pump page 7 HRN216VKU Honda rotary mower, 21-inch mower deck, octane rating of 86 or higher containing ® 3-in-1 Clip Director , Smart Drive variable no more than 10% ethanol by volume speed transmission, flywheel brake, fixed Capacity: 0.91 L... -
Page 19: Fuel System Maintenance
AVOIDING FUEL-RELATED PROBLEMS When maintained properly, your Honda lawn mower should provide years of trouble-free operation. This includes the fuel system. However, petrol can quickly deteriorate, causing starting or running problems and, in some cases, damage to the fuel system. Most fuel-related problems can be avoided by following the precautions listed below. -
Page 20: Contact Honda
The information and specifications included in this publication were in effect at the time of approval for printing. Honda Motor Co., Inc. reserves the right, however, to discontinue or change specifications or design at any time without notice and without incurring any obligation whatever. -
Page 21: Service Record
SERVICE RECORD Here is an easy way to keep track of the hours your Honda lawn mower has done. Record how many hours you get from a tank of fuel, and then simply record the number of tanks used. TANK x HOURS per TANK = TOTAL HOURS USE. (Refer to the Maintenance Schedule on page 11). - Page 22 SERVICE RECORD Here is an easy way to keep track of the hours your Honda lawn mower has done. Record how many hours you get from a tank of fuel, and then simply record the number of tanks used. TANK x HOURS per TANK = TOTAL HOURS USE. (Refer to the Maintenance Schedule on page 11).
-
Page 23: Warranty Coverage
What Honda Will Repair or Replace Under Warranty: accessories, or apparel. Honda will repair or replace, at its option, any part that is proven to be defective in Parts and accessories installed by a dealer who is authorised by Honda to sell them material or workmanship under normal use during the applicable warranty time will be repaired or replaced under warranty without charge for parts or labor. - Page 24 www.hondampe.com.au HPE.2020.01 PRINTED IN U.S.A.
Need help?
Do you have a question about the HRN216VKU and is the answer not in the manual?
Questions and answers