Table of Contents
Advertisement
Quick Links
INSTRUCTION MANUAL
EQAM-420A
EdgeQAM 420A
Model
Stock No. Description
EQAM-420A-1-16 6522A-1-16
6522A-1-16P* Same as above but with Pro:Idiom™ encrypted output
EQAM-420A-2-32 6522A-2-32
6522A-2-32P* Same as above but with Pro:Idiom™ encrypted output
EQAM-420A-PIL
6522-PIL*
* Available to Pro:Idiom™ licensees only
Status
Active
Obsolete
Obsolete
©2012 Blonder Tongue Laboratories, Inc. All rights reserved. Specifications are subject to change without notice. Trademarks are the property of their respective owner.
EdgeQAM-420A equipped with 1 Quad-QAM output module (accepts 16 unencrypted HD programs)
EdgeQAM-420A equipped with 2 Quad-QAM output modules (accepts 32 unencrypted HD programs)
Software option to add Pro:Idiom™ encryption
Date
December 14, 2012
May 14, 2012
August 1, 2011
(800) 523-6049 • (732) 679-4000 • FAX: (732) 679-4353
Document No.
Issue No.
651226500C
651226500B
651226500A
One Jake Brown Road
Old Bridge, NJ 08857-1000 USA
www.blondertongue.com
Author
3
BP
2
BP
1
AB
Advertisement
Table of Contents

Subscribe to Our Youtube Channel
Related Manuals for Blonder tongue EQAM-420A


Summary of Contents for Blonder tongue EQAM-420A
- Page 1 Issue No. Author Active December 14, 2012 651226500C Obsolete May 14, 2012 651226500B Obsolete August 1, 2011 651226500A ©2012 Blonder Tongue Laboratories, Inc. All rights reserved. Specifications are subject to change without notice. Trademarks are the property of their respective owner.
- Page 2 We recommend that you write the following information in the spaces provided below. Purchase Location Name: Purchase Location Telephone Number: EQAM-420A Serial Number: The information contained herein is subject to change without notice. Revisions may be issued to advise of such changes and/or additions.
-
Page 3: Table Of Contents
EQAM-420A Instruction Manual Table of Contents SECTION 1 – GENERAL & SAFETY INSTRUCTIONS ....................... 4 SECTION 2 – PRODUCT SUMMARY ..........................6 2.1 REVISION HISTORY & REASON ............................ 6 2.2 PRODUCT APPLICATION & DESCRIPTION ........................6 2.3 PRODUCT SPECIFICATION ............................9 SECTION 3 –... -
Page 4: Section 1 - General & Safety Instructions
➥ U nplug the unit from the AC power outlet before cleaning. Use only a damp cloth for cleaning the exterior of the unit. ➥ D o not use accessories or attachments not recommended by Blonder Tongue, as they may cause hazards, and will void the warranty. - Page 5 ❏ The unit exhibits a distinct change in performance. ➥ When replacement parts are required, ensure that the service technician uses replacement parts specified by Blonder Tongue. Unauthorized substitutions may damage the unit or cause electrical shock or fire, and will void the warranty.
-
Page 6: Section 2 - Product Summary
38.8 Mbps. The input streams are aggregated in up to eight (8) QAM RF channels in the 54-996 Mhz range. The EQAM-420A can be configured with one or two QAM output modules, each capable of delivering four (4) adjoining QAM channels. Each QAM channel can contain up to four (4) programs. - Page 7 (iii) AC power is connected and power supply is working properly but the motherboard’s chipset has not been configured properly. The unit must be sent to Blonder Tongue for repair for conditions (ii) and (iii).
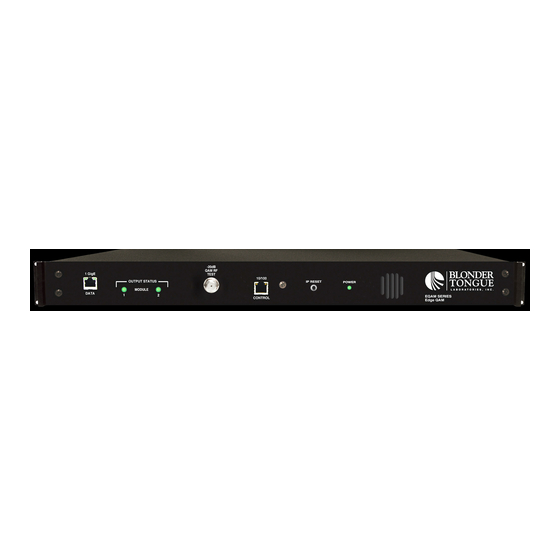
- Page 8 8 EQAM-420A Instruction Manual INPUT POWER ASSEMBLY AND SWITCh: IEC 14 power inlet plug – rated 115-230 vAC; 0.7A; 60/50 hz; equipped with Slo-Blo, 3.0 Amps, 250 v Fuse. QAM OUTPUT: "F" female connector for QAM RF output (clear or Pro:Idiom™ encrypted). The unit can be configured with up to 2 output...
-
Page 9: Product Specification
EQAM-420A Instruction Manual 2.3 Product Specification INPUT OUTPUT No. of Output Modules: 1 or 2 Quad-QAM Connector: 1x RJ-45 Connector: 1x “F” Female Standard: 1000Base-T Ethernet (rear-panel; for combined outputs) Modulation: QAM 16, 32, 64, 128, and 256 UDP/RTP: Supported... -
Page 10: Section 3 - Installation & Power-Up
3.2 Installation The EQAM-420A is designed to be installed in a standard 19-inch (483 mm) rack (EIA 310-D, IEC 60297, and DIN 41494 SC48D). To install the unit, secure the unit’s front panel to the rack by inserting four (4) machine screws, with cup washers, through the four (4) mounting holes in the front panel. -
Page 11: Section 4 - Communicating With The Unit
EQAM-420A Instruction Manual Section 4 – Communicating with the Unit Local or remote communication with the unit is only possible through a GUI-based menu via any standard web browser. Before you can communicate with the unit, you must configure the unit's IP address to conform with your existing IP network or LAN. -
Page 12: Section 5 - Quick Configuration
12 EQAM-420A Instruction Manual Section 5 – Quick Configuration 5.1 Accessing the Unit via a Web Browser You must complete the steps described in Section 4 before proceeding as follows: (1) Open a web browser on your computer (Internet Explorer 7 or higher is recommended) and enter the following URL address (http://172.16.70.1). -
Page 13: Quick Configuration Via "Config" File
When utilizing the “Config” file feature, operator must also select an appropriate “Configuration Mode” (see of Section 6.7.1 for details). When EQAM-420A is operating in "Automatic" Configuration Mode (see of Section 6.7.1 for details), the user must update the respective config file while switching between the SPTS and MPTS modes. -
Page 14: Main > Status" Screen
14 EQAM-420A Instruction Manual 6.2 "Main > Status" Screen The “Main > Status” screen” (Figure 6.2.1 & 6.2.2) is a “read only” screen where the following parameters are displayed: Figure 6.2.1 - "Main > Status" Screen when operating in MPTS Mode... - Page 15 EQAM-420A Instruction Manual In the section entitled “Stream Input” under the green header, the following parameters about each source IP stream are displayed: Stream: indicates the method of encapsulation used, i.e UDP (User Datagram Protocol) or RTP (Real-Time Transport Protocol), the IP address, and port number (see Section 6.2.1 for details).
-
Page 16: Main > Status > Edit" Screen
16 EQAM-420A Instruction Manual 6.2.1 "Main > Status > Edit" Screen The “Main > Status > Edit” screen (Figure 6.2.3) is a “read and write” screen where the same information as the “Main > Status” screen is displayed, but the following parameters can be updated: Figure 6.2.3 - "Main >... - Page 17 EQAM-420A Instruction Manual Stream: the user must update the source IP stream information in the following format: xxx://yyy.yyy.yyy.yyy:zzzzz where, xxx = the protocol / encapsulation method of the source (IP) stream. The only acceptable protocols are UDP or RTP. yyy.yyy.yyy.yyy = IP address of the source stream.
-
Page 18: Main > Stream Info" Screen
18 EQAM-420A Instruction Manual 6.3 "Main > Stream Info" Screen The “Main > Stream Info ” screen (Figure 6.3) is a “read only” screen where the following parameters about the source IP streams are displayed: The "Main > Stream Info" screen will be visible only if the user has selected the "MPTS" Mode on the "Main >... - Page 19 EQAM-420A Instruction Manual Stream #: indicates the Stream ID number of the incoming source IP MPTS. <encapsulation:// ip address: port number>: indicates the following information about the source IP stream: encapsulation = indicates the encapsulation method used, i.e UDP or RTP ip address = indicates the IP address of the source stream.
-
Page 20: Main > Qam Config" Screen
20 EQAM-420A Instruction Manual 6.4 "Main > QAM Config" Screen The “Main > QAM Config” screen (Figure 6.4.1 & 6.4.2) is a “read and write” screen where the following parameters are displayed or can be configured: Figure 6.4.1 - "Main > QAM Config" Screen when operating in MPTS Mode... - Page 21 EQAM-420A Instruction Manual RF Module #: must select the Quad-QAM output RF module number 1 or 2. Output Channel/Frequency: must assign an RF channel number to the first RF QAM output of the Quad-QAM module (i.e. RF channel 50, as shown in Figure 6.4.1). The remaining three RF QAM channels will be automatically assigned to the next adjacent channels (i.e.
-
Page 22: Main > Diagnostics" Screen
22 EQAM-420A Instruction Manual 6.5 "Main > Diagnostics" Screen The “Main > Diagnostics” screen (Figure 6.5) is a screen for monitoring and diagnosis where the following parameters are displayed: Figure 6.5 - "Main > Diagnostics" Screen #: indicates the sequential number of the incoming IP addresses recognized by the unit. -
Page 23: Main > Refresh" Screen
The “Main > Refresh” tab can be clicked while you are on any of the following sub-tab screens: “Status”, “Stream Info” (available only when the unit is operating in MPTS Mode), “QAM Config”, “Diagnostics”, and “Mode”. When clicked, it will update all relevant fields/parameters of the active screen as that information is retrieved from the EQAM-420A in a real-time basis. -
Page 24: Main > Network" Screen
24 EQAM-420A Instruction Manual 6.7. "Network" Screen The “Network” screen (Figure 6.6) is a “read and write” screen where the following parameters are displayed or can be configured: Figure 6.6 - "Network" Screen... - Page 25 DDQ Version (RF Output 1): indicates the current software version of the unit’s Quad-QAM output module #1. DDQ Version (RF Output 2): indicates the current software version of the unit’s Quad-QAM output module #2. EQAM-420A Serial Number: indicates the unit’s serial number. headend Name: allows user to enter a headend name to make identification easier.
-
Page 26: Admin.html" Hidden Screen
26 EQAM-420A Instruction Manual 6.7.1 "Admin.html" hidden Screen To change/modify the IP network parameters, as well as the Username and Password values for the unit, you must be logged in to the unit as “Admin” to access a hidden screen shown in Figure 6.6.1 by typing the URL of the unit followed by a forward slash and Admin.html, for example: http://172.16.70.1/Admin.html. - Page 27 Manual: allows the user to make setup/configuration changes from any of the primary/sub tab screens. Automatic: Prompts EQAM-420A to retrieve the “Config" file (see Sections 5.2 and 6.11 for details) from its memory every 30 minutes and verify its current configuration against the “Config" file. Any mismatch among the two configurations will be automatically updated to the configuration specified in the “Config"...
- Page 28 SNMP Destination Port #: is the SNMP destination Port from which the operator can monitor different parameters of the EQAM-420A unit when used in conjunction with an SNMP server. The factory default value, which cannot be modified, and industry standard is 161.
-
Page 29: Management" Screen
“Admin.html” hidden Screen (see & of Section 6.7.1 for details). SNMP Trap > Error Log: monitors the Error Log of the EQAM-420A and, if enabled, forwards any relevant error messages to the SNMP server as configured in the “Admin.html” hidden Screen (see &... -
Page 30: Time" Screen
6.9 "Time" Screen The “Time” screen (Figure 6.8) allows you to set the current date and time for the EQAM-420A. To remain compliant with ATSC and cable standards, it is important to have the accurate date and time stamps. For this reason, it is recommended to use the "Automatic"... -
Page 31: Error Log" Screen
EQAM-420A Instruction Manual 6.10 "Error Log" Screen The “Error Log” screen (Figure 6.9) is a “read and write” screen where the following parameters can be displayed or configured. The data in Error Log can be forwarded to a SysLog database – (see , &... -
Page 32: Config" Screen
X = the protocol of the incoming stream. 0 indicates UDP; 1 indicates RTP. Y = IP address of the incoming stream. Multicast addresses must be from 224.0.0.0 to 239.255.255.255. All other IP addresses will be considered Unicast by the EQAM-420A. Z = the port number of the incoming stream. - Page 33 Figure 6.10.2 - "STPS Config" File Figure 6.10.3 - "MPTS Config" File When EQAM-420A is operating in "Automatic" Configuration Mode (see of Section 6.7.1 for details), the user must update the respective config file while switching between the SPTS and MPTS...
-
Page 34: Appendix A: Updating The Software Remotely
Appendix A: Updating the Software Remotely General background: There are two different PROMs that need to be programmed in EQAM-420A. They are called PROM1 and PROM2. Please note not every software update requires both PROMs to be programmed. However, program both PROMs unless you get a written notice with Release notes to do otherwise. - Page 35 Instruction Manual Telnet to EQAM-420A: There are two ways to telnet to the EQAM-420A: (1) Use Command line and type in “ telnet IP address “ for example “telnet 172.16.70.1” (2) Use the Terminal program such as Putty to telnet.
- Page 36 The server board should now configure itself on power-up. Two choices to reset the EQAM-420A: (1) Reset switch in the back of the unit. (2) Use Telnet and type “epcs –c” this will automatically reboot the EQAM-420A without a need for resetting with power switch.
- Page 37 THIS PAGE INTENTIONALLY LEFT BLANK...
- Page 38 BT may determine) any product manufactured by BT which proves to be defective in materials or workmanship or fails to Blonder Tongue Laboratories, Inc. (BT) will at its sole option, either repair or replace (with a new or factory reconditioned product, as BT may meet the specifications which are in effect on the date of shipment or such other specifications as may have been expressly...
- Page 40 One Jake Brown Road Old Bridge, NJ 08857-1000 USA (800) 523-6049 • (732) 679-4000 • FAX: (732) 679-4353 www.blondertongue.com...
Need help?
Do you have a question about the EQAM-420A and is the answer not in the manual?
Questions and answers