
Subscribe to Our Youtube Channel
Related Manuals for anko K2304


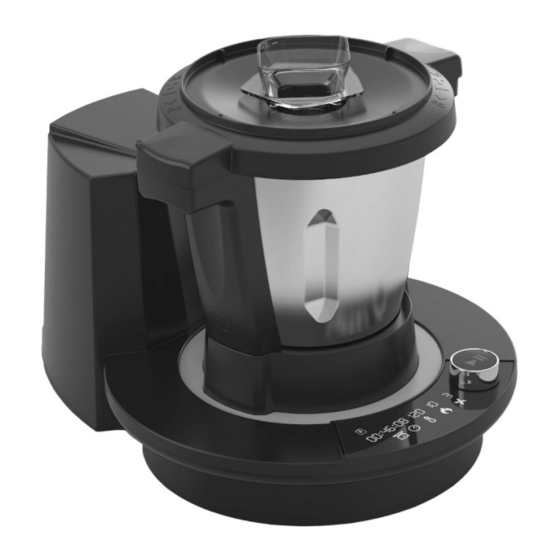
Summary of Contents for anko K2304
- Page 1 Thermal Cooking Kitchen Machine Instruction Manual Scan the code to access over 150 recipes Model No.: K2304 Rev: 5...
- Page 2 Page 2 of 44...
-
Page 3: Table Of Contents
Important Safeguards ................5 Components ..................9 Methods of Safe Installation ..............10 Before First Use .................. 10 Unpacking ..................10 Assembling Components and Use of Accessories ......10 Drive Coupling ................. 10 Multifunction Blade ................11 Kneading Blade ................12 Butterfly Whisk ................ - Page 4 Page 4 of 44...
-
Page 5: Important Safeguards
When using electrical appliances, in order to reduce the risk of fire, electric shock and/or injury, these basic safety precautions should always be followed: Important Safeguards When using electrical appliances, basic safety precautions should always be followed, including the following: Before using this appliance, read and follow all warnings and instructions in this manual, even •... - Page 6 Avoid contacting moving parts. Keep hands, hair, clothing as well as spatulas and other • utensils away during operation to prevent injury and/or damage to the appliance. • Switch off the appliance and disconnect from supply before changing accessories or approaching parts that move in use.
- Page 7 Make sure that the blade sealing ring is fitted correctly and the blade assembly is assembled • securely in the jar base before use. The failure of correct assembly will cause the food leakage which will damage the appliance. Take care after using the heating function as the surfaces of components will stay hot for •...
- Page 8 Do not use the unit in very hot or humid places, or under direct sunlight. • • It is not recommended to use this appliance with an extension cord or power board. • Do not place any other appliances on top of the appliance. This appliance is designed for domestic use only.
-
Page 9: Components
Components Steamer Lid Kneading Blade Steamer Tray Multifunction Blade Steamer Base Measuring Cup / Lid Plug Strainer / Steamer Basket Jar Lid Butterfly Whisk Spatula Main Body Page 9 of 44... -
Page 10: Methods Of Safe Installation
Methods of Safe Installation Place the appliance on a strong, flat and level surface. Place your appliance where there is no heat source nearby or direct sunlight. Splashing water on the appliance may cause a short circuit. For good ventilation keep enough space between the side walls and your appliance. Leave at least a 100mm gap between the back and sides of the Appliance and any wall. -
Page 11: Multifunction Blade
To do this, take the drive coupling and ensure the rubber gasket is fitted over the bottom of the coupling as shown below. Failure to fit the rubber sealing gasket will allow liquids to escape out the bottom of the jar. -
Page 12: Kneading Blade
Lower the Multifunction Blade over the top of the Drive Coupling in the bottom of the jar, ensuring to align the tabs on the drive coupling with the slots in the bottom of the blade, then push down firmly until it seats and clicks in place. To remove the Multifunction Blade, grasp the top of the blade post and pull it straight up and out Kneading Blade... -
Page 13: Butterfly Whisk
To remove the Kneading Blade, grasp the top of the blade post and pull it straight up and out. Butterfly Whisk The Butterfly Whisk is used primarily for stirring and whisking food items. IMPORTANT: Do not use the Butterfly Whisk above speed setting 4. Do Not add ingredients into the jar when the appliance is working with the butterfly whisk, as the butterfly whisk may get jammed and damaged. -
Page 14: Jar And Lid Assembly
Jar and Lid Assembly There are jar capacity marks on one side, inside the jar. The Max capacity for blending is 2L as indicated by the symbol: …-- MAX The Max capacity for heating without blending is 2.3L as indicated by the symbol: …-- MAX To attach the lid, position the lid on the top of the jar, press the lid down firmly so that it... -
Page 15: Measuring Cup / Jar Lid Plug
Measuring Cup / Jar Lid Plug The “Plug” in the Jar lid not only prevents food and liquids from being ejected from the hole in the lid, it is also a convenient measuring cup. To assemble the Measuring Cup / Jar Lid Plug to the lid, place the measuring cup into the hole, push down and rotate clockwise to lock in place. -
Page 16: Strainer / Steamer Basket
Strainer / Steamer Basket The Strainer / Steamer Basket can be used to strain out the fruit / vegetable juice after processing. Insert the Strainer into the jar and hold in place while you pour out the juice. It can also be used to hold soft food such as pasta or noodles while cooking, and can be used to cook side dishes, such as rice and potatoes. -
Page 17: Instruction For Use
Instruction For Use NOTE: When first using the appliance, you may notice an electrical smell from the motor which is quite normal. After a period of uses, this smell will gradually disappear. IMPORTANT: Before use, READ ALL the notes under the headings “Important Safeguards” and “Methods of Safe Installation”. -
Page 18: Controls
Controls 00:00:00 00 0 0 Pre-Programmed Option Touch Button Heat Function Touch Button Digital Read-out Temperature Setup Touch Button Rotary Knob Timer Function Touch Button Start / Pause button Scale Function Touch Button * Speed Function Touch Button Note: * The Scale Function Button will not show if the Jar with the lid fitted and locked has been placed in the appliance. -
Page 19: Speed
To set the desired operation time, touch the Timer Touch Button to enter the Minute Setting and the Minute Digits will blink. Rotate the knob to adjust the minutes required. Touch the Timer Touch Button again to enter the Seconds Setting and the Seconds Digits will blink. -
Page 20: Turbo Mode
6.5.1 Turbo Mode Touch and keep touching the Speed Touch Button and the appliance will start in Turbo mode. This function starts the appliance at the highest speed. Stop touching the Speed Touch Button, and the appliance will stop immediately. NOTE: This function will only operate for a maximum of 1 minute each time. -
Page 21: Scales
You are able to adjust the temperature whilst the appliance is in operation unless in some of the Pre-Set programs. Note: as you adjust the Temperature, you will notice the digits above the Heating Power Touch Button will also increment depending on the temperature selected. It is advisable to use these default heating settings based on the temperature selected. -
Page 22: Suggested Speed And Capacity For Each Accessory
Suggested Speed and Capacity for each Accessory **Warning: Do not assemble or use the kneading blade and the Strainer / Steamer Basket at the same time Operation Accessory Image Function Speed Capacity time 2 L max, Food Items Chop (+) 1 Minute 1 - 2cm in size Multi-... - Page 23 P01: Clean: This is a cleaning program for the inside of the jug. Assemble the butterfly whisk. • • Add 500ml of clean water and 1 - 2 drops of dishwashing liquid. Attach and ensure the jar lid and measuring cup (in the Jar Lid) are secure and •...
- Page 24 Step 2 Default Settings Adjustable Accessories Remark Kneading Speed Level 2 - 3 Blade Temperature 0 or 37 (°C) Power Level Time - Minutes 3 - 20 P03: Crush (Smoothie / Mince): Mince vegetables, meat, spices and crush ice easily in just a few seconds.
- Page 25 P04: Chop: Chops all kinds of ingredients, from meat or fish to fruit or vegetables. • Assemble the Chopping Blade. Add your ingredients. • • Attach and ensure the jar lid and measuring cup (in the Jar Lid) are secure and locked in place.
- Page 26 P06: Stew: The traditional stews that require long cooking processes can be achieved with this appliance. Slow cooking + long hours = the best flavours. • Add your ingredients. Attach and ensure the jar lid and measuring cup (in the Jar Lid) are secure and •...
- Page 27 P07: Steam: This function is ideal for steaming the healthiest recipes. It allows saving time thanks to its 2-level steamer, as you can cook more than 1 dish at once. • Assemble the Steamer. Add your ingredients. • Add no more than 1.5 Litres of cool (not hot and not fridge cold) water to the Jar •...
- Page 28 P09: Yoghurt: Prepare homemade yoghurts easily. The appliance will keep the mixture at fermenting temperature so that the next morning yoghurt is ready to cool and eat. • Assemble the Chopping Blade. Add your ingredients to the jar. • Attach and ensure the jar lid and measuring cup (in the Jar Lid) are secure and •...
- Page 29 P10: Fresh Recovery (Washing): Scientific refresh cleaning method at 50°C can clean away meat blood foam and vegetable / fruit pesticide residue, etc. Assemble the Chopping Blade. • Add 1.5 Litres of cool (not hot and not fridge cold) water to the Jar. •...
- Page 30 Step 2 Default Settings Adjustable Accessories Remark Chopping Speed Level Blade Temperature (°C) Power Level Time - Minutes Step 3 Default Settings Adjustable Accessories Remark Chopping Speed Level Blade Temperature (°C) Power Level Refer note Time - Minutes following Note: Step 3 will continue to run until the ingredients have reduce temperature to 90C or less and will then change automatically to Step 4.
- Page 31 P12: Quick Soup: Suitable for vegetable soup. Chop ingredients by hand, then add and cook. Assemble the Chopping Blade. • • Attach and ensure the jar lid and measuring cup (in the Jar Lid) are secure and locked in place. •...
- Page 32 P13: Stir: Stirs food stuffs as it cooks them to ensure uniform heating and to achieve professional textures. Cook delicious risottos, pasta salads, custard or prepare hot chocolate. • Assemble the Butterfly Whisk. Attach and ensure the jar lid and measuring cup (in the Jar Lid) are secure and •...
- Page 33 P15: Reheat: Allows you to reheat cooked food. Assemble the Chopping Blade. • Add your pre-cooked ingredients to the jar. • Note: Only add thawed foods and not frozen foods. Ensure the jar lid and measuring cup (in the Jar Lid) are secure and locked in place. •...
- Page 34 Step 2 Default Settings Adjustable Accessories Remark Chopping Speed Level Blade and Basket Temperature (°C) Power Level Time - Minutes Step 3 Default Settings Adjustable Accessories Remark Chopping Speed Level Blade and Basket Temperature (°C) Power Level Time - Minutes Step 4 Default Settings Adjustable...
- Page 35 P17 Porridge: Use this setting to make softer foods such as beans or porridge. This is ideal for foods that require milk or water to be cooked Assemble the Chopping Blade. • Add your ingredients to the jar • • Attach and ensure the jar lid and measuring cup (in the Jar Lid) are secure and locked in place.
-
Page 36: Recipes And Examples For Pre-Set Function
Step 2 Default Settings Adjustable Accessories Remark Chopping Speed Level Blade Temperature (°C) Power Level Time - Minutes Recipes and Examples for Pre-set Function NOTE: Refer to the front page and scan the QR code to access over 150 Recipes. P02 (Knead)- Pasta Dough 375g plain flour 60g olive oil... -
Page 37: P05 - (Sauté) Chickpea Curry
P05 – (Sauté) Chickpea Curry 1 400g tin chickpeas, drained 1 onion, sliced 1 garlic clove, sliced 1 carrot, large dice 115g yellow/red curry paste 200ml coconut cream 300ml water 2tsp fish sauce/soy sauce 1tbsp lime juice 2tsp palm sugar/agave syrup Salt - to taste Garnish coriander leaves 1. -
Page 38: P09 - (Yoghurt) Honey Yoghurt
P09 – (Yoghurt) Honey Yoghurt 1 litre full fat milk 1tbsp yoghurt with live cultures OR 1 probiotic capsule 60ml honey 1. Attach Chopping Blade 2. Place all ingredients in the jar then select YOGHURT (program 09) and start. 3. Leave for 8-10 hours (it will thicken with more time) 4. -
Page 39: P13 - (Stir) Strawberry Compote
9.10 P13 – (Stir) Strawberry Compote 500g fresh strawberries, hulled and halved 60g caster sugar 30g lemon juice Note: substitute any berries you like, however, check the sweetness at the end and adjust the amount of sugar as necessary. 1. Attached Butterfly Whisk 2. -
Page 40: P18 - Congee
9.13 P18 – Congee 2 cup sushi rice 2lt chicken or vegetable stock 2 garlic cloves, minced 2cm ginger, minced soy sauce Garnish 1 spring onion, finely sliced 2tbsp fried shallots 1. Place rice, stock, garlic and ginger into the cooking jar and select CONGEE (program 18) and start. -
Page 41: Disposal
Wipe the Motor Base over with a slightly damp cloth and mild detergent and then dry off, ensuring the electrical contact area is perfectly dry. Dry with a dry soft cloth. Cleaning the parts immediately after use ensures a faster clean up time, and this will •... -
Page 42: Troubleshooting
12 Troubleshooting Error Description Possible reasons Solution code Jar lid is not fitted correctly Ensure the Jar Lid is fitted to the Jar or Locked in correctly and locked in Safety switch not position. place. activated Jar is not seated correctly Ensure the Jar is seated into the base. -
Page 43: Warranty Against Defect
13 Warranty Against Defect 12 Month Warranty Thank you for your purchase from Kmart. Kmart Australia Ltd warrants your new product to be free from defects in materials and workmanship for the period stated above, from the date of purchase, provided that the product is used in accordance with accompanying recommendations or instructions where provided. - Page 44 Page 44 of 44...
Need help?
Do you have a question about the K2304 and is the answer not in the manual?
Questions and answers