
Related Manuals for WBOX Technologies WBXHD041S


Summary of Contents for WBOX Technologies WBXHD041S
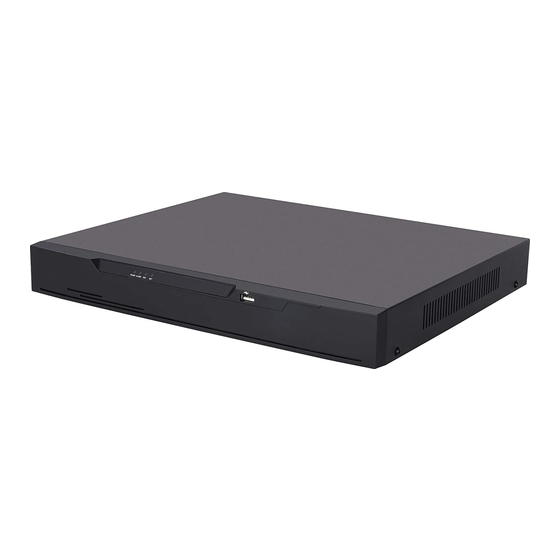
- Page 1 Digital Video Recorder(DVR) User Manual If you have any questions, please WBXHD041S contact your ADI salesperson. WBXHD041S1T WBXHD082S WBXHD082S2T WBXHD162S WBXHD162S4T...
-
Page 3: Precautions
Digital Video Recorder(DVR) User Manual Precautions Precautions Precautions Fully understand this document before using this device, and strictly observe rules in this document when using this device. If you install this device in public places, provide the tip "You have entered the area of electronic surveillance" in an eye- catching place. - Page 4 Digital Video Recorder(DVR) Precautions User Manual Strictly conform to local electrical safety standards and use power adapters that are marked with the LPS standard when installing and using this device. Otherwise, this device may be damaged. Use accessories delivered with this device. The voltage must meet input voltage requirements for this device.
- Page 5 Digital Video Recorder(DVR) User Manual Precautions Special Announcement All complete products sold by the manufacturer are delivered along with nameplates, operation instructions, and accessories after strict inspection. The manufacturer shall not be held responsible for counterfeit products. This manual may contain misprints, technology information that is not accurate enough, or product function and operation description that is slightly inconsistent with the actual product.
-
Page 6: Table Of Contents
Digital Video Recorder(DVR) Contents User Manual Contents Precautions ........................i 1 Specifications......................1 2 Hard Disk ........................3 2.1 Precautions ........................3 2.2 Hard Disk Recommendation ..................3 2.3 Approximate Video Storage Duration ................3 2.4 Hard Disk Installation ....................4 3 Operation Instruction.................... - Page 7 Digital Video Recorder(DVR) User Manual Contents 5.4 Video loss ........................29 5.5 Motion Detection......................33 5.6 Privacy Area ......................... 35 5.7 Camera tamper ......................35 5.8 OSD settings......................... 36 6 System setting......................38 6.1 Basic ..........................38 6.1.1 System ......................39 6.1.2 Time .........................
- Page 8 Digital Video Recorder(DVR) Contents User Manual 9 Web Access ......................69 9.1 Login ..........................69 9.2 Live Video ........................70 9.3 Video Playback ......................70 9.4 Alarm Search ........................ 72 9.5 DVR Setting ......................... 74 9.5.1 Viewing basic information ................75 9.5.2 Network management ..................
-
Page 9: Specifications
Digital Video Recorder(DVR) User Manual 1 Specifications Specifications WBXHD041S WBXHD162S WBXHD082S Model WBXHD082S2T WBXHD041S1T WBXHD162S4T VIDEO Video Compression H.264 High Profile Encode Ability 4ch*1080P@15fps 8ch*1080P@15fps 16ch*1080P@15fps Decode Ability 4ch *1080P@15fps 8ch*1080P@15fps 16ch*1080P@15fps Pure Analog: Pure Analog: Pure Analog: 4ch*1080P/4ch*720 8ch*1080P/8ch*720... - Page 10 Digital Video Recorder(DVR) 1 Specifications User Manual WBXHD041S WBXHD162S WBXHD082S Model WBXHD082S2T WBXHD041S1T WBXHD162S4T 720P:10G~20G/ day*channel 1080P: 20G~30G/ day*channel Audio:691.2M/ day*channel Backup Mode USB HDD INTERFACE 4ch BNC 8ch BNC 16ch BNC (AHD/TVI/CVI/C (AHD/TVI/CVI/C (AHD/TVI/CVI/C Video Input VBS) VBS) VBS)...
-
Page 11: Hard Disk
Digital Video Recorder(DVR) User Manual 2 Hard Disk Hard Disk 2.1 Precautions Formatting will clear all video data on the hard disk. Use this function only when necessary. Be sure to uninstall the hard disk before removing it from the DVR during runtime; otherwise, the hard disk may be damaged or data may be lost. -
Page 12: Hard Disk Installation
Digital Video Recorder(DVR) 2 Hard Disk User Manual d indicates the bit rate (unit: Kbit/s). Step 2 Use the following formula to calculate the approximate video storage duration t (unit: day) w indicates the capacity (unit: Mbyte) of a single hard disk. n indicates the number of disks. - Page 13 Digital Video Recorder(DVR) User Manual 2 Hard Disk Figure 2-1 Removing the upper cover Step 2 Take out the hard disk fixing screws and silicone cushion included in the accessory package, route the fixing screw through the silicone cushion, and install it to the screw holes, as shown in Figure 2-2.
- Page 14 Digital Video Recorder(DVR) 2 Hard Disk User Manual Figure 2-3 Inserting the hard disk Step 4 Turn the device over, and fasten two hard disk fixing screws, as shown in Figure 2-4. Figure 2-4 Fixing the hard disk Step 5 Install the other hard disk according to Step 2, Step 3, and Step 4, then insert the hard disk data cable and power cable, as shown in Figure 2-5.
- Page 15 Digital Video Recorder(DVR) User Manual 2 Hard Disk Figure 2-5 Inserting the cable Step 6 Put on the upper cover, and fasten the fixing screws, as shown in Figure 2-6. Figure 2-6 Put on the upper cover ----End Issue V1.0 (2018-06-04)
-
Page 16: Operation Instruction
Digital Video Recorder(DVR) 3 Operation Instruction User Manual Operation Instruction 3.1 Front panel Figure 3-1 shows the front panel of DVR. Table 3-1 shows the description of front panel. Figure 3-1 Front panel Table 3-1 Elements of the front panel Element Description Power indicator, When DVR is operating, the... - Page 17 Digital Video Recorder(DVR) User Manual 3 Operation Instruction Figure 3-2 Rear panel of 0E-HD4C1TB Figure 3-3 shows the rear panel of 0E-HD8C2TB and the interfaces on it. Figure 3-3 Rear panel of 0E-HD8C2TB Figure 3-3 shows the rear panel of 0E-HD16C2TB and the interfaces on it. Figure 3-4 Rear panel of 0E-HD16C2TB Table 3-2 shows the description of rear panel Table 3-2 Elements of the real panel...
-
Page 18: Startup
Digital Video Recorder(DVR) 3 Operation Instruction User Manual Name Description LAN network RJ45 10 /100/1000 Mbps adaptive interface Ethernet interface Supports connection to a USB mouse, a USB flash drive or USB removable hard disk. RS485 RS485 port DC power Connected to an external power adapter interface Power switch... -
Page 19: Powering Off The Device
Digital Video Recorder(DVR) User Manual 3 Operation Instruction Figure 3-5 Real-time video screen Users need to provide a hard disk for the DVR. The hard disk is strictly detected during device startup. If the detection result failed, the possible causes are as follows: ... -
Page 20: Changing The Password
Digital Video Recorder(DVR) 3 Operation Instruction User Manual Figure 3-6 Login page Step 2 Enter the username and password. The username and password are both admin. If you forget password, click Forgot password. You can choose a way to find previous password: 1. -
Page 21: Adding Cameras
Digital Video Recorder(DVR) User Manual 3 Operation Instruction Figure 3-7 Change the default password page Operation Steps Step 1 Enter the new password, and confirmation password. Step 2 Click OK. The real-time video screen is displayed 3.7 Adding Cameras This DVR can be connected to both analog cameras and network cameras. The DVR gives preference to the access of the analog camera by default. - Page 22 Digital Video Recorder(DVR) 3 Operation Instruction User Manual Figure 3-8 DVR topology Switch Remote monitor ----End Issue V1.0 (2018-06-04)
-
Page 23: Quick Navigation
Digital Video Recorder(DVR) Quick Navigation User Manual Quick Navigation After the DVR operation screen is displayed, move the cursor to the downmost position of the DVR screen. The DVR floating menu bar is displayed. Click in the left of DVR floating menu bar. a quick main menu is displayed. The quick main menu provides Playback, Search, Picture Grid, Event, System Setting, Exit System and Shutdown, as shown in Figure 4-1. - Page 24 Digital Video Recorder(DVR) User Manual Quick Navigation : layout button. After this button is clicked, the real-time video window is switched between the single-screen mode and multi-screen mode. Click on the right of screen splitting format and choose the channels to view the video. : Dwell on, After this button is clicked, the layout dwell on screen is enable, for how to set the dwell on, please see 6.4 Step 2.
-
Page 25: Ptz Operations
Digital Video Recorder(DVR) Quick Navigation User Manual 4.1 PTZ Operations Click the PTZ button on the real-time video toolbar. The PTZ control page is displayed, as shown in Figure 4-5. Figure 4-5 PTZ control 4.1.1 PTZ The PTZ control and function settings are applicable only to high-speed dome, PTZ cameras and cameras externally connected to PTZs, The function in the PTZ control screen is described as follows: : layout button. - Page 26 Digital Video Recorder(DVR) User Manual Quick Navigation Operation Steps Step 2 Select a P.T.Z control type from the drop-down list box. RS485: Use RS485 protocol to control analog high-speed domes and analog cameras with Motorized zoom lenses. Coaxial: Use coaxial protocol to control analog high-speed domes and analog cameras with Motorized zoom lenses.
-
Page 27: Utc
Digital Video Recorder(DVR) Quick Navigation User Manual 1. Select the preset ID. 2. Click Goto to invoke preset, the camera rotate the preset position. Or click Home to rotate the camera to the first preset position. : Channel button. Click to select the P.T.Z control channel. -
Page 28: Playback
Digital Video Recorder(DVR) User Manual Quick Navigation 4.2 Playback Playback refers to playing back a video. Click Playback in the quick navigation bar to access the playback screen, as shown in Figure 4-9. Figure 4-9 Playback screen The toolbar at the bottom of the playback screen is described as follows: : Slow play : Fast forward : Pause... -
Page 29: Search
Digital Video Recorder(DVR) Quick Navigation User Manual : Full screen off. After this button is clicked, the device returns to the real-time video screen. : Indicates whether to insert a USB flash drive. indicates that a USB flash drive is inserted into the DVR. indicates that no USB flash drive is inserted into the DVR. -
Page 30: Picture Grid
Digital Video Recorder(DVR) User Manual Quick Navigation : Backup. After this button is clicked, the video backup starts. This function is available after a USB flash drive is connected to the DVR. : Download. After this button is clicked, the backup ends. This function is available after the backup function is enabled. -
Page 31: Event
Digital Video Recorder(DVR) Quick Navigation User Manual Figure 4-11 Picture grid screen Operation Steps Step 1 Select a camera in the camera list on the left side of the picture grid screen. Videos shot by the camera in the earliest time range on the current day are displayed as thumbnails in the window on the right side. - Page 32 Digital Video Recorder(DVR) User Manual Quick Navigation Figure 4-12 DVR main menu ----End Issue V1.0 (2018-06-04)
-
Page 33: Camera Management
Digital Video Recorder(DVR) Camera Management User Manual Camera Management Camera management mainly involves analog cameras and network cameras. Analog cameras can be directly connected to input channels of the DVR. When analog cameras are insufficient, the DVR automatically searches for and adds network cameras in the same Local Area Network (LAN). -
Page 34: Camera Management
Digital Video Recorder(DVR) User Manual Camera Management 5.1 Camera Management 5.1.1 Lock a Camera On the camera management screen, check the locking status of network cameras in the camera list on the right side. If the locking status of a network camera is , you can lock the camera manually. -
Page 35: Picture Parameter
Digital Video Recorder(DVR) Camera Management User Manual Figure 5-2 Unlock confirmation message 5.2 Picture Parameter Picture parameters refer to basic attributes of a picture, including the lightness, saturation, contrast, and sharpness. You can set picture parameters for each channel based on scenarios. Operation Description Click Picture Param next to Camera in the main menu or click Menu in the upper left corner of the camera management screen and choose Picture Param to access the... -
Page 36: Encode Parameter
Digital Video Recorder(DVR) User Manual Camera Management Brightness: picture brightness. Saturation: brilliance of the picture color. Sharpness: picture clarity. Contrast: picture transparency. Operation Steps Step 1 Click a camera in the camera list on the left side of the Picture Parameter screen. Step 2 Select where to install this camera from the drop-down list. -
Page 37: Video Loss
Digital Video Recorder(DVR) Camera Management User Manual Figure 5-4 Encode Parameter screen Operation Steps Step 1 Click a camera in the camera list on the left side of the Encode Parameter screen. Step 2 Select Main Video or Sub Video. Step 3 Set Resolution, Quality, Frame rate, Bitrate and Bitrate type. - Page 38 Digital Video Recorder(DVR) User Manual Camera Management Figure 5-5 Encode Parameter screen Operation Steps Step 1 Enable video loss. Click next to Start video loss to enable video loss. Step 2 Set arming time. Click on the right of Processing method to access arming time setting screen of processing method, as shown in Figure 5-6.
- Page 39 Digital Video Recorder(DVR) Camera Management User Manual Figure 5-6 Arming time screen Step 3 Arming time setting: Method 1:Click left mouse button to select any time point within 0:00-24:00 from Monday to Sunday. Method 2:Hold down the left mouse button, drag and release mouse to select the arming time within 0:00-24:00 from Monday to Sunday.
- Page 40 Digital Video Recorder(DVR) User Manual Camera Management Figure 5-7 Trigger channel screen 2. Select the trigger channel of current channel. 3. Click OK to save trigger channel settings or click Cancel to cancel the settings. Step 5 Set Processing method. 1.
-
Page 41: Motion Detection
Digital Video Recorder(DVR) Camera Management User Manual Figure 5-8 Processing method screen of “Buzzer alarm”, Push message”, “Alarm message”, “Linkage 2. Click record” respectively to enable or disable these function. 3. Click OK to save processing method settings or click Cancel to cancel the settings. Step 6 Click OK to save video loss settings or click Copy to all, then click OK to apply the video loss settings to cameras of all channels. - Page 42 Digital Video Recorder(DVR) User Manual Camera Management Figure 5-9 Motion Detection screen Operation Steps Step 1 Select a camera in the camera list on the left side of the Motion Detection screen. Step 2 Click next to Start Motion Detection to enable motion detection. Step 3 In the video window, hold down and drag the left mouse button to draw a motion detection area.
-
Page 43: Privacy Area
Digital Video Recorder(DVR) Camera Management User Manual 5.6 Privacy Area The system allows you to mask images in a specified area and this area is called privacy area. Operation Description Click Menu in the upper left corner of the camera management screen and choose Privacy area to access the Privacy area screen, as shown in Figure 5-10. -
Page 44: Osd Settings
Digital Video Recorder(DVR) User Manual Camera Management Operation Description Click Menu in the upper left corner of the camera management screen and choose Camera tamper to access the Camera tamper screen, as shown in Figure 5-11. Figure 5-11 Camera tamper screen Operation Steps Step 1 Select a camera in the camera list on the left side of the camera tamper screen. - Page 45 Digital Video Recorder(DVR) Camera Management User Manual Figure 5-12 OSD setting screen Operation Steps Step 1 Select a camera in the camera list on the left side of the OSD setting screen. Step 2 Click next to Time to enable or disenable OSD time setting. Step 3 Click next to Channel to enable or disenable OSD channel setting.
-
Page 46: System Setting
Digital Video Recorder(DVR) User Manual System setting System setting The system setting allows you to set basic information, network, record, output, alarms manager, disk, privacy manager, advanced setting, and App for the system in System Setting. Figure 6-1 shows the system setting screen. Figure 6-1 System setting screen 6.1 Basic The system allows you to view the firmware version, compile time and product model,... -
Page 47: System
Digital Video Recorder(DVR) System setting User Manual 6.1.1 System Operation Steps Step 1 On the System setting screen, choose Basic > System to access the System setting screen, as shown in Figure 6-2. Figure 6-2 System setting screen Step 2 Enter Device name for selected device. -
Page 48: Time Zone
Digital Video Recorder(DVR) User Manual System setting Figure 6-3 Time setting screen Step 2 Select a required date format from the Date Format drop-down list. Step 3 Click next to 24 Hour to disable the 24-hour system. Then, the 12-hour system is enabled. -
Page 49: Dst
Digital Video Recorder(DVR) System setting User Manual Figure 6-4 Time zone setting screen Step 2 Select a required time zone from the Time Zone drop-down list. Step 3 Click OK to save settings or click Cancel to cancel settings. ----End 6.1.4 DST When the DST start time arrives, the device time automatically goes forward one hour. -
Page 50: Network
Digital Video Recorder(DVR) User Manual System setting Figure 6-5 DST setting screen Step 2 Click next to Daylight saving time to enable DST. Step 3 Select start time, end time, offset time from the drop-down list respectively. Step 4 Click OK to save settings or click Cancel to cancel settings. ----End 6.2 Network 6.2.1 Ipv4... - Page 51 Digital Video Recorder(DVR) System setting User Manual Figure 6-6 Ipv4 setting screen Step 2 Click next to Obtain IP automatically to enable or disable the function of automatically getting an IP address. The function is enabled by default. If the function is disabled, click input boxes next to IP, Netmask, and Gateway to set the parameters as required.
-
Page 52: Port
Digital Video Recorder(DVR) User Manual System setting Figure 6-7 Network check screen Step 5 Click OK to save IPv4 network settings or click Cancel to cancel settings. ----End 6.2.2 Port Operation Steps Step 1 On the System setting screen, choose Network > PORT to access the port setting screen, as shown in Figure 6-8. -
Page 53: Upnp
Digital Video Recorder(DVR) System setting User Manual Figure 6-8 Port setting screen Step 2 Set HTTP port, Data port1 and Data port2 respectively. Step 3 Click OK to save settings or click Cancel to cancel settings. Data Port1 used as RTSP port ... -
Page 54: Smtp
Digital Video Recorder(DVR) User Manual System setting Figure 6-9 Port mapping setting screen Step 2 Click next to UPNP to enable or disable the function of UPNP. The function is enabled by default. Step 3 After UPNP is disabled, you can manually set the HTTP port and Data port1. Step 4 Click OK to save settings or click Cancel to cancel settings. -
Page 55: Ddns
Digital Video Recorder(DVR) System setting User Manual Figure 6-10 SMTP setting screen Step 2 Click next to SSL to enable or disable the function of SSL. The function is disabled by default. Step 3 Set SMTP server and SMTP server port manually. Step 4 Set sender E-mail, user name and password manually. -
Page 56: Blacklist
Digital Video Recorder(DVR) User Manual System setting Figure 6-11 DDNS setting screen Step 2 Click the button next to Enable to enable the DDNS function. It is disabled by default. Step 3 Select a required value from the Protocol drop-down list. Step 4 Click OK to save DDNS network settings or click Cancel to cancel settings. - Page 57 Digital Video Recorder(DVR) System setting User Manual Figure 6-12 Blacklist screen Step 2 Click next to Blacklist to enable or disable the function of blacklist. The function is disabled by default. Step 3 Select a required value from the rule type drop-down list. Step 4 Click Add, the set the black and white list IP segment screen is displayed, as show in Figure 6-13.
-
Page 58: Record
Digital Video Recorder(DVR) User Manual System setting Blacklist: IP address in specified network segment to prohibit access. Whitelist: IP address in specified network segment to allow access Select a name in the list and click Delete to delete the name from the list. ... -
Page 59: Output
Digital Video Recorder(DVR) System setting User Manual 6.4 Output Operation Steps Step 1 On the System setting screen, choose Output to access the output setting screen, as shown in Figure 6-15. Figure 6-15 Output setting screen Step 2 Click next to Dwell time to access the dwell time screen, as shown in Figure 6-16. Issue V1.0 (2018-06-04) - Page 60 Digital Video Recorder(DVR) User Manual System setting Figure 6-16 Dwell time screen 2. Select a required value from the Dwell interval drop-down list. 3. Set layout. Click to choose layout. 4. Select dwell channel. Click the video window and select a channel from the channel list to set the dwell channel.
- Page 61 Digital Video Recorder(DVR) System setting User Manual Figure 6-17 CVBS output settings screen 2. Set the display offset. Press and hold the left mouse button and drag the value bar to set the left, up, right, down display offset of the CVBS monitor. 3.
-
Page 62: Alarm Manager
Digital Video Recorder(DVR) User Manual System setting Figure 6-18 Display colour settings screen 4. Press and hold the left mouse button and drag the value bar to set the brightness, contrast, chroma, saturation of the CVBS monitor. 5. Click OK to save CVBS output settings or click Cancel to cancel settings. 6.5 Alarm Manager The system allows you to set alarm surveillance and alarm in in Alarm manager. -
Page 63: Alarm In
Digital Video Recorder(DVR) System setting User Manual Figure 6-19 Surveillance setting screen Step 2 Click next to Enable to enable the surveillance function. Step 3 Select alarm duration from the drop-down list. Step 4 Click OK to save surveillance settings or click Cancel to cancel settings. ----End 6.5.2 Alarm in Operation Steps... -
Page 64: Disk
Digital Video Recorder(DVR) User Manual System setting Figure 6-20 Alarm in setting screen Step 2 Select a channel in alarm in. Step 3 Click next to Enable to enable or disable the functions. Step 4 Select Alarm type from the drop-down list. ... -
Page 65: Viewing Disk Information
Digital Video Recorder(DVR) System setting User Manual 6.6.1 Viewing Disk Information Operation Steps Step 1 On the System setting screen, choose Disk to access the disk management screen, as shown in Figure 6-21. Figure 6-21 Disk management screen Step 2 You can view the total capacity, used capacity, and SN of a disk on the disk management screen. -
Page 66: Privilege Manager
Digital Video Recorder(DVR) User Manual System setting 6.7 Privilege manager 6.7.1 User manager Operation Steps Step 1 On the System setting screen, choose Privilege manager > User manager to access the user management screen, as shown in Figure 6-22. Figure 6-22 User manager screen Step 2 Add or delete a user. - Page 67 Digital Video Recorder(DVR) System setting User Manual Figure 6-23 Add user screen 2. Enter a username, password and confirm password. The password should include letter, character and number. The password should be 6~32. 3. Select a Group from the drop-down list box. 4.
-
Page 68: Modify Password
Digital Video Recorder(DVR) User Manual System setting 6.7.2 Modify Password Operation Steps Step 1 On the System setting screen, choose Privilege manager > Modify password to access the modify password screen, as shown in Figure 6-24. Figure 6-24 Password modification screen Step 2 Enter the correct old password, new password, and confirm password, and click Modify. -
Page 69: Advanced Setting
Digital Video Recorder(DVR) System setting User Manual Figure 6-25 Privacy screen Step 2 Click next to Enable password to enable or disable the function. The function is enabled by default. Step 3 Click OK to save enable password settings or click Cancel to cancel settings. ----End 6.9 Advanced setting Operation Steps... -
Page 70: App
Digital Video Recorder(DVR) User Manual System setting Figure 6-26 Advanced setting screen Step 2 Click Import to import the configuration. Step 3 Click Export to export the configuration. Step 4 Click Reset, Reboot, Shutdown to reset the DVR, reboot the DVR or Shutdown the DVR if you need. - Page 71 Digital Video Recorder(DVR) System setting User Manual Figure 6-27 Mobile phone App screen QR codes are described as follows: iOS QR code: used by iOS-based devices to download the App client. Android QR code: used by Android-based devices to download the App client. UUID QR code: After the mobile phone App is installed, you can scan the UUID QR code to add an DVR.
-
Page 72: Log Center
Digital Video Recorder(DVR) User Manual Log Center Log Center The system allows you to set and view records of any operations performed on the DVR in Log Center, including power-on, parameter settings, and camera management. Operation Steps Step 1 Click Log Center in the main menu to access the Log Center screen, as shown in Figure 7-1. - Page 73 Digital Video Recorder(DVR) Log Center User Manual Figure 7-2 Log play screen Step 6 Click Export log to export logs to USB storage.. ----End Issue V1.0 (2018-06-04)
-
Page 74: Alarm
Digital Video Recorder(DVR) User Manual Alarm Alarm The system allows you to view alarm events, set the timeline, and clear alarms in Alarm. 8.1 Event Operation Steps Step 1 Click Alarm in the main menu to access the Event Center screen, as shown in Figure 8-1. -
Page 75: Timeline
Digital Video Recorder(DVR) Alarm User Manual Figure 8-2 Alarm video play screen ----End 8.2 Timeline The system allows you to set the timeline to play alarm videos presented by time on each day of a week. Operation Steps Step 1 Choose Alarm >... -
Page 76: Clear Alarm
Digital Video Recorder(DVR) User Manual Alarm Figure 8-3 Timeline screen Step 2 Select the alarm time to view the alarm records on that day. Step 3 Double-click an alarm picture to play the alarm video. ----End 8.3 Clear alarm When the buzzer beeps, click Clear alarm in the main menu to clear the alarm. ----End Issue V1.0 (2018-06-04) -
Page 77: Web Access
Digital Video Recorder(DVR) Web Access User Manual Web Access The DVR is embedded with a web server and supports mainstream browsers such as Internet Explorer, Chrome, Firefox, and Safari. Operations such as quick setup, real- time preview, video playback, alarm search, DVR setup, and camera setup can be performed through the web. -
Page 78: Live Video
Digital Video Recorder(DVR) User Manual Web Access Enter your user name and password to access the main interface. The default user name and password are both admin. 9.2 Live Video On the Live Video interface, you can select an online camera in the left Cameras pane and view the corresponding live video. - Page 79 Digital Video Recorder(DVR) Web Access User Manual Figure 9-3 Playback interface Step 2 Select a camera. Click a camera in the device list. A selected device is marked with . An unselected device is marked with Step 3 Select a date. Current date is displayed automatically.
-
Page 80: Alarm Search
Digital Video Recorder(DVR) User Manual Web Access Figure 9-4 Control bar Table 9-1 Playback button Buttons Button description How to operate Pause Click button to pause to play the video. Double increasing speed play when you click the Speed + button. - Page 81 Digital Video Recorder(DVR) Web Access User Manual Figure 9-5 Alarm Search interface Step 2 Click at the top right conner, set the channel, type,start time and end time, as shown in Figure 9-6 Figure 9-6 Channel alarm Step 3 Click OK, the result will be displayed as shown in Figure 9-7 Issue V1.0 (2018-06-04)
-
Page 82: Dvr Setting
Digital Video Recorder(DVR) User Manual Web Access Figure 9-7 Retrieval result Click to select the page of alarm list.. shows the rows shown in every page.. The system alarm retrieval is same as channel alarm. 9.5 DVR Setting Click DVR Setup in the navigation bar at the top of the web interface. -
Page 83: Viewing Basic Information
Digital Video Recorder(DVR) Web Access User Manual Figure 9-8 DVR Setting interface 9.5.1 Viewing basic information You can view time, time zone, DST (Daylight saving time) and device language in basic interface. Operation Steps Step 1 On the System Setting screen, choose System > Basic setting to access the Basic interface, as shown in Figure 9-9. -
Page 84: Network Management
Digital Video Recorder(DVR) User Manual Web Access Figure 9-9 Basic interface Step 2 Click Time, Time zone, DST, Device language to view these basic information.. ----End 9.5.2 Network management You can set IPv4, port, DDNS, SMTP in network management interface. 9.5.2.1 IPv4 IPv4 is the IP protocol that uses an address length of 32 bits. -
Page 85: Port
Digital Video Recorder(DVR) Web Access User Manual Figure 9-10 IPv4 interface Step 2 Click next to Obtain IP automatically to enable or disable the function of automatically getting an IP address. The function is enabled by default. If the function is disabled, click input boxes next to IP, Netmask, and Gateway to set the parameters as required. -
Page 86: Ddns
Digital Video Recorder(DVR) User Manual Web Access Figure 9-11 Port setting interface Step 2 Set HTTP port, Data port1 and Data port2 respectively. Step 3 Click Apply to save settings. Data Port1 used as RTSP port Data Port2 used as video control port ... -
Page 87: Smtp
Digital Video Recorder(DVR) Web Access User Manual Figure 9-12 DDNS setting interface Step 2 Click the button to enable the DDNS function. It is disabled by default. Step 3 Select a required value from the Protocol drop-down list. Step 4 Set Domain name, Account, and Password. -
Page 88: Device Management
Digital Video Recorder(DVR) User Manual Web Access Figure 9-13 SMTP setting interface Step 2 Click next to SSL to enable Secure Sockets Layer( Some SMTP servers are required). It is disabled by default. Step 3 Set SMTP server and SMTP server port manually. Step 4 Set sender E-mail, user name and password manually. - Page 89 Digital Video Recorder(DVR) Web Access User Manual Figure 9-14 Device management interface Table 9-2 Device management operations Buttons Button description How to operate Reboot , the message “Are you sure to (1) Click restart?” is displayed. (2) Click OK and the NVR reboot. Upgrade (1) Click and select an upgrade package.
-
Page 90: Alarm
Digital Video Recorder(DVR) User Manual Web Access Buttons Button description How to operate Reset , the message “Are you sure to (1) Click restore?” is displayed. (2) Click OK, the message “Apply success! The device is rebooting, please login later!” is displayed. - Page 91 Digital Video Recorder(DVR) Web Access User Manual Figure 9-15 Motion Alarm interface Step 2 Select a channel from the drop-down list. Step 3 Click to enable channel alarm . It is disabled by default. Step 4 Drag the slider to set the sensitivity. Step 5 Set the alarm events.
-
Page 92: Storage
Digital Video Recorder(DVR) User Manual Web Access Step 7 Set time plan. 1. Click Time plan in channel alarm interface, the time plan interface is display, as shown in Figure 9-16 Figure 9-16 Time plan interface 2. Set the time plan. Method 1:Click left mouse button to select any time point within 0:00-24:00 from Monday to Sunday. -
Page 93: User
Digital Video Recorder(DVR) Web Access User Manual Figure 9-17 Record policy interface Step 2 Click to enable schedule record. It is enabled by default. Step 3 Set the record policy. Please refer to 9.6 Step 7 Set time plan. Step 4 Click Apply to save the setting. - Page 94 Digital Video Recorder(DVR) User Manual Web Access Figure 9-18 Privilege management interface Step 2 Add a user. 1. Click in privilege management interface to access the add user interface, as shown in Figure 9-19 Issue V1.0 (2018-06-04)
- Page 95 Digital Video Recorder(DVR) Web Access User Manual Figure 9-19 Add user interface 2. Set the user name, password, and confirm password. 3. Select a group from the drop-down list. 4. Check the privilege. 5. Click OK to save the setting or Click cancel to cancel the setting. NOTE ...
-
Page 96: Modify Password
Digital Video Recorder(DVR) User Manual Web Access 9.8.2 Modify password Operation Steps Step 1 On the System Setting screen, choose User > Modify password to access the Modify password interface, as shown in Figure 9-20. Figure 9-20 Modify password interface Step 2 Enter the old password, and set the new password and confirm password. - Page 97 Digital Video Recorder(DVR) Web Access User Manual Figure 9-21 Download configuration interface Step 2 Enter the image download path. Step 3 Enter the record download path. Step 4 Click Apply to save the setting. -----End Issue V1.0 (2018-06-04)
-
Page 98: Faq
Digital Video Recorder(DVR) User Manual 1. Why is the DVR self-test screen frozen? Use the methods below to fix the problem: Method 1: Check whether the DVR is equipped with a hard disk. Method 2: Check whether the DVR is equipped with an unformatted hard disk. Method 3: Check whether the hard disk is damaged.
Need help?
Do you have a question about the WBXHD041S and is the answer not in the manual?
Questions and answers