Table of Contents
Advertisement
Quick Links
Advertisement
Table of Contents

Related Manuals for Boss Audio Systems BV9364B


Summary of Contents for Boss Audio Systems BV9364B
-
Page 3: Table Of Contents
Congratulations on your purchase of a Boss Audio Systems Multimedia Receiver. It has been designed, engineered and manufactured to bring you the highest level of performance and quality, and will offer you years of entertainment pleasure. Specifications....................1 Safety Notice....................2 Accessories......................3 Unit Installation.................... -
Page 4: Specifications
Model No. BV9364B Fixed front panel with 6.2 inch TFT screen FM/AM radio Fully compatible with DVD/VCD/CD/MP3/MPEG4/JPEG USB (front and rear) and SD card media play support Bluetooth audio stream and hands-free phone call General AUX input features AV input... -
Page 5: Safety Notice
Please read and understand the following safety information before operating this unit. The unit is suitable for 12V power supply (requires grounding). Do not connect it to 24V power supply in trucks or buses, or else it will be damaged. Please use genuine discs instead of incompatible discs or the unit will be damaged and/or the service live will be shortened. -
Page 6: Accessories
Remote control.............. Wire harness..............Mounting brackets............Bracket screws ............. Trim ring................1 External microphone............1 UNIT INSTALLATION Bracket Screw Trim ring Bracket Screw 1. Put the 2 brackets to the left and right side of the unit. 2. Use the supplied screws to attach the brackets to the unit. 3. -
Page 7: Remote Control Operation
Navigation menus. VOL +/- Increase or decrease volume. Answer or make a phone call. Numeric buttons Select a title/chapter/track. • In radio mode, select a preset station. • In Bluetooth phone mode, enter a phone • number or a special symbol. End or reject a phone call. -
Page 8: Wires Connection Description
WIRES CONNECTION DESCRIPTION The Description of the Input/Output Interface AM/FM Antenna Jack Video Output Front Camera Input A/V Input Wire Harness Connector Pre-Amp Output Rear Camera Input Wire Harness Explanation Speaker Outputs Power White......... Left Front (+) Yellow........Constant (+12V) White/Blk........ -
Page 9: Panel Introduction
MENU Remote sensor Aim the remote control directly at the sensor. Eject the disc. Disc slot Insert a disc. MUTE Mute or restore volume. Built in microphone Pick up sound. MODE Switch between modes. SD card slot Connect to a Micro SD card for media play. Reset button Press the reset button if the unit fails to operate properly. -
Page 10: Main Menu Operation Instruction
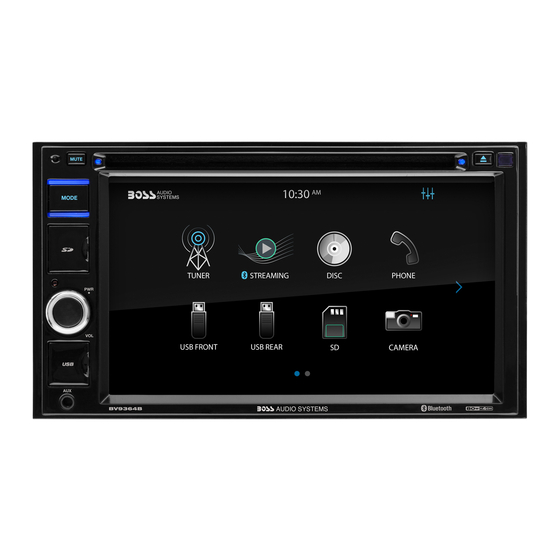
MAIN MENU 1 1. Tuner Interface 2. Streaming Interface 3. DISC Interface 4. Phone Interface 5. USB FRONT Interface 6. USB REAR Interface 7. SD Interface 8. Camera Interface MAIN MENU 2 9. AV INPUT Interface 10. AUX IN Interface 11. -
Page 11: Access Setup Interface
CAMERA SETTINGS-Menu 2 1. Camera Trigger: Touch to select Front/Rear/Off. Select to display the front or rear camera view, or no camera view when reversing. 2. Rear Camera: Touch to enable or disable the rear camera input. 3. Rear Cam Pwr: Touch to enable or disable power connection to the rear camera. 4. -
Page 12: Tuner Settings
ACCESS SETUP INTERFACE 1. Touch to select whether to output sound from an external amplifier. 2. Startup volume: default volume. If the volume at the last shutdown is less than this volume, the volume at the last ① shutdown will be used when rebooting; if the volume at the last shutdown is greater than this volume, this default volume ②... -
Page 13: About Settings
TUNER OPERATION ABOUT SETTINGS –Menu 7 1. Touch to enter the touch calibration interface. 2. Touch to view the version number of the machine. 3. Touch to restore the machine to factory settings. 4. Touch to select whether it is necessary to display a End User License Agreement when booting up. -
Page 14: Disc/Cd/Usb/Sd Playback
DVD MODE OPERATION 1. Touch to select a title/chapter of DVD. 2. Short press to move to the previous chapter; long press to rewind quickly. 3. Touch to playback/pause. 4. Short press to move to the next chapter; long press to fast forward quickly. 5. -
Page 15: Media Playing Cd Audio
MEDIA PLAYING CD AUDIO 1. Show the music’s ID3 information. 2. Time bar: show the total time and playing time of the present song. 3. Touch to change play mode: repeat all, repeat directory, repeat single, sequential play and shuffle play. -
Page 16: Bluetooth Operation
The default password is "0000" and can be changed by clicking "0000". e.Default Bluetooth name for this unit: Boss Audio BV9364B 2.Function area: a.Click to see the dialing keypad. Users can dial phone numbers and make calls. b.Click to see the Bluetooth phonebook menu. -
Page 17: Bluetooth Phonebook
BLUETOOTH PHONEBOOK 1.Touch to search for a name or phone number. 2.Contact list. BLUETOOTH PHONE CALL HISTORY 1.Click to sync phonebook. 2.Touch to show missed calls. 3.Touch to show the dialed phone numbers. . 4.Touch to show the received phone numbers. -
Page 18: Photos
PHOTOS 1.Keypad: enter a number to select file. 2.Skip to the previous picture. 3. PLAY/PAUSE: Touch to start picture playing mode. Touch again to pause. During picture playing mode, each picture will be played for 5 seconds and then automatically move to the next if the PLAY/PAUSE button is not pressed. -
Page 19: Troubleshooting
Media displayed Cause Corrective Action Loading Disc is being read Wait until the reading finishes Disc is dirty Clean the disc No disc/Bad disc Disc is upside down Insert disc in right way Unknown disc Unsupported disc type Check the disc and change Illegal mechanism Press EJECT for 5s to reset Error... - Page 20 Problem Cause Corrective Action Incorrect connection Check wiring and correct to parking brake wire No image Parking brake is not Stop vehicle in safe place and engaged set parking brake ON Flashing image or Improper video signal Check wiring and correct interference appears connections on screen...
Need help?
Do you have a question about the BV9364B and is the answer not in the manual?
Questions and answers
Can the Clock numbers be made to be larger