Advertisement
Quick Links
sauder.com
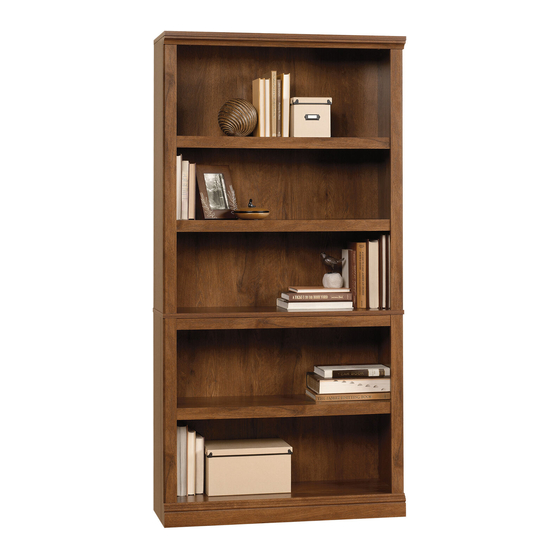
5-Shelf Bookcase
410367
Need help? Visit Sauder.com to view video assembly tips or chat with a live rep.
Prefer the phone? Call 1-800-523-3987.
Share your journey!
Great for all those
books you'll never read.
NOTE: THIS INSTRUCTION
BOOKLET CONTAINS IMPORTANT
SAFETY INFORMATION.
PLEASE READ AND KEEP FOR
FUTURE REFERENCE.
English pg 1-18
Français pg 19-21
Español pg 22-24
Lot # 372649
05/14/15
Purchased: __________________
Be sure to give us a ring before
making any returns. 1-800-523-3987
Advertisement

Related Manuals for Sauder 410367


Summary of Contents for Sauder 410367
- Page 1 5-Shelf Bookcase 410367 NOTE: THIS INSTRUCTION BOOKLET CONTAINS IMPORTANT SAFETY INFORMATION. Need help? Visit Sauder.com to view video assembly tips or chat with a live rep. PLEASE READ AND KEEP FOR FUTURE REFERENCE. Prefer the phone? Call 1-800-523-3987. English pg 1-18 Français pg 19-21...
- Page 2 LEFT END (1) LARGE BACK (1) M46 BASE (1) LOWER RIGHT END (1) BACK (1) SHELF MOLDING (3) LOWER LEFT END (1) ADJUSTABLE SHELF (3) SKIRT (1) TOP (1) END MOLDING (2) LOWER END MOLDING (2) BOTTOM (1) Page 2 410367 www.sauder.com/services...
- Page 3 Now you know Part Identifi cation our ABCs. www.sauder.com/services 410367 Page 3...
- Page 4 CAM COVER - 8 HOLE PLUG - 3 METAL PIN - 12 BLACK 1-7/8" FLAT HEAD SCREW - 5 BLACK 1-1/8" PAN HEAD SCREW - 3 BLACK 9/16" LARGE HEAD SCREW - 17 NAIL - 55 Page 4 410367 www.sauder.com/services...
- Page 5 CAM DOWELS (R2) into the HIDDEN CAMS. Do not tighten the HIDDEN CAMS in this step. Arrow (12 used) Arrow Insert the metal end of the CAM DOWEL into the HIDDEN CAM. www.sauder.com/services 410367 Page 5...
- Page 6 Tighten Risk of damage or Arrow injury. HIDDEN CAMS must be completely Arrow Maximum tightened. HIDDEN 210 degrees CAMS that are not completely tightened may loosen, and parts may separate. To Minimum completely tighten: 190 degrees Page 6 410367 www.sauder.com/services...
- Page 7 BLACK 1-1/8" PAN HEAD SCREWS (Y). Insert three HOLE PLUGS (V) into the holes in the å TOP MOLDING (M20). BLACK 1-1/8" PAN HEAD SCREW (3 used in this step) Do not overtighten these SCREWS. Curved edge www.sauder.com/services 410367 Page 7...
- Page 8 Step 4 Slide the END MOLDINGS (K) onto the notched edges of å the ENDS (A and B). * U.S. Patent No. 5,499,886 å Notched edge Notched edge Slide the END MOLDINGS (K) onto the notched edges. Page 8 410367 www.sauder.com/services...
- Page 9 Fasten the SHELF (G) to the ENDS (A and B). Use four å BLACK 1-7/8" FLAT HEAD SCREWS (X). Long Finished edge r f a w i t o l e BLACK 1-7/8" FLAT HEAD SCREW (4 used in this step) www.sauder.com/services 410367 Page 9...
- Page 10 Fasten the LOWER LEFT END (D) to the SHELF (G). å Tighten two HIDDEN CAMS. Notched edge i t h f a c S u r D E N H I D Maximum Arrow 210 degrees Minimum 190 degrees Page 10 410367 www.sauder.com/services...
- Page 11 Don't worry. It isn't Rome. This can be built in a day. These holes must be here. S u r f a c H I D D E N i t h Maximum Arrow 210 degrees Minimum 190 degrees www.sauder.com/services 410367 Page 11...
- Page 12 Notched edge Slide the LOWER END MOLDINGS (P) onto the notched edges. Notched edge i t h o f a c S u r D E N H I D Maximum Arrow 210 degrees Minimum 190 degrees Page 12 410367 www.sauder.com/services...
- Page 13 Fasten the BASE (M46) to the LOWER ENDS (C and D) and å BOTTOM (F). Use fi ve BLACK 9/16" LARGE HEAD SCREWS (Z). BLACK 9/16" LARGE HEAD SCREW (10 used in this step) Rounded edge www.sauder.com/services 410367 Page 13...
- Page 14 Fasten the SKIRT (O) to the SHELF (G). Use three BLACK å 9/16" LARGE HEAD SCREWS (Z). NOTE: There are no pre-drilled holes in the SKIRT. The å SCREWS will tighten into the groove. BLACK 9/16" LARGE HEAD SCREW (6 used in this step) Page 14 410367 www.sauder.com/services...
- Page 15 Repeat this step for the BACK (I). å NAIL (55 used in this step) 1" Do not fasten NAILS along this edge until the BACK (I) is overlapping the LARGE BACK (H). 1/2" 1-1/2" 5-1/2" 1/4" www.sauder.com/services 410367 Page 15...
- Page 16 ADJUSTABLE SHELVES (J). Repeat this step for the other ADJUSTABLE SHELVES (J). å * U.S. Patent No. 5,499,886 å These surfaces should be even. Notched edge Slide the SHELF MOLDING (N) onto the notched edge. Page 16 410367 www.sauder.com/services...
- Page 17 Insert the METAL PINS (W) into the hole locations of your å legs. And, you know, choice in the ENDS (A and B) and LOWER ENDS (C and D). your arms. Set the ADJUSTABLE SHELVES (J) onto the METAL PINS. (12 used) www.sauder.com/services 410367 Page 17...
- Page 18 (1 used into a stud in your wall) BLACK 9/16" LARGE HEAD SCREW (1 used into the top of your unit) No load 30 lbs. 30 lbs. 40 lbs. 30 lbs. (8 used) To cover HIDDEN CAMS 50 lbs. Page 18 410367 www.sauder.com/services...
- Page 19 QUANTITÉ d’ a chat de cet élément et conserver le livret pour future référence. EXTRÉMITÉ DROITE ..........1 EXCENTRIQUEESCAMOTABLE ....12 Pour contacter Sauder EXTRÉMITÉ GAUCHE ..........1 CHEVILLE D’EXCENTRIQUE......12 en ce qui concerne cet EXTRÉMITÉ DROITE INFÉRIEURE ....1 CONSOLE DE SÉCURITÉ ........1 élément, faire référence...
- Page 20 ÉTAPE 5 REMARQUE : La PLINTHE ne comporte pas de trous pré-percés. Serrer les VIS dans la rainure. Fixer la TABLETTE (G) aux EXTRÉMITÉS (A et B). Utiliser quatre VIS NOIRES TÊTE PLATE 48 mm (X). Page 20 410367 www.sauder.com/services...
- Page 21 fi gurent sur la couverture arrière du manuel d’instructions. * Brevet État Unis n° 5,499,886 Ceci complète l’ a ssemblage. Pour nettoyer, utiliser l’encaustique pour meubles préférée ou un chiff on humide. Essuyer. www.sauder.com/services 410367 Page 21...
- Page 22 EXCÉNTRICO ESCONDIDO ......12 et conserver le livret pour future référence. EXTREMO IZQUIERDO ............1 PASADOR DE EXCÉNTRICO ......12 Pour contacter Sauder EXTREMO DERECHO INFERIOR ........ 1 MÉNSULA DE SEGURIDAD .........1 en ce qui concerne cet EXTREMO IZQUIERDO INFERIOR ......1 SOPORTE ANGULAR ..........8...
- Page 23 Fije el ESTANTE (G) a los EXTREMOS (A y B). Utilice cuatro TORNILLOS NEGROS DE CABEZA PERDIDA de 48 mm (X). NOTA: No hay agujeros perforados en el FALDÓN. Los TORNILLOS apretarán dentro de la ranura. www.sauder.com/services 410367 Page 23...
- Page 24 ESTANTES AJUSTABLES (J). Esto completa el ensamblaje. Limpie con su pulimento para Repita este paso para los otros ESTANTES AJUSTABLES (J). muebles preferido o un paño húmedo. Seque con un paño. *Patente EE. UU. No. 5,499,886 Page 24 410367 www.sauder.com/services...
- Page 25 Les téléviseurs peuvent être un téléviseur. cet eff et. particulièrement lourds. De plus, le poids et l’emplacement du tube image ont tendance à rendre les téléviseurs instables et enclins à tomber vers l’ a vant. www.sauder.com/services 410367 Page 25...
- Page 26 Además, el peso y la ubicación del tubo de imagen tienden a causar la inestabilidad de televisores y propensa a volcarse hacia adelante. Page 26 410367 www.sauder.com/services...
- Page 27 à compter de la date d'achat la première fois et qui sont signalés à Sauder dans les limites de couverture de la contre tout défaut de matériaux ou de fabrication des composantes de mobilier Sauder.
- Page 28 Dear Valued Customer: So, how did it go? Thanks so much for choosing Sauder® furniture. I hope the Set a world record for speed? purchase and assembly process was a positive experience Feeling good about yourself? and you feel good about the furniture you just built. If you Nice.
Need help?
Do you have a question about the 410367 and is the answer not in the manual?
Questions and answers