Table of Contents
Advertisement
Quick Links
Natural Gas
FPB-25RBS22MT-N
FPB-29RBS22MT-N
FPB-33RBS31MT-N
FPB-19RBS16MT-N
FPB-25RBS22MT-N
FPB-20SBS16MT-N
FPB-26SBS22MT-N
FPB-32SBS31MT-N
FPB-38SBS36MT-N
Outdoor Match Throw Fire Pits
Installation and Operating Instructions
IF YOU CANNOT READ OR UNDERSTAND THESE INSTALLATION INSTRUCTIONS
DO NOT ATTEMPT TO INSTALL OR OPERATE THIS APPLIANCE
This fire pit requires a minimum 18-square inches (per side) of cross ventilation.
Failure to provide proper ventilation can void the warranty.
Warning: For Outdoor Use Only
PLEASE RETAIN THIS MANUAL FOR FUTURE REFERENCE
MODELS
25" Round Stainless Pan with 22" Stainless Spur Burner
29" Round Stainless Pan with 22" Stainless Spur Burner
33" Round Stainless Pan with 31" Stainless Spur Burner
19" Round Stainless Pan with 16" Stainless Spur Burner
25" Round Stainless Pan with 22" Stainless Spur Burner
20" Square Stainless Pan with 16" Stainless Burner
26" Square Stainless Pan with 22" Stainless Burner
32" Square Stainless Pan with 31" Stainless Burner
38" Square Stainless Pan with 36" Stainless Burner
INSTALLATION PRECAUTION:
Description
Advertisement
Table of Contents

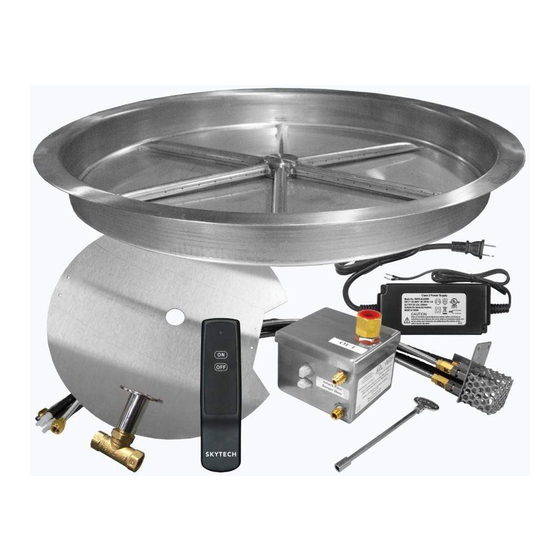
Summary of Contents for Skytech firegear Outdoors FPB-25RBS22MT-N
- Page 1 MODELS Natural Gas Description FPB-25RBS22MT-N 25” Round Stainless Pan with 22” Stainless Spur Burner FPB-29RBS22MT-N 29” Round Stainless Pan with 22” Stainless Spur Burner FPB-33RBS31MT-N 33” Round Stainless Pan with 31” Stainless Spur Burner FPB-19RBS16MT-N 19” Round Stainless Pan with 16” Stainless Spur Burner FPB-25RBS22MT-N 25”...
- Page 2 D ANGER CARBON M ONOXIDE H AZZARD This a ppliance c an p roduce c arbon m onoxide which h as n o o dor. ...
-
Page 3: Table Of Contents
Fuels used in gas fired appliances, and the products of combustion such as fuels, contain chemicals known to cause cancer, birth defects and/or other reproductive harm. This warning is issued pursuant to the California Health & Safety Code Sec. 25249.1 TABLE OF CONTENTS Specifications Preparation for Non-Conbustible Structure... -
Page 4: Specifications
SPECIFICATIONS Model: Natural Gas (NG) Min./Max. Inside Ground Side Combustible Combustible Depth Install Opening Level Wall Ceiling Floor FPB-25RBS22MT-N 2.500” 25.25”/27.5” 23.875” 8” 36” 96” 18” FPB-29RBS22MT-N 2.500” 30”/31.35” 29” 8” 36” 96” 18” FPB-33RBS31MT-N 2.500” 34”/35.25” 33” 8” 36” 96”... -
Page 5: Preparation For Non-Conbustible Structure
WARNING: Proper clearances from combustible materials must be maintained from all sides, top and bottom of this appliance. Use the specifications listed on page 3 for proper clearance to combustibles. PREPARING A NON-COMBUSTIBLE STRUCTURE The fire pit can be installed on a flat, stable surface, away from any combustible materials. Install Fire pit on any level, outdoor non-combustible, flat stable surface or a combustible floor according to the clearances specified in this manual. -
Page 6: Installation Into An Approved Enclosure
INSTALLATION OF FIRE PIT INTO AN APPROVED ENCLOSURE REQUIREMENTS 1. Only non-combustible materials should come in direct contact with any part of the fire pit. Underneath area should be non-combustible or a flat level combustible surface according to the clearances specified in this manual.. We recommend using 3/4”... -
Page 7: Typical Installation Drawings
Non-Combustible Fire Pit Pan Fire Pit Enclousure Key Valve Shut-O Gas Supply NOTE: Key valve and flexible gas lines are supplied. Gas shut-off is not supplied. Note: A 1¼” x 2” black iron or galvanized coupler/nipple (not supplied) can be used as a spacer between the manual valve and the valve flange to add additional Non-... -
Page 8: Operation
OPERATION CAUTION: Children and adults should be alerted to the hazards on high surface temperatures and should stay away to avoid burns or clothing ignition. Young children should be carefully supervised when they are in the area of the appliance. WARNING: Do not use this appliance if any part has been under water. -
Page 9: Replacement Parts
MT REPLACEMENT PARTS Drawings are not proportioned. MT Burning Spur Fire Pits I-MT REV. 7-23-15 Page 8... -
Page 10: Replacement Parts List
MT REPLACEMENT PARTS Qty. Item Description Part Number Pan-GV25R 25-inch Round Black Pan Pan-GV29R 29-inch Round Black Pan Pan-GV33R 33-inch Round Black Pan Pan-SS19R 19-inch Round Stainless Pan Pan-SS25R 25-inch Round Stainless Pan Pan-SS20S 20-inch Square Stainless Pan 26-inch Square Stainless Pan Pan-SS26S 32-inch Square Stainless Pan Pan-SS32S... -
Page 11: Fire Pit Maintenance/ Trouble Shooting
FIRE PIT MAINTENANCE 1. The fire pit should be inspected and cleaned before initial use at least annually by a qualified field service person. 2. Any component that is found faulty must be replaced with an approved component. 3. Any tampering or modifying with the fire pit is dangerous and voids all warranties. 4. - Page 12 (855) 498-8324 FOR TECHNICAL SERVICE, CALL: Firegear Outdoors 9230 Conservation Way Fort Wayne, IN 46809 For Sales: (888) 672-8929 www.firegearoutdoors.com WEB SITE: MT Burning Spur Fire Pits I-MT REV. 7-23-15 Page 11...
- Page 13 Expanded View of Match Throw Fire Pit Fire Pit Pan Burner 7/8” Washer Brass Nut OASNG# Note: Use joint compound or Te on tape resistant to all gasses on all male NPT U3-8D-S (Fitting) threads; not ared ttings. Ensure all connections are tight and check for gas leaks before and after assembly is complete.
- Page 14 Pipe Fitting Precautions CAUTION: Failure to follow the procedures below could result in fire of loss of life. The gas fittings in the package require the use of a gas-rated Teflon tape or pipe compound to seal all NPT fittings. Before assembling the fittings ensure the gas connections are turned OFF and at the gas meter outside the home or business before disconnecting or attaching gas lines to appliances.


Need help?
Do you have a question about the firegear Outdoors FPB-25RBS22MT-N and is the answer not in the manual?
Questions and answers