Table of Contents
Advertisement
Quick Links
COUNTER-HEIGHT REFRIGERATORS
Models:C
405
ALL SAFETY RULES AND OPERATING INSTRUCTIONS
Write Model and Serial Numbers here:
Model _________________________
Serial No. ______________________
FF6 series
FF7 series
FF7COM
FF7BCOM
SCR600L
SCR600BL
CM411L
Instruction Manual
BEFORE USE, PLEASE READ AND FOLLOW
(ACCUCOLD® brand)
(
ACCUCOLD® brand)
(SUMMIT Commercial)
(SUMMIT Commercial)
(ACCUCOLD® brand)
(SUMMIT Commercial)
FELIX STORCH, INC.
An ISO 9001:2015 registered company
770 Garrison Avenue
Bronx, NY 10474
www.summitappliance.com
Advertisement
Table of Contents

Related Manuals for Summit Appliance accucold FF6 Series


Summary of Contents for Summit Appliance accucold FF6 Series
- Page 1 COUNTER-HEIGHT REFRIGERATORS Models:C FF6 series (ACCUCOLD® brand) FF7 series ACCUCOLD® brand) FF7COM (SUMMIT Commercial) FF7BCOM (SUMMIT Commercial) SCR600L (ACCUCOLD® brand) SCR600BL (SUMMIT Commercial) CM411L Instruction Manual BEFORE USE, PLEASE READ AND FOLLOW ALL SAFETY RULES AND OPERATING INSTRUCTIONS FELIX STORCH, INC. Write Model and Serial Numbers here: An ISO 9001:2015 registered company Model _________________________...
-
Page 2: Important Safeguards
IMPORTANT SAFEGUARDS Your safety and the safety of others are very important. We have provided many important safety messages in this manual and on your appliance. Always read and obey all safety messages. This is the Safety Alert Symbol. This symbol alerts you to potential hazards that can kill or injure you and others. - Page 3 Use two or more people to move and install the refrigerator. Failure to do so can result in back or other injury. To ensure proper ventilation for your appliance, the front of the unit must be completely ° °...
-
Page 4: Table Of Contents
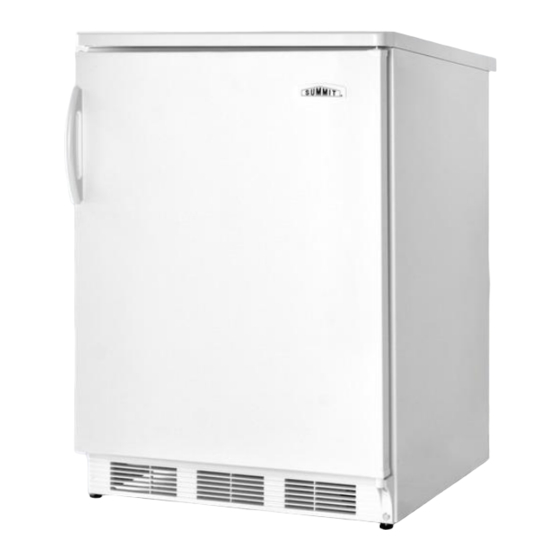
Table of Contents Important Safeguards ...................... 1 - 2 Location of Parts ......................3 - 4 Technical Information ......................5 Installation Instructions ....................6 - 8 Before Using Your Appliance ................... 6 Installing the Refrigerator ....................6 Electrical Connection / Extension Cord ............... 6 - 7 Reversing the Door Swing .................. - Page 5 Temperature control dial FF7 series, (thermostat), light switch FF7COM & and interior light FF7BCOM Handle Adjustable shelves Door (wire for FF7, FF7L & FF7COM; glass for FF7B, FF7LBL & FF7BCOM) Front ventilation Defrost water slots (kick plate) outlet Leveling legs NOTE: Lock on models FF7L and FF7LBL is located on the front of the door, near the top center.
-
Page 6: Technical Information
Technical Information FF6 (white with wire shelves and no lock; door storage) FF6L (white with wire shelves and lock; door storage) FF6B (black with glass shelves and no lock; door storage) FF7 (white with wire shelves and no lock; flat door liner) FF7L (white with wire shelves and lock;... -
Page 7: Installation Instructions
Installation Instructions Before Using Your Appliance: Remove the exterior and interior packing. Before connecting the unit to a power source, let it stand for approximately 2 hours. This will reduce the possibility of a malfunction in the cooling system from handling during transportation. -
Page 8: Reversing The Door Swing
responsibility and obligation to have it replaced with a properly grounded 3-prong wall outlet. To prevent accidental injury, the cord should be secured behind the unit and not left exposed or dangling. The unit should always be plugged into its own individual electrical outlet which has a voltage rating that matches the rating label on the appliance. -
Page 9: Door Handle Installation
For models FF6, FF6L, FF7L, FF7LBL, SCR600L and SCR600BL: NOTES: See illustration below. All of the parts that are removed must be kept for the reinstallation of the door. 1. Unscrew the lower hinge and take off the door. 2. Push the kick plate to the right in the new position. 3. -
Page 10: Operating Your Refrigerator
Operating Your Refrigerator Temperature Control: Your appliance’s evaporator system is out of sight behind the interior rear wall. The interior temperature is controlled with a thermostat knob located inside the unit, towards the upper right-hand corner. Turn the knob clockwise from the STOP (0) position toward the higher numbers for colder temperatures. -
Page 11: Care And Maintenance
Care and Maintenance Cleaning Your Appliance: Unplug the appliance, turn the thermostat to STOP (0) and remove all contents, including shelves. Wash the inside surfaces with a solution of lukewarm water and vinegar. Wipe dry with a clean, soft cloth. Wash the shelves, drip tray and crisper with a mild detergent solution, then rinse and dry thoroughly. - Page 12 Troubleshooting When using this appliance, you may come across some problems that in many cases result from improper handling and can easily be eliminated. TROUBLESHOOTING GUIDE The appliance fails to operate after being connected to the power source. Check whether the power supply is active and that the thermostat is not set to the STOP (0) position.
- Page 13 Notes...
- Page 14 Notes...
- Page 15 Notes...
-
Page 16: Limited Warranty
Limited Warranty ONE-YEAR LIMITED WARRANTY Within the 48 contiguous United States, for one year from the date of purchase, when this appliance is operated and maintained according to instructions attached to or furnished with the product, warrantor will pay for factory-specified parts and repair labor to correct defects in materials or workmanship. Service must be provided by a designated service company.
Need help?
Do you have a question about the accucold FF6 Series and is the answer not in the manual?
Questions and answers