Advertisement
Quick Links
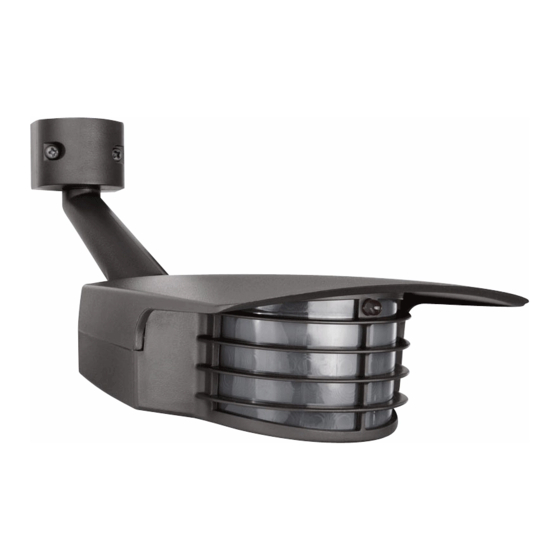
STL200 Installation Manual
STL200
STL200HB
STL200H
Specifications:
Switching Capacity:
8 amps
Voltage:
120 volts
1000 watts Incandescent
500 watts Fluorescent
Detection Pattern:
50' x 200˚
Time Adjustment:
5 seconds
to 12 minutes
Power Consumption:
1 watt
Surge protection:
I. E.C. specs
UL Listing:
Raintight
Photoelectric
Switch
Advertisement

Subscribe to Our Youtube Channel
Related Manuals for RAB STL200HB


Summary of Contents for RAB STL200HB
- Page 1 STL200 Installation Manual STL200 STL200HB STL200H Specifications: Switching Capacity: 8 amps Voltage: 120 volts 1000 watts Incandescent 500 watts Fluorescent Detection Pattern: 50’ x 200˚ Time Adjustment: 5 seconds to 12 minutes Power Consumption: 1 watt Surge protection: I. E.C. specs...
-
Page 2: Mounting Plate
Mounting Plate: TURN OFF ALL POWER AT STL200 floodlight kits come pre- CIRCUIT BREAKER / FUSE PANEL. wired and assembled on the RAB CU4 EZ plate, allowing for mounting on round, rectangular or octagonal Read entire Installation Manual surface or recessed boxes. - Page 3 Easy Installation & Product Help Toll Free Phone Toll Free Fax Fax on Demand Call our friendly experts. Send faxes to RAB Faxed information, 8AM - 6PM ET Mon. - Fri. 24/7. 24/7. 888 RAB-1000 888 RAB-1232 888 RAB-1236 E-mail www.rabweb.com...
- Page 4 Contents of Accessory Kit • 2 Lens Masks • Indoor Switchplate Label • 3 Wire Nuts • Crossbar with Green Ground Screw • Hanging Hook • 1/2" Close Up Plugs (3) • Slotted Screws (4) • Finishing Cap • O-ring Gasket •...
- Page 5 How Does the STEALTH Work? Stealth’s infrared sensor “sees” How are the Time, Sensitivity and small temperature changes caused Photocell adjusted? by the motion of people or cars Time: Sets the time that lights within its protection zone and turns will remain on after the detection on lights automatically.
- Page 6 Picking a Location Choose a location from which How does the LED Detection the sensor can “see” all the paths Indicator work? of movement. The red LED above the lens shows the logic state of the sensor. If the The sensor may be wall or ceiling sensor is set for night only opera- mounted.
-
Page 7: Limited Warranty
$20.00 (made out to RAB Electric). We will repair or replace your unit. For repair replacement, return the product freight prepaid and insured... - Page 8 Technical Tips: Lights Turn On for Unknown Reasons 1. Lights may turn on occasionally 3. You may not be aware that during rain, snow and windstorms animals have triggered the sensor. because the sensor is detection Check sensor aiming to reduce changes in temperature.
- Page 9 Kit Wiring (pigtail) EZ Plate Black Black Power White White Ground Ground Red pigtail is only used to switch remote or additional fixtures. 1. Attach the Universal Mounting 3. Bring power leads and sensor bar with the bar screws (provid- kit leads through holes in all ed) to the junction box.
-
Page 10: Wiring Diagrams
Wiring Diagrams White Basic Wiring Diagram Power In Black Sensor Basic Kit Wiring (pigtail) Black Note: Pigtail is only used to switch Power In remote or additional light fixtures Black White White Ground Ground Multiple Fixtures White Multiple fixtures may be wired to a Power in single sensor. - Page 11 Technical Tips: Range Appears Limited 1. Check that the sensor is level 3. Check that movement is not from side to side and pointed at the directly towards sensor. Sensor area you desire. If unit is tilted, part will see movement across its of the detection zone may be high pattern more quickly.
- Page 12 Technical Tips: Lights Do Not Turn On Lights Turn Off Too Quickly 1. Check that lamps and fixtures 1. Check if sensor is being “tricked” work. Compare wiring to the wiring by reflected light. If lights controlled diagram in this manual. Check that by the sensor shine or reflect into the power is on.
- Page 13 Aiming And Walk Testing Walk Test The purpose of the Walk Test is to check and adjust the coverage pattern. Stealth has a 5 minute Test Period which allows the sensor to be aimed and walk tested day or night. If you require 5 more minutes Start Finish of Test Time, turn the power off for...
- Page 14 Technical Tips: Lights Do Not Turn Off 1. Make sure that the sensor is not 3. Make sure sensor and lights are in Manual Override Mode. Turn mounted firmly and do not move power OFF for 10 seconds, then even slightly when touched. If they ON Sensor will be in Test Mode for move, tighten all screws.
- Page 15 Technical Tips: Lights Turn On and Off Inappropriately 1. Make sure the sensor is installed 6. Make sure sensor is not aimed on its own dedicated circuit, free of within 20 feet of a road or sidewalk. motor loads such as HVAC equip- Passing cars will activate sensor.
Need help?
Do you have a question about the STL200HB and is the answer not in the manual?
Questions and answers