Table of Contents
Advertisement
Available languages
Available languages
Having TROUBLE with operation?
Please reset your unit
Refer to page of How to reset your unit
Still having trouble??
USA ONLY
Call 1-800-252-5722
http://www.jvc.com
We can help you!
EN, SP, FR
© 2012 JVC KENWOOD Corporation
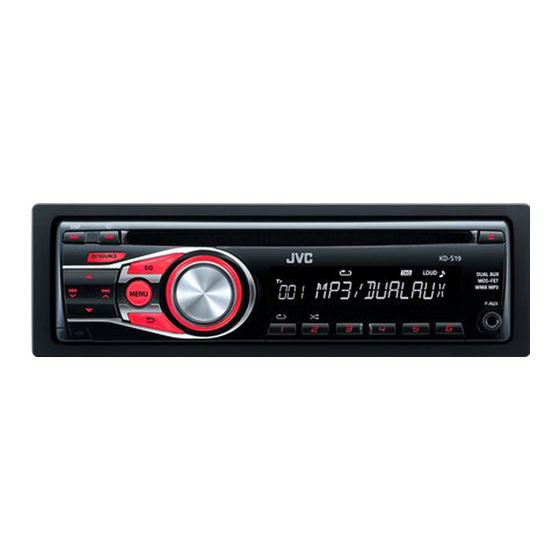
KD-S19
CD RECEIVER / RECEPTOR CON CD /
RÉCEPTEUR CD
For canceling the display demonstration, see page 4. / Para cancelar la demostración en pantalla,
consulte la página 4. / Pour annuler la démonstration des affichages, référez-vous à la page 4.
For installation and connections, refer to the separate manual.
Para la instalación y las conexiones, refiérase al manual separado.
Pour l'installation et les raccordements, se référer au manuel séparé.
0612DTSMDTJEIN
INSTRUCTIONS
MANUAL DE INSTRUCCIONES
MANUEL D'INSTRUCTIONS
ENGLISH
ESPAÑOL
FRANÇAIS
For customer Use:
Enter below the Model
No. and Serial No. which
are located on the top or
bottom of the cabinet.
Retain this information
for future reference.
Model No.
Serial No.
GET0862-001A
[J]
Advertisement
Chapters
Table of Contents

Related Manuals for JVC KD-S19


Summary of Contents for JVC KD-S19
- Page 1 No. and Serial No. which are located on the top or bottom of the cabinet. Retain this information INSTRUCTIONS for future reference. MANUAL DE INSTRUCCIONES Model No. MANUEL D’INSTRUCTIONS Serial No. EN, SP, FR GET0862-001A © 2012 JVC KENWOOD Corporation 0612DTSMDTJEIN...
- Page 2 Thank you for purchasing a JVC product. Please read all instructions carefully before operation, to ensure your complete understanding and to obtain the best possible performance from the unit. INFORMATION (For U.S.A.) This equipment has been tested and found to comply with the limits for a Class B digital device, pursuant to Part 15 of the FCC Rules.
-
Page 3: Table Of Contents
WARNING: CONTENTS Stop the car before operating the unit. 3 How to attach/detach the control Caution: panel 3 How to reset your unit Adjust the volume so that you can hear sounds 3 How to forcibly eject a disc outside the car. Driving with the volume too 3 Maintenance high may cause an accident. -
Page 4: Canceling The Display Demonstration
Canceling the display demonstration Turn on the power. Select <DEMO OFF>. [Hold] [Hold] (Initial setting) Finish the procedure. (Initial setting) Setting the clock Turn on the power. [Hold] [Hold] (Initial setting) Select <CLOCK>. Select <CLOCK SET>. Adjust the hour. (Initial setting) Adjust the minute. -
Page 5: Preparing The Remote Controller
Preparing the remote controller When you use the remote controller for the first Caution: time, pull out the insulation sheet. • Danger of explosion if battery is incorrectly replaced. Replace only with the same or equivalent type. • Battery shall not be exposed to excessive heat Insulation sheet such as sunshine, fire, or the like. -
Page 6: Basic Operations
Basic operations Loading slot Control dial Display window Ejects the disc Remote sensor Front auxiliary input jack • DO NOT expose to bright sunlight. Detaches the panel When you press or hold the following button(s)... Remote Main unit General operation controller —... -
Page 7: Listening To The Radio
Listening to the radio • [Press] Searches for stations automatically. Ÿ • [Hold] Searches for stations manually. “M” flashes, then press the button ] “FM” or “AM” repeatedly. “ST” lights up when receiving an FM stereo broadcast with sufficient signal strength. Improving the FM reception Manual presetting (FM/AM) You can preset up to 18 stations for FM and 6... -
Page 8: Listening To A Disc
Listening to a disc Ÿ Playback starts automatically. ] “CD” All tracks will be played repeatedly until you change the source or eject the disc. Stopping playback and ejecting Selecting a track/folder from the list the disc If the ejected disc is not removed within 15 seconds, it is automatically inserted into the loading slot. -
Page 9: Connecting The Other External Components
Connecting the other external components You can connect an external component to the auxiliary input jack on the control panel (F-AUX) and/or on the rear side of the unit (R-AUX). Summary of using the external components through the auxiliary input jacks: Preparation Connecting Auxiliary... -
Page 10: Selecting A Preset Sound Mode
Selecting a preset sound mode You can select a preset sound mode suitable for the music genre. FLAT = NATURAL = DYNAMIC = VOCAL BOOST = ] <PRO EQ> ] <BASS/ MIDDLE/ BASS BOOST = USER = (back TREBLE> to the beginning) While listening, you can adjust the subwoofer and tone level of the selected sound mode. - Page 11 Menu item Selectable setting, [Initial: Underlined] DIMMER SET AUTO : Changes the display and button illumination between the Day/Night adjustments in <BRIGHTNESS> setting when you turn off/on the car headlights. * ON : Selects the Night adjustments in <BRIGHTNESS> setting for the display and button illumination.
- Page 12 Menu item Selectable setting, [Initial: Underlined] AMP GAIN LOW POWER : Limits the maximum volume level to 30. (Select if the maximum input power of each speaker is less than 50 W to prevent damaging the speakers.) / HIGH POWER : The maximum volume level is 50. SSM * See page 7.
-
Page 13: Troubleshooting
UNIT” / “WARNING CHK WIRING THEN with insulating tape properly, then reset the unit. (page 3) RESET UNIT” appears on the display and no If the message does not disappear, consult your JVC car audio operations can be done. dealer or a company supplying kits. -
Page 14: Using Bluetooth ® Devices
Using Bluetooth ® devices For Bluetooth operations, it is required to connect the Bluetooth adapter, KS-BTA100 (not supplied) to the auxiliary input jack (R-AUX/BT ADAPTER) on the rear of the unit. (page 9) • For details, refer also to the instructions supplied with the Bluetooth adapter and the Bluetooth device. -
Page 15: Specifications
Specifications AUDIO AMPLIFIER SECTION CD PLAYER SECTION Type : Compact disc player Signal Detection System : Non-contact optical pickup (semiconductor laser) Number of Channels : 2 channels (stereo) Power Output : 20 W RMS × 4 Channels at 4 Ω Frequency Response : 5 Hz to 20 000 Hz and ≤... - Page 16 Muchas gracias por la compra de un producto JVC. Como primer paso, por favor lea detenidamente este manual para comprender a fondo todas las instrucciones y obtener un máximo disfrute de esta unidad. IMPORTANTE (EE.UU.) Este equipo se ha sometido a todo tipo de pruebas y cumple con las normas establecidas para dispositivos de Clase B, de conformidad con la Parte 15 de las reglas de la FCC (Comisión Federal...
-
Page 17: Cómo Montar/Desmontar El Panel De Control
ADVERTENCIA: CONTENIDO Detenga el automóvil antes de operar la unidad. 3 Cómo montar/desmontar el panel Precaución: de control Ajuste el volumen a un nivel que permita 3 Cómo reposicionar su unidad 3 Cómo expulsar el disco por la fuerza escuchar el ruido del tráfico y otros sonidos 3 Mantenimiento ambientales. -
Page 18: Cancelación De Las Demostraciones En Pantalla
Cancelación de las demostraciones en pantalla Encienda la unidad. Seleccione <DEMO OFF>. [Sostener] [Sostener] (Configuración inicial) Finalice el procedimiento. (Configuración inicial) Puesta en hora del reloj Encienda la unidad. [Sostener] [Sostener] (Configuración inicial) Seleccione <CLOCK>. Seleccione <CLOCK SET>. Ajuste la hora. (Configuración inicial) Ajuste los minutos. -
Page 19: Preparación Del Control Remoto
Preparación del control remoto Retire la lámina aislante cuando utilice el Precaución: control remoto por primera vez. • Peligro de explosión si se instala la pila de manera incorrecta. Cámbiela solamente por una del mismo tipo o de un tipo equivalente. •... -
Page 20: Operaciones Básicas
Operaciones básicas Ranura de carga Disco de control Ventanilla de visualización Expulsa el disco Sensor remoto Jack de entrada auxiliar • DO lo exponga a la luz delantero solar brillante. Desmonta el panel Si pulsa o mantiene pulsado(s) el(los) siguiente(s) botón(es)... Unidad Control Operaciones generales... -
Page 21: Para Escuchar La Radio
Para escuchar la radio • [Pulse] Efectúa automáticamente la Ÿ búsqueda de emisoras. • [Sostener] Efectúa manualmente la búsqueda de emisoras. ] “FM” o “AM” “M” parpadea, a continuación, pulse el botón repetidamente. “ST” se enciende cuando se recibe una radiodifusión FM estéreo con una intensidad de señal suficiente. -
Page 22: Escuchando Un Disco
Escuchando un disco Ÿ La reproducción se inicia automáticamente. ] “CD” Todas las pistas se reproducen repetidamente hasta que usted cambie la fuente o extraiga el disco. Para detener la reproducción y • Si el disco MP3/WMA contiene numerosas pistas, puede efectuar una búsqueda rápida expulsar el disco (±10, ±100) a través de los discos girando Si no extrae el disco expulsado en... -
Page 23: Conexión De Otros Componentes Externos
Conexión de otros componentes externos Puede conectar un componente externo al jack de entrada auxiliar en el panel de control (F-AUX) y/o en el lado trasero de la unidad (R-AUX). Ejemplos de uso de los componentes externos a través de los jacks de entrada auxiliar: Preparativos Toma de Cable/dispositivo... -
Page 24: Selección De Un Modo De Sonido Preajustado
Selección de un modo de sonido preajustado Podrá seleccionar un modo de sonido preajustado adecuado al género musical. FLAT = NATURAL = DYNAMIC = VOCAL BOOST ] <PRO EQ> ] <BASS / MIDDLE / = BASS BOOST = USER = TREBLE>... - Page 25 Opción del menú Ajuste seleccionable, [Inicial: Subrayado] DIMMER SET AUTO : Cambia la iluminación de la pantalla y de los botones entre los ajustes diurno/ nocturno en <BRIGHTNESS> cuando usted apaga/enciende los faros del vehículo * ON : Selecciona el ajuste nocturno en <BRIGHTNESS> para la iluminación de la pantalla y de los botones.
- Page 26 Opción del menú Ajuste seleccionable, [Inicial: Subrayado] AMP GAIN LOW POWER : Limita el nivel máximo de volumen a 30. (Selecciónelo si la potencia máxima de entrada es inferior a 50 W, con el fin de evitar posibles daños en los altavoces). / HIGH POWER : El nivel máximo de volumen es 50.
-
Page 27: Localización De Averías
(página 3) puede realizar ninguna operación. Si el mensaje no desaparece, consulte con su concesionario de equipos de audio para automóvil JVC o con una compañía que suministra tales kits. El receptor no funciona en absoluto. Reinicialice la unidad. (página 3) Verifique el ajuste <SRC SELECT>... -
Page 28: Uso De Dispositivos Bluetooth
Uso de dispositivos Bluetooth ® Para las operaciones Bluetooth, se deberá conectar el adaptador Bluetooth (KS-BTA100) (no suministrado) al jack de entrada auxiliar (R-AUX/BT ADAPTER) en la parte trasera de la unidad. (página 9) • Si desea más información, consulte también las instrucciones suministradas con el adaptador Bluetooth y el dispositivo Bluetooth. -
Page 29: Especificaciones
Especificaciones SECCIÓN DEL AMPLIFICADOR DE SECCIÓN DEL REPRODUCTOR DE CD AUDIO Tipo : Reproductor de discos compactos Sistema de detección de señal : Captor óptico sin contacto (láser semiconductor) Número de canales : 2 canales (estereofónicos) Respuesta de frecuencias : 5 Hz a 20 000 Hz Salida de potencia : 20 W RMS ×... - Page 30 Merci pour avoir acheté un produit JVC. Veuillez lire attentivement toutes les instructions avant d’utiliser l’appareil afin de bien comprendre son fonctionnement et d’obtenir les meilleures performances possibles. Précautions : Tout changement ou toute modification non approuvés expressément par la partie responsable de la conformité...
- Page 31 AVERTISSEMENT: TABLE DES MATIERES Arrêtez la voiture avant de manipuler l’appareil. 3 Comment attacher/détacher le Attention: panneau de commande Ajustez le volume de façon à pouvoir entendre 3 Comment réinitialiser votre appareil les sons extérieurs à la voiture. Conduire avec 3 Comment forcer l’éjection d’un disque le volume trop haut peut être la cause d’un 3 Entretien...
- Page 32 Annulation des démonstrations des affichages Mise sous tension de l’appareil. Choisissez <DEMO OFF>. [Maintenez pressée] [Maintenez pressée] (Réglage initial) Terminez la procédure. (Réglage initial) Réglage de l’horloge Mise sous tension de l’appareil. [Maintenez pressée] [Maintenez pressée] (Réglage initial) Choisissez <CLOCK>. Choisissez <CLOCK SET>.
- Page 33 Préparation de la télécommande Lorsque vous utilisez la télécommande pour la Attention: première fois, tirez sur la feuille isolante pour • Danger d’explosion si la pile est remplacée de la retirer. façon incorrecte. Remplacez-la uniquement avec le même type de pile ou un type équivalent.
- Page 34 Opérations de base Fente d’insertion Molette de commande Fenêtre d’affichage Éjection d’un disque Capteur de télécommande Prise d’entrée • NE l’exposez PAS à la lumière auxiliaire avant directe du soleil. Retrait du panneau Quand vous appuyez ou maintenez pressées les touches suivantes... Appareil Télécommande Opérations générales...
- Page 35 Écoute de la radio • [Appuyez sur la touche] Recherche Ÿ des stations automatiquement. • [Maintenez pressée] Recherche des ] “FM” ou “AM” stations manuellement. “M” clignote, puis appuyez sur la touche répétitivement. “ST” s’allume lors de la réception d’une émission FM stéréo avec un signal suffisamment fort. Amélioration de la réception FM Préglage manuel (FM/AM) Vous pouvez prérégler un maximum de 18...
- Page 36 Écoute d’un disque Ÿ La lecture démarre automatiquement. ] “CD” Toutes les plages sont reproduites répétitivement jusqu’à ce que vous changiez la source ou éjectiez le disque. Arrête de la lecture et éjection du Sélection d’une plage/dossier à disque partir de la liste Si le disque éjecté...
- Page 37 Connexion d’autres appareils extérieurs Vous pouvez connecter un appareil extérieur à la prise d’entrée auxiliaire sur le panneau de commande (F-AUX) et/ou à l’arrière de l’appareil (R-AUX). Résumé de l’utilisation des appareils extérieurs par les prises d’entrée auxiliaire. Préparation Câble de Prise Appareil Nom de la...
- Page 38 Sélection d’un mode sonore préréglé Vous pouvez sélectionner un mode sonore préréglé adapté à votre genre de musique. FLAT = NATURAL = DYNAMIC = VOCAL BOOST ] <PRO EQ> ] <BASS / MIDDLE / = BASS BOOST = USER = TREBLE>...
- Page 39 Article de menu Réglages pouvant être choisis, [Réglage initial: Souligné] DIMMER SET AUTO : Change l’éclairage de l’affichage et des touches entre les réglages Jour et Nuit dans le réglage <BRIGHTNESS> quand vous allumez ou éteignez les feux du véhicule * ON : Choisit le réglage Nuit dans le réglage <BRIGHTNESS>...
- Page 40 Article de menu Réglages pouvant être choisis, [Réglage initial: Souligné] AMP GAIN LOW POWER : Limite le volume maximum à 30. (Choisissez ce réglage si la puissance d’entrée maximum de chaque enceinte est inférieure à 50 W pour éviter tout dommage des enceintes.) / HIGH POWER : Le volume maximum est 50.
- Page 41 (page 3) aucune opération ne peut être réalisée. Si le message ne disparaît, consultez votre revendeur d’autoradio JVC ou la société qui fabrique les kits. Cet autoradio ne fonctionne pas du tout. Réinitialisez l’appareil. (page 3) Cochez le réglage <SRC SELECT> = <F-AUX / R-AUX>.
- Page 42 Utilisation de périphériques Bluetooth ® Pour les opérations Bluetooth, il faut connecter l’adaptateur Bluetooth, KS-BTA100 (non fournis) à la prise d’entrée auxiliaire (R-AUX/BT ADAPTER) à l’arrière de cet appareil. (page 9) • Pour en savoir plus, référez-vous aussi aux instructions fournies avec l’adaptateur Bluetooth et le périphérique Bluetooth.
- Page 43 Spécifications SECTION DE L’AMPLIFICATEUR SECTION DU LECTEUR CD AUDIO Type : Lecteur de disque compact Système de détection du signal : Capteur optique sans contact (laser semi-conducteur) Nombre de canaux : 2 canaux (stéréo) Réponse en fréquence : 5 Hz à 20 000 Hz Puissance de sortie : 20 W RMS ×...
Need help?
Do you have a question about the KD-S19 and is the answer not in the manual?
Questions and answers
Se protegió mi estereo JVC KD-S19
Yes, your JVC KD-S19 stereo includes protection features. It complies with FCC rules to reduce harmful interference and displays warning messages like “MISWIRING CHK WIRING THEN RESET UNIT” if there are wiring issues, helping to prevent damage.
This answer is automatically generated