Advertisement
Quick Links
11.04.2017 - 1.0 .998100050+ - تقرير
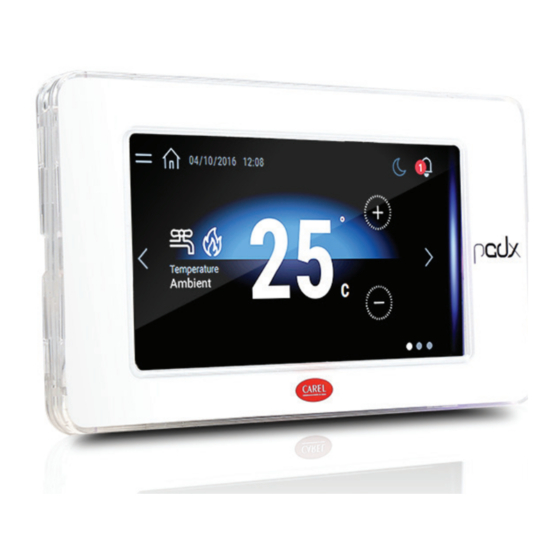
pGDx
User terminal pGD Touch 4.3" – pGDx Touch 4.3" محطة التحكم الطرفية لمستخدم
Dimensions / األبعاد
31,6
116,6
WRONG
133,8
RIGHT
4
151,5
33,1
8,9
Code: PGTA00SM40
31,9
151,7
23
133,8
Code: PGTA00RM40
150,8
63,1
133,8
54,2
to remove for plasterboard installation
Fig.1 / 1 الشكل
Assembly and installation / التثبيت والتركيب
/ الجزء ال أ ماميFront
Frame code:
PGTA**F]T,H]]0,1]*
Fig.3a / 3a.شكل
Rear / الجزء الخلفي
Important:
keep the flat cable
isolated from the
metal panel
:هـــام
ِ أبق
الشاشة بمعزل عن اللوحة
المعدنية
Flat cable passage
only in case(
)of external keypad
Fig.3b / 3b.شكل
/ تجويف حائطيWall flush mounting
:مالحظة
Note:
ﻻ تقم بتوجيه كابالت
Do not run power
الطاقة داخل علبة
cables inside the
flush-mount box
التجويف
Frame code:
PGTA**F]W,B]]0,1]*
Fig.3c / 3c.شكل
/ بروز حائطيWall surface mounting
Note:
:مالحظة
can only be used
يمكن استخدامه فقط
with models
مع موديالت
***]PG*******]B,E
PG*******[B,E]***
Frame code:
PGTA**F]W,B]]0,1]*
Fig.3d / 3d.شكل
Introduction
The pGDx 4.3 inch graphic terminal is part of the family of touchscreen terminals designed
to simplify user interface with the pCO sistema family controllers. The electronic technology
used and the new 65K colour display means high quality images and advanced functions
are available for a superior appearance. The touchscreen panel moreover makes interaction
between the user and the unit much easier by simplifying navigation between the various
screens.
Part numbers
P/N
PGR04****A***
PGR04****B***
PGR04****C***
PGR04****E***
134
Ø 4
Packaging contents
dima di foratura
drilling template
pGDx; power supply and RS485 connectors (only on models where featured); fastening
127x69 mm
screws; technical leaflet.
Installation warnings
For correct installation contact a qualified installer.
133,8
Do not install the terminals in environments with the following characteristics:
• relative humidity greater than the value specified in the technical specifications;
• with built-in temperature/humidity sensor, it is recommended to:
– only use faceplates fitted ventilation openings
– install the display away from air streams coming from heating/cooling systems
– if installed vertically, position the probe at the bottom of the display
125,7
• strong vibrations or knocks;
• exposure to aggressive and polluting atmospheres (e.g.: sulphur and ammonia fumes, salt
spray, smoke) so as to avoid corrosion and/or oxidation;
83,5
• strong magnetic and/or radio frequency interference (therefore avoid installing the units
RIGHT side connection STANDARD 503
57,3
RIGHT side connection CHI/DE STANDARD
near transmitting antennae);
• exposure to direct sunlight or the elements in general;
• large and rapid fluctuations in the room temperature;
• environments where explosives or mixes of flammable gases are present.
Devono essere rispettate le seguenti prescrizioni:
• only use shielded cables for Ethernet and RS485 communication networks;
57,3
• power supply voltages other than those specified may seriously damage the system;
LEFT side connection CHI/DE STANDARD
83,5
• use cable ends suitable for the corresponding terminals. Loosen each screw and insert the
LEFT side connection (Ethernet version) STANDARD 503
cable ends, then tighten the screws. When the operation is completed, slightly tug the cables
to check they are sufficiently tight;
148,3
• do not open the product when powered;
to remove for plasterboard installation
• operation at low temperatures may cause a noticeable decline in the response speed of the
display. This should be considered normal and does not indicate a malfunction.
• for one correct installation of IP65 models be safe of a 0,4 Nm screws tightening and a
correct assembly of the gasket.
• avoid any contact of the product with live parts.
• be sure that cables are accurately fixed in order to avoid contact with live parts in case of
their accidentally disconnection.
Meaning of the colours on the notification bar
At power-on, the notification bar briefly shows a blue signal to indicate the start of the
boot phase. The subsequent signals are then managed by the application program
developed using c.touch.
HMI Runtime and/or application update
Copy the update package (.ZIP file) containing
the runtime or application, or both, depending
on the options selected when generating
the "Update package" using c.touch, to a USB
pendrive and then plug the pendrive into the
pGDX and hold the pGDX terminal screen
for a few seconds until the shortcut menu is
:(displayed (see the figure on the side
Select "Update..." to
start the Runtime and/
or application update
procedure. The update
utility will start and the
following window will be
:displayed
ممر كابل الشاشة
(فقط � ف ي حالة
)لوحة المفاتيح الخارجية
System settings
Touch and hold the pGDX terminal screen for a few
seconds until the shortcut menu is displayed (see the
figure below). Select "Show system settings"; the main
configuration program screen will be displayed (figure
:(on the side
Below is a list of the functions relating to the different menu items:
Language
System
Logs
Date & Time
Network
Services
Management
Display
Restart
Authentication
EXIT
Wall box
standard 503/GIRA
pGDx
Description
Resolution
1 RJ12 telephone connector
480x272
1 485 port
1 24 Vdc power connector
1 optional keypad connector
1 optically-isolated 485 port
1 24 Vdc power connector
1 optional keypad connector
1 Ethernet port
1 24 Vdc power connector
1 Ethernet port
Then follow
the guided
procedure,
selecting the file
saved on the USB
pen drive
Set the system language (not the c.touch application)
Contains information on the pGDX: BSP version, Memory, Timers and temperature / humidity
sensor (if featured)
Download the system log files
Set pGDX date and time using the automatic or manual procedure
Show current system IP data (address, subnet, Gateway, DHCP, DNS) and access the Ethernet port
configuration menu
Start/stop various pGDX system services (Modbus server port, pGDX network address,...)
Update the different pGDX BSP partitions (ConfigOS, MainOS, Bootloader, Splash image, etc....)
Set brightness, backlight timeout and screen orientation
Restart the system
Set the password used to access the system
Exit the menu
بحجم 3.4 بوصة إىل عائلة وحدات التح ك ُّم النهائية ذات شاشة التح ك ُّم بال ل َّمس المصم َّ مةpGDx تنتمي وحدة التح ك ُّم الطرفية التصويرية
. التكنولوجيا ال إ لك� ت ونية المستخد َ مة � ف ي هذهpCO Sistema لتسهيل التفاعل البي� ف ي ب� ي ف المستخد ِ م ووحدات التح ك ُّم لمجموعة ن ظ ُم
56 لون تسمحان بعرض صور عالية الد ق َّة ووظائف تشغيلية متقد ِّ مة للحصول عىل شكل جماىل ي قياس يK الوحدات وشاشة العرض ذات الـ
وجذَّ اب. ي ُ ضاف إىل ذلك أن َّ لوحة التح ك ُّم بال ل َّمس تس ه ِّ ل التفاعل البي� ف ي ب� ي ف ال إ نسان وال آ لة وبالتاىل ي تيس� ي عملية النتقال ب� ي ف مخت ل َف شاشات
د ق َّة العرض
480x272
RJ12 1 موصل هاتفي
1 موصل كهربا� أ ي 42 فولت تيار مبا� ش
)1 موصل لوحة مفاتيح (اختياري
1 منفذ 584 معزول برص ي ً ا
1 موصل كهربا� أ ي 42 فولت تيار مبا� ش
)1 موصل لوحة مفاتيح (اختياري
1 موصل كهربا� أ ي 42 فولت تيار مبا� ش
. (فقط � ف ي الموديالت ال� ت ي تتطلبه); مسام� ي تثبيت; ورقة التعليماتRS485 ; موصالت كهربائية وpGDx
للحصول عىل عملية تثبيت صحيحة ومطابقة للمواصفات، اتصل بعمال ال� ت كيب المؤهل� ي ف . تج ن َّ ب تركيب وحدات التح ك ُّم الطرفية � ف ي ال أ ماكن
ال أ ماكن ذات مستوى رطوبة نسبية أعىل من المستوى المحد َّ د � ف ي المواصفات الف ن ِّ ية لال أ جهزة؛
:مع مسبار الح ر ارة/الرطوبة ينصح بـ
استخدم فقط ال أ طر المزودة بفتحة تهوية
ركب الشاشة بعيد ً ا عن تدفقات الهواء القادمة من مصادر الح ر ارة/الت� ب يد
� ف ي حالة تركيب الجهاز بشكل ر أس ي قم بوضع المسبار � ف ي الجزء السفىل ي من الشاشة
ال أ ماكن ال� ت ي بها اه� ت ف ا ز ات أو اصطدامات قوية؛
)ال أ ماكن المعر َّ ضة لعوامل مناخية عنيفة أو ملو ِّ ثة (مثل الغا ز ات الك� ب يتية وال أ مونيا، والضباب الملحي وال أ دخنة
ال أ ماكن ال� ت ي بها مجالت تداخل وحقول مغناطيسية و/أو تر د ُّ دات ر اديو (تحاس ش بالتاىل ي تركيب ال آ لت بالقرب من
ال أ ماكن المعر َّ ضة ل أ شع َّ ة الشمس المبا� ش ة أو للعوامل المناخية بشكل ٍ عام؛
ال أ ماكن ذات التق ل ُّبات الكب� ي ة والقوية لدرجات الح ر ارة؛
.ال أ ماكن ال� ت ي بها غا ز ات قابلة لالنفجار أو مخاليط غازية قابلة لالشتعال
; استخدم الكابالت المحمية فقطRS485 لشبكات اتصال ال إ ي� ش نت و
وبالتاىل ي فإن َّ أي جهد تي َّ ار تغذية آخر مختلف عن الجهد المحد َّ د يمكن أن يتلف النظ ِ ام ويعر ِّ ضه ل أ عطال كب� ي ة؛
استخد ِ م نهايات طرفية للكابالت مناسبة للمش� ت كات المستخد َ مة. قم بإرخاء ربط جميع ال� ب اغي ثم َّ قم بإدخال
النهايات الطرفية للكابالت، ثم َّ أع ِ د ربط ال� ب اغي. بعد النتهاء من هذه العملية قم بشد ِّ الكابالت قلي ال ً للتح ق ُّق من إحكام ربطها
ل تقم بفتح المنتج أثناء توصيله بالتيار الكهربا� أ ي ؛
قد يؤدي استخدام الجهاز � ف ي درجات ح ر ارة شديدة النخفاض إىل التقليل من �عة استجابة الشاشة لال أ وامر
.التشغيلية. وهذا أمر ُ عادي وليس مؤ� ش ِ ً ا عىل وجود أي خلل � ف ي التشغيل
تحقق من ربط ال� ب اغي بعزم 4.0 نيوتن/م� ت , وكذلك من تجميع حشوات إحكامIP65 ل أ فضل تثبيت لموديالت
.تجنب مالمسة المنتج لال أ ج ز اء المتصلة بتيا ر ات كهربائية خط� ي ة
تأكد من أن الكبالت مثبتة بشكل صحيح لتجنب مالمسة ال أ ج ز اء المتصلة بتيا ر ات كهربائية خط� ي ة � ف ي حالة الفصل
عند بدء التشغيل، يقوم � ش يط ال إ خطا ر ات بإصدار إشارة زرقاء قص� ي ة لالإشارة إىل بداية مرحلة التشغيل. ثم يتم إدارة المؤ� ش ات التالية
.c.touch بواسطة ب ر نامج التطبيق الذي تم إنشاؤه باستخدام
و / أو التطبيقHMI Runtime تحديث
) ال� ت ي تحتوي عىل وقت التشغيل أوZIP. قم بنسخ حزمة التحديث (ملف
"التطبيق أو كليهما، وف ق ًا للخيا ر ات المختارة عند إنشاء "حزمة التحديث
.pGDX ثم قم بتوصيل الوحدة إىل جهازUSB ، عىل وحدةc.touch مع
pGDX استم ِ ر � ف ي الضغط بإصبعك عىل شاشة وحدة التح ك ُّم الطرفية
:) لبضع ثوان ح� ت َّ تظهر القائمة النصية (الشكل الجان� ب ي
..." لبدء إج ر اء تحديثUpdate" َ اخ� ت
و / أو التطبيق. يبدأ تشغيلRuntime
:أداة التحديث وتظهر النافذة التالية
لبضع ثوانpGDX استم ِ ر � ف ي الضغط بإصبعك عىل شاشة وحدة التح ك ُّم الطرفية
", فتظهرShow system" settings ح� ت َّ تظهر القائمة النصية (الشكل السفىل ي ), اخ� ت
:) شاشة تهيئة ال� ب نامج ال ر ئيسية (الشكل الجان� ب ي
:فيما يىل ي الوظائف الموجودة � ف ي عنارص القائمة المختلفة
)c.touch ضبط لغة النظام (وليس لغة تطبيق
, الذاكرة, أجهزة ضبط الوقت, مسبار الح ر ارة / الرطوبة (إنBSP : إصدارpGDX يتضمن معلومات عن
يسمح بت� ف ف يل ملفات سجل النظام
يدو ي ً ا أو أوتوماتيكي ً اpGDX يسمح بضبط التاريخ والوقت لجهاز
, الخاص بالنظام (العنوان, الشبكة الفرعية ، البوابةIP يعرض البيانات الحالية ل� ب وتوكول ال إ ن� ت نت
) ويسمح بالدخول إىل قائمة تهيئة منفذ ال إ ي� ش نتDHCP, DNS
� فpGDX , عنوانModbus (منفذ خادمpGDX يسمح بتشغيل/إيقاف خدمات مختلفة خاصة بنظام
ي
ConfigOS, MainOS, (مثلpGDX الخاصة بجهازBSP يسمح بتحديث التقسيمات المختلفة لـ
)..., إلخBootloader, Splash image
يسمح بضبط شدة ال إ ضاءة ووقت ال إ ضاءة الخلفية واتجاه الشاشة
يعمل عىل إعادة تشغيل النظام
يسمح بضبط كلمة مرور الدخول للنظام
يسمح بالخروج من القائمة
مقدمة
.التح ك ُّم
كود الموديل َّ ت
الوصف
الكود
***PGR04****A
485 1 منفذ
***PGR04****B
***PGR04****C
1 منفذ إي� ش نت
***PGR04****E
1 منفذ إي� ش نت
محتوى العبوة
تحذيرات عملية التركيب
:ذات المواصفات التالية
–
–
–
ل أ ن َّها تسب ِّ ب التأكل و/أو ال أ كسدة؛
هوائي َّ ات نقل وإرسال ال إ شا ر ات والبث)؛
:يجب الل� ت ف ام بال� ش وط ال آ تية
وشد ِّ ها بالشكل الصحيح؛
.الغلق بالشكل الصحيح
. العر� ف ي
معاني ألوان شريط اإلخطارات
ثم اتبع ال إ ج ر اء الس� ت شادي
عن طريق تحديد الملف
الذي تم إد ر اجه � ف ي وحدة
USB الـ
معايير ضبط النظام
Language
System
)وجد
Logs
Date & Time
Network
Services
)...,الشبكة
Management
شاشة العرض
Restart
Authentication
EXIT
Advertisement

Subscribe to Our Youtube Channel
Related Manuals for Carel pGD Series


Summary of Contents for Carel pGD Series
- Page 1 11.04.2017 - 1.0 .998100050+ - تقرير pGDx pGDx User terminal pGD Touch 4.3” – pGDx Touch 4.3” محطة التحكم الطرفية لمستخدم مقدمة Introduction The pGDx 4.3 inch graphic terminal is part of the family of touchscreen terminals designed بحجم 3.4 بوصة إىل عائلة وحدات التح ك ُّم النهائية ذات شاشة التح ك ُّم بال ل َّمس المصم َّ مةpGDx تنتمي وحدة التح ك ُّم الطرفية التصويرية .
- Page 2 . يجب عىل العميل النها� أ ي استخدام المن ت َ ج فقط بالطرق المحد َّ دة � ف ي الوثائق المتع ل ِّقة بهذاCAREL التشغيىل ي وهي أشياء ل تتحم َّ ل مسؤولي َّ تها مطل ق ًا � ش...
Need help?
Do you have a question about the pGD Series and is the answer not in the manual?
Questions and answers