Table of Contents
Advertisement
Quick Links
Advertisement
Table of Contents

Subscribe to Our Youtube Channel
Related Manuals for GABOR FPC-85

Summary of Contents for GABOR FPC-85
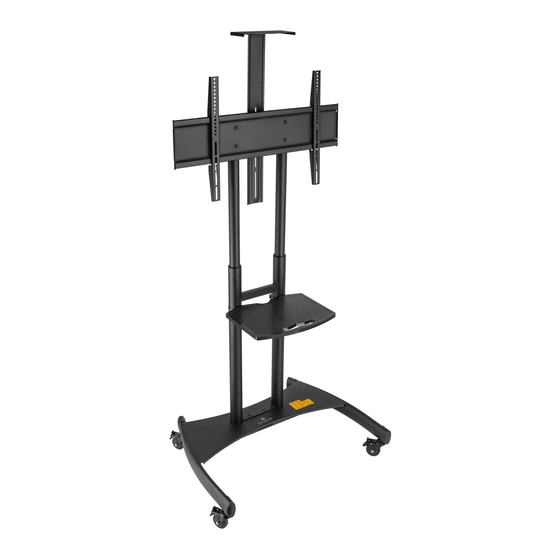
- Page 1 FPC-85 / FLAT PANEL TV CART for 55 – 85 in. Flat-Panel Screens User Manual...
- Page 2 Thank you for choosing Gabor. The Gabor FPC-85 Flat-Panel TV Cart is the modern heavy duty rolling A/V cart. Wheel your 85-inch monitor, laptop, and webcam from room to room, whether it’s at the office, on the sales floor, or in school.
-
Page 3: Safety Warnings
• It is strongly recommended that this product be installed by a qualified professional or installation contractor; Gabor takes no responsibility for any product damage or personal injury resulting from mishandling, incorrect mounting, faulty assembly, or improper use of this product. -
Page 4: Product Specifications
Product Specifications Compatible flat-panel display size: 30.9 in. (100 cm) 55 to 85 in. (139.7 to 215.9 cm) Max height: 66 in. (167.5 cm) Min height: 47.8 in. (121.4 cm) Max weight capacity: 200 lb. (90.7 kg) Weight: 64.6 lb. (29.3 kg) 17.7 in. -
Page 5: Parts List
Parts List Required tool: Phillips screwdriver and washer... -
Page 6: Installing The Casters
Installing the Casters Step 1 Lock the casters during installation and cart assembly. Turn over Step 2 Setting Up the Risers Lay the riser assembly on a flat surface. Remove the locking screws. Pull the riser out approximately 2 inches, until the spring pin securely pops into the open hole. - Page 7 Attaching the Riser Post Step 1 Make sure the cable-management holes are facing the rear of the base. Step 2...
- Page 8 Adjusting the Right riser Riser Height Left riser Hold onto the riser when adjusting the height. Posts Spring Step 1 Spring Important! Always insert the locking screw one space above the spring pin. Step 2...
- Page 9 A/V Shelf Assembly and Installation Step 1 Step 2 Step 4 Step 3...
- Page 10 Installing the Display Mount...
- Page 11 Installing the Display/TV Bracket Selecting the Right VESA Mounting Hardware for Your Display A variety of screws are included to fit VESA standards on the back of most displays. Select the appropriate M5, M6, or M8 screws and washers. Hand-thread the screws to determine the correct diameter.
- Page 12 Mounting the TV to the Display Mount Step 1 Step 2 Step 3...
- Page 13 Camera Tray Attachment Step 1 Step 2 Step 3 Step 4 Step 5...
-
Page 14: Installing Power
Installing Power and A/V Cables Step 1 Step 2... - Page 15 TV Height Adjustment Important! Adjusting the TV height is at minimum a two-person job. These steps must be done by at least two people. Lock the casters. Unplug all connected devices. Caution: Make sure the cables have enough slack to move the risers up or down.
- Page 16 FIVE-YEAR LIMITED WARRANTY This GABOR product is warranted to the original purchaser to be free from defects in materials and workmanship under normal consumer use for a period of five (5) years from the original purchase date or thirty (30) days after replacement, whichever occurs later. The warranty provider’s responsibility with respect to this limited warranty shall be limited solely...
Need help?
Do you have a question about the FPC-85 and is the answer not in the manual?
Questions and answers