Table of Contents
Advertisement
Quick Links
Installation Guide
MODEL NO.:
QCF -DB52061
You may install your ceiling fan as Flush Mount, using the Short or Long Rod. Measure your room height
before installing the fan and consider the different installation height options indicated in the above diagram.
INSTALL THE BULBS IN THE MOTOR HOUSING before hanging the ceiling fan
Required bulbs (not included):
Light kit- use - E12, Type B, 40W x 2 (Not Included)
Motor housing- use - E12, Type C, 7W x 4 (Not Included)
Alternative bulbs usage: CFL or LED Bulbs may be used. Ensure the Max. Wattage indicated on the socket
labels is not exceeded, and verify the bulbs do not get in contact with any metal part of the fan components
(shade or motor housing)
Table of Contents:
Safety tips Pg.2
Unpacking your fan Pg.3
Tools and material required Pg.4
Outlet Box Pg.5
Hanging Bracket Installation Pg.4 - 5
Bulb installation Pg.6
Fan Assembly Pg.6 - 7
Professional Installation Recommended
Note: Approximate time of assembly is 30 min to 1
MODEL NO.: QCF -DB52061
READ AND SAVE THESE
Wiring Pg.7 - 8
Blade Assembly Pg.9
Canopy Assembly Pg.9
Light Kit and Shade Assembly Pg.10
Testing Your Fan Pg.11
Trouble Shooting Pg.11-12
Maintenance Pg.12
PAGE 1
INSTRUCTIONS
hour
PRINTED IN CHINA
Advertisement
Table of Contents

Summary of Contents for River of Goods QCF-DB52061
-
Page 1: Table Of Contents
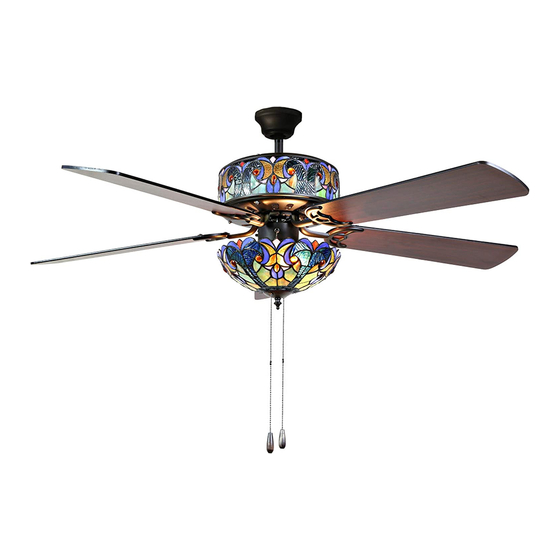
MODEL NO.: QCF -DB52061 Installation Guide READ AND SAVE THESE INSTRUCTIONS MODEL NO.: QCF -DB52061 You may install your ceiling fan as Flush Mount, using the Short or Long Rod. Measure your room height before installing the fan and consider the different installation height options indicated in the above diagram. INSTALL THE BULBS IN THE MOTOR HOUSING before hanging the ceiling fan Required bulbs (not included): Light kit- use –... -
Page 2: Safety Tips
MODEL NO.:QCF‐DB52061 SAFETY TIPS To reduce the risk of electrical shock, turn off the electricity to the fan at the main fuse box or circuit WARNING: panel before you begin the fan installation or before servicing the fan or installing accessories. READ ALL INSTRUCTIONS AND SAFETY INFORMATION CAREFULLY BEFORE INSTALLING YOUR FAN AND SAVE THESE INSTRUCTIONS. -
Page 3: Unpacking Your Fan
MODEL NO.:QCF‐DB52061 1. Unpacking Your Fan. Carefully open the packaging. Remove items from Styrofoam inserts. Remove motor housing and place on carpet or styrofoam to avoid damage to finish. Do not discard fan carton or styrofoam inserts should this fan need to be returned for repairs. -
Page 4: Outlet Box
MODEL NO.:QCF‐DB52061 3. Tools Required Step ladder Pliers Screw driver flat head and phillip Electrical tape Circuit tester 4. Installation Preparation To prevent personal injury and damage, ensure that the hanging location allows the blade a clearance of 7ft.(2.13m) from the floor and 30in.(76cm) from any wall or obstruction. - Page 5 MODEL NO.:QCF‐DB52061 CAUTION Be sure outlet box is grounded properly and that a ground wire (green or bare) is present. Partially loosen screws in slotted holes of canopy. Remove the other 2 screws (along with the star washers) -save for later use.
-
Page 6: Bulb Installation
MODEL NO.:QCF‐DB52061 6. Bulbs Installation. Installing bulbs in the Motor Housing, locate the four access plates on the motor housing top. Remove two screws per access plate to reach each socket, use phillip screwdriver. Do not remove the Center Screw on each Access Plate Install each candelabra base Type C, 7W bulbs (Not Included). -
Page 7: Fan Assembly
MODEL NO.:QCF‐DB52061 8. Fan Assembly with Down Rod - Choose the 4” or 21” Down Rod - Remove Pin and Clip from down rod (if you have not already done so). Slide the Down rod through the canopy, and the Down rod cover as shown. - Page 8 MODEL NO.:QCF‐DB52061 3.Install the receiver into the Hanging bracket of the fan. This unit is to be used for the control of ceiling fan and in an AC120V 60Hz power supply only. Do not install in damp locations or immerse in water. For indoor use only. Do not pull on or cut the receiver wire leads shorter.
-
Page 9: Blade Assembly
MODEL NO.:QCF‐DB52061 Important: Make sure all electrical connections comply with Local Codes or Ordinances and the National Electrical Code. If you are unfamiliar with electrical wiring, or if the house/building wires are different colors than those referred to in the instructions, please use a qualified electrician. 10. - Page 10 MODEL NO.:QCF‐DB52061 11. Light Kit Assembly. 1. Remove the three screws from the Light kit. 2. Plug the connectors from the Light kit to the connectors from the Switch housing. Please note the correct wiring is: White to White ...
-
Page 11: Testing Your Fan
MODEL NO.:QCF‐DB52061 12. Testing Your Fan. It is recommended that you test the fan before finalizing installation. Restore power from circuit box and light switch (if applicable). Test the fan speeds from the Remote controller. Start at the OFF position (no blade movement) and continue testing the LOW, MED and HI speeds. -
Page 12: Maintenance
MODEL NO.:QCF‐DB52061 FAN FOUND NOISY Always take a few days" break in" time for any new fan at medium or high speed. Try to diagnose the exact location of the noise by listening carefully from several sides (blades, motor, light kit, etc). Fan noise can come from a light kit. Make sure all screws in the fan assembly and light kit are tight and properly threaded.


Need help?
Do you have a question about the QCF-DB52061 and is the answer not in the manual?
Questions and answers