Table of Contents
Advertisement
P R E S S U R E O V E N
I M P O R T A N T N O T I C E
E S S E N T I A L
Please read operating instructions before using this
product. Please keep original box and packing materials
U S E & C A R E
in the event that service is required.
For questions or concerns please contact customer service at:
Toll-free: 877-359-9747 • 9:00am - 9:00pm EST - Seven days a week
Email: wolfgangpuckoven@kitchentek.com • Website: www.puckoven.com
WPEPO1002 Series
©KitchenTek® Operating LLC. All rights reserved.
0.8 Cubic Foot Capacity
Patents pending US and foreign
Photos and illustrations throughout this manual may differ slightly from actual product.
P R E S S U R E O V E N
P r i n te d In Chin a
WPEPO1002 Series
2 0 013 13 69Z
Advertisement
Table of Contents

Related Manuals for Wolfgang Puck ESSENTIAL WPEPO1002 Series


Summary of Contents for Wolfgang Puck ESSENTIAL WPEPO1002 Series
- Page 1 P R E S S U R E O V E N I M P O R T A N T N O T I C E E S S E N T I A L Please read operating instructions before using this product.
-
Page 2: Important Safeguards
IMPORTANT SAFEGUARDS When using electrical appliances, basic safety precautions should be This appliance has a tempered, safety glass door. The glass is stronger than followed, including: ordinary glass and more resistant to breakage. Tempered glass can break, but the pieces will not have sharp edges. Avoid scratching door surface Read all instructions. -
Page 3: Table Of Contents
About Wolfgang Puck Introduction In the beginning, there was Quick Start Guide Wolfgang Puck. There were Know Your Wolfgang Puck Pressure Oven cooks and there were kitchens and there were people eating Before Your First Use food, but the world had never seen anything like Spago—... -
Page 4: Introduction
Introduction Quick Start Guide (cont.) Congratulations on your purchase of the Wolfgang Puck Pressure Oven, breakthrough technology in the world of cooking. After years of Turn VENT RELEASE VALVE development, Wolfgang Puck has teamed with KitchenTek to design to VENT... -
Page 5: Know Your Wolfgang Puck Pressure Oven
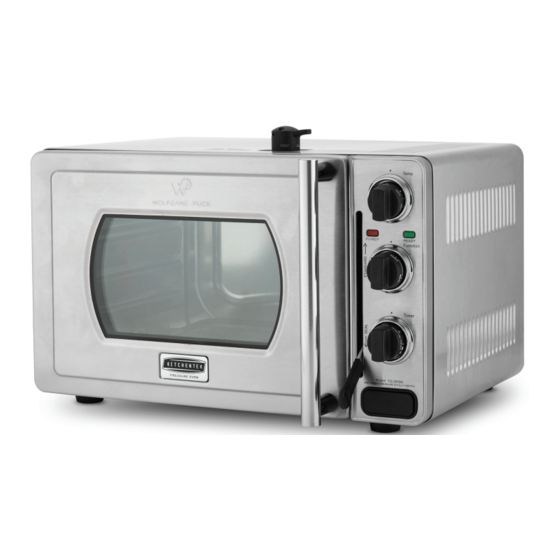
Know Your Wolfgang Puck Pressure Oven Timer Knob Vent Release Valve Baking Rack Door Handle Broil Rack Insert Power Indicator Light Drip/Baking Pan Ready Light Roasting Pan Sealing Lever Crumb Tray Door Release Button Rack Removal Tool Temperature Knob Control Panel... -
Page 6: Before Your First Use
Before Your First Use Become Familiar with Your Oven Parts Become familiar with your oven and the functions before plugging in and using. Always unplug your oven and wait until all parts and oven body have completely cooled prior to cleaning. Ensure that you have removed Temperature Knob all parts from the packaging materials by referencing the Know Your Choose the desired or recommended temperature up to 450˚F. -
Page 7: Use & Care References
Become Familiar with Your Use & Care References Oven Parts (cont.) Vent Release Valve Used to maintain low pressure (1 psi) in the oven during the cooking process. The VENT RELEASE VALVE has two settings, SEAL (see fig. 4 on page 14) to maintain the pressure, and VENT (see fig. 5 on page 14) to release pressure at the end of the cooking process. -
Page 8: Operation
• for use in microwave ovens as well as regular ovens. Check package directions carefully to determine if the container is suitable for use in a regular oven. Check for Wolfgang Puck accessories on puckoven.com. • Figure 5 Figure 6... -
Page 9: Bake Function
Bake Function Toast Function STANDARD Mode: STANDARD Mode: In Bake mode, both the top and bottom heating elements operate to In Toast mode, both the top and bottom heating elements operate to cycle on and off to maintain the selected temperature. cycle on and off to maintain the selected temperature. -
Page 10: Roast Function
Roast Function Broil Function STANDARD Mode: STANDARD Mode: In Roast mode, both the top and bottom heating elements operate to The top heating elements cycle on and off to maintain the set cycle on and off to maintain the selected temperature. temperature. -
Page 11: Trussing Chicken
Trussing Chicken Warm Function Items needed to truss chicken: 2 feet butchers twine (approximate) It is not necessary to use the WARM function in pressure mode. Scissors or knife STANDARD Mode: Ensure the SEALING LEVER is in the STANDARD position and the VENT RELEASE VALVE is in the VENT position. -
Page 12: Cooking Chart
Cooking Chart Cooking Chart (cont.) PRESSURE STANDARD US-FDA MODE MODE RECOMMENDED Type Weight Rack Temp Time Temp Time Internal Temp POULTRY Chicken (Whole) 3-4 lbs Middle 35 min 2 hrs Chicken (Whole) 5-6 lbs Middle 37 min 2 to 2 hrs 15min Chicken (Whole) 7-8 lbs Bottom... -
Page 13: Troubleshooting Guide
Oven does not turn on Unit is not plugged in, or circuit Unit is not plugged in, or circuit Ensure that your Wolfgang Puck Pressure Oven is plugged into a proper breaker is tripped breaker is tripped 120v A.C. grounded outlet. If your unit still does not turn on check the circuit breaker or fuse for the outlet you are using and ensure that it is closed. - Page 14 This is a normal occurrence when cooking in pressure mode in the oven inside the cavity The Green ready light Your Wolfgang Puck Pressure Oven is This is a normal occurrence. keeps turning on and off able to maintain the set temperature every few minutes.
-
Page 15: Care & Cleaning
Care & Cleaning Notes Ensure that your oven is unplugged and all parts are cool prior to cleaning. Do not clean with metal scouring pads. Pieces can break off the pad and touch electrical parts, creating a risk of electric shock. To protect against electric shock, do not immerse cord, plug, or housing of the oven in water or other liquids. -
Page 16: Limited Warranty
Notes Limited Warranty This warranty covers all defects in workmanship or materials in the mechanical and electrical parts, arising under normal usage and care, in this product for a period of 12 months (or 36 months if extended warranty was purchased) from the date of purchase provided you are able to present a valid proof-of-purchase.
Need help?
Do you have a question about the ESSENTIAL WPEPO1002 Series and is the answer not in the manual?
Questions and answers
I need the oven rack for model WPROR 1002-B
The compatible oven rack for the Wolfgang Puck WPROR 1002-B model is the BAKING RACK, which should be placed with the curved portion at the rear of the oven and the two brackets in the up position.
This answer is automatically generated
I need a replacement oven rack