Advertisement
Safety & Installation Instructions
ENG WARNING – RISK OF FIRE AND ELECTRIC SHOCK. THIS PRODUCT IS BEST INSTALLED BY A QUALIFIED ELECTRICIAN.
INSTALL IN ACCORDANCE WITH CURRENT NEC WIRING REGULATIONS.
SUITABLE FOR DRY LOCATIONS ONLY
THE FITTING MUST BE GROUNDED. TURN OFF POWER AT THE MAIN FUSE BEFORE COMMENCING INSTALLATION.
FR
ATTENTION – RISQUE D'INCENDIE, RISQUE DE CHOC.
CE PRODUIT DOIT ÊTRE INSTALLÉ SELON LE CODE D'INSTALLATION PERTINENT, PAR UNE PERSONNE QUI CONNAÎT
BIEN LE PRODUIT ET SON FONCTIONNEMENT AINSI QUE LES RISQUES INHÉRENTS.
POUR EMPLACMENTS SECS SEULEMENT
L'APPAREIL DOIT ÊTRE MIS À LA TERRE. COUPEZ LE FUSIBLE PRINCIPAL AVANT DE COMMENCER L'INSTALLATION.
1. If you are in any doubt consult a qualified electrician as to the installation of the fitting. Install in accordance with
current NEC wiring regulations. It is recommended that this fitting is installed by a qualified electrician.
2. Ensure that the electrical supply is OFF. Disconnect the electrical supply at the fuse-board.
3. If removing an existing fitting first, note all wiring connections: record which of the house wires is connected to the
live, neutral and earth terminals.
4. Carefully identify where the supply cable is (and check there are no other cables in the area) to avoid damage to
concealed wiring during installation.
5. Position the light where desired ensuring that there is access to a suitable junction box for the fixture.
6. Using your existing junction box, use a screwdriver to open the junction box. Keep the two existing screws. This
fitting should be installed on a 4" junction box (not supplied).
7. Support the fitting so that no strain is applied to the wiring when making the electrical connections. If necessary get
a colleague to help.
8. Electrical connection: this light fitting must be grounded. In your junction box there should be two supply and one
ground wire. Connect the power supply (live) Black wire to the Black conductor on the lamp cord, neutral White wire
to the White conductor on the lamp cord and ground wire (normally green & yellow or bare copper) to the
green/yellow wire.
KEY
BLACK
L =
Live
Fitting
GRN/YEL
N =
Neutral
=
Ground
WHITE
9. Double check all the connections are secure and that no loose strands of wire are left out of the connectors, then fit
all the wires and connections back into the junction box.
10. Check that no wires are trapped behind or within the fitting and complete the installation, referring to the
Installation Diagram inside.
11. Fit the correct type and wattage of lamp (or less). Be careful not to overtighten the lamp.
12. Switch on at the fuse-board. Your light fitting is now ready for use.
Other Important Information
Switch off at mains before changing lamp(s). Never fit a lamp of greater wattage than recommended. Ensure children do
not play with the light fitting. Dispose of old lamps carefully. Never leave a fitting without a lamp in position (or someone
can accidently touch the contacts). Adjust fitting only when power to the fitting is off and has been left to cool. If the
electrical flex or electrical components become damaged at any point, power to the fitting should be disconnected
immediately and not operated until the damaged parts are fixed/replaced. For use in dry, indoor environment only. Ensure
the fitting does not come into contact with any liquids.
Cleaning and Maintenance
Metal finishes should only be cleaned with a soft, dry cloth. Do not use polishes or abrasives. Bone china can be cleaned
by hand, using a soft damp cloth with a diluted mild detergent (nonabrasive) if necessary. Switch off power to the fitting
before cleaning. Spare parts are available for this product, please contact us on the details below.
Established in 1990, Original BTC manufactures relaxed, familiar lighting for traditional and contemporary homes.
All products are hand-assembled in Oxford from high quality components, produced in the UK.
ORIGINALBTC.COM
+44 (0)1993 882 251
UNIT 21 / 22 AVENUE ONE, STATION LANE, WITNEY, OX28 4XZ, ENGLAND
L
BLACK
*Mains
GRN/YEL
Supply
N
WHITE
Fin
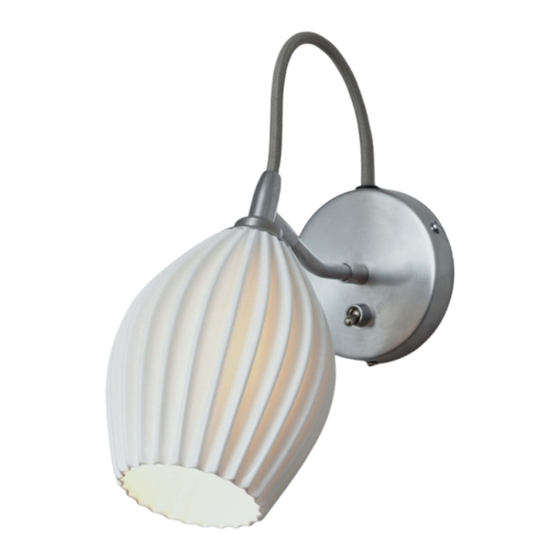
Wall Light
v1.2- 05.19
Instruction Manual
LAMP GUIDANCE
MADE IN BRITAIN
BASE
SHAPE
TYPE*
US-FW574
WATTAGE**
Advertisement
Table of Contents

Related Manuals for Original BTC Fin US-FW574


Summary of Contents for Original BTC Fin US-FW574
- Page 1 Spare parts are available for this product, please contact us on the details below. Established in 1990, Original BTC manufactures relaxed, familiar lighting for traditional and contemporary homes. All products are hand-assembled in Oxford from high quality components, produced in the UK.
- Page 2 Wall Light Installation Diagram 120V ac 60Hz IP20 US-FW574 Fin Wall Light A Junction Box (not supplied) LAMP GUIDANCE B Main Supply WATTAGE** BASE SHAPE TYPE* C Cover Disc D Back Plate INCANDESCENT 40W MAX E J-Box Fixing Screws (not supplied) ...
Need help?
Do you have a question about the Fin US-FW574 and is the answer not in the manual?
Questions and answers