Table of Contents
Advertisement
Advertisement
Table of Contents

Subscribe to Our Youtube Channel
Related Manuals for Johnson & Johnson ASP STERRAD 100S


Summary of Contents for Johnson & Johnson ASP STERRAD 100S
- Page 1 ® STERRAD 100S Sterilizer Installation Guide...
- Page 2 ® STERRAD 100S Sterilizer Installation Guide 1-888-STERRAD 1-888-783-7723 www.sterrad.com ASP USA Customer Support (001.949.581.5799) ©2003 Advanced Sterilization Products. All rights reserved. Products mentioned in this publication are trademarked by their respective corporations. Reproduction, adaptation, or translation of this publication without prior written permission is prohibited. Printed in the USA. 08-51917-0-00X TS-51756-0-001 ®...
-
Page 3: Table Of Contents
Contents Chapter 1. Installation Overview................5 Introduction ......................6 Installation Forms ......................6 Physical Specifications ..................7 Environmental Conditions..................8 Electrical Requirements..................9 Heater Impedance .....................9 Thermocouples ....................10 Standards ......................10 System Configuration ..................11 STERRAD 100S Sterilizer Configuration Kit – USA..........11 STERRAD 100S Sterilizer Configuration Kit - International .........11 Tools and Test Equipment.................13 Chapter 2. - Page 4 Control Panel Bezel ....................35 Software Installation ..................36 System Reset ....................37 Set System Parameters..................37 Verify Voltages......................37 Install Printer Ribbon and Paper................38 Power Connection .....................38 Phase Rotation ....................39 Preparing The System For Use .................39 Initialization.......................39 Replace the Panels....................43 Perform BI Validation..................43 Final Procedures....................44 Certification Statement Instructions ................44 ®...
-
Page 5: Chapter 1. Installation Overview
Chapter 1. Installation Overview ® STERRAD 100S Installation Guide... -
Page 6: Introduction
Chapter 1. Installation Overview Introduction This section describes how to uncrate, assemble, set up and initialize a ® new STERRAD 100S Sterilization System. Following initialization, the system performance must be verified using the product certification procedures. This installation procedure is for the Block 2 systems as 1.8 systems are no longer available for new installation. -
Page 7: Physical Specifications
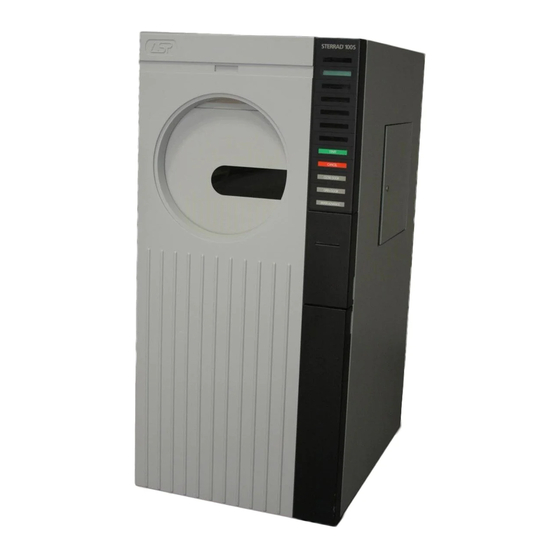
Chapter 1. Installation Overview Physical Specifications System Dimensions Dimensions 765 mm W x 1660 mm H x 1020 mm D (30² W x 65.5² H x 40² D) Appearance FED color specification #26408 Block 2 has a custom color Weight Approximately 325 Kg (700 lbs) Shipping Weight Approximately 350 Kg (750 lbs) -
Page 8: Environmental Conditions
Chapter 1. Installation Overview Environmental Conditions Transport and Storage Ambient Temperature -40 to +70° C (50 to 104° F) Relative Humidity 10 to 100% including condensation Atmospheric Pressure 500 hPa to 1060 hPa Operation Ambient Temperature +10 to 40° C (50 to 104° F) Altitude -100 to 3000 m above msl (-330 to 10,000 ft above msl) Relative Humidity... -
Page 9: Electrical Requirements
Chapter 1. Installation Overview Electrical Requirements Voltage Specification IMPORTANT WARNING! Prior to relocating the sterilizer to a new power source, electrical phase rotation should be checked by a qualified technician. Failure to verify phase rotation may cause damage to the system and void the warranty. 208V 60 Hz Power For versions employing 208V, 60 Hz power, the sterilizer 200V and 208V (Block 2) -
Page 10: Thermocouples
Chapter 1. Installation Overview Thermocouples Thermocouples Measurement Location 42°-50° C Top of chamber behind injector valve 42°-50° C Bottom of chamber near door 42°-50° C Middle of door 42°-50° C Edge of door Standards Agency Description EPA/OSHA Maximum hydrogen peroxide ambient concentration: less than 1 PPM (8 hour weighted average). -
Page 11: System Configuration
Chapter 1. Installation Overview System Configuration ® STERRAD 100S Sterilization systems are generic until the configuration kit is installed. Configuration kits contain language specific software, membrane panel, a power label, and a language- specific user’s guide. It also contains voltage specific parts; thermal overload relay and one of the Configuration PWAs ... - Page 12 Chapter 1. Installation Overview Country Language Voltage Configuration Kit Ecuador Spanish 208V 05-06421-X-002 Finland Finnish 380V 05-06426-X-003 France French 380V 05-06423-X-003 Germany German 380V 05-06424-X-003 Greece Greek 380V 05-51269-X-003 Hong Kong English 380V 05-06420-X-003 Hungary English 398V 05-06430-X-004 Indonesia English 415V 05-06420-X-005 Ireland...
-
Page 13: Tools And Test Equipment
Chapter 1. Installation Overview Country Language Voltage Configuration Kit Thailand English 380V 05-06420-X-003 United Kingdom English 415V 05-06420-X-005 Uruguay Spanish 380V 05-06421-X-003 Venezuela Spanish 208V 05-06421-X-002 Generic (200V) English 200V 05-06420-X-001 Generic (208V) English 208V 05-06420-X-002 Generic (380V) English 380V 05-06420-X-003 Generic (398V) English... -
Page 15: Chapter 2. For Your Safety
Chapter 2. For Your Safety ® STERRAD 100S Installation Guide... -
Page 16: Overview
Chapter 2. For Your Safety Overview Your safety is of primary concern to ASP. This section provides information on safely using the sterilizer. You must read, understand, and use the information in this section before operating the unit. Also, always pay attention to the warnings, cautions, and notes throughout this guide. -
Page 17: Safe Maintenance
Chapter 2. For Your Safety • Ingestion can produce injury that may be life threatening. If swallowed, drink plenty of water immediately to dilute. Do not induce vomiting. Consult a physician. • If hydrogen peroxide comes into contact with organic material (such as greasy surfaces) it can be a fire hazard. -
Page 18: Cassette Handling
Chapter 2. For Your Safety Cassette Handling • STERRAD CASSETTES CONTAIN CONCENTRATED HYDROGEN PEROXIDE, A STRONG OXIDIZER. CONCENTRATED HYDROGEN PEROXIDE IS CORROSIVE TO SKIN, EYES, NOSE, THROAT, LUNGS, AND GASTROINTESTINAL TRACT. Direct contact with the skin can cause severe irritation. If skin contact occurs, immediately flush with large amounts of water. -
Page 19: Device Safety
Chapter 2. For Your Safety Device Safety • The chapter on Preparing Items To Be Sterilized in the STERRAD 100S User's Guide contains information about materials and devices that can be processed by the sterilizer. Make sure your customer is familiar with that section prior to using the sterilizer. -
Page 21: Chapter 3. Installation
Chapter 3. Installation ® STERRAD 100S Installation Guide... -
Page 22: Pre-Installation
Chapter 3. Installation Pre-Installation Perform the following steps prior to uncrating the system. It is a good idea to have performed these steps prior to delivery of the system. Note: If the seismic restraint is being installed, the hospital must have identified the location of the restraints and have pre-drilled the proper holes. - Page 23 Chapter 3. Installation Figure 1. Installation Diagram ® STERRAD 100S Installation Guide...
-
Page 24: Uncrating The System
Chapter 3. Installation 3. Verify that the AC power connection is in place, is the proper voltage and phase rotation, and is activated. If the power requirements are not met, notify the hospital engineering department immediately so they can correct the problem. The phase rotation should be CBA, that it is, it should be counterclockwise from standard ABC phase rotation. - Page 25 Chapter 3. Installation 1. Position the crate on a level surface so that the ramp side faces an open area large enough for the ramp to be extended and the unit removed. 2. Cut the banding and immediately dispose of it. 3.
- Page 26 Chapter 3. Installation WARNING! USE A PARTNER. FOR SAFETY PURPOSES, THIS STEP REQUIRES THE PRESENCE OF AT LEAST TWO PEOPLE CAPABLE OF HANDLING 100 LBS. 13. With one person pushing carefully at the back of the system and one person guiding the system at the front, ease the system forward and guide it down the ramp until all four wheels are on the floor.
-
Page 27: Installing The Seismic Restraints
Chapter 3. Installation Installing the Seismic Restraints This procedure is approved by the State of California Building Code as a valid seismic restraint procedure and is required for units installed in California. Customers in other states or countries, or ships at sea, may need to have seismic restraints installed. -
Page 28: Pre-Installation Procedure-To Be Done By The Customer
Chapter 3. Installation Pre-Installation Procedure-To Be Done by the Customer The customer must identify the location for the sterilizer and perform steps 1-4 below prior to any other installation procedures. Figure 3. Optional Mounting Plan Note: There is a drilling template included in the kit. It has the proper dimensions and drilling positions. - Page 29 Chapter 3. Installation 2. Using the dimensions in the preceding figure, and in the kit diagrams, measure carefully and position the front bracket on the floor (about 33 inches from the rear bracket). Mark the location of the holes for drilling. 3.
-
Page 30: Installing The Brackets
Chapter 3. Installation Installing the Brackets 1. Fasten the rear bracket onto the anchor bolts using the 3/8" wide flat washers and the nuts supplied with the anchor bolts. See the preceding figure. 2. Remove the rubber tipped spindles on the locating pins. Then loosen the 2 locating pins on the rear bracket. -
Page 31: Vacuum Subsystem Assembly
Chapter 3. Installation Vacuum Subsystem Assembly Prior to assembling the unit make sure the following are completed or verified: • All vacuum fittings must be clean and free of foreign material. • Lightly coat all O-rings and seals with a thin film of high vacuum grease before installation. - Page 32 Chapter 3. Installation 2. Attach the atmospheric switch to the manifold assembly containing the vent valve and HEPA filter. 3. Attach the manifold assembly to the bottom of the chamber. 4. Attach the bellows to bottom of the manifold assembly. 5.
-
Page 33: System Configurations
Chapter 3. Installation Figure 6. Correctly Assembled Vacuum Stack. System Configurations Systems are shipped with the final, language-specific configurations yet to be done. The final configuration information and parts are in a kit that is shipped with the system. The receiving organization finishes the system and returns the completion notification to ASP. -
Page 34: Thermal Overload Relay
Chapter 3. Installation Figure 7. International Label Position. 5. Attach the labeled cover to the rear of the AC Enclosure and secure by hooking the tabs into the slots and securing the PEM studs inside the enclosure with 2 each, M4 Flat washers and M4 Hex Lock nuts. Thermal Overload Relay WARNING! POWER MUST BE OFF AND THE POWER CORD DISCONNECTED FROM... -
Page 35: Power Plug
Chapter 3. Installation 6. Connect orange wire #90 to CR3-NC 96. 7. Connect black wire #29 to CR3-T1. 8. Connect blue wire #30 to CR3-T2. 9. Connect red wire #31 to CR3-T3. 10. Install CR3 to CR2 by hooking CR3 into the cover of CR2 and inserting pins into CR2-T1, T2, and T3. -
Page 36: Software Installation
Chapter 3. Installation Software Installation CAUTION: You MUST WORK AT A STATIC PROTECTED WORKSTATION, BE GROUNDED AT ALL TIMES, AND CONFORM TO ELECTROSTATIC CONTROL PROCEDURES. A WRIST STRAP CONNECTED TO THE FRAME OF THE MACHINE IS NOT GROUNDED UNLESS THE MACHINE IS PLUGGED INTO AN EARTH GROUND. -
Page 37: System Reset
Chapter 3. Installation System Reset 1. Turn the circuit breakers ON. 2. Press and hold CANCEL and at the same time close the control enclosure cover to activate the safety switch and turn the unit on. 3. Continue to hold CANCEL until the machine beeps. 4. -
Page 38: Install Printer Ribbon And Paper
Chapter 3. Installation Install Printer Ribbon and Paper 1. Install the printer ribbon. 2. Install a roll of paper in the printer. Place the rest of the paper in the accessory box for shipment to the customer. Power Connection 1. Verify that the main circuit breaker located on the AC interface assembly is in the OFF position. -
Page 39: Phase Rotation
Chapter 3. Installation Phase Rotation 1. Start a cycle with no cassette and verify that the vacuum pump rotation is correct. Air blows out of the air mist filter housing when correct. Note: If air is entering into the oil mist filter housing, immediately remove power from the system. - Page 40 Chapter 3. Installation System Reset WARNING! Do not perform the master reset when a cycle is in progress. Perform only when the system is in the idle state. 1. Remove any cassettes that may be in the injector pump. Discard according to accepted procedures.
- Page 41 Chapter 3. Installation 4. Reenter the edit mode, as shown previously and change the total machine cycles to the number you wrote down in step 4. 5. Press CANCEL and the system displays the serial number as follows: SERIAL NUMBER XXXXX OPEN (change) - CLOSE (accept) Note: The serial number is located on the frame behind the storage drawer.
- Page 42 Chapter 3. Installation 4. Press OPEN DOOR to change the MM, DD, and YY each in turn until the desired setting is displayed. Press CLOSE DOOR each time to move the cursor to the next field. After the YY is updated, the following message is displayed on the LCD: TIME=HH:MM:SS AM OPEN(change) - CLOSE (accept)
-
Page 43: Replace The Panels
Chapter 3. Installation Replace the Panels 1. Replace the system panels. 2. Perform a complete system certification. Perform BI Validation 1. Perform a complete BI validation and keep the records. ® STERRAD 100S Installation Guide... -
Page 44: Final Procedures
Chapter 3. Installation Final Procedures The system must pass the product certification and biological acceptance procedure after installation. 1. Fill out the required forms and send or fax them to the appropriate location. 2. If the unit is being shipped to another location, return it to the shipping crate and make sure it is correctly packed and secured.
Need help?
Do you have a question about the ASP STERRAD 100S and is the answer not in the manual?
Questions and answers