Table of Contents
Advertisement
Quick Links
Advertisement
Table of Contents
Troubleshooting

Related Manuals for Johnson & Johnson Sterrad 100NX


Summary of Contents for Johnson & Johnson Sterrad 100NX
- Page 1 ® ® STERRAD 100NX Sterilization System Service Guide TS-54155-04 October 2011...
- Page 2 Sterilization System Service Guide 1-888-783-7723 ASP USA Professional Services www.aspjj.com International Technical Support 001.949.581.5799 ASP International Customer Support (Call your local ASP Customer Support Representative) ® © Division of Ethicon 2007-2011. All rights reserved. STERRAD is a registered trademark of Advanced ®...
-
Page 3: Table Of Contents
Contents Chapter 1. Introduction Overview ............................7 Sterilant and Cassette ......................... 8 Hardware ............................8 Software ............................. 9 Chapter 2. Safety Information Personal Safety and First Aid ......................11 Safe Maintenance/Device Safety ....................... 13 ... - Page 4 Subsystems and Components ...................... 29 Chamber Heater Resistance ......................31 Door Heater Resistance ....................... 31 Process Variables and Cancellation Limits ..................32 Access Levels and Supervisor Tasks ....................34 Access Levels ..........................34 Additional Utilities Menu ......................34 ...
- Page 5 Canceling a Cycle ........................74 Process Parameters ..........................75 Cycle Completed ..........................76 Processing a Sterilized Load ......................76 Inspecting Chemical Indicators ....................77 Processing Biological Indicators ....................77 Chapter 5. Diagnostic Tests and Troubleshooting ...
- Page 6 Chapter 7. Maintenance Overview ............................151 Maintenance Checks – All Calls ....................... 152 PM1 ..............................152 Drain the Vacuum Pump Oil ....................... 152 Oil Mist Filter Element Replacement ..................153 Air Filter/Fans ..........................153 ...
-
Page 7: Chapter 1. Introduction
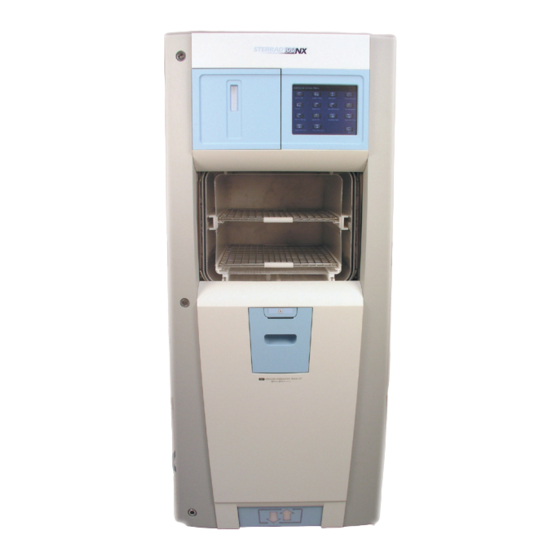
Introduction Chapter 1. Introduction IMPORTANT: The optional DUO Cycle is not available in the United States. Overview ® ® The STERRAD 100NX Sterilizer is a self-contained standalone system of hardware and software designed to sterilize medical instruments and devices using a patented hydrogen peroxide gas plasma process. -
Page 8: Sterilant And Cassette
Introduction Sterilant and Cassette ® ® The sterilant used in the STERRAD 100NX Sterilizer is hydrogen peroxide. It is supplied in cassette form as a separate accessory. The cassette contains 10 individually sealed cells. Each of the filled cells contains 5.4 ml of 59% nominal hydrogen peroxide. Each sterilization cycle uses two cells, except the DUO cycle;... -
Page 9: Software
Introduction Software The sterilization process is controlled automatically by software. The software controls and monitors the hardware through digital and analog signals. Functions managed by software include: • Timing • Temperature/pressure measurement and control • Sterilant delivery and vaporization • Plasma power generation and measurement •... -
Page 11: Chapter 2. Safety Information
Safety Information Chapter 2. Safety Information Your safety is of primary concern to Advanced Sterilization Products. ® This chapter provides information on safely servicing the STERRAD ® 100NX Sterilizer. You must read and understand the safety information in this chapter before performing service on the sterilizer. - Page 12 Safety Information WARNING! RISK OF EYE INJURY. Direct hydrogen peroxide contact with eyes can cause irreversible tissue damage. If contact with eyes occurs, hold the eyes open and flush with large amounts of water for at least 15-20 minutes. Remove contact lenses, if present, and then continue rinsing the eyes.
-
Page 13: Safe Maintenance/Device Safety
Safety Information WARNING! ELECTRIC SHOCK HAZARD. High voltages are present inside the sterilizer. Contact with electrically energized parts can cause injury or death. Turn OFF and unplug the sterilizer before performing service tasks. WARNING! RISK OF BREATHING DIFFICULTIES On rare occasions, the outlet filter on the vacuum pump can prematurely fail. If this occurs, you may see mist or what some users have described as “haze”... -
Page 14: Cassette Handling
Safety Information CAUTION: RISK OF DAMAGE TO THE STERILIZER. REPAIRS MUST BE PERFORMED BY AUTHORIZED PERSONNEL Repairs and adjustments should only be attempted by experienced technicians ® ® who are fully trained to maintain and repair the STERRAD 100NX Sterilizer. Do not attempt to perform any adjustments or procedures on the sterilizer if you have not been trained in an ASP-approved training facility by an ASP trainer. -
Page 15: Device Safety
Safety Information coverings are recommended. Where there is risk of product splashing into eyes, an independent face shield must be worn in addition to chemical splash goggles as authorized in 29 CFR 1910.133, applicable U.S. State regulations, or the appropriate standards of Canada and its Provinces or EC Member States (per European Standard EN 166). -
Page 16: Warnings, Cautions, And Notes
Safety Information Guidance And Declaration-Electromagnetic Emissions ® ® The STERRAD 100NX Sterilizer is intended for use in the electromagnetic environment specified below. Assure that it is used in such an environment. Emissions Test Compliance Electromagnetic Environment - Guidance ® ® RF emissions CISPR 11 Group 1 The STERRAD... -
Page 17: Symbols Used On The Sterilizer Or In This Guide
Safety Information Symbols Used on the Sterilizer or in This Guide Hot surfaces present. Do not touch without protection. Corrosive chemical present. Use personal protective equipment. Oxidizing chemical present Use personal protective equipment. Do not expose to excessive heat or open flame. -
Page 18: Safety Standards Compliance
Safety Information Safety Standards Compliance ® ® The STERRAD 100NX Sterilizer meets the following safety standards: • CAN/CSA-C22.2 No. 61010-1/R: 2009; Safety Requirements for Electrical Equipment for Measurement, Control, and Laboratory Use. • UL 61010-1/R: 2008; Standard for Safety for Electrical Equipment for Laboratory Use. -
Page 19: Chapter 3. Functional Description
Functional Description Chapter 3. Functional Description Overview of the Sterilization Process ® ® The STERRAD 100NX Sterilizer software interfaces with the hardware through digital/analog input and output signals and through serial communications via serial ports. The inputs monitor the sterilization process while the outputs control the process. The process occurs as follows: 1. -
Page 20: Hydrogen Peroxide Concentration And Delivery
Functional Description Hydrogen Peroxide Concentration and Delivery Standard and Flex Cycles During the hydrogen peroxide delivery step, hydrogen peroxide solution is delivered into the vaporizer bowl after the system pumps below 200 torr. Additional air is removed from the chamber and from the vaporizer/condenser by pulling a vacuum to a controlled pressure in the vaporizer/condenser. -
Page 21: Process Monitoring And Control
Functional Description Process Monitoring and Control The monitoring and control systems regulate the following: • Temperature • Pressure • Hydrogen peroxide monitor • Plasma power • Time • Process status • Temperature Temperature monitoring and control are involved in two aspects of the ®... -
Page 22: Plasma Power
Functional Description light reaching the detector by an amount proportional to the amount of hydrogen peroxide present in the light path. A photodiode detector measures the amount of light coming from the lamp, before and during hydrogen peroxide transfer to the chamber, allowing a calculation of the hydrogen peroxide concentration. - Page 23 Functional Description Figure 2. Software Control Diagram. STERRAD ® 100NX ® Service Guide...
-
Page 24: Subsystems
Functional Description Subsystems Delivery System The hydrogen peroxide delivery assembly transfers hydrogen peroxide solution from the cassette assembly to the vaporizer assembly. The delivery process involves: accepting a valid cassette from the user via an RFID, positioning the cells in the hydrogen peroxide extractor assembly, delivering hydrogen peroxide solution from a cell to the vaporizer, isolating the vaporizer from atmosphere, and disposing of a used cassette. -
Page 25: Cassette Disposal Box
Functional Description Cassette Disposal Box The cassette disposal box holds 2 depleted sterilant cassettes when full. It is located behind the access panel. The cassette disposal box is removed, closed, and discarded according to the facility’s procedures. Vaporizer/Condenser The vaporizer/condenser subsystem is connected between the delivery system and the chamber. -
Page 26: Dc Power Supplies
Functional Description DC Power Supplies Two DC power supplies convert AC power to six different DC voltages. One power supply is 24 VDC only. The second power supply voltages are +3.3V, +5V, +12V, and ±15V. All output voltages are regulated and the DC power supplies have built-in overcurrent protection. -
Page 27: Chamber And Shelves
Functional Description Chamber and Shelves The chamber functions as the container where sterilization of a load takes place. The chamber assembly includes the chamber, electrode, shelves, heaters, three temperature sensors, thermostats, and insulation. The chamber is heated using three independent heating zones; each controlled by a heater, thermostat, and temperature sensor. -
Page 28: Vacuum Pump Assembly
Functional Description Vacuum Pump Assembly The vacuum pump assembly consists of a vacuum pump, in a tray assembly, exhaust oil mist filter, exhaust catalytic converter, oil return valve, vacuum control valve, and related components. The vacuum pump assembly is mounted on the input side of the unit. The vacuum pump assembly can be removed from the sterilizer and be serviced or replaced using the supplied caster assembly that is manually attached to the tray. -
Page 29: Diagnostic Functions And Tests
Functional Description Diagnostic Functions and Tests The diagnostic function of the system software provides an automatic link between a failed cycle (cancelled cycle) and a specific subsystem function and performance test. The service personnel can access the diagnostic functions independent of the cycle. ®... - Page 30 Functional Description Subsystem Components Condenser heat/cool Condenser fans Vacuum Vacuum pump Vacuum control valve Vent valve Atmospheric pressure switch Chamber pressure sensors (2) Vacuum control valve current sensor Vent valve current sensor Inlet valve Inlet valve current sensor Transition valve Transition valve current sensor Vaporizer pressure sensor Oil return valve...
-
Page 31: Chamber Heater Resistance
Functional Description Subsystem Components Display VGA display Touch panel Printer Printer Fan current sensor Sound Alarm enunciator Chamber Heater Resistance Wire Color Ohms Red to black 56.9 +3.0/-5.1 Door Heater Resistance Wire Color Ohms Red to black 121.0 +6.4/-11.0 STERRAD ®... -
Page 32: Process Variables And Cancellation Limits
Functional Description Process Variables and Cancellation Limits The following table lists the control parameters and cancellation limits for the Standard and Flex cycles. Variable Cycle Parameters Cancellation Limits Standard Flex Standard/Flex Cycle time 47 minutes 42 minutes Not applicable Chamber wall temperature 50º... - Page 33 Functional Description The following table lists the control parameters and cancellation limits for the Express and optional DUO cycles. Variable Cycle Parameters Cancellation Limits Express Express/DUO Cycle time 24 minutes 60 minutes Not applicable Chamber wall temperature 50º C 50º C <47°...
-
Page 34: Access Levels And Supervisor Tasks
Functional Description Access Levels and Supervisor Tasks Users with supervisor-level access privileges (see below) are permitted to perform a set of restricted sterilizer functions. These functions are not used in daily sterilizer operation and some of them are designed to control access, manage system records, and perform advanced diagnostic functions. - Page 35 Functional Description The Additional Utilities Menu allows supervisors to configure the sterilizer and the network connection, set the date and time, set up and maintain user privileges, view and print files, perform diagnostic tests, and dispose of cassettes. Figure 3. Additional Utilities Menu. Date &...
-
Page 36: Date And Time Settings
Functional Description Date and Time Settings Use the Date and Time Settings screen to set the date and time, and select the local time zone and display formats. Figure 4. Date and Time Setting. Set Date Use the MM box to set the month (01-12), the DD box to set the day (01-31), and the YY box to set the year. -
Page 37: System Configuration
Functional Description Time Format Select 12-hour or 24-hour format. If 12-hour format is selected, the AM and PM buttons on the Set Time line are enabled. If 24-hour format is selected, AM and PM are disabled. Cancel/Done To cancel the date or time setting, touch Cancel. When the date and time settings are correct, touch Done to return to the Utilities menu. - Page 38 Functional Description Disabled causes the system to not capture data with an IMS system (optional). Vacuum Units torr/mtorr expresses vacuum measurements in torr and mtorr. kPa/Pa expresses vacuum measurements in kilopascals and Pascals. This is the factory default setting. Load Data Entry Option Enabled causes the Enter Load Item Data screen to be displayed after login.
- Page 39 Functional Description Language Selection Scroll through the list to select the language used in displays and printed reports. The factory default setting is English. Sterilizer Settings Touch Sterilizer Settings to display the following screen. The information entered here is included in the printout, but its use is optional.
- Page 40 Functional Description Printer Settings Touch Printer Settings to display the following screen: Touch Done to save the changes. Figure 7. Printer Settings. Internal Printer Input Side allows you to select the printer on the input side. This is the default. Internal Printer Output Side allows you to select the printer on the output side (2 door configuration).
- Page 41 Functional Description Transfer Settings When you touch Transfer Settings from the System Configuration menu, the following screen appears. This screen displays selectable report types that automatically transfer via a network to a remote PC upon cycle completion. Touch Done to save the settings. Touch Cancel to return to the previous screen.
-
Page 42: User Administration
Functional Description User Administration Use the User Administration screen to add, modify, or delete user names, passwords, and access levels. A button on this screen allows you to upload user information over a USB memory stick. Supervisor level access allows you to add, edit, or delete a User or another Supervisor. Note: It is very important that you, as an administrator, keep track of your password. -
Page 43: Add User
Functional Description Add User Use the Add User screen to enter a new user’s identification, password, and access level. Figure 10. Add User. 1. Enter the user’s operator “identification” in the Operator field. The entry must be alphanumeric, no more than 10 characters. Note: Operator and Password fields are case-sensitive. -
Page 44: Modify User
Functional Description Modify User Use the Modify User screen to modify an existing user’s identification, password, and access level. Figure 11. Modify User. 1. Touch the user’s name whose information you wish to edit or delete. 2. Touch Delete User to remove the user from the access list and revoke access to sterilizer operation. -
Page 45: Upload User Data
Functional Description • To modify the selected user’s information, touch Edit User. • To change the user’s operator name, make changes in the Operator field. • To change the user’s password, make changes in the Password field. • To change the user’s access level, select the desired Access Level. -
Page 46: Steps To Upload A User Database
Functional Description Steps to Upload a User Database To upload a list of user identifications and passwords, perform the following steps: 1. Create an ASCII text file called "users.rec" that contains the user identifications, passwords, and access levels. Use Microsoft Notepad to create the entry. -
Page 47: Dispose Cassette
Functional Description Dispose Cassette WARNING! HYDROGEN PEROXIDE MAY BE PRESENT. WEAR CHEMICAL RESISTANT PVC (VINYL), OR NITRILE GLOVES WHENEVER HANDLING A LOAD AFTER A CYCLE CANCELLATION OR WHEN DISPOSING OF A CASSETTE. HYDROGEN PEROXIDE LIQUID MAY BE PRESENT ON THE CASSETTE, THE LOAD OR IN THE CHAMBER. -
Page 48: Peroxide Clearance Cycle
Functional Description Peroxide Clearance Cycle WARNING! HYDROGEN PEROXIDE MAY BE PRESENT. WEAR CHEMICAL RESISTANT PVC (VINYL), OR NITRILE GLOVES WHENEVER HANDLING A LOAD AFTER A CYCLE CANCELLATION OR AFTER RUNNING THE PEROXIDE CLEARANCE CYCLE. HYDROGEN PEROXIDE LIQUID MAY BE PRESENT ON THE LOAD OR IN THE CHAMBER. This feature is used to dispose of the peroxide remaining in the DUO delivery module when the peroxide has expired (after 10 days in the system), or before servicing. -
Page 49: Network
Functional Description Network ® ® These STERRAD 100NX Sterilizer has a networking feature that must be configured by an ASP Field Service Engineer working in conjunction with the customer’s network administrator. Call ASP for current information on setting up the network. Diagnostics The diagnostics function prompts you to select one of two types of tests (either Temperature or Other Tests). -
Page 50: Diagnostic Tests
Functional Description Diagnostic Tests Order Test Name What is tested Average Time to Run* Power Supply Test High- and low-voltage power supplies and 30 sec. sensors. Vacuum Test Vacuum pump and pressure sensors. 2 min. 20 sec. Plasma Test Plasma electrical subsystem. Electrode integrity. -
Page 51: File Management
Functional Description File Management Use the File Management screen to select and display calibration files or diagnostic report files. Figure 17. File Management. Calibration Files Touch Calibration Files to display a list of calibration files created during a sterilizer calibration. Scroll through the list and touch the file name you wish to view. -
Page 52: Upload File
Functional Description Upload File This screen allows you to upload item information to the sterilizer using the USB memory port. Figure 18. Upload Items Screen. 1. Using Microsoft “Notepad,” create a list of load items similar to the example shown in the figure. To obtain the above vertical display list;... -
Page 53: Input/Output Doors
Functional Description Input/Output Doors The doors can be opened or closed via the footpad that you tap with your toe or by touching Input Door or Output Door. If the system has only one door, only Input Close Door and Input Open Door are available for use. -
Page 54: Cycle Statistics
Functional Description Cycle Statistics Figure 20. Cycle Statistics. This screen displays the Completion Code, Number of Occurrences and Percentage (%). The completion code column displays the error conditions that resulted in a canceled cycle. The percentage column indicates the percentage of the total errors that resulted in that code being generated. -
Page 55: User Log
Functional Description User Log Figure 21. User Log. The User Log displays a listing of every login and logout event, including date, time, user name, and either login or logout. The most recent log entry is displayed first. A total of 100 entries can be displayed. STERRAD ®... -
Page 56: Software Error Log
Functional Description Software Error Log Figure 22. Software Error Log. The Software Error log displays the following details: • Date • Time • Module Name • Error Type The most recent error messages are displayed in the bottom of the list. A maximum of 100 logs can be displayed. -
Page 57: Hardware Configuration
Functional Description Hardware Configuration Figure 23. Hardware Configuration. The Hardware Configuration screen allows you to make various choices regarding the sterilizer hardware use. Touch Done to save your setting and exit the display. If you changed the IMS selections, the system needs to be rebooted for those selections to be implemented. -
Page 58: Summary
Functional Description Summary Figure 24. Cycle and System Summary. The summary screen displays complete details of all the parameters and actions associated with the cycle. These include: Cycle Number, login information, language selected, PM information, cassette information, customer information, etc. Touch Print to obtain a paper copy of this information. -
Page 59: Service Log
Functional Description Service Log Figure 25. Service Log. The Service Log screen allows you to enter information pertaining to a specific service call or event. The sterilizer automatically time-stamps the information with the time, date, and service details. Touch Save to save the information you enter. -
Page 60: Displayed Reports
Functional Description Displayed Reports Users with Operator-level access can display the Cycle History file. Users with Supervisor-level access can display the Cycle History file, the Calibration files, and Diagnostic files. All displayed files can be printed by touching Print on the file display screen. -
Page 61: Printed Reports
Functional Description Print List prints a list of all cycle history files stored in the sterilizer. View Cycle displays the selected Cycle History file on the screen. Print Cycle (Short) prints a short-format report of the selected cycle history file. Print Cycle (Long) prints a long-format report of the selected cycle history file. -
Page 62: Long Report
Functional Description Long Report The long-format report lists detailed information about the cycle, shows the cycle status, lists the date and duration of the cycle, shows operator and load identifying information, and provides detailed data about the operation of the sterilizer, including temperatures, pressures, plasma measurements, and sterilant concentrations throughout the cycle. -
Page 63: Chapter 4. Operation
Operation Chapter 4. Operation Before You Start ® ® Each time you use the STERRAD 100NX Sterilizer, follow the instructions provided in the chapter on load preparation. It is your responsibility to be familiar with the load preparation and safety information provided in this service guide. -
Page 64: Preparing The Load
Operation Preparing the Load While the sterilizer is warming up, you can use this time to prepare the load. Refer to the chapter detailing load preparation information. Biological Indicators Confirming that sterilizing conditions were achieved during a cycle is an important part of the sterilization process. - Page 65 Operation Figure 28. Operator Login Screen. 1. Touch the Operator field. The cursor appears in the field. Note: Operator and Password fields are case-sensitive. 2. Use the on-screen keyboard to type your assigned operator identification. 3. Touch the Enter key. The cursor jumps to the Password field. You can also touch the password field.
-
Page 66: Entering Load Information
Operation Entering Load Information Note: If your sterilizer has been configured not to require load item data, this screen will not appear. Skip to the subsection titled Cycle Notes. Enter Load Item Data The Load Item Data screen allows you to enter information about the contents of the load. -
Page 67: Cycle Notes
Operation Select From List If a database has been established containing frequently used load information, you can select that information using the following steps: 1. Touch Select from List. 2. Scroll up or down the load item menu list to the desired item. Touch the items you wish to add to your current list and touch Select. -
Page 68: Loading The Chamber
Operation Loading the Chamber Note: The doors are equipped with safety mechanisms that prevent them from closing if and obstruction is encountered. If this occurs, the door stops immediately. You must touch Open or Close Door to move the door. 1. - Page 69 Operation Figure 32. Do Not Block the UV Lamp. 2. When placing the load on the shelves, make certain that you do not block the beam of the ultraviolet lamp in the front right side of the chamber. Make sure the load is centered on the shelves and that the shelves are centered in the chamber.
- Page 70 Operation Figure 34. Do NOT Stack Trays. Figure 35. Load Correctly Placed. 5. When you are finished loading the chamber, close the door by tapping the foot pad or touching Close Door. 6. If the message “Please Close Door” is displayed, the door is not securely closed.
-
Page 71: Selecting And Starting A Cycle
Operation Selecting and Starting a Cycle When the load has been placed in the chamber, and the door has been closed, use the System Ready screen to start the cycle. The screen displays the message “Please Insert New Cassette” if a new cassette is required, if the cassette in the sterilizer is expired, or if there is no cassette installed in the sterilizer. -
Page 72: System Ready Screen
Operation System Ready Screen The System Ready screen displays a row of buttons along the bottom of the screen. Touch them to select sterilizer functions: • Standard cycle sterilizes the load in about 47 minutes. • Flex cycle is specifically designed for flexible endoscopes and sterilizes the load in about 42 minutes. -
Page 73: Cycle In Progress
Operation Figure 37. Inserting the Cassette into the Slot. 6. After a slight pause, the sterilizer pulls the cassette through the slot and the slot door closes. If the cassette is accepted, cassette loading is now complete. Note: If the cassette is not accepted by the system, e.g., expired, used, invalid, etc, it is ejected into the cassette disposal box. -
Page 74: Canceling A Cycle
Operation The clock displays the estimated number of minutes and seconds remaining before the cycle is finished. The “Time Remaining” field updates as the sterilization cycle progresses. As each sterilization cycle stage runs, the screen displays the name of the stage. A moving bar graph also displays the percent of the cycle that is complete. -
Page 75: Process Parameters
Operation Figure 40. Cycle Cancellation In Progress. Cancellation Has Been Confirmed. 2. Touch No to continue with the cycle. Touch Yes to cancel the cycle. Once the cycle cancellation sequence begins, the screen turns red and the cancellation sequence cannot be interrupted. The cancellation sequence may take up to ten minutes to complete. -
Page 76: Cycle Completed
Operation Cycle Completed When the cycle is complete, the Cycle Completed screen is displayed. The background of the screen is green to indicate a successfully completed cycle. The loudspeaker emits one long beep to indicate successful cycle completion. Figure 41. Cycle Completed. 1. -
Page 77: Inspecting Chemical Indicators
Operation Inspecting Chemical Indicators After ensuring that the chemical indicators exhibit the correct color change, and the cycle printout shows that all parameters were met, the sterilized load is ready for immediate use, following your facility’s policy. If the chemical indicators do not exhibit the correct color change, investigate the cause and repackage and reprocess the load. -
Page 79: Chapter 5. Diagnostic Tests And Troubleshooting
Diagnostic Tests and Troubleshooting Chapter 5. Diagnostic Tests and Troubleshooting Diagnostic Files Diagnostic files are created by the diagnostics tests. The files contain details about the tests and the outcomes (Passed or Failed) of each. An example of a Diagnostic file is shown in the figure following the table. Touch Diagnostic Files to display a list of reports created by the Diagnostics function. - Page 80 Diagnostic Tests and Troubleshooting Diagnostic Tests Order Test Name What is tested Minimum Time to Run* Power Supply Test DC voltage power supplies and 30 sec. sensors. Vacuum Test Vacuum pump and pressure 2 min. 20 sec. sensors. Plasma Test Plasma electrical subsystem.
- Page 81 Diagnostic Tests and Troubleshooting DIAGNOSTICS REPORT Fan Test ....FAN TEST PASSED/FAILED Time Stamp: MM/DD/YY File Name: /xxxxxx HH:MM:SS Power Supply Test 3.3 Volts Power Supply: x.x Sound Test 5 Volts Power Supply: SOUND TEST PASSED/FAILED...
-
Page 82: Troubleshooting
Diagnostic Tests and Troubleshooting Troubleshooting If an error occurs during operation, the sterilizer may allow you to run a diagnostic test immediately. When prompted to do so, touch Confirm to perform the diagnostic test. A diagnostic test displays and prints a diagnostic message when the test is completed. - Page 83 Diagnostic Tests and Troubleshooting Error Message Probable Cause Suggested Remedy CASSETTE DID NOT System could not Run diagnostics. If diagnostics INDEX communicate with delivery fail, adjust or replace the delivery subsystem while attempting subsystem. to index the cassette. CASSETTE EXPIRED, The cassette has expired or Load a new cassette.
- Page 84 Diagnostic Tests and Troubleshooting Error Message Probable Cause Suggested Remedy CHAMBER 2 The chamber center Run diagnostics. Replace failed TEMPERATURE temperature difference was component. DRIFTED HIGHER larger than expected. A sensor or heater may have failed. CHAMBER 2 The chamber center Run diagnostics.
- Page 85 Diagnostic Tests and Troubleshooting Error Message Probable Cause Suggested Remedy DOOR SENSOR FAULT A fault was detected during Run diagnostics. Troubleshoot or operation. replace the door sensor. DOOR TEMPERATURE The door temperature did Run diagnostics. Troubleshoot or HAS NOT RISEN not reach the process replace failed component.
- Page 86 Diagnostic Tests and Troubleshooting Error Message Probable Cause Suggested Remedy INCORRECT The cassette inserted is not Insert a cassette. If the problem ® ® CASSETTE TYPE, a STERRAD 100NX persists, run diagnostics. Adjust EJECTING cassette. or replace the delivery subsystem. IPC FAILURE Generic system error.
- Page 87 Diagnostic Tests and Troubleshooting Error Message Probable Cause Suggested Remedy PLEASE REMOVE The sterilizer cannot Inspect the cassette. Make sure it CASSETTE AND identify the proper cassette is the correct type for the VERIFY CASSETTE type. The wrong type of sterilizer.
- Page 88 Diagnostic Tests and Troubleshooting Error Message Probable Cause Suggested Remedy UV PATH IS BLOCKED, An object is blocking the Try to isolate the problem to the OPEN DOOR AND UV lamp and monitor load. Inspect operation of UV CLEAR PATHWAY pathway.
- Page 89 Diagnostic Tests and Troubleshooting Diagnostic Messages Diagnostic messages are displayed and printed when the diagnostic tests are run. Error Message Probable Cause Suggested Remedy 12 VOLT SUPPLY HIGH 12 volt DC supply > 14.4 Replace DC power supply. volts. 12 VOLT SUPPLY LOW 12 volt DC supply <...
- Page 90 Diagnostic Tests and Troubleshooting Error Message Probable Cause Suggested Remedy CANNOT TURN Plasma power out of Replace LFPS II power supply. PLASMA OFF specification. CARRIAGE SENSOR Carriage sensor not Replace delivery system READ FAILURE functional. assembly. CASSETTE MOTOR Cassette motor not functional. Replace delivery system FAILURE assembly.
- Page 91 Diagnostic Tests and Troubleshooting Error Message Probable Cause Suggested Remedy CHAMBER 2 Thermistor circuit failure. Replace temperature sensor 3. TEMPERATURE RAILED HIGH CHAMBER 2 Thermistor disconnected. Inspect sensor wiring and TEMPERATURE connector. Replace temperature RAILED LOW sensor 3 if failed. CHAMBER 3 Chamber heater stuck on.
- Page 92 Diagnostic Tests and Troubleshooting Error Message Probable Cause Suggested Remedy CONDENSER Thermistor circuit failure. Inspect wiring and connect-ors. TEMPERATURE Replace vaporizer/ condenser RAILED HIGH assembly if failed. CONDENSER Thermistor disconnected. Inspect the wiring and TEMPERATURE connectors. Replace the RAILED LOW vaporizer/ condenser assembly if it has failed.
- Page 93 Diagnostic Tests and Troubleshooting Error Message Probable Cause Suggested Remedy EJECT FAILURE Cassette did not eject. Wear gloves and open the cassette box access panel and free up any jammed cassettes. If problem persists, troubleshoot or replace collection box switch. FAILED TO EXTEND Needle motor not functional.
- Page 94 Diagnostic Tests and Troubleshooting Error Message Probable Cause Suggested Remedy UV LIGHT IS BAD UV lamp not functional. Replace UV lamp. VACUUM COMMAND Vacuum valve electrical Inspect valve wiring and ALWAYS CLOSED failure. connectors. Replace vacuum valve if failed. VACUUM COMMAND Vacuum valve mechanical Inspect valve wiring and ALWAYS OPEN...
- Page 95 Diagnostic Tests and Troubleshooting Error Message Probable Cause Suggested Remedy VAPORIZER Thermistor disconnected. Inspect wiring and connect-ors. TEMPERATURE Replace vaporizer/ condenser RAILED LOW assembly if failed. VENT SENSOR STUCK Vent valve sensor failure. Inspect vent valve wiring and CLOSED connectors. Replace vent valve if failed.
-
Page 96: Running The Peroxide Clearance Cycle
Diagnostic Tests and Troubleshooting Running the Peroxide Clearance Cycle WARNING! HYDROGEN PEROXIDE MAY BE PRESENT. WEAR CHEMICAL RESISTANT PVC (VINYL), OR NITRILE GLOVES WHENEVER HANDLING A LOAD AFTER A CYCLE CANCELLATION OR AFTER RUNNING THE PEROXIDE CLEARANCE CYCLE. HYDROGEN PEROXIDE LIQUID MAY BE PRESENT ON THE LOAD OR IN THE CHAMBER. - Page 97 Diagnostic Tests and Troubleshooting If peroxide remains in the DUO delivery module longer than 150 days without running a Peroxide Clearance cycle, “Mandatory Service Call Is Required For This Feature. Please Call ASP” is displayed. To correct this message do the following: 1.
-
Page 99: Chapter 6. Subassembly Removal And Replacement
Subassembly Removal and Replacement Chapter 6. Subassembly Removal and Replacement Access to Sterilizer Interior Service access to the interior of the sterilizer is primarily obtained by using a hex wrench to open the front panel. The side and top panels can be removed if needed. - Page 100 Subassembly Removal and Replacement Front Panel Note: The front panel does not need to be removed unless it is being replaced. The panel swings open allowing you to gain access to the inside of the system. Required Tools: 10 mm hex wrench. Opening: 1.
- Page 101 Subassembly Removal and Replacement Top Panel Figure 45. Top Panel Showing Pan Screen. Required Tools: 3 mm hex wrench. Removal: 1. Remove the 4 screws and washers. 2. Lift the panel to remove. It may be necessary to open the front panel to ease removal.
- Page 102 Subassembly Removal and Replacement Side Panels Figure 46. Side Panels. Required Tools: 3 mm hex wrench. Removal: 1. Remove the 2 screws and washers at the top of each panel. 2. Using the handle provided in the panel, lift the panel up and out. Note: Some force may be required to break the panel seal.
- Page 103 Subassembly Removal and Replacement Rear Panel Figure 47. Rear Panel. Note: This panel is on one- door units only. Required Tools: 3 mm hex wrench. Removal: 1. Remove the 8 screws and washers. 2. Lift the panel up and out to remove. Replacement: Replacement is the reverse of the removal steps.
-
Page 104: Component Replacement
Subassembly Removal and Replacement Component Replacement The following replacement procedures detail removing and replacing various components and subassemblies. Make sure you follow all safety procedures detailed in Chapter 2 for servicing the sterilizer. Delivery System Assembly (02-52302) The delivery system assembly includes the following components: •... - Page 105 Subassembly Removal and Replacement WARNING! RISK OF HYDROGEN PEROXIDE EXPOSURE. TRAPPED CASSETTES, NEEDLES, AND DELIVERY SYSTEM TUBING MAY CONTAIN HYDROGEN PEROXIDE. USE APPROVED PERSONAL PROTECTION EQUIPMENT (PPE) INCLUDING EYE PROTECTION AND GLOVES WHEN HANDLING THESE COMPONENTS. WARNING! THE INJECTION NEEDLES ARE VERY SHARP. MAKE SURE YOU KNOW WHERE YOU ARE PLACING YOUR HANDS AT ALL TIMES.
- Page 106 Subassembly Removal and Replacement Needle Replacement This is a PM procedure. WARNING! THE NEEDLES ARE VERY SHARP. USE CAUTION WHEN REMOVING THEM. Removal/ 1. Locate the needles and unscrew them counter clockwise. Replacement 2. Insert the new needles and screw them in clockwise. Finger tighten only.
-
Page 107: Delivery Valve (28-53786) (Pm Kit Item)
Subassembly Removal and Replacement Delivery Valve (28-53786) (PM Kit Item) Figure 49. Delivery Valve. Required Tools: Small pick Preparation: 1. Turn the sterilizer OFF and unplug it. 2. Remove the left side panel. Removal: 1. Unscrew and disconnect P128 from the delivery valve. 2. -
Page 108: Vaporizer/Condenser Assembly (02-52303)
Subassembly Removal and Replacement Vaporizer/Condenser Assembly (02-52303) The vaporizer/condenser assembly includes the following components: • Pressure transducer • Transition valve • Inlet valve • Thermoelectric modules (2) • Thermoelectric fans (2) • Thermostat • Thermistor sensor Figure 50. Vaporizer/Condenser Assembly. WARNING! RISK OF HYDROGEN PEROXIDE EXPOSURE. - Page 109 Subassembly Removal and Replacement Removal: 1. Disconnect the delivery tube connecting the vaporizer to the vaporizer/condenser. Retain the small O-ring for later use. 2. Remove all cables from the assembly. 3. Use the soft-jaw pliers to unscrew the collar to the Ultratorr fitting. 4.
-
Page 110: Vent Valve Assembly (02-52424)
Subassembly Removal and Replacement Vent Valve Assembly (02-52424) Figure 51. Vent Valve. Required Tools: 1 inch open end wrench and soft-jaw pliers. Preparation: 1. Turn the sterilizer OFF and unplug it. 2. Open the front panel. 3. Engage the door safety stop located on the bottom front edge of the chamber. -
Page 111: Vent Valve Hepa Filter (25-00473)
Subassembly Removal and Replacement Vent Valve HEPA Filter (25-00473) Figure 52. Vent Valve showing HEPA Filter. ® Required Tools: Teflon tape. Preparation: 1. Turn the sterilizer OFF and unplug it. 2. Open the front panel. Removal: Unscrew the HEPA filter from the valve body. Replacement: ®... -
Page 112: Chamber Pressure Control Assembly (02-52387)
Subassembly Removal and Replacement Chamber Pressure Control Assembly (02-52387) The chamber pressure control assembly contains the following components: • Pressure transducers » Low vacuum transducer (0-30 torr) » High vacuum transducer (0-200 torr) • Atmospheric pressure switch Figure 53. Chamber Pressure Control Assembly. Required Tools: Soft-jaw pliers. - Page 113 Subassembly Removal and Replacement Replacement: 1. Clean the inside of the Ultratorr fitting. 2. Lightly coat a new O-ring with approved vacuum grease and place the O-ring in the Ultratorr fitting. 3. Reinstall the spacer in the Ultratorr fitting and replace the threaded collar.
-
Page 114: System Control Enclosure Assembly (02-53248)
Subassembly Removal and Replacement System Control Enclosure Assembly (02-53248) The System Control Enclosure contains the ETX and interface boards. The entire enclosure is replaced if a failure occurs. The test points are located on the interface board behind a removable enclosure panel. Figure 54. -
Page 115: Ide Software Replacement
Subassembly Removal and Replacement IDE Software Replacement CAUTION: ESD-sensitive parts. The circuit boards may be damaged by electrostatic discharge. Avoid touching components on the circuit boards. Attach and use an approved ESD grounding wristband when handling circuit boards. Removal: 1. Turn the sterilizer OFF and unplug it. 2. -
Page 116: I/O Panel Assembly (03-53151)
Subassembly Removal and Replacement I/O Panel Assembly (03-53151) There is an I/O Panel Assembly on the lower right front of the sterilizer. Connection ports for an external printer and the network are located in the panel. The panel assembly moves in and out to clear the door when it is opened. -
Page 117: Alternating Current (Ac) Distribution Assembly (40-52312)
Subassembly Removal and Replacement Alternating Current (AC) Distribution Assembly (40-52312) The AC distribution assembly is a closed system which requires no servicing. The unit is certified as electrically safe and is sealed and should not be opened. If the unit requires configuration between high and low voltage (the unit is shipped with the low voltage configuration), use the procedure that follows this section to change the voltage configuration. - Page 118 Subassembly Removal and Replacement Removal: 1. Unplug the cables on top of the AC unit. 2. Loosen the 3 thumbscrews holding the AC unit in place on the frame. 3. Slide the unit to the side, and then pull it forward. 4.
- Page 119 Subassembly Removal and Replacement button to ensure that the breaker has not tripped. 5. Close the enclosure sides and tighten the screws. 6. Return the enclosure to the sterilizer using the replacement procedures. Figure 56. AC Distribution Assembly. Figure 57. Motor Starter Current Setting and Reset Button. STERRAD ®...
-
Page 120: Direct Current (Dc) Power Supplies (40-53112 24 Vdc, 40-52313 Atx Dc)
Subassembly Removal and Replacement Direct Current (DC) Power Supplies (40-53112 24 VDC, 40-52313 ATX DC) Figure 58. DC Power Supplies. WARNING! ELECTRIC SHOCK HAZARD. HAZARDOUS VOLTAGES ARE PRESENT INSIDE THE DC POWER SUPPLY. TURN THE STERILIZER OFF AND UNPLUG IT BEFORE HANDLING THE DC POWER SUPPLY. -
Page 121: Display Assembly (40-52308)
Subassembly Removal and Replacement Display Assembly (40-52308) Figure 59. Display Assembly. WARNING! ELECTRIC SHOCK HAZARD. HAZARDOUS VOLTAGES ARE PRESENT INSIDE THE DISPLAY BACKLIGHT. TURN THE STERILIZER OFF AND UNPLUG IT BEFORE HANDLING THE DISPLAY ASSEMBLY. Required Tools: 3 mm hex wrench. Preparation: 1. -
Page 122: Fan Assembly (40-53551)
Subassembly Removal and Replacement Fan Assembly (40-53551) Figure 60. Fan Assembly. There are 4 fans on the sterilizer. They are inspected as part of PM1 procedures. Required Tools: 4 mm hex wrench. Preparation: 1. Turn the sterilizer OFF and unplug it. 2. -
Page 123: Ultraviolet Lamp Power Supply (40-51449)
Subassembly Removal and Replacement Ultraviolet Lamp Power Supply (40-51449) The ultraviolet lamp is part of the hydrogen peroxide monitor system. The power supply is located in the top section of the frame. Figure 61. UV Lamp Power Supply. WARNING! ELECTRIC SHOCK HAZARD. HAZARDOUS VOLTAGES ARE PRESENT INSIDE THE UV LAMP POWER SUPPLY. -
Page 124: Hydrogen Peroxide Monitor Lamp Assembly (04-50544)
Subassembly Removal and Replacement Hydrogen Peroxide Monitor Lamp Assembly (04-50544) The hydrogen peroxide monitor lamp assembly includes the monitor lamp optical window. Lamp Retainer Lamp UV Lamp Screw Housing Ultratorr Fitting This is a PM procedure. WARNING! ULTRAVIOLET LIGHT EXPOSURE! ULTRAVIOLET LIGHT CAN HARM UNPROTECTED EYES AND SKIN. - Page 125 Subassembly Removal and Replacement 2. Use soft-jaw pliers to unscrew the collar to the Ultratorr fitting. 3. Lift the lamp housing up to remove. 4. Remove the spacer and the O-ring from inside the Ultratorr fitting. 5. Insert a 1 mm hex wrench through the hole in the top of the lamp housing to loosen the lamp retaining screw.
-
Page 126: Electrode Assembly (02-52391)
Subassembly Removal and Replacement Electrode Assembly (02-52391) Figure 62. Electrode Assembly. Required Tools: 2.5 mm and 3 mm hex wrenches, #2 Phillips screwdriver and manual door crank. Preparation: 1. Open the front panel. 2. Move the door down to the service position using the manual crank. - Page 127 Subassembly Removal and Replacement Replacement: 1. Replace the spaces and shelf support. 2. Orient the electrode assembly so that the feedthrough lines up with the feedthrough mounting tab on the bottom electrode element. 3. Slide the electrode assembly into the chamber. Note: Ensure that the electrode bottom spacers engage the remaining 2 shoulder screws located at the far end of the chamber.
-
Page 128: Door Drive And Belt
Subassembly Removal and Replacement Door Drive and Belt Figure 63. Door Drive and Belt. Required Tools: 2.5 and 5 mm hex key, 7/64" hex key, 7/16" or 11 mm wrench Preparation: 1. Close all doors. 2. Open the input or output panel to access the motor needing replacement. -
Page 129: Counterbalance
Subassembly Removal and Replacement Replacement: 1. Slide the metal coupling collar over the motor shaft with the set screw closest to the motor. 2. Set the motor in place onto the frame and loosely install one screw farthest away from the coupling. 3. -
Page 130: Timing Belt
Subassembly Removal and Replacement CAUTION: Do not bend, nick, or damage the counterbalance metal tape in any way. Do not use any tool to clamp it to another part. If the tape is damaged, it will bind in the housing slit, further damage the part, and disrupt the door motion. -
Page 131: Door Rollers
Subassembly Removal and Replacement Removal: 1. Disconnect the timing belt from the counterbalance by removing two flathead screws securing the belt clamp to the belt holder. 2. Disconnect the timing belt from the door arm lifter by removing two screws securing the belt holder to the door arm lifter. 3. -
Page 132: Door Seal O-Ring
Subassembly Removal and Replacement Door Seal O-Ring Required Tools: Small, plastic, flat-blade screwdriver, and manual door crank. Preparation: 1. Open the front panel. 2. Open the chamber door and manually place in the service position using the door crank. Removal: 1. -
Page 133: Hydrogen Peroxide Detector Assembly (04-52108)
Subassembly Removal and Replacement Hydrogen Peroxide Detector Assembly (04-52108) The hydrogen peroxide detector assembly includes the detector optical window. Optical O-Ring Window Inside Inside Figure 66. Detector Assembly. CAUTION: Safe parts handling. Do not touch the surface of the optical window with your bare hands. Oil and contaminants from your skin will damage the window and cause premature failure. - Page 134 Subassembly Removal and Replacement Replacement: 1. Put on clean gloves. Install a new optical window and O-ring in the detector (if necessary). Do not touch the optical window with your bare hands. 2. Remove the gloves. Clean the inside of the chamber fitting. 3.
-
Page 135: Vacuum Pump Assembly
Subassembly Removal and Replacement Vacuum Pump Assembly The vacuum pump assembly (02-52301) contains the following components: • Vacuum pump and tray assembly • Catalytic converter • Oil mist filter • Oil return valve • Vacuum control valve Note: You may need to remove the vacuum control valve to provide enough clearance to remove the vacuum pump. - Page 136 Subassembly Removal and Replacement Required Tools: 5 mm hex wrench, flat-blade screwdriver, 10 mm nut driver Preparation: 1. Turn the sterilizer OFF and unplug it. 2. Open the front panel. 3. Remove the I/O panel assembly from the frame using the removal instructions shown previously in this chapter.
- Page 137 Subassembly Removal and Replacement 7. Slide the caster assembly under the tray and over the M6 studs. Note: The caster assembly can only fit one way on the tray. Ensure proper orientation. 8. Install 4 nuts and washers to secure the caster assembly to the tray. 9.
- Page 138 Subassembly Removal and Replacement Note: The plunger can be released after about 1-2 inches of travel. 10. Fully remove the pump assembly from the frame. Replacement: Replacement is the reverse of the removal steps. STERRAD ® 100NX ® Service Guide...
-
Page 139: Catalytic Converter (25-05611)
Subassembly Removal and Replacement Catalytic Converter (25-05611) Figure 68. Catalytic Converter. This is a PM procedure. Preparation: 1. Turn the sterilizer OFF and unplug it. 2. Open the front panel. Removal: 1. Unscrew the catalytic converter. Note: The plastic adapter will probably unscrew from the oil mist filter. -
Page 140: Oil Mist Filter (Alcatel 25-53795, Solberg 25-54623)
Subassembly Removal and Replacement Oil Mist Filter (Alcatel 25-53795, Solberg 25-54623) Figure 69. Solberg Oil Mist Filter. This is a PM procedure. Required Tools: 4 mm hex wrench, 6 mm hex wrench. Preparation: 1. Oil may be present in the oil mist filter. Navigate to the Vacuum/Plasma utility screen and run the vacuum pump with the oil return valve ON for 30 seconds to drain oil from the filter. - Page 141 Subassembly Removal and Replacement Note: The pump oil is hydrocarbon mineral oil. 7. For the Solberg filter, remove the clamp. Note the orientation. 8. Remove the thumb-screw securing the filter element to the housing. 9. Remove and discard the filter element according to local regulations.
-
Page 142: Vacuum Control Valve (28-52422)
Subassembly Removal and Replacement Vacuum Control Valve (28-52422) Figure 70. Vacuum Control Valves. MKS (left) Leybold (right). Preparation: 1. Open the front panel. Removal: 1. Disconnect the KF-40 clamps attaching the vacuum control valve to the bellows and the vacuum pump. 2. -
Page 143: Oil Return Valve (28-51498)
Subassembly Removal and Replacement Oil Return Valve (28-51498) Required Tools: 18 mm open end wrench Preparation: 1. Open the front panel. 2. The vacuum pump may be pulled from the frame to the safety stop to make servicing easier. Removal: 1. -
Page 144: Low Frequency Plasma System (Lfps Ii) (40-52321)
Subassembly Removal and Replacement Low Frequency Plasma System (LFPS II) (40-52321) Figure 71. LFPS II. WARNING! ELECTRIC SHOCK HAZARD. HAZARDOUS VOLTAGES ARE PRESENT INSIDE THE LFPS II. TURN THE STERILIZER OFF AND UNPLUG IT BEFORE HANDLING THE LFPS 2. Required Tools: Flat-blade screwdriver Preparation: 1. -
Page 145: Printer Assembly
Subassembly Removal and Replacement Printer Assembly Figure 72. Printer Assembly. The printer assembly is mounted in the front panel. Required Tools: 3 mm hex wrench (long shaft). Preparation: 1. Turn the sterilizer OFF and unplug it. 2. Open the front panel. Removal: 1. -
Page 146: Optional Hardware
Subassembly Removal and Replacement Optional Hardware DUO Delivery Module (103329-XX) Filter Valve, 2-Way, 24VDC Air Pump Metering Board Assembly Angled View Top View The DUO delivery module assembly includes the following replaceable components: • Metering Board Assembly • Valve, 2-Way, 24 VDC •... -
Page 147: Metering Board Assembly (103410-Xx)
Subassembly Removal and Replacement Required Tools: None. Preparation: 1. Run the Peroxide Clearance cycle prior to removing the DUO delivery module or any of its components. 2. Turn the sterilizer off and unplug it. 3. Remove the left side panel. 4. -
Page 148: Valve, 2-Way, 24 Vdc (103442-Xx)
Subassembly Removal and Replacement Valve, 2-Way, 24 VDC (103442-XX) Note: You may need to loosen the 4 screws holding the metering board assembly to the manifold to gain access to the valve. ® Required Tools: None. (Snap-On QDRIVER2 torque wrench or equivalent, and a 2.5 mm hex bit.) Preparation: 1. -
Page 149: Air Pump (20-50831-004)
Subassembly Removal and Replacement Air Pump (20-50831-004) ® Required Tools: Snap-On QDRIVER2 torque wrench or equivalent, and a 2.5 mm hex bit. Preparation: 1. Run the Peroxide Clearance cycle prior to removing the DUO delivery module or any of its components. 2. -
Page 150: Air Filter 0.2 Ptfe, 25Mm & Luer Male 1/4-28Unf
Subassembly Removal and Replacement Air Filter 0.2 PTFE, 25mm & Luer MALE 1/4-28UNF (25- 50703-001 & 74-50773-001 (PM2 kit parts)) This is a PM2 procedure. Required Tools: None. Preparation: 1. Remove the left side panel. Removal: 1. Unscrew and disconnect the inlet filter cartridge along with the male Luer fitting. -
Page 151: Chapter 7. Maintenance
Maintenance Chapter 7. Maintenance Overview There are two Planned Maintenance (PM) intervals for the ® ® STERRAD 100NX Sterilizer. PM1 is normally performed after 1500 cycles or 6 months and PM2 is performed at 3000 cycles or after 12 months of operation, whichever occurs first. Planned maintenance consists of replacing sterilizer components that are subject to wear or degradation from use. -
Page 152: Maintenance Checks - All Calls
Maintenance Maintenance Checks – All Calls 1. Check the door roller alignment, if necessary, by following the procedure shown in the System Verification Chapter. 2. Check the door timing belt pulley and motor shaft coupler set screws to ensure they are properly tightened onto the shaft. Check each door mechanism counterbalance for damage. -
Page 153: Oil Mist Filter Element Replacement
Maintenance Oil Mist Filter Element Replacement 1. Disconnect the oil mist filter tube and remove the oil filter assembly. Leave the connectors attached to the oil filter assembly. 2. Replace the filter element in the oil filter assembly. 3. Reinstall the oil filter on the vacuum pump. Air Filter/Fans 1. -
Page 154: Pm2
Maintenance Perform a PM1 and then proceed to perform the PM2 steps. Converter Replacement 1. Grasp the catalytic converter and turn it counter clockwise to unscrew it. The plastic adapter may come off with the converter. Remove and retain the adapter for the new converter. A tool may be needed to remove the adapter. -
Page 155: Hydrogen Peroxide Monitor Lamp
Maintenance Hydrogen Peroxide Monitor Lamp WARNING! ULTRAVIOLET LIGHT EXPOSURE! ULTRAVIOLET LIGHT CAN HARM UNPROTECTED EYES AND SKIN. DO NOT LOOK DIRECTLY AT AN ENERGIZED UV LAMP. HOT SURFACES! THE ULTRAVIOLET LAMP AND ITS HOUSING ARE HOT WHEN ENERGIZED. CONTACT WITH THESE PARTS MAY CAUSE BURNS OR OTHER INJURIES. -
Page 156: Door Seal O-Ring
Maintenance 4. Place the threaded collar around the base of the lamp housing. Insert the lamp housing tube into the Ultratorr fitting. Press down until it is seated firmly. 5. Orient the lamp housing so that there is no interference with the lamp cable. -
Page 157: Additional Pm Procedure
Maintenance Vaporizer 1. Locate the thermistors mounted on the vaporizer manifold. 2. Remove the thermistors and discard. 3. Install the new thermistors. Condenser You will need to access the top panel, which requires the use of an acceptable ladder or step stool. 1. -
Page 158: Cassette Disposal
Maintenance Cassette Disposal The customer routinely performs the procedures in this section. If the cassette box becomes full during a planned maintenance procedure, it is a good idea to dispose of the empty cassettes and insert a new box in the cassette box opening. - Page 159 Maintenance Figure 75. Pinch the Edge of the Lid to Close the Box. 3. Dispose of the closed cassette box according to your facility’s policy. 4. Insert a new box making sure the tab is facing you and the lid is open and not caught in the opening.
-
Page 160: Printer Maintenance
Maintenance Printer Maintenance Replacing Printer Paper When the printer paper roll is empty, the sterilizer displays a message “Printer is out of paper. Please load a new roll.” 1. Open the printer by pushing up on the button in the handle. The printer door drops forward. - Page 161 Maintenance Figure 78. Insert a New Paper Roll. Pull the Paper Over the Top of the Door and Align the Paper Between the Guides. 4. Pull a short length of paper over the top of the printer door. 5. Align the paper so that it fits between the two paper guides on the top of the printer door.
- Page 162 Maintenance Figure 80. Press the Paper Advance Button. 8. When the paper has advanced normally, tear off the used strip in an upward direction. Paper replacement is now complete. STERRAD ® 100NX ® Service Guide...
-
Page 163: Cleaning The Thermal Printer Head
Maintenance Cleaning the Thermal Printer Head Inspect the quality of the printed information at the planned maintenance interval. If the quality of the printed information is faint or has blank spots, the thermal printer head needs to be cleaned. WARNING! THE PRINT MECHANISM MAY BE HOT IMMEDIATELY AFTER PRINTING. -
Page 165: Chapter 8. System Calibration
System Calibration Chapter 8. System Calibration Overview ® ® The STERRAD 100NX Sterilizer has onboard calibration tools to make it easy to calibrate the various components of the system. As of this publication, calibration is still being researched and the procedures presented here are subject to change. - Page 166 System Calibration On Additional Utilities (shown at left) touch Service Functions On Service Functions (shown at left) touch Calibration On Calibration Tests (shown at left) touch Temperature Calibration. “Set the Bath Temperature to 35.0 ˚C” is displayed. STERRAD ® 100NX ®...
- Page 167 System Calibration Figure 81. Temperature Calibration Showing Virtual Keypad. 2. Select each heater circuit you wish to calibrate (you can also select ALL). Touch Start to turn off the heater and begin the calibration procedure. 3. Set the bath temperature to 35.0º C and place the thermistor in the bath.
- Page 168 System Calibration • Stores the following information in the file: the current timestamp (MM/DD/YY HH:MM), R, A, B, C, both calculated verification points (50.0ºC and 70.0ºC), last verified dates and status (PASS). • The software exits the calibration screen and stores the calculated coefficients into NVRAM.
-
Page 169: Temperature Calibration - Thermistor Resistor Adjustment
System Calibration Temperature Calibration – Thermistor Resistor Adjustment Electronic temperature circuit ranges are calibrated or verified in this procedure. 1. Using a Fluke 87 or equivalent digital multimeter, verify that the precision resistor values match the resistor label values ±1 %. 2. - Page 170 System Calibration On Calibration Tests (shown at left) touch Thermistor Resistor Adjustment. Figure 82. Thermistor Resistance Adjustment Display. 3. Touch the entry field for each thermistor to place the cursor in the fields. Using the virtual keypad, enter the Ohm value of each resistor.
- Page 171 System Calibration Figure 83. Replace the Resistors as Shown in Step 4. Press Done. 4. Disconnect the thermistors for the circuits to be calibrated and install the appropriate precision resistor to the extension harnesses. 5. Press DONE. Press DONE again if needed. The results are displayed in a table.
-
Page 172: Peroxide Calibration With Neutral Density Filters
System Calibration Figure 85. Press Yes to Accept Values. Peroxide Calibration With Neutral Density Filters Figure 86. Neutral Density Filter Calibration Display. Note that Start is Inactive. 1. Open the front panel. All the other panels should be in place. 2. - Page 173 System Calibration 4. Using the displayed keypad, enter the OD values marked on each filter in the order shown on the display. Touch Enter after each entry or touch the next field. Touch Save. Touch Back. 5. This setup may take several minutes. During this time, the system is setting up the sterilizer to support the calibration and is setting the temperature of the condenser to 70˚...
-
Page 174: Zero Adjustment Procedure For The Pressure Transducers
System Calibration Zero Adjustment Procedure for the Pressure Transducers Figure 87. Pressure Calibration and Verification Display. This section describes the steps for verifying and adjusting the zero pressure point of the pressure transducers. The zero point of the transducers is verified and adjusted against a traceable reference. There are 3 pressure transducers in the system. - Page 175 System Calibration To calibrate the pressure transducers, do the following: 1. Login as Service. Navigate to Additional Utilities/Service Functions/Pressure Calibration. 2. Attach the vacuum gauge (reference meter) to the pressure manifold using the KF-16 to 7/16-20 adapter, KF-16 centering ring adapter, and a KF-16 clamp.
-
Page 177: Chapter 9. System Verification
System Verification Chapter 9. System Verification Overview System Verification includes the following activities: • Check the DC voltages • Verify the plasma power. • Zero the pressure transducers. • Verify Vacuum (leak back) • Verify user interface • Verify cassette system •... -
Page 178: Service Action Table
System Verification On Additional Utilities (shown at left) touch Service Functions. On Service Functions (shown at left) touch Calibration. Service Action Table Use the system verification procedures to verify sterilizer performance whenever the service actions listed in the following table are completed. Service Action Performed System Verification Test Requirements PM Level 1... -
Page 179: Check Voltages
System Verification Service Action Performed System Verification Test Requirements Replace thermistor Complete temperature verification and run standard cycle. Replace delivery system components Leak back test, cassette guide test and run standard cycle. Adjust door or replace door sensor Door operation and run standard cycle. Replace printer Complete printer test and run standard cycle. - Page 180 System Verification Figure 89. Connect the leads. STERRAD ® 100NX ® Service Guide...
-
Page 181: Plasma Power Verification
System Verification Plasma Power Verification Figure 90. Vacuum Plasma Test. This section describes the steps for verifying the output of the LFPS II against a traceable reference. This procedure requires the use of the LFPS II Power Verification Meter (PVM). 1. -
Page 182: Zeroing Pressure Transducers
System Verification 10. Read the output voltage on the DVM. Output should be between 3.82 - 4.79 VDC. If the output is correct, the test is complete. If the output is not correct, troubleshoot the system and replace components if needed. -
Page 183: Chamber And Vaporizer-Concentrator Leak Test
System Verification Chamber and Vaporizer-Concentrator Leak Test Note: If the chamber does not evacuate, then check all vacuum seals for tightness. If the chamber still does not evacuate, then the door(s) may need readjustment. See the Door Roller Adjustment section for details. 1. -
Page 184: Door Roller Adjustment
System Verification Door Roller Adjustment This procedure is only performed if the chamber cannot be evacuated (pumped down) for testing. Tools needed: 3 mm and 5 mm Hex keys, small 10 mm open end wrench, flat-blade screwdriver, and a clean piece of paper (standard 20 lb bond from a copy machine). - Page 185 System Verification 7. Using a flat-blade screwdriver, turn the roller adjustment screw until the piece of paper has some slight resistance when pushed/pulled slightly. The paper should be able to be moved. Do not over-tighten the adjustment screw. Do not turn the screw too much in one direction or else the snap ring will come off.
-
Page 186: Temperature Verification
System Verification Temperature Verification Figure 93. Temperature Test. Figure 94. Temperature Calibration. 1. Login as Service. Navigate to Additional Utilities/Service Functions/Temperature Test. 2. Run an empty chamber Standard Cycle until it is completed. 3. Log in as “Service.” Navigate to the Service/Temperature display. 4. -
Page 187: Door Test
System Verification Door Test Figure 95. Door Test. This display helps you test the functionality of the doors and door sensors. 1. Login as Service. Navigate to Additional Utilities/Service Functions/Door Test. 2. Touch Open and observe the sensors and signals as the door functions. -
Page 188: Cassette Test
System Verification Cassette Test Figure 96. Cassette Test. This display tests the cassette and the cassette system. Follow the instructions on the screen. You will be instructed to insert the cassette at a certain time. 1. Login as Service. Navigate to Additional Utilities/Service Functions/Cassette Test. - Page 189 System Verification Figure 97. Cassette Test (Insert Cassette). The display will instruct you as to when to insert the cassette. A used cassette that has a least two usable cells can be used for this test. 1. Examine the cassette label. Insert cassette when instructed to do so. 2.
-
Page 190: Monitor
System Verification Monitor Figure 98. H Monitor. This screen displays information that allows you to verify the function of the H Monitor. 1. Login as Service. Navigate to Additional Utilities/Service Functions/H2O2 Monitor. 2. Enter the bulb intensity voltage. Note: “100” is the lowest intensity that can be entered for an accurate reading. -
Page 191: Printer Test
System Verification Printer Test Figure 99. Printer Test. The printer test verifies the function of the printer. 1. Login as Service. Navigate to Additional Utilities/Service Functions/Printer Test. 2. Touch Print Test Page. Verify that the test page printed correctly. 3. If the test page is not correct, touch Reset to reset the printer and then touch Print Test Page again. -
Page 192: Touch Screen Test
System Verification Touch Screen Test Figure 100. Touch Screen Test. Use this display to calibrate the touch screen. 1. Login as Service. Navigate to Additional Utilities/Service Functions/Touch/VGA Test. 2. Touch Input (or Output) side display to verify that the display is functioning correctly. -
Page 193: Software Upgrade
System Verification Software Upgrade Figure 101. Software Upgrade. This display is only used when you are upgrading the software via a compact flash. 1. Login as Service. Navigate to Additional Utilities/Service Functions/Software Upgrade. 2. Touch Software Upgrade and follow the displayed instructions: Note: OS Upgrade is not used at this time. -
Page 195: Appendix A. Sterilizer Specifications
Specifications Appendix A. Sterilizer Specifications Power The phase rotation is adjusted to match the system requirements at installation. 208V 60 Hz Power: For versions employing 208V, 60 Hz power, the sterilizer requires a NEMA L21-30 five-wire grounding twist lock outlet attached to a dedicated 30 Amp, 3 phase 208 Volt circuit with separate neutral and ground conductors. - Page 196 Specifications Temperature Operating: 18° C - 35° C (64° F - 95° F). Storage: -29º C - 70° C (-20° F - 158° F) Humidity Operating: 10% – 85% up to 30 linearly decreasing from 85% at 30 C to 70% at 40 Storage: 10% –...
Need help?
Do you have a question about the Sterrad 100NX and is the answer not in the manual?
Questions and answers