Table of Contents
Advertisement
Quick Links
Advertisement
Table of Contents

Related Manuals for Lifelines trackit Mk3


Summary of Contents for Lifelines trackit Mk3
- Page 1 Ambulatory EEG Recorder USER MANUAL Imagine EEG Anywhere...
- Page 2 Issue: CCN: CCN126 Digitally signed by Geoff Salter Created Date: 2020.07.07 09:44:33 +01'00' Digitally signed by David Hulin DN: cn=David Hulin, o=Lifelines Ltd, Checked ou=Development, email=david.hulin@llines.com, c=GB Date: 2020.07.08 09:23:29 +01'00' Digitally signed by Geoff Salter Approved Date: 2020.07.09 16:57:19...
- Page 3 Customer Responsibility Customer Responsibility The Trackit Mk3 is reliable only when operated and maintained in accordance with the instructions contained in this manual, accompanying labels, and inserts. A defective system should not be used. Parts that may be broken or missing or those that are clearly worn or contaminated should be replaced immediately with new original replacement parts that have been manufactured by or are available from Lifelines Neuro.
- Page 4 The information in this section is subject to change without notice. Except as stated below, Lifelines makes no warranty of any kind with regard to this material, including, but not limited to, the implied warranties of merchantability and fitness for a particular purpose. Lifelines shall not be liable for errors contained herein or for incidental or consequential damages in connection with the furnishing, performance or use of this material.
- Page 5 The manufacturer and distributor consider themselves responsible for the equipment’s safety, reliability and performance only if: y any peripheral equipment to be used with Trackit Mk3 is supplied by third-party providers recommended by the manufacturer; y assembly operations, extensions, readjustments, modifications, or repairs are carried out by person authorised by the manufacturer;...
-
Page 6: Table Of Contents
2.8 Disposal of equipment ....................................18 Connections and Usage ............................19 Overview ..........................................19 3.2 Connecting the Trackit Mk3 ................................20 3.3 Switching the Trackit Mk3 Recorder On and Off ......................21 3.4 Symbols on the display ..................................22 3.5 Bluetooth .........................................23 Trackit Software - overview ..........................24 The ambulatory recording .......................... - Page 7 Appendix 6: Troubleshooting Guide ................................ 62 Appendix 7: Manufacturer’s Declaration ..............................64 Illustrations Figure 1: Connecting the Trackit Mk3 – Clinical use ........................19 Figure 2: Connecting the Trackit Mk3 – Home Use ........................20 Figure 3 Connecting the Trackit Mk3 recorder ..........................20 Figure 4 Trackit Mk3 recorder: front panel ............................
- Page 8 Figure 24: Photic Stimulation control window ..........................45 Figure 25: Photic trigger signal definition ............................46 Figure 26: Hyperventilation .....................................47 Figure 27: Hyperventilation control window ............................47 Figure 28: Trackit Mk3 with Internal Bluetooth Module ......................50 Figure 29: The Trackit Control Panel ............................... 51 51336-006...
-
Page 9: System Overview
The Trackit Mk3 is intended to measure and record EEG signals. Indications for use The Trackit Mk3 is used as an aid in the diagnosis of neurophysiological disorders such as epilepsy. General description The Trackit Mk3 is a multi-channel, ambulatory, electroencephalograph recorder. It is a compact body-worn device that is battery powered and the data is stored on a Compact Flash card. -
Page 10: Warnings And Cautions
Do not use the Trackit Mk3 EEG Recorder in an MRI environment, in an explosive atmosphere or during defibrillation. This equipment is intended to be used by a healthcare professional and in accordance with these instructions for use which must be read in their entirety before the device is used. - Page 11 Portable RF communications equipment (including peripherals such as antenna cables and external antennas) should be used no closer than 30 cm (12 inches) to any part of the Trackit Mk3 EEG Recorder, including cables specified by Lifelines Ltd. Otherwise, degradation of the performance of this equipment could result.
-
Page 12: Explanation Of Symbols
USER MANUAL Overview and Technical Description Explanation of symbols Symbol Meaning Symbol Meaning Type BF applied part Follow operating instructions Input/output connection Input connection Special recycling required* Bluetooth Consult warnings in User Manual Manufacturer Push to eject Compact Flash card European Representative Special recycling required, do not dispose of in landfill. -
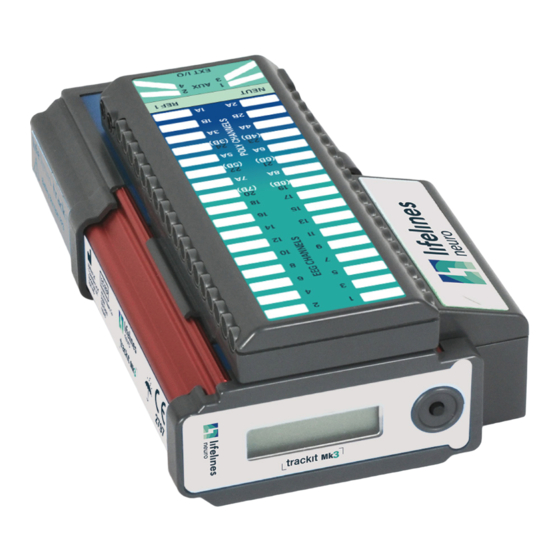
Page 13: The Trackit Mk3 And Its Parts
NOTE: Trackit Mk3 is available in a number of versions, including a 32-channel (Trackit-32/0 or Trackit-24/8), a 24-channel (Trackit 24/0) and a 12-channel (Trackit-12/0). The version is displayed on the Trackit Mk3 LCD at switch-on. This manual applies to all versions, the only difference being the number of channels. -
Page 14: Specifications And Safety
USER MANUAL Overview and Technical Description Specifications and safety Refer to Appendix 1 for specifications. The Trackit Mk3 has been certified and complies with the following standards: Standard Description IEC 60601-1 and International standard for medical electrical equipment, general requirements IEC 60601-2-26 and particular requirements for EEG systems. -
Page 15: Description Of The Components
The Patient Connection Unit (PCU) connects the standard 1.5mm touchproof EEG recording electrodes attached to the patient to the Trackit Mk3 unit. It is available either as a ‘Cabled’ type which is connected via a screened cable or a ‘Clickon’ type which fits on the Trackit Mk3 directly without needing a cable. - Page 16 Lithium battery option and a small (single) 9V/PP3 option is available. CF flash card A Compact Flash (‘CF’) card is used to store the EEG data recorded by Trackit Mk3. Storage cards of varying capacity are available in the CF format.
-
Page 17: Installation And Maintenance
3. Assembly instructions for third-party products will be found in their packing cases. It is recommended that these instructions be filed with Trackit Mk3 technical reference materials. 4. Check for signs of damage that may have occurred during transit or storage. If any damage is found, do not use the instrument;... -
Page 18: Power Supply Connections
Power consumption Maximum power from USB port: 2.5W. The Trackit Mk3 must only be used with the USB cable provided with the unit. Use in the home environment The equipment is intended to be operated in its bag where it is protected against ingress of solid objects and water to a degree of IP22. -
Page 19: Use With Other Equipment
Portable RF communications equipment (including peripherals such as antenna cables and external antennas) should be used no closer than 30 cm (12 inches) to any part of the Trackit Mk3, including cables specified by Lifelines Ltd. Otherwise, degradation of the performance of this equipment could result. -
Page 20: Maintenance And Cleaning
Installation and Maintenance Maintenance and cleaning The Trackit Mk3 contains no user-serviceable parts (apart from replaceable batteries). The system uses solid state components and requires no routine testing or maintenance procedures apart from occasional cleaning and checking for wear and damage to all parts including the accessories. -
Page 21: Connections And Usage
Clinical Use During Clinical use, the Trackit Mk3 Recorder can be connected to a PC either using the USB cable or through the optional wireless Bluetooth connection (see Figure 1). Housing the recorder in the Trackit Mk3 bag is optional and may be used to protect and secure the amplifier. -
Page 22: Connecting The Trackit Mk3
Connecting the Trackit Mk3 The Trackit Mk3 is simply plugged into the PC USB port using the cable supplied. The Trackit Mk3 recorder must only be used with the USB cable (with the red tip) provided with the unit. USB cable... -
Page 23: Switching The Trackit Mk3 Recorder On And Off
Connections and Usage The necessary USB drivers will be found on the installation CD. Upon first connection of the Trackit Mk3 to the PC USB port, at the Windows prompt, browse to the folder CD Drive:\USB Drivers. From there, Windows will find the correct drivers for the version of Windows being used. -
Page 24: Symbols On The Display
Recording Active: Displayed when the Trackit Mk3 is recording to the CF card. Internal Bluetooth on/off When the Internal Bluetooth option is fitted to the Trackit Mk3, the unit will display whether it is enabled or disabled with a large ‘B’ (enabled) or small ‘β’ (disabled) next to the B/β... -
Page 25: Bluetooth
Bluetooth Usage (Trackit Plus Software) Once paired, the Trackit Mk3 acts as the server and provides a serial port service to the PC, acting as a client. The Serial COM port number can be found in the Windows® Bluetooth settings. -
Page 26: Trackit Software - Overview
The ambulatory recording Trackit Software - overview The Trackit software is available on the included CD/USB disk or on the Lifelines FTP site. A readme file describes installation. Check with your distributor or Lifelines if a newer version of software is available. -
Page 27: The Ambulatory Recording
The ambulatory recording Once Trackit Mk3 has been set up for an ambulatory recording, and a recording has been initiated, you can change batteries and cards without interfering with the recording, so long as you observe the rules for changing batteries and cards outlined below. -
Page 28: Figure 7: Removing And Replacing 9V Pp3 Batteries
USER MANUAL The ambulatory recording 2 Different battery types 9V / PP3 Battery Follow the following procedures for replacing and removing batteries. Replacement: Replace the batteries one at a time, making sure they are orientated correctly and firmly seated onto their terminals. -
Page 29: Figure 7 Removing And Replacing Lithium Rechargeable Battery
USER MANUAL The ambulatory recording Lithium Rechargeable Battery For the Lithium rechargeable option, firstly slide out the tray that holds the battery inside the box. To slide out the Tray, push the battery gently towards the open end of the Battery Box. This will slide out the battery and the Tray simultaneously. -
Page 30: Figure 9: Closing The Rear Battery Box/Door
The battery can only be charged outside the Trackit Mk3. Only the specific Canon charger for the BP511 must be used. Lifelines do not supply the charger; this is available from your local camera or video stockist. Always refer to the documentation that accompanies the charger for charging instructions. -
Page 31: Figure 10: Removing And Replacing The Flash Card
Changing the flash card 1 Open the Trackit Mk3 rear Battery box/door with the special tool provided. See Figure 23. The unit’s warning beeper will sound for a few seconds and the Door Open symbol on the display will flash. -
Page 32: Fitting The Clickon Pcu
USER MANUAL The ambulatory recording Figure 11: Removing the flash card 4 Replace the card with a blank one. 5 Refit the rear Battery box/door, and screw it down with the special tool provided. Do not over-tighten the locking screw – finger tight is all that is required Fitting the Clickon PCU Retaining screw location Figure 12: Clickon PCU Retaining screw location... -
Page 33: Figure 13: Detach The Pcu
3 Ensure that the retaining screw is released as described above. Squeeze as shown below between fingers and thumb of each hand until the PCU moves by about 5mm and unplugs from the Trackit Mk3. Figure 13: Detach the PCU 4 Lift the PCU away from the Trackit Mk3. -
Page 34: Event Marking
6 Squeeze as shown below between fingers and thumb of each hand until the PCU locates fully on the Trackit Mk3. Make sure the two tabs of the PCU are located correctly inside the slots in the top of the Trackit Mk3. Lock the PCU with the retaining screw as described above. -
Page 35: Reading An Ambulatory Recording
MANUAL Reading an ambulatory recording The Trackit Mk3 recording can be reviewed using the Trackit Software. Refer to the Trackit Plus Software user manual for more details. As an alternative to the Trackit software which offers basic playback features, any EDF-compatible viewer can be used to read the standard EDF files recorded by the Trackit Mk3. -
Page 36: Appendix 1: Trackit Mk3 Specifications
MANUAL The ambulatory recording Appendix 1: Trackit Mk3 Specifications Lifelines reserves the right to change product specifications at any time without notice. This is in line with the company’s policy of continual product development. EEG inputs Number of EEG channels... - Page 37 USER MANUAL The ambulatory recording Connections, ports and controls Patient Connection Unit Connector for touch-proof Patient Connection Unit (PCU), either Leaded or Clickon (36 pin MDR connector) Front panel pushbuttons 1 on/off pushbutton Patient Event during record Aux. Connector 1 (RJ45 connector) USB port (isolated from patient) Aux.
- Page 38 Type of protection against electrical shock Class I or Class II mains AC power. No electrical (when connected to host system) isolated medical grade connection to Trackit Mk3 power supply. (Bluetooth connection in use) Ordinary (no protection) Degree of protection against harmful ingress of water...
-
Page 39: Appendix 2: Advanced Trackit Settings (Defaults)
Defaults are checked. Trackit Defaults Tab 1 This menu item activates a control dialog that adjusts how the Trackit Mk3 behaves during a recording. See Figure 16. Figure 16: Trackit Defaults Tab 1 To save new defaults to Trackit Mk3, press ‘Send these values to Trackit’ , followed by ‘Save current values’. - Page 40 BU battery auto charge: enables fast charging of the backup battery when the Trackit Mk3 is connected to its external power supply. Warn if <8 mins card time: the Trackit Mk3 starts beeping when the card has room for only another 8 minutes of recording.
-
Page 41: Figure 17: Trackit Defaults | Tab 2
USER MANUAL The ambulatory recording Trackit Defaults Tab 2 (Mk2 and Mk3 only) The Trackit Mk2 and Mk3 have additional optional parameters. These are accessed via Tab 2 of Trackit Defaults, as shown in Figure 17 below. Figure 17: Trackit Defaults | Tab 2 51336-006... - Page 42 The Trackit Mk3 will not record over a data file on the card which is less than 24 hours old. y The Trackit Mk3 will append new data, if enabled, if the data file on the flash card is less than 24 hours old and the Trackit Mk3’s Setup and Patient Name and Recording ID are identical to that on the card.
- Page 43 Lifelines distributor. To format a flash card: 1 Insert the flash card into the Trackit Mk3 and connect to the host computer. See Step 6 Connect Trackit for Setup.
-
Page 44: Appendix 3: Trackit Mk3 Options
Nonin XPOD pulse oximeter The Nonin XPOD is an in-line pulse oximeter that connects to the second serial port on the side of the Trackit Mk3, or the optional AUX input box. Finger probes may be purchased locally from Nonin. -
Page 45: Figure 19: Connecting The Oximeter To Trackit Mk3
1 Locate the 15 pin EXT IO connector on the Trackit Mk3. If the Click-on PCU is attached, this connector is located on the PCU. If the Click on PCU is not attached, the 15-pin connector is located on the side of the Trackit Mk3. -
Page 46: Figure 21: Attaching The Oximeter Probe To The Finger
5 Connect the Trackit Mk3 to the host PC. Switch on, and click on Connect in the Trackit Control Panel. 6 Observe the display of SaO2 and pulse rate on the Trackit Control Panel. Probe off, and XPOD disconnect information is displayed. -
Page 47: Appendix 4: Photic Stimulator And Hyperventilation
EEG acquisition software please refer to the relevant user manual. Photic Stimulation An optional Lifelines Photic Stimulator is available which can be used with the Trackit Mk3 to asses patient photosensitivity in EEG studies. For a detailed description of operation, connection and specifications please refer to the separate documentation Lifelines Photic User Manual and the Trackit Plus Software manual. -
Page 48: Figure 25: Photic Trigger Signal Definition
USER MANUAL NOTE: Refer to the Trackit Plus Software manual to set up a Photic Trigger signal definition. Define a signal with a name “Photic”, set it to type DC, units mV and Physical Signal Amplitude of + - 1000mV/V. Set the sensitivity to non-master and 10mV/mm. -
Page 49: Figure 26: Hyperventilation
USER MANUAL Hyperventilation A method of timing and marking a Hyperventilation and post-Hyperventilation activation sequence is provided. Figure 26: Hyperventilation Figure 27: Hyperventilation control window This provides a digital timer, which is used as follows: y Click on HV Start to start the HV period and the timer starts running. An ‘HV Start’ event is recorded. y Thereafter an ‘HV’... -
Page 50: Appendix 5: Bluetooth Wireless
Using a single plug-in Bluetooth interface module on the Trackit Mk3, wireless connections can be established with it from any Bluetooth-enabled PC, Laptop or PDA. This allows the Trackit Mk3 to be controlled or monitored remotely over a secure wireless link up to a range of about 100m or greater (dependent on hardware and environmental factors). - Page 51 USER MANUAL Specification Summary y The devices in a piconet share a common communication data channel. The channel has a total capacity of 1 megabit per second (Mbps). Headers and handshaking information consume about 20 percent of this capacity. y In the United States and Europe, the frequency range is 2,400 to 2,483.5 MHz, with 79 1 MHz radio frequency (RF) channels.
-
Page 52: Figure 28: Trackit Mk3 With Internal Bluetooth Module
Internal Bluetooth Trackit Mk3 has built-in Bluetooth capability which can be ordered as an option. When present there is a small ‘β’ on the display as shown in Figure 5 on page 22. This internal Bluetooth can be enabled by pressing the pushbutton 5 times within 3 seconds whereupon the display will change to a ‘B’... -
Page 53: Figure 29: The Trackit Control Panel
USER MANUAL What you can do with a Trackit Bluetooth link: y Connect wirelessly to any Trackit within range equipped with a Bluetooth Module y Control the Trackit wirelessly (Acquire on/off, Ongoings on/off, Impedance Check on/off, Recording on/off, Calibration on/off etc.) y Send setups to the Trackit wirelessly y Review the Trackit status wirelessly (general system status as well as Trackit time, recording time, battery level, disk level, SaO2 level, heartrate etc.) - Page 54 2. Bluetooth power-down (discoverable and connectable) – only applicable to original module 3. Bluetooth normal not connected (discoverable and connectable) 4. Bluetooth normal connected 5. Bluetooth normal connected and transmitting 4th Generation Bluetooth Module (OBS433i) Internal (Trackit Mk3) Battery life Typical battery life reduced to %...
- Page 55 Trackit Mk2 + 3rd Generation 110m Bluetooth module Trackit Mk3 + 4th Generation 190m module Trackit and Bluetooth Module Setup The Trackit and the Bluetooth Module are setup from the Trackit Defaults screens. Refer to the Trackit Plus software manual for Trackit Bluetooth module setup.
- Page 56 MANUAL Trackit Bluetooth Module Specifications NOTE: Lifelines reserves the right to change product specifications at any time without notice. This is in-line with the company’s policy of continual product development. There are several versions of the Bluetooth Module: Type 1 is designed to be connected to the Trackit Mk1 or Mk1+ and Type 2 the Trackit Mk2.
- Page 57 USER MANUAL Parameter Data Original (OEMSPA33i) Bluetooth Module manufacturer: connectBlue AB, Sweden Bluetooth radio: Infineon/Ericsson PBD 313 02 (MIRIAN) Bluetooth base band controller: Infineon/Ericsson PBM 990 90 (BLINK) RF output power: Class 1, min –28dBm, max +16dBm Note: 0 dBm = 1 mW, 20 dBm = 100 mW Receive sensitive level: -80dBm (0.1% BER) Receive input level (max):...
- Page 58 USER MANUAL Regulatory Original (OEMSPA33i) R&TTE Directive 1999/5/EC EN 300 328-2 V1.1.1 (2000-07) EMC Directive: 89/336/EEC EN 301 489-1 V1.3.1 (2001-09) EN 301 489-17 V1.1.1 (2000-09) EN 61000-6-2 (1999) Low Voltage Directive: EN 61131-2 73/23/EEC Medical Electrical Equipment IEC 60601-1-2 3rd Generation (OEMSPA332i) R&TTE Directive 1999/5/EC EN 300 328 V1.6.1 (2004-11)
- Page 59 USER MANUAL FCC Statement This device complies with Part 15 of the FCC Rules. Operation is subject to the following two conditions: (1) this device may not cause harmful interference, and (2) this device must accept any interference received, including interference that may cause undesired operation. NOTE: This equipment has been tested and found to comply with the limits for a Class B digital device, pursuant to Part 15 of the FCC Rules.
- Page 60 USER MANUAL IC Compliance Operation is subject to the following two conditions: (1) this device may not cause harmful interference, and (2) this device must accept any interference received, including interference that may cause undesired operation. This device has been designed to operate with an antenna having a maximum gain of 8dBi. Having a higher gain is strictly prohibited per regulations of Industry Canada.
- Page 61 USER MANUAL Bluetooth Qualification Original (OEMSPA33i) The Serial Port Adapter has been qualified according to Bluetooth 1.1 specification, QPLN reference GRA 001 03, qualification date 2003-01-31. The following Bluetooth profiles are supported (covered functionality): y Generic Access Profile y Serial Port Profile y Dial-up Networking Profile y LAN Access Profile 3rd Generation (OEMSPA332i)
- Page 62 USER MANUAL Guidelines for Efficient and Safe Use Read this information before using your Serial Port Adapter. For any exceptions, due to national requirements or limitations, when using your Serial Port Adapter, please visit www.bluetooth.com. Product Care y Do not expose your product to liquid or moisture. y Do not expose you product to extreme hot or cold temperature y Do not expose your product to lit candles, cigarettes, cigars, open flames, etc.
- Page 63 USER MANUAL Bluetooth Knowledge Base 1. The list of adapter hardware used by Lifelines so far is as follows : y Belkin Bluetooth USB adapter F8T001 y Ezurio/TDK Bluetooth USB adapter “go blue” y Newlink Bluetooth USB adapter USBBTC1A-N-CDL y Anycom Bluetooth Compact Flash Card CF-2001...
-
Page 64: Appendix 6: Troubleshooting Guide
MANUAL Appendix 6: Troubleshooting Guide COM port problems with Bluetooth communication to Trackit Mk3 The COM port is available but is being used by another application. This could well be the case if an application such as Microsoft Active Synch is installed and polling the COM port for a Windows CE device. - Page 65 USER MANUAL File review problems The card is not formatted in FAT16 When a recording is made on a card formatted in FAT32 it will appear to be severely truncated and most probably unreadable. If you know a recording has a duration of >24 hours but it only shows up as several minutes in review, the most likely cause is that the card is not formatted in FAT16.
-
Page 66: Appendix 7: Manufacturer's Declaration
Portable RF communications equipment (including peripherals such as antenna cables and external antennas) should be used no closer than 30 cm (12 inches) to any part of the Trackit Mk3, including cables specified by Lifelines Ltd. Otherwise, degradation of the performance of this equipment could result. - Page 67 Guidance and Manufacturer’s Declaration Electromagnetic Emissions EN 60601-1-2 The Trackit Mk3 is intended for use in the electromagnetic environment specified below. The customer or user of the Trackit Mk3 should assure that it is used in such an environment. Emissions Test...
- Page 68 RF transmitters, an electromagnetic site survey should be considered. If the measured field strength in the location in which the Trackit Mk3 is used exceeds the applicable RF compliance level above, the Trackit Mk3 should be observed to verify normal operation.
- Page 69 The Trackit Mk3 is intended for use in the electromagnetic environment in which radiated RF disturbances are controlled. The customer or the user of the Trackit Mk3 can help prevent electromagnetic interference by maintaining a minimum distance between portable and mobile RF communications equipment (transmitters) and the Trackit Mk3 as recommended below, according to the maximum output power of the communications equipment.
-
Page 70: Version History
V1.8 (28 January 2010) V2.2 (September 2011) y Virus protection recommendations added, Page 5. y Trackit Mk3 introduced: USB Interface detail added to Sections 1.2, 1.3, 3.1, 3.2 and 4.2. y Lifelines logo adjusted, Page 3. y Large memory cards (FAT32) added in Section 5.6. - Page 71 Ambulatory EEG Recorder Lifelines Ltd, 7 Clarendon Court, Over Wallop, near Stockbridge, Hampshire SO20 8HU, UK Telephone +44 (0)1264 782226 www.LLines.com sales@LLines.com Imagine EEG Anywhere...
Need help?
Do you have a question about the trackit Mk3 and is the answer not in the manual?
Questions and answers