
Related Manuals for Kitz BJ


Summary of Contents for Kitz BJ
- Page 1 Document No. : KE-2025-01 Operation Manual BJ Type Butterfly Valves 【Wafer Type】 We appreciate your purchasing our products. Read all the contents of this manual before piping and using them. Also keep this manual in a place accessible to the operator.
- Page 2 Document No.: KE-2025-01 This manual applies to the KITZ BJ type butterfly valves (Wafer Type). For automated operation, refer to the operation manual prepared by the manufacture of the relevant valve actuators. SAFETY CAUTIONS For the safe use of the product, read all of the safety precautions in this manual before handling the product.
-
Page 3: Table Of Contents
Document No.: KE-2025-01 Contents Ⅰ. Construction and Design Features ············································ 1 Ⅱ. Valve Operating Device ································································· 6 Ⅲ. Transportation and Storage ························································· 9 Ⅳ. Valve Installation ·············································································· 12 Ⅴ. Valve Operation ················································································ 16 Ⅵ. Periodic Inspection ·········································································· 20 Ⅶ. Disassembly and Reassembly ······················································ 24... -
Page 4: Ⅰ. Construction And Design Features
Document No.: KE-2025-01 1/38 I. Construction and Design Features... - Page 5 Document No.: KE-2025-01 2/38 I. Construction and Design Features 1. Construction and Function 1.1 Construction and parts names are as indicated in the figure below. 1.2 Rotation of the stem by 90 degrees opens and closes the valve. 1.3 Designed for use in fully open, fully closed, or intermediate position for flow control. 1.4 A center drive mechanism is adopted.
- Page 6 Neck design can be selected from a long neck type or a short neck type. 2.2 Interchangeability with JIS products BJ type butterfly valves (wafer type) comply with JIS B 2032.and interchangeable with the existing JIS standard butterfly valves. And gear operator type valves (nominal size 50A to 300A) satisfy the public building construction standard specifications.
- Page 7 Document No.: KE-2025-01 4/38 I. Construction and Design Features 3. Valve Specifications and Pressure-Temperature Rating 3.1 Valve specifications 3.1.1 Maximum allowable pressure 1.0 MPa 3.1.2 Service temperature range(Do not freeze the fluid) EPDM:from -20C to +120C FKM:+5~+90℃ Chlorine resistant EPDM:0~+35℃ (See PT chart for more details) 3.1.3 Fluid temperature range for continuous operation (EPDM) from -20C to +100C...
- Page 8 Document No.: KE-2025-01 5/38 I. Construction and Design Features 4. Size and Number of Mounting Bolt and Nut JIS 10K Valve Size Length (L) Number of bolts Nominal Size (mm) 11/2 21/2 Hexagon bolt and nut (L=mm) 5. Minimum Inside Diameter of Applicable Pipe Never apply the pipes which have inside diameters smaller than those shown in the table below, otherwise it will cause unwanted contact with the valve disc and malfunctions.
-
Page 9: Ⅱ. Valve Operating Device
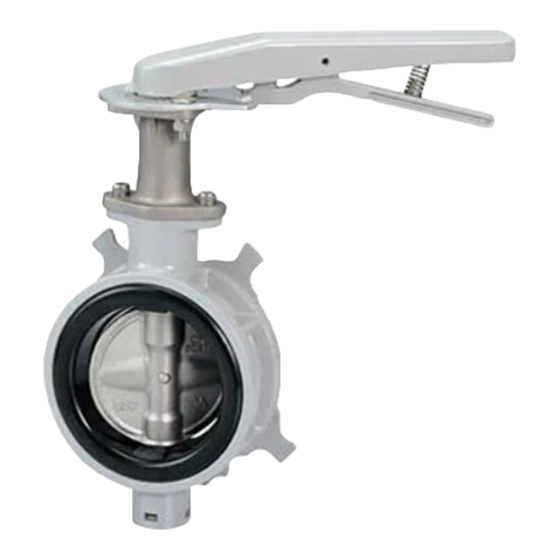
Document No.: KE-2025-01 6/38 Ⅱ. Valve Operating Device... - Page 10 Document No.: KE-2025-01 7/38 Ⅱ. Valve Operating Device Lever Operator Type 1. A lever operator is directly mounted on the valve. 2. Turning the lever handle by 90 clockwise will close the valve, and turning the lever handle by 90 counterclockwise will open the valve.
- Page 11 Document No.: KE-2025-01 8/38 Ⅱ. Valve Operating Device Gear Operator Type 1. A gear operator is mounted on the valve. 2. According to the letter or arrow on the hand wheel, turning the handwheel clockwise will close the valve, and turning the handwheel counterclockwise will open the valve. 3.
-
Page 12: Ⅲ. Transportation And Storage
Document No.: KE-2025-01 9/38 Ⅲ. Transportation and Storage... - Page 13 Document No.: KE-2025-01 10/38 Ⅲ. Transportation and Storage 1. Transportation 1.1 Precautions Keep off the valve lifting area to prevent personal injury caused by unsecured valves when transporting the valve by lifting. Take care not to damage painted valve surfaces during transportation. All damaged surfaces shall be properly repaired to prevent corrosion.
- Page 14 Document No.: KE-2025-01 11/38 Ⅲ. Transportation and Storage 2. Storage 2.1 Precautions DO NOT store valves in a corrosive environment. It may cause corrosion in the threaded portions of valves. DO NOT apply any heavy load to the valve. Overloading may damage the valve. ...
-
Page 15: Ⅳ. Valve Installation
Document No.: KE-2025-01 12/38 Ⅳ. Valve Installation... - Page 16 Document No.: KE-2025-01 13/38 Ⅳ. Valve Installation 1. Precautions for Installation Check the valve specifications with the catalog and/or the attached name plate. The valve trim and seat materials determine the service pressure, service fluid and the range of temperature. Services beyond the valve specifications could cause leakage or malfunctions.
- Page 17 Document No.: KE-2025-01 14/38 Ⅳ. Valve Installation 2. Precautions for Piping DO NOT use a flange gasket for piping. It may cause leakage. DO NOT forcibly install the valve when the distance between the flanges is not enough. It may cause leakage due to displacement or deformation of the seat rubber. ...
- Page 18 Document No.: KE-2025-01 15/38 Ⅳ. Valve Installation 3. Valve Mounting 3.1 Adjust the flange-to-flange distance for valve installation. Use jack bolts if required. Allow some space between the flanges, 6 mm to 10mm wider than the valve face-to-face dimension. 3.2 Set two bolts to the lower part of the valve. Then, place the valve between the flanges taking care not to damage the seat rubber.
-
Page 19: Ⅴ. Valve Operation
Document No.: KE-2025-01 16/38 Ⅴ. Valve Operation... - Page 20 When the valve is used at the slightly open position by 30 degrees or below, contact KITZ for technical advice. 2. Open-Close Operation 2.1 Lever operator Clockwise rotation of the lever handle by 90 degrees opens the valve and counterclockwise rotation closes the valve.
- Page 21 Document No.: KE-2025-01 18/38 Ⅴ. Valve Operation 3. Daily Inspection Carry out daily maintenance and inspection on the valves in use. Inspection items are as shown below. Inspection Areas to be Inspection Remedies Items inspected Methods Pipe connection Visual check Retighten the bolts and nuts.
- Page 22 Document No.: KE-2025-01 19/38 Ⅴ. Valve Operation 4. Remedial Measures Wear protective equipment such as goggles, gloves and safety footwear. Take adequate safety measures against toxic, inflammables or corrosive fluid. Reduce the line pressure to the atmospheric level before retightening the flange bolts and nuts.
-
Page 23: Ⅵ. Periodic Inspection
Document No.: KE-2025-01 20/38 Ⅵ. Periodic Inspection... - Page 24 Document No.: KE-2025-01 21/38 Ⅵ. Periodic Inspection 1. Periodic Inspection 1.1 Conduct valve inspections with the valve installed in the pipeline at least once a year. 1.2 Check that the valve operates smoothly and safely. 1.3 See “3. Daily Inspection” in Chapter Ⅴ for inspection items and methods. 1.4 Conduct periodic inspections on the valves that are not inspected daily or not operated on a daily basis.
- Page 25 Document No.: KE-2025-01 22/38 Ⅵ. Periodic Inspection 2. Maintenance Inspection After maintenance work or inspection of the pipeline facilities is conducted, perform a valve seat leakage test and an operation test, as required. If any sign of seat or external leakage is found, overhaul and inspect the product and make sure that the product is satisfactory.
- Page 26 Document No.: KE-2025-01 23/38 Ⅵ. Periodic Inspection 2.3 Test and inspection Check the following points. 2.3.1 Operation Test (1) Operation of the lever or gear handle is smooth without galling or sticking in the moving parts. (2) The stem is firmly connected to the disc without looseness. (3) The disc is parallel with the flow passage when it is fully open.
-
Page 27: Ⅶ. Disassembly And Reassembly
Document No.: KE-2025-01 24/38 VII. Disassembly and Reassembly... - Page 28 Document No.: KE-2025-01 25/38 Ⅶ.Disassembly and Reassembly 1. Disassembly 1.1 Precautions Take protective measures against fire hazard and the fluid left in the valve. Wear protective equipment such as goggles, gloves and safety footwear. Be careful not to catch your finger or hand in the valve during disassembly. 1.2 Notes for disassembly 1.2.1 Disassemble the valve in a clean area.
- Page 29 Document No.: KE-2025-01 26/38 Ⅶ.Disassembly and Reassembly 1.3 Precautions for parts replacement Remove the valve from the pipe system before parts replacement. DO NOT remove the neck (stand) while the valve is under pressure, otherwise the stem may blow out. Figure 1 ...
- Page 30 Document No.: KE-2025-01 27/38 Ⅶ.Disassembly and Reassembly 1.4 Disassembly (Removal of Operating Device) 1.4.1 Gear operator (1) Fully close the valve. (2) Put matchmarks on the gear unit (102), stand (61) and body (1) so that they can be installed in the correct position when reassembling them.
- Page 31 Document No.: KE-2025-01 28/38 Ⅶ.Disassembly and Reassembly 1.5 Disassembly (40A and 50A) 1.5.1 Remove the stand bolt (63) and stand (61). 1.5.2 Pull out the stem (3) from the body (1). 1.5.3 Remove the disc (4) from the body (1). 1.5.4 Remove the seat rubber (106) by inserting a flat blade screwdriver between the body (1) and the seat rubber to make a space.
- Page 32 Document No.: KE-2025-01 29/38 Ⅶ.Disassembly and Reassembly 1.7 Prior Work (250A and 300A) Follow the procedures below to discharge the internal pressure from the cavity in the disc before disassembly. Discharge the pressure completely to prevent a blowout of the stem during disassembly.
- Page 33 Document No.: KE-2025-01 30/38 Ⅶ.Disassembly and Reassembly 1.8.6 Remove the disc (4) from the body (1). Body 1.8.7 Remove the seat rubber (106) by inserting a flat Seat rubber blade screwdriver between the body (1) and the seat rubber to make a space. Put the hand into Flat-blade this space and take out the seat rubber (106).
- Page 34 Document No.: KE-2025-01 31/38 Ⅶ.Disassembly and Reassembly 2. Reassembly 2.1 Precautions Wear protective equipment such as goggles, gloves and safety footwear. Take care not to catch fire during work. Be careful not to catch your finger or hand in the valve during reassembly. ...
- Page 35 Document No.: KE-2025-01 32/38 Ⅶ.Disassembly and Reassembly 2.3 Reassembly (40A and 50A) 2.3.1 Insert the O ring (45C) in the bearing (67) and apply liquid packing (Three Bond 1215) around the bearing periphery. Install the bearing into the body (1). 2.3.2 Place the body (1) securely with the upper side up.
- Page 36 Document No.: KE-2025-01 33/38 Ⅶ.Disassembly and Reassembly 2.3.6 Install the thrust bearing (74) and the stand (61) and fix them with the stand bolts (63). Tightening torque: 12 – 15Nm Tighten the stand bolts evenly and securely. *1: KF96-100000cSt (or better grade) manufactured by SHIN-ETSU SILICONES is recommended. *2: GLEITMO746 (CHEMPLEX 746) is recommended.
- Page 37 Document No.: KE-2025-01 34/38 Ⅶ.Disassembly and Reassembly Body 2.5 Reassembly(250A and 300A) 2.5.1 Insert the bottom stem (103) into the body (1) beforehand. Use this assembly as a guide when installing the seat rubber (106) into the body (1). Bottom stem Seat rubber 2.5.2 Put the hole located at the bottom of the seat rubber (106) into the bottom stem (103).
- Page 38 Document No.: KE-2025-01 35/38 Ⅶ.Disassembly and Reassembly Tighten the stand bolts evenly and securely. 2.5.9 Install the O ring (45B) and the stem bearing (67B) to the bottom stem (103). 2.5.10 Insert the bottom stem (103) in the disc and fix the end plate (147) and the spring washers (145A) to the bottom stem with the end plate bolts (35)..
- Page 39 Document No.: KE-2025-01 36/38 Ⅶ.Disassembly and Reassembly 3. Structure Drawing 3.1 Gear Operator Type, 40A and 50A PARTS BODY STEM DISC NAME PLATE O RING O RING SNAP RING STAND STAND BOLT STEM BEARING THRUST BEARING SET BOLT GEAR UNIT ト SEAT RUBBER This illustration shows a typical construction.
- Page 40 Document No.: KE-2025-01 37/38 Ⅶ.Disassembly and Reassembly 3.2 Gear Operator Type, 250A and 300A, Long Neck PARTS BODY STEM DISC O RING WASHER NAME PLATE END PLATE BOLT GLAND PLATE BOLT O RING O RING STAND STAND BOLT STEM BEARING STEM BEARING STEM BEARING SET BOLT...
- Page 41 Document No.: KE-2025-01 38/38 Ⅶ.Disassembly and Reassembly 3.3 Gear Operator Type, 250A and 300A, Short Neck PARTS BODY STEM DISC O RING WASHER NAME PLATE END PLATE BOLT GLAND PLATE BOLT O RING O RING STEM BEARING STEM BEARING SET BOLT GEAR UNIT BOTTOM STEM SEAT RUBBER...
Need help?
Do you have a question about the BJ and is the answer not in the manual?
Questions and answers