
Subscribe to Our Youtube Channel
Related Manuals for HySecurity StrongArm M30 CE


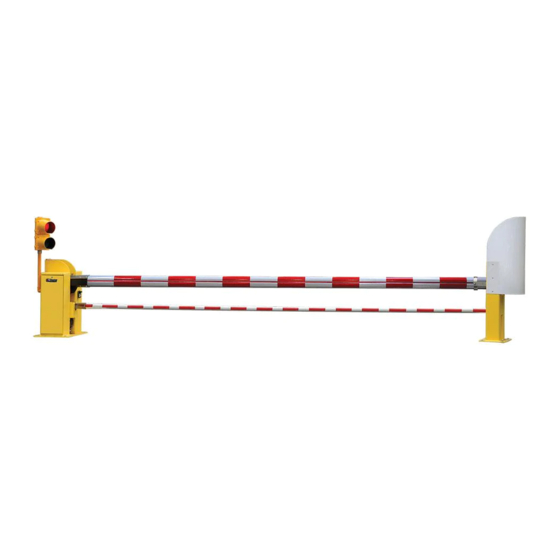
Summary of Contents for HySecurity StrongArm M30 CE
- Page 1 StrongArm M30/M50 ® StrongArm M30 CE StrongArm M50 CE Crash-rated barrier arm EN - Programming and operations manual IMPORTANT - These instructions apply only to the CE models.
-
Page 2: Table Of Contents
Reference Section ........89 Appendix A - Wiring Diagrams ....90 Appendix B - Wire Sizing & Runs ... 95 Appendix C - Vehicle Loop Layout ..98 Checklist - Post Installation ....103 Warranty ..........105 Specifications ........106 support.hysecurity.com... -
Page 3: Contact Information
Qualified HySecurity distributors are experienced and trained to assist in resolving installation problems. For the name of a qualified distributor near you, call HySecurity at 800-321-9947. *Before contacting your distributor or HySecurity Technical Support, obtain the serial number of your operator. -
Page 4: Introduction
HYDRAULICS INSIDE PIVOT POST (HOSES NOT SHOWN) Torque Requirements Bolt size (inches) ft-lbs HANDLE FOR MANUAL OPERATION ¼ - 20 ⅜ - 16 ½ - 13 PUMP PACK ⅝ - 11 & ⅝ - 18 HAND PUMP ¾ - 10 support.hysecurity.com... - Page 5 INTRODUCTION StrongArm M50 Components The same call outs used on the StrongArm M30 match the StrongArm M50 components. To review the exploded parts and terminology, refer to the previous page. The StrongArm M50 differs in the size and strength of its components. REINFORCED CATCH POST VERTICAL REBAR...
-
Page 6: Safety Information
1. A minimum of three years experience installing similar equipment. Indicates a hazardous situation which, if not avoided, COULD result in DEATH or SERIOUS INJURY. 2. Proof of attending a HySecurity Technical Training seminar within the past three years. CAUTION 3. Signifi cant manufacturer endorsements of technical aptitude in gate operator installation and operation. - Page 7 SAFETY INFORMATION WARNING! To reduce the risk of injury or death: READ AND FOLLOW ALL INSTRUCTIONS. Never let children operate or play with gate controls. Keep the remote control away from children. Always keep people and objects away from the barrier arm. NO ONE SHOULD CROSS THE PATH OF THE MOVING ARM.
- Page 8 © 2019 | www.hysecurity.com StrongArm M30/M50 Programming and Operations Manual (CE/EU) MX3576-01 REV. B Page 11 support.hysecurity.com...
- Page 9 „ The WARNING labels supplied with the StrongArm M30/M50 must remain installed and pump pack fluid, found clearly visible on both sides of the barrier arms. hydraulic HySecurity operators, recycled. Gear oil, found HySecurity „ Do not physically disable the warning buzzer and electromechanical gate operators, can also be NEVER disconnect or cut its wires.
- Page 10 SAFETY INFORMATION HySecurity Vertical Barrier Arm Safety and Traffi c Control ARM INSTALLATION Do not install the operator where arm moves within 16 inches of a rigid object or within 10 feet of high power wires when the barrier arm is raised.
- Page 11 SAFETY INFORMATION HySecurity Vertical Barrier Arm Safety and Traffi c Control High levels of force are generated by moving traffi c barrier arms. Ensure warning signs and safety devices are properly installed and operated to address the following hazards: •...
- Page 12 SAFETY INFORMATION HySecurity Vertical Barrier Arm Safety and Traffi c Control HySecurity Vertical Barrier Arm Safety and Traffi c Control Traffi c Light Separate Pedestrian Traffi c Light Non-Contact Loop Separate Pedestrian Non-Contact Loop Walkway (Optional) Sensor Beam Sensor Walkway...
- Page 13 HySecurity Vertical Barrier Arm Safety and Traffi c Control The following sensors have been shown in testing to provide the best performance when installed with HySecurity operators. HySecurity supports installers who install recommended sensors. “Compatible Sensors” are still certifi ed to meet UL 325 6th edition installation with HySecurity operators.
- Page 14 OFF before performing Never mix battery sizes, types, or brands. Charging circuit maintenance on the gate operator on HySecurity DC operators is designed for AGM-type or making contact with output batteries, not fl ooded lead acid-type batteries. receptacles.
- Page 15 The arm should travel gate. However, when installing a barrier smoothly and quietly throughout its range. If it does arm gate in a high wind area, Hysecurity not, contact a gate professional to correct the problem. suggests trhe following: ...
-
Page 16: Power
HySecurity Limited Warranty. HySecurity requires grounding the operator with a separate earth ground rod (or a similar device... - Page 17 POWER WIRING AC POWER The StrongArm M30 and StrongArm M50 have separate Installation Instructions that explain how to connect to AC power. For reference purposes, the same information is provided below. See Figure 3. The AC power disconnect switch is inside the Pivot Post (electronics side). DANGER CAUTION Turn OFF AC power at the source (circuit...
- Page 18 POWER SITE CONSIDERATIONS WIRE SIZING AND RUNS HySecurity gate operators are intended for Supplying a gate operator with the correct permanent installation. Prepare the site with the electrical service is crucial to the performance following considerations: of the operator and the life of its electrical components.
-
Page 19: Arm Position Sensor - Limit Switches
ARM POSITION SENSOR — SETTING LIMITS SETTING THE CLOSE & OPEN LIMITS NOTICE Before turning the power disconnect switch to ON, make sure all site requirements concerning proper wiring, safety, foundation installation, and electrical power have been met. When set, position sensing remains intact even if power is lost. The only exceptions occur when factory defaults are reinstated, or the Smart Touch Controller is replaced. - Page 20 2. If further adjustment is needed, take steps 1 - 4 until the close limit is set at the desired location. If a larger adjustment is required, follow the instructions in, "Resetting Open and Close Limits" on page 21. LEARN OPEN LEARN CLOSE INCHES: XX.X INCHES: XX.X Figure 7. Learn Open Figure 8. Learn Close support.hysecurity.com...
- Page 21 ARM POSITION SENSOR — SETTING LIMITS RESETTING OPEN AND CLOSE LIMITS Resetting the open and close limits is easily accomplished by accessing the Installer Menu. Access to the Installer Menu is through the User Menu. See the flowchart (Figure 9) below. See Figure 10. Press Menu twice at Status Display the Run Mode static...
- Page 22 Close button. It will close a second or two faster than normal operation and ignore any photo eye, vehicle loop, or other safety device inputs. NOTICE If additional accessories are to be added, read about "STC Inputs & Wiring" on page 44. support.hysecurity.com...
-
Page 23: Control Panel Overview
CONTROL PANEL OVERVIEW This section provides an overview of the the electrical controls found in your gate operator. The illustrations highlight the various components and describe their function. Each callout explains where to find more information about the component. Smart Touch Controller: STC Display &... -
Page 24: Display & Menu Options
S.T.A.R.T. software and most current software Refer to "Troubleshooting" on page 72. version from support.hysecurity.com before heading out into the field. This makes it easy The keypad lets you navigate, change, or clear the to adjust settings using a laptop. - Page 25 DISPLAY & MENU OPTIONS MENU MODE AND THE STC KEYPAD In Menu Mode, the motor disengages and operator commands are ignored. Data entry, menu navigation, and menu selection can be accomplished using the buttons on the Smart Touch Controller keypad. See Figure 14.
- Page 26 Pressing Reset clears alerts or faults and returns to Run Mode. NOTE: Press Reset at any Run mode status display to view the software version. For example: h4.35 HYSECURITY HYSECURITY HYSECURITY GATE OPEN GATE CLOSED GATE STOPPED Pressing Open, Pressing Menu scrolls...
- Page 27 DISPLAY & MENU OPTIONS VIEWING OPERATOR STATUS DISPLAYS Press the Menu button once and the operator status displays scroll past in two second intervals. Pertinent information appears to provide a quick overview of the operator’s status or configurations. The type of information that may scroll across the display includes: interlocked or sequenced gate (if applicable), operator type (OT), gate handing (RH or LH), clear opening (CO), Usage Class (UC), buss voltage, and cycle counter.
-
Page 28: User Menu
NOT the recommended site seconds design for fortified sites. The Close Timer assigns how many seconds before the open arm initiates closure. Keep the setting at 0 if a hard-wired, push-button control device is being used. Refer to HC. support.hysecurity.com... - Page 29 USER MENU Table 1. User Menu STC Wire User Menu Setting Options Menu Tasks & Explanations Connections Set to 0 to produce an Arm closure when a momentary signal is transmitted. Set to 1 if a constant hold to close signal, such as a push HC 0 button control, is being used.
- Page 30 The ALERT motor runs for a maximum of 4s and, if the arm is not fully open at the end of this period, the buzzer sounds for 10s. ALERT 2 appears on the display. support.hysecurity.com...
- Page 31 USER MENU Table 1. User Menu STC Wire User Menu Setting Options Menu Tasks & Explanations Connections Set to 1, the operator serves as an aide in photo eye transmitter/ receiver alignment. The buzzer chirps once when the emitter and receiver are not aligned.
- Page 32 When computer loaded experiencing intermittent problems, DS 0 (OFF) with HySecurity free 0 = off (standard) set this item to 1 to record all DIAGNOSTIC S.T.A.R.T. software operator open and close events, in...
-
Page 33: Installer Menu
INSTALLER MENU The Installer Menu items provide advanced configurations for the StrongArm operators. Access to the Installer Menu is through the User Menu. The navigational buttons are the same in both menus. Refer to "Menu Mode Navigation" on page 25. Access: While a static Run Mode code is being displayed, press the Menu button twice. - Page 34 It does not appear with wiring is present. The VFD uses any other operator its factory settings to control type. speed. CAUTION: A setting of 2 or 3 requires extended limit ramps to be installed on the drive rails! support.hysecurity.com...
- Page 35 INSTALLER MENU Table 2. Installer Menu Installer Setting Options Menu Tasks & STC Wire Connections Menu Explanations UC 0 0 = gate disabled Set the UL usage class. USAGE CLASS The installer must set 1 = single family dwelling the usage class for the 2 = multi-family operator to function.
- Page 36 4 = Loop Layout/Site #4 Gate menu item DG is set at 0 (solo operator). NOTE: Access the User Menu in both operators and set a Close Timer if desired. Installer Setting Options Menu Tasks & STC Wire Connections Menu Explanations support.hysecurity.com...
- Page 37 INSTALLER MENU Table 2. Installer Menu CH 0 (AC) 0 = AC powered charger Does not appear on an CHARGER AC-powered operator. 1 = Solar powered charger TYPE The menu item only appears when using the DC Charger unit. 0 = disabled FO 0 Enables the Fire Dept.
- Page 38 1 = Disable Close Timer DETECTOR (#9) the Free Exit function DISABLE or, alternately, the FUNCTION Timer Close function. The default setting disables the Free Exit function. Installer Setting Options Menu Tasks & STC Wire Connections Menu Explanations support.hysecurity.com...
- Page 39 INSTALLER MENU Table 2. Installer Menu OR 1 REVERSE 0 = Pause closing only The default (1) is for OUTSIDE OBS LOOP full reversal when the (#11) OUTSIDE OBS 1 = Enable reversing to open Outside Obstruction LOOP COM or connection Loop is triggered.
- Page 40 2 additional open commands if the open input is activated a second time while the Arm remains open. (For example, to prevent a vehicle from being stranded). Installer Setting Options Menu Tasks & STC Wire Connections Menu Explanations support.hysecurity.com...
- Page 41 INSTALLER MENU Table 2. Installer Menu EB 0 (OFF) 0 = Normal operation of Free The default allows Free Exit Detector Exit normal latch open (#8) ELD BACKOFF operation of the Free 1 = Back off close function COM or connection Exit detector.
- Page 42 Set to option 1, the system resets to allow LEARN LIMIT 1 = Erases the learned limit relearning limits. Refer positions to "Resetting Open and Close Limits" on page 21. Installer Setting Options Menu Tasks & STC Wire Connections Menu Explanations support.hysecurity.com...
- Page 43 INSTALLER MENU Table 2. Installer Menu SA 0 (OFF) 0 = No network Sets the system RS-485. Involves address for network additional hardware STC ADDRESS 1 to 99 = Network “drop” communication: & software. address 0 = no network communication 1-99 sets individual poling addresses.
-
Page 44: Stc Inputs & Wiring
Blinks green = operational Red = alert, fault, or error DO NOT USE - 20 DO NOT USE CHARGER Charger AC Loss - 21 AC LOSS HySecurity Hy5B Shadow / Gate Lock Interlock - 22 LOCK INTERLOCK MX000585 Reset* Socket VERSION... - Page 45 DO NOT USE Hy5B OUTSIDE LOOP SENSOR 2 DO NOT USE STATUS SENSOR 3 DO NOT USE CHARGER AC LOSS HySecurity Hy5B LOCK INTERLOCK MX000585 CENTER LOOP Tact Push Button VERSION EMERG CLOSE FIRE DEPT OPEN Smart Touch Controller LIMIT...
- Page 46 LIMIT DUAL GATE RADIO OPTIONS is desired. OPEN +24V +24V EDGE If you plan to connect operators to a networked central master command station, contact HySecurity for software protocols and additional information. Refer to "Contact Information" on page 3. support.hysecurity.com...
- Page 47 STC INPUTS & WIRING SMART TOUCH CONTROLLER INPUTS When using AC power, an LED lights next to active inputs. All the Smart Touch Controller inputs listed below are shown as a single input. The second wire is connected to the Common Terminal Bus on the Power Module. 1.
- Page 48 Contact) Installation" on page 62. DO NOT USE Configurable Object Detection Sensor. See "Table 2. Installer Sensor 2 Menu" EC & PC DO NOT USE See "Table 2. Installer Configurable Object Detection Sensor 3 Menu". PC Sensor. DO NOT USE support.hysecurity.com...
- Page 49 STC INPUTS & WIRING Table 3. STC Inputs Chart Charger AC Loss Jumper to Common. Battery backup operators only. See "Table 2. Installer Gate Lock Interlock Locking mechanisms. Menu". DG & SG Installer menu enabled and input Jumper to +24 COM. See +24V to trigger.
- Page 50 StrongArm 6 to 8 seconds 5 to 7 seconds SlideDriver 2.2 fps (26 in 3 fps (91 cm/s) 50VF2 per sec) SlideDriver 3 fps (91 cm/s) 3 fps (91 cm/s) 50VF3 Power Disconnect Switch Figure 22. STC Control Board support.hysecurity.com...
- Page 51 Hy5B (Ex. Card reader, keypad) OUTSIDE LOOP SENSOR 2 DO NOT USE STATUS SENSOR 3 DO NOT USE CHARGER AC LOSS HySecurity Hy5B SPARE INPUT MX000585 CENTER LOOP VERSION EMERG CLOSE Photo eye FIRE DEPT OPEN Smart Touch Controller LIMIT...
- Page 52 Arm Lock output 7/10ths of a second before the operator starts moving Relay 1 or 2 the Arm and remains active while moving. Output remains active, for a few seconds, after stopping. support.hysecurity.com...
- Page 53 STC INPUTS & WIRING Table 5. Programmable User Relays Activated if the Arm is forced off the closed limit switch and the operator is not able to restore the Arm to full 7 Arm forced open output Relay 1 or 2 closed position within four seconds.
- Page 54 Controls flashing lights that pulse 500ms per second. Flasher The relay is constantly activating except when the open Relay 1 or 2 (requires AC power) limit switch is triggered or AC power fails. support.hysecurity.com...
- Page 55 Due to safety considerations and the mass and speed of the Fortified Barrier Arms, it is recommended that three vehicle loops be installed with HySecurity StrongArm M30 or StrongArm M50 Barrier Arms. If the gate is to be manually controlled with a pushbutton, only one Reset loop, centered under the arm is recommended.
- Page 56 Optional access control devices (card reader, etc.) PEDESTRIAN GATE & WALKWAY & & & Inductance Field created when Loop is active. The effective height of loop (H) is 2/3 the distance of X. Figure 25. Single/Bi-Directional Traffic Loop Layout support.hysecurity.com...
- Page 57 The vehicle detector input functions are as follows: vehicle detectors may be connected in the Free Exit Loop Detector - Opens a fully traditional manner, but HySecurity’s custom Hy5B closed gate. mini-detector module plugs directly into the Smart Touch Controller, making field installation much Outside Obstruction Loop Detector (Out faster and enhancing performance.
- Page 58 Hy5B (Ex. Card reader, keypad) OUTSIDE LOOP SENSOR 2 DO NOT USE STATUS SENSOR 3 DO NOT USE CHARGER AC LOSS HySecurity Hy5B SPARE INPUT MX000585 CENTER LOOP VERSION Photo eye EMERG CLOSE FIRE DEPT OPEN Smart Touch Controller Figure 26. Hy5B Vehicle Detector Module...
- Page 59 STC INPUTS & WIRING CONNECTING HY5B VEHICLE DETECTORS 6. Repeat Steps 1 through 5 for each Hy5B detector. NOTICE 7. Cycle the barrier two times to allow the Refer to the installation instructions provided detectors to 'LEARN' the environment. with the Hy5B vehicle detectors. It provides detailed illustrations and instructions that are 8.
- Page 60 The UL 325 standard requires that a photoelectric sensor be laboratory tested and “recognized” under UL 325. In order to be compatible with all HySecurity operators, a photo eye must be rated to function from 24 Volts DC source power. support.hysecurity.com...
- Page 61 STC INPUTS & WIRING Installation Install additional photo eyes according to the following steps. 1. Locate the photo eye approximately 15 to 30 inches (38 to 76 cm) above the ground and as close to the gate as possible. See site layout below. 2.
- Page 62 Two wires to one terminal SENSOR 2 (either Input 14 or 15) DO NOT USE STATUS SENSOR 3 DO NOT USE CHARGER AC LOSS HySecurity SPARE INPUT MX000585 VERSION Photo eye EMERG CLOSE FIRE DEPT OPEN Smart Touch Controller LIMIT...
- Page 63 In order to avoid false triggering, it is important to carefully align the system, especially with retroreflective photoelectric sensors. To that end, HySecurity has provided a unique feature that turns power on to the photo eyes and causes a buzzer to chirp when the photo eye enters and exits alignment.
-
Page 64: Dual Gate Systems
SENSOR 3 shield should then DO NOT USE DO NOT USE be grounded on CHARGER CHARGER one end to one of AC LOSS AC LOSS HySecurity HySecurity SPARE INPUT SPARE INPUT the operators. MX000585 MX000585 VERSION VERSION EMERG CLOSE EMERG CLOSE... - Page 65 Be sure both operators are running the same software. The software version can be viewed on the display by pressing the RESET button. For example: h 4.31 (“h” = Hysecurity, “4.31” = software version).
- Page 66 1. Press Next until DG 2 appears 1. Press Next until DG 1 appears on the display. on the display. Master / Second 2. Press Select to establish the 2. Press Select to establish the operator as Master. operator as Second. support.hysecurity.com...
- Page 67 DUAL GATE SYSTEMS CONNECTING SEQUENCED GATES Sequenced gates are slightly different than dual or interlocked gates. When two gate operators are connected as sequenced gates, a faster “Traffic Control Gate” operator (i.e. barrier arm or wedge) and a slower “Security Gate” operator (slide, swing, or vertical lift gate) operate in sequence to help prevent tailgating by unauthorized vehicles.
- Page 68 SG 1 = Sequential Gate #1 configuration SG 2 = Sequential Gate #2 configuration NOTE: Set both operators on the site to the same number. See the site designs on the following pages. Figure 32. Dual Gate (Sequenced Gate) Menu Layout support.hysecurity.com...
- Page 69 DUAL GATE SYSTEMS Sequential Gate #1 StrongArm M30/M50 with Slide Gate Site Diagram Optional access control devices (card reader, etc.) Configuration steps: 1. Set the Installer Menu item SG (Sequenced Gate) to “1” in both gate operators.** Concrete foundation shown 2.
- Page 70 If a communication failure occurs, an AL22 (Alert 22) appears and the buzzer sounds. The Traffic Control Gate maintains functionality while the Security Gate defaults to open until communication is restored (or the Security Gate is manually closed). Drawings are not to scale. © 2012 support.hysecurity.com...
-
Page 71: Troubleshooting
Audio Alert buzzer emits distinctive chirping sounds. Any Alert, Fault, or Error is logged into memory and date and time stamped. These diagnostic messages can be retrieved for analysis purposes via optional S.T.A.R.T. software. NOTICE S.T.A.R.T. configuration and diagnostic software is available at no charge from support.hysecurity.com. MX4995-01 Rev. A ©2021... - Page 72 If the line voltage is not dropping below these limits, check the 24V AC and DC power at the power supply. Voltages less than 20V indicate an overloaded or failing transformer or power supply board. Remove the loads until the fault is found. support.hysecurity.com...
- Page 73 TROUBLESHOOTING Table 7. Troubleshooting Codes Display Code Error/Fault/Alert Buzzer Chirp Possible Cause & Suggested (7 Segment) Display Description Sequence Corrective Action 2 chirps per second after each close Only occurs in DC powered operators L AC Voltage too Low cycle. Display without a solar charger.
- Page 74 Hy5B detector has detected a short 2 chirps per circuit in the loop. Temporarily switch LE Shorted Loop Alert second every 15 detector to be sure the loop is at fault seconds and then repair it. support.hysecurity.com...
- Page 75 TROUBLESHOOTING Table 7. Troubleshooting Codes Display Code Error/Fault/Alert Buzzer Chirp Possible Cause & Suggested (7 Segment) Display Description Sequence Corrective Action Hy5B detector has sensed that the loop 2 chirps per Disconnected Loop has become an open circuit. Check all LE ...
- Page 76 VFD is experiencing a fatal error. If you seconds cannot clear the error alert by pressing the open or close button, contact HySecurity. A p p e a r s w h e n t h e R S - 4 8 5...
- Page 77 TROUBLESHOOTING Table 7. Troubleshooting Codes Display Code Error/Fault/Alert Buzzer Chirp Possible Cause & Suggested (7 Segment) Display Description Sequence Corrective Action Appears in sequence with another display code which pertains to the loop issue. Refer to the other display code for more information.
- Page 78 Communication Error and wiring. Make sure both units are per minute working properly. 3 chirps per EEPROM Data Error second once Contact HySecurity. E (factory) per minute PWM Sensor Error 3 chirps per Check wiring from the hydraulic cylinder E...
- Page 79 TROUBLESHOOTING Table 7. Troubleshooting Codes Display Code Error/Fault/Alert Buzzer Chirp Possible Cause & Suggested (7 Segment) Display Description Sequence Corrective Action “Supervised” means the STC must see the photo-eye NC contact change from closed to open and back to close after receiving the command to move, but before starting.
- Page 80 Attempting to slow Arm speed by changing a valve setting will cause inefficiency and increased heating of the hydraulic system, which will degrade system performance and also may result in premature system failure. NOTICE If the gate speed must be changed, contact your HySecurity distributor or HySecurity Tech Support. support.hysecurity.com...
- Page 81 TROUBLESHOOTING Extremely cold weather is unlikely to seriously affect the Arm speed because HySecurity employs a special grade of hydraulic fluid (Uniflow), which maintains a near constant viscosity over a broad temperature range. This high quality fluid, combined with other design considerations, allows HySecurity to rate its operators for service in ambient temperatures of -40°F to 158°F (-40°C to 70°C).
- Page 82 AA batteries. Note the polarity on both batteries is in the same direction. 3. Replace the battery cover, place the battery-powered photo eye inside the catch post, and secure the access panel. 4. If needed, realign the photo eye. See "Photo Eye Alignment" on page 63“. support.hysecurity.com...
-
Page 83: Hand Pump Operation
HAND PUMP OPERATION HAND PUMP OPERATION A hand pump is available to manually operate the hydraulic mechanism that secures the barrier arm. In the event of a power failure, manual operation is achieved by accessing the hydraulics section of the pivot post. Follow the steps below to open or close the barrier arm: HANDLE CAUTION... -
Page 84: General Maintenance
HySecurity Serial RS-232 communication cable. Be See "Setting User Account Controls". sure to install the USB driver in your laptop, if you are using the HySecurity RS-232 to USB adapter. Laptop computer with Windows PC operating system (XP, Vista or 7) - Page 85 GENERAL MAINTENANCE Setting User Account Controls Clock Battery Replacement Because of the security settings inherent in VISTA A lithium coin battery supports the clock, so the and Windows 7, you need to disable the “user date and time is retained even when the main account controls”...
- Page 86 1. Remove the metal plug from the tank. Schedule regular maintenance: 2. Use HySecurity Uniflow hydraulic fluid; part 9 Check for signs of rust. The operator number MX000970. Gallon sold by our chassis is zinc plated which is corrosion- distributors.
- Page 87 Fluid breakdown caused by heat is the main concern. If the unit is subjected to high use, or NOTICE you are using the HySecurity biodegradable A biodegradable fluid option does exist, but fluid option (especially in a warm climate), it does not have the same fluid viscosity at change the fluid more frequently (250,000 extremely low temperatures.
- Page 88 Buzzer Lower arm Pivot Pin 100,000 may or may not sound depending on User Menu setting. Arm should close fully and arm lights should be on, or flashing depending on User Menu setting. support.hysecurity.com...
-
Page 89: Reference Section
REFERENCE SECTION This section provides illustrations that are useful to refer to during the prep and install phases. Appendix A: Wiring Diagram D0437 and Hydraulic Schematic D0511 Appendix B: Wire Sizing and Runs Appendix C: StrongArmM30/M50 Loop Design and Layouts Appendix D: Installer’s Checklist - An overview of the steps involved in installing the StrongArm Fortified Barrier Arm operator. -
Page 90: Appendix A - Wiring Diagrams
APPENDIX A - WIRING DIAGRAMS STRONGARM M30/M50 WIRING DIAGRAM 220V CE M200 VFD, REV. B (1 OF 2) support.hysecurity.com... - Page 91 APPENDIX A - WIRING DIAGRAMS STRONGARM M30/M50 WIRING DIAGRAM 220V CE M200 VFD, REV. B (2 OF 2) MX4995-01 Rev. A ©2021...
- Page 92 APPENDIX A - WIRING DIAGRAMS STRONGARM M30/M50 WIRING DIAGRAM 380V CE, REV. B (1 OF 2) support.hysecurity.com...
- Page 93 APPENDIX A - WIRING DIAGRAMS STRONGARM M30/M50 WIRING DIAGRAM 380V CE, REV. B (2 OF 2) MX4995-01 Rev. A ©2021...
- Page 94 APPENDIX A - WIRING DIAGRAMS STRONGARM M30/M50 HYDRAULIC DIAGRAM CLOSE GATE BRAKE VALVE OPEN GATE PRESSURE GUAGE PORT PLUG CHECK VALVE HAND PUMP PUMP ELECTRIC MOTOR OPEN VALVE NOTE: DRAWING IS NOT TO SCALE. support.hysecurity.com...
-
Page 95: Appendix B - Wire Sizing & Runs
APPENDIX B - WIRING SIZING & RUNS WIRE SIZING AND RUNS Supplying a StrongArm M30/M50 operator with the right electrical service is crucial to the performance of the operator and the life of its electrical components. If the wire size used is too small, the voltage loss, especially during motor startup, will prevent the motor from attaining its rated horsepower. - Page 96 2750 (838m) (1015m) 4380 5300 620 (189m) 680 (207m) 1430 (436m) 1580 (482m) (1335m) (1615m) 6990 8470 990 (302m) 1090 (332m) 2280 (695m) 2530 (771m) (2130m) (2582m) 3620 4000 11,070 13,400 1560 (475m) 1730 (527m) (1103m) (1219m) (3374m) (4084m) support.hysecurity.com...
- Page 97 APPENDIX C - LOOP DESIGN HOW A VEHICLE DETECTOR WORKS Site design considerations: See Figure 42 and Figure 43. An inductance field is created when the vehicle Type of vehicular traffic using your site detector passes a small amount of alternating (high bed trucks, passenger vehicles, etc.) current through an in-ground, twisted wire, closed-loop system.
-
Page 98: Appendix C - Vehicle Loop Layout
E = 10 to 12 f (305 cm to 366 cm) if an access control device i s employed F = 2 ft minimum clearance (61 cm) Several Sequenced and Interlocked loop layout scenarios are provided in this section. For more information, refer to "Connecting an Interlocked Pair (Dual Gate)" on page 65. support.hysecurity.com... - Page 99 APPENDIX C - VEHICLE LOOP LAYOUT SEQUENCED GATES #1 - SLIDE GATE LOOP LAYOUT OUTSIDE Optional access control devices (card reader, etc.). OBSTRUCTION Align along 6 ft edge of the LOOP Outside Obstruction Loop. MINIMUM 6FT FROM GATE To sequence the gates, (OOLD for Traffic Control Gate) set the Menu item, SEQENCED GATE to “3”...
- Page 100 C/L of gate: 1 to 5 ft (31 to 152 cm). DRAWINGS NOT TO SCALE Center to center between gates: 4 ft minimum (122 cm) Dimension “F” = 10 to 15 feet (3 to 3.6 m) 9 ft maximum (274 cm) support.hysecurity.com...
- Page 101 APPENDIX C - VEHICLE LOOP LAYOUT SEQUENCED GATES #1 - SWING GATE LOOP LAYOUT Optional access control devices (card reader, etc.). OUTSIDE Align along 6 ft edge of the Outside Obstruction Loop. OBSTRUCTION LOOP To sequence the gates, (OOLD for Traffic Control Gate) set the Installer Menu item, SG to “1”...
- Page 102 (or the Security Gate Dimension “F” = 10 to 15 feet (3 to 3.6 m) is manually closed). **NOTICE Center to center between gates: 4 ft minimum (122 cm) 9 ft maximum (274 cm) DRAWINGS NOT TO SCALE support.hysecurity.com...
-
Page 103: Checklist - Post Installation
CHECKLIST - POST INSTALLATION StrongArm M30/M50 Post Installation Checklist Date Installed: ________________________________________________ StrongArmM30/M50 Arm Length: _______________________ Site Location: _________________________________________________ Serial Number: __________________________________________ Customer Name: ______________________________________________ Mailing Address: ______________________________________________ _______________________________________________________________ Inspected by: ____________________________________________ ________________________________ Phone Contact: _______________________________________________ Date Inspected: 1. Foundation Checked Initials 1.1 Concrete Foundation to Spec... - Page 104 Outside Obstruction Loop, Reset Loop, & Inside Obstruction Loop are well laid and within specifications. (Refer to diagrams shown in the product manual.) Test vehicle detection and check which type of vehicle detectors are used. Note it here: HySecurity HY5B Other: ____________________ ...
-
Page 105: Warranty
HySecurity, and the Two Year warranty period in (b), (d), (e), and (f) will not extend force majeure. This warranty does not cover any incidental expenses, including fines beyond four years from the date that the product was shipped from HySecurity. -
Page 106: Specifications
Qualified HySecurity distributors are experienced and trained to assist in resolving installation problems. For the name of a qualified distributor near you, call HySecurity at 800-321-9947. *Before contacting your distributor or HySecurity Technical Support, obtain the serial number of your operator.
Need help?
Do you have a question about the StrongArm M30 CE and is the answer not in the manual?
Questions and answers