Advertisement
Quick Links
Installation Instructions
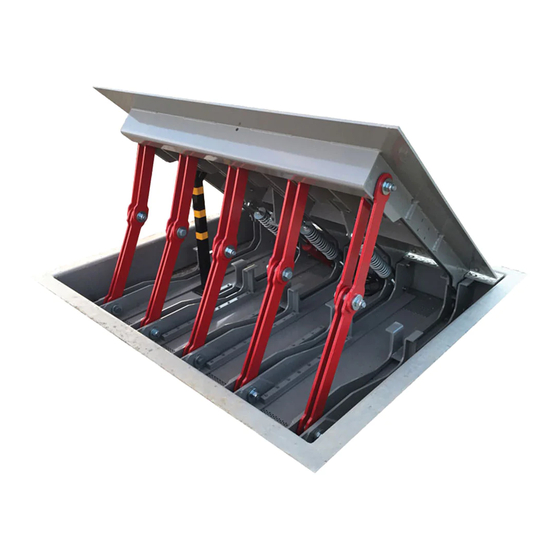
Domestic & internationally certified, shallow mount wedge barrier with HydraSupply XL and Smart Touch Controller
www.SecureOpeners.com | (800) 878-7829 | Sales@SecureOpeners.com
Models
HydraWedge SM50
HydraWedge SM50 UPS
HydraWedge SM50 Twin
HydraWedge SM50 Twin UPS
Pictured: Two controllers for twin model
MX3969-01
Advertisement

Subscribe to Our Youtube Channel
Related Manuals for HySecurity HydraWedge SM50


Summary of Contents for HySecurity HydraWedge SM50
- Page 1 Models HydraWedge SM50 HydraWedge SM50 UPS HydraWedge SM50 Twin HydraWedge SM50 Twin UPS Pictured: Two controllers for twin model Domestic & internationally certified, shallow mount wedge barrier with HydraSupply XL and Smart Touch Controller MX3969-01 www.SecureOpeners.com | (800) 878-7829 | Sales@SecureOpeners.com...
- Page 2 ..................................10 SM50: a ................4 : ac ...................11 ydra edge ttacH ebar iring iagraMS Moving the HydraWedge SM50 on Site ........................4 AC Single-Acting: HydraSupply XL ..........................11 Attach Rebar .................................4 AC Twin: HydraSupply XL...............................11 SM50: P ..............5 dc ....................12 ydra edge oundation...
- Page 3 Read & Plan HydraWedge SM50 less than 80 feet (25 m) Bollards Eye bolts used Prior to installing the HydraWedge SM50 and HydraSupply XL, read and for lifting HydraWedge SM50 Reset Loop follow the Important Safety Information provided in the Programming Outside and Operations Manual.
- Page 4 HydraWedge SM50 or HydraSupply XL at the site location. • The HydraWedge SM50 and HydraSupply XL are delivered fully assembled. Rebar supports for the HydraWedge SM50 must be supplied and fitted on site by a third 76¾ in party.
- Page 5 HydraWedge SM50: Prep Foundation Prepare HydraWedge SM50 foundation Attach Drainage Channel Option: Top View (Plan View) To ensure the stability of the HydraWedge SM50, the foundation must be constructed M5x16 - DIN7513 Two drainage channels are installed for each HydraWedge SM50.
- Page 6 4 inch (10 cm) flange to secure Min 3" (7 cm) HydraSupply XL Cabinet diameter cabinet to posts NOTE: Conduit runs between HydraWedge SM50 and HydraSupply XL cabinet. Unistrut Eye bolts used for lifting attached to cabinet 2.2" Set Up HydraSupply XL flange.
- Page 7 Transport: Blocking Plate, Base Frame & Rebar Foundation: Prep, Level and Cast 1. Set the base frame, rebar and drainage channels in Review Moving the HydraWedge SM50 on Site on page 4. foundation pit. 1. Use proper lifting machinery to transport the HydraWedge SM50.
- Page 8 Turn OFF AC power at the source (circuit breaker panel) before accessing the wires in the HydraSupply XL. HySecurity operators are intended for permanent installation. Make sure you prepare the site with the Follow facility Lock Out/Tag Out procedures. Make sure all power switches are in the OFF position. Follow following main power considerations: all electrical code standards and regulations.
- Page 9 DO NOT USE DO NOT USE AUXILIARY 1 AUXILIARY 1 DO NOT USE DO NOT USE come in contact with the blocking plate. Check the area around the HydraWedge SM50 PHOTO EYE CLOSE PHOTO EYE CLOSE AUXILIARY 2 AUXILIARY 2 AC LOSS...
- Page 10 Close & secure HydraSupply XL cabinet. Terminal block inside HydraWedge SM50. Wire harness/limit switch connections. OPEN INPUT 2 • Hand over HydraWedge SM50 to the end user making reference to the product manual CLOSE INPUT 2 OPEN INPUT 3 Place DANGER signs Use 17 mm socket and remove and accompanying product literature shipped with the Crash product.
- Page 11 Back to Contents Wiring Diagrams: AC NOTE: More wiring diagrams may be found in the Programming & Operations Manual. © 2016 HydraWedge SM50 Installation and Assembly MX3969-01 Rev. A Page 11 www.SecureOpeners.com | (800) 878-7829 | Sales@SecureOpeners.com...
- Page 12 Back to Contents Wiring Diagrams DC NOTE: More wiring diagrams may be found in the Programming & Operations Manual. © 2016 HydraWedge SM50 Installation and Assembly MX3969-01 Rev. A Page 12 www.SecureOpeners.com | (800) 878-7829 | Sales@SecureOpeners.com...
- Page 13 VEHICLE DETECTOR SHADOW ARMING WIEGAND FREE INSIDE OUTSIDE RESET LOOP EXIT OBSTR OBSTR MOTOR USER 1 USER 2 RS232 DISPLAY DISPLAY USER 3 © 2016 HydraWedge SM50 Installation and Assembly MX3969-01 Rev. A Page 13 www.SecureOpeners.com | (800) 878-7829 | Sales@SecureOpeners.com...
- Page 14 Crash Certified: Domestic ASTM F2656-15 M50-P1 International IWA 14-1 V/7200[N3C]/80/90:0.0 PAS68 V/7500[N3]/80/90:0.0/20.7 with no penetration MX3969-01 www.SecureOpeners.com | (800) 878-7829 | Sales@SecureOpeners.com...
Need help?
Do you have a question about the HydraWedge SM50 and is the answer not in the manual?
Questions and answers