
Related Manuals for Horizon Fitness 853VES


Summary of Contents for Horizon Fitness 853VES
- Page 1 MODEL 853VES Model 853VES Operator’s Manual Laboratory Centrifuge P/N 7711012 Rev. F...
-
Page 2: Table Of Contents
Table of Contents Model Description ..............3 Supplied Equipment ............... 3 Warranty Information ............. 3 Specifications ................. 4 Control Panel / Parts of the Centrifuge ........ 5 Setup Location ................ 6 Initial Setup Procedure ............6 Operation ................7 Tube Holder Configurations 12-Place Horizontal Standard / Performance Plus Rotors .. -
Page 3: Model Description
The use of flammable or explosive materials as well as those materials which chemically react vigorously is prohibited. Model Description The Horizon Model 853VES, is a medium capacity centrifuge with unmatchedperformance. The 853VES offers control over almost every aspect of the unit’s operation from variable acceleration and deceleration to easy time and speed input. -
Page 4: Specifications
Specifications General Specifications for the Horizon Model 853VES Centrifuge Overall Dimensions (H x W x D): ....8.5˝ x 12.5˝ x 15.5˝ Centrifuge Motor: ........1/2 H.P. Brushless DC Protection Breaker: ........4 Amp. re–settable Timer: ............Electronic, with hold or 0 to 99 minutes, +/- 1% Weight: ............ -
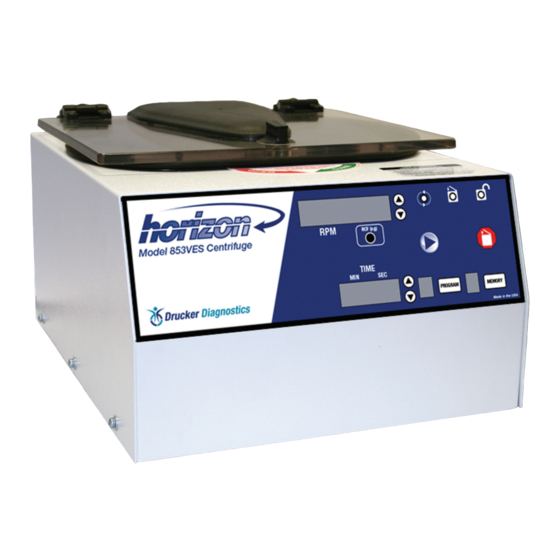
Page 5: Control Panel / Parts Of The Centrifuge
Control Panel / Parts of the Centrifuge Lid Knob Lid Safety Interlock System Control Panel (see below) Cabinet Up/Down RPM Latched Unlocked Change Buttons Running Indicator Indicator Indicator Light Light Light Display Start Button Open / Stop RCF Conversion Button Button Memory Button... -
Page 6: Setup Location
Setup Location 1. Unpack the centrifuge and verify that all of the supplied equipment is present. 2. Choose a setup location which meets the following criteria: a) A bench top clearance height of 20” is required in order to open the lid. b) The clearance envelope is the space around the centrifuge which is required for safety. -
Page 7: Operation
Initial Setup Procedure (continued) 9. The ‘RUNNING’ indicator light will illuminate. 10. The test tube carriers will slide up into the horizontal position (horizontal rotor only) and the unit will accelerate to the current set speed. 11. Listen to the sound of the centrifuge. A smooth whirring sound should be heard. If there are any loud or unusual sounds, stop the centrifuge by pressing the ’OPEN / STOP’... -
Page 8: Tube Holder Configurations
Tube Holder Configurations The next two pages will describe proper balancing and tube loading. Use the appropriate section for the rotor installed in your centrifuge. Improper loading can result in damage to the centrifuge or test tube samples. Twelve (12) Place Horizontal Standard and Performance Plus Rotors This rotor is designed to hold up to twelve (12) tube holders. -
Page 9: Control Panel Functions Time Adjustment And Timer Operation
Control Panel Functions Time Adjustment and Timer Operation: The run time may be set from 30 seconds to 99 minutes and 30 seconds. Press the up and down arrow buttons next to the time display to adjust the run time. Adjustments may be made prior to a run or after a run begins. -
Page 10: Braking Rate
Advanced User Settings (continued) Braking Rate: The user may adjust the braking rate from minimum (slowest deceleration, 0) to maximum (quickest deceleration, 9) using the following procedure: 1. While the centrifuge is idle, press the PROGRAM button. 2. Use the UP/DOWN arrow buttons next to the speed display until “BRAKE” is displayed in the speed display. -
Page 11: Memory Locations / Storing And Recalling
Memory Locations / Storing and Recalling The Performance Series centrifuges are capable of storing up to 10 user-defined presets. These memory presets contain all of the settings needed to define a specific run, (run time, speed, acceleration rate, braking rate, etc.). The user can use these memory locations to quickly configure the centrifuge for a specific test type and ensure that the test is run in the same way each time by recalling this same setting. -
Page 12: Care And Preventative Maintenance
Care and Preventative Maintenance With proper care and maintenance your Horizon centrifuge will provide years of laboratory service. For proper care, the following steps should be taken: 1. Provide Adequate Ventilation: For cooling purposes, the Horizon draws in ambient air through the air intake cover on the top of the lid and exhausts this air in the rear of the base. -
Page 13: Troubleshooting
Troubleshooting: 1. Problem: The rotor does not spin freely. Solutions: • Make sure that nothing has fallen into the rotor chamber. • If there is nothing obstructing the rotor, the motor may be damaged. Contact your authorized dealer or Drucker Diagnostics for further assistance. 2. -
Page 14: Safety
The Horizon model 853 complies with all requirements of UL’s Electrical Equipment for Measurement, Control, and Laboratory Use; Part 1: General Requirements, UL 61010-1, Issued: 7/12/2004, Ed: 2nd, Rev: 10/28/08; Requirements for Electrical Equipment for Measurement, Control, and Laboratory Use Part 1: General Requirements, CSA/C22.2 #61010-1, Issued: 7/12/2004, Ed: 2nd Safety: Horizon Lid Safety Switch:... -
Page 15: Replacement Parts
7735016 ....Motor, 1/2 H.P. Brushless DC 853VES Performance 7717041 ....PC Control Board Plus Horizontal Rotor p/n 7786010 3056002 ....853VES Transformer, 115V-16V 3056003 ....853VES Transformer, 220V-16V 7751043 ....Circuit Breaker 7724044 ....Front Panel Label 7760003 ....Line cord 7714101 ....
Need help?
Do you have a question about the 853VES and is the answer not in the manual?
Questions and answers