
Related Manuals for Airlink101 AP671W


Summary of Contents for Airlink101 AP671W
- Page 1 Wireless N 300 Multi-Function Access Point with 5-Port Switch Model # AP671W User’s Manual Ver. 1A...
-
Page 2: Federal Communication Commission Interference Statement
20 cm spacing must be provided between computer mounted antenna and person’s body (excluding extremities of hands, wrist and feet) during wireless modes of operation. This device complies with Part 15 of the FCC Rules. Operation is subject to the following two conditions: (1) this device may not cause harmful interference, and (2) this device must accept any interference received, including interference that may cause undesired operation. -
Page 3: Table Of Contents
ODE FOR 2.4.1 AP Mode ...19 2.4.1.1 Multiple ESSID ... 20 2.4.2 AP Client Mode...22 2‐4‐2‐1 Wireless Site Survey... 24 2.4.3 AP Bridge - Point to Point Mode ...25 2.4.4 AP Bridge - Point to Multi-Point Mode...27 2.4.5 AP Bridge - WDS Mode...29 2.4.6 Universal Repeater ...31 2.5 C... -
Page 4: Chapter 1 Introduction
5-Port 10/100Mbps switch. A full range of security features such as WEP, WPA-PSK, and WPA2-PSK provide the highest level of wireless network security. Best of all, AP671W works with IEEE 802.11 b/g/n network devices, which ensures compatibility with your existing network products. -
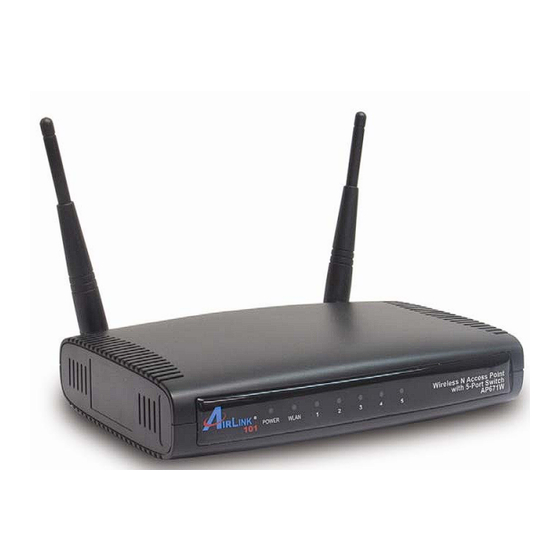
Page 5: Access Point Interface
Reset: Press this button and hold for 10 seconds to restore all settings to factory defaults. Reset / • WPS: Press this button for no longer than 1 second to start wireless security synchronization with clients. Description Router is powered on. - Page 6 1 ~ 5 Local Area Network (LAN) ports 1 to 5. Power Power connector DC 12V/1A, connects to A/C power adapter. 5...
-
Page 7: Chapter 2 Configuring The Access Point
Chapter 2 Configuring the Access Point 2.1 Installing the Access Point to Your Network Step 1 Insert the provided CD into your computer’s CD ROM drive. You will be using this computer to configure the AP. Step 2 Click Next to start the configuration. Step 3 Connect one end of a network cable to the WAN port of the router and connect the other end of the cable to the DSL/Cable modem. - Page 8 A. Connect the AP to the Router B. Power on the AP 7...
- Page 9 Step 6 Assign a valid IP Address/Subnet Mask and Default Gateway for your AP. This setting must match with your wireless network. You will use this IP address to access the AP’s Web- based Configuration Utility for more advanced features.
- Page 10 Configure the SSID and Channel Number if you have selected Access Point mode. Click Next. Check on Enable the WPA/WPA2 (Mixed) and enter 8~63 characters into Pre-Shared Key. This is the security key for your wireless network. Click Next. 9...
- Page 11 B) Universal Repeater Click on Site Survey, select the wireless router or AP you wish to repeat on the popup Wireless Site Survey window and click Connect. Configure a network name in Main SSID for the repeater to be identified.
- Page 12 AP. Click Next. C) AP Client Click on Site Survey, select the wireless router or AP you wish to connect on the popup Wireless Site Survey window or enter your wireless network’s SSID manually. Click Next.
- Page 13 Enter the key of the wireless network you wish to connect to. Click Next. D) Point-to-Point / Point-to-MultiPoint / WDS Bridge Same setup procedure applies to Point-to-Point Bridge, Point-to-MultiPoint Bridge and WDS Bridge modes. For bridge mode, you need at least two Access Points. We will use Point-to- Point Bridge as an example.
- Page 14 Configure the wireless security settings. It is recommended to use WPA2-PSK(AES) which is the safest encryption for general users. Click Next. After finishing the setup of the first AP, you need to follow the same configuration procedure on other Access Point(s).
- Page 15 Step 10 Click Finish to end the EZ Setup Wizard. After the AP is restarted, it is ready to use. To configure more advanced features, please go to the next section. 14...
-
Page 16: Accessing The Access Point By Web Browser
Selecting an operation mode for this Access Point and configuring its corresponding settings. Configuring the wireless security settings for the Access Point. Configuring the MAC address filter to protect your network from being accessed by unauthorized users and highly increase the security for your personal data. -
Page 17: View System Status And Information
You can click ‘Status’ on the left, and the system status and information will be displayed, as shown below: Here are descriptions of every item: Mode Displays current wireless operating mode (see next Section) . ESSID Displays current ESSID (the name used to identify this wireless access point). Channel Displays current wireless channel number. Number Security Displays current wireless security setting. - Page 18 Default Gateway Displays the IP address of default gateway. MAC address Displays the MAC address of the AP. Up time Displays the total passed time since the wireless access point is powered. Hardware Version Displays the hardware version. Firmware Version Displays the current firmware version.
-
Page 19: Select An Operating Mode For Access Point
Connect two physically isolated wireless networks with two wireless Point access points. Both access points must be configured to the same mode. You will need two AP671W for this mode. The AP can only be connected by another AP in this mode wirelessly. AP Bridge-Point to... -
Page 20: Ap Mode
Please select one wireless operating mode, for detailed descriptions of every operating mode; please refer to Section 2.4.1 to 2.4.6 listed below. 2.4.1 AP Mode In AP mode, this access point acts as a bridge between 802.11b/g/Draft-N wireless devices and wired Ethernet network, and exchanges data between them. ... -
Page 21: Multiple Essid
Band Please select the wireless band you wish to use. By selecting different band setting, you’ll be able to allow or deny the wireless client of a certain band. If you select 2.4GHz (B), 2.4GHz (N), or 2.4GHz (G), only wireless clients using the wireless band you select (802.11b, 802.11 Draft-N,... - Page 22 This access point supports 4 sets of SSID. Besides the main SSID (It can be configure in Basic Setting page), you can configure another three SSIDs here. With different SSIDs, you can separate the wireless networks with different SSID name, wireless security, WMM, and VLAN settings.
-
Page 23: Ap Client Mode
In this mode, you can connect the access point to Ethernet device such us TV and Game player to enable the Ethernet device be a wireless station and join to a wireless network through an access point or AP router. - Page 24 Band Please select the wireless band you wish to use. By selecting different band setting, you’ll be able to allow or deny the wireless client of a certain band. If you select 2.4GHz (B), 2.4GHz (N), or 2.4GHz (G), only wireless clients using the wireless band you select (802.11b, 802.11 Draft-N, or...
-
Page 25: 2-4-2-1 Wireless Site Survey
Display the encryption setting of the access points. If you have selected the access point with security setting, you have to go to ‘2-7 Wireless Security’ to set the same security with the access point you want to associate. Authentication Display the authentication type of the access point. -
Page 26: Ap Bridge - Point To Point Mode
2.4.3 AP Bridge - Point to Point Mode In this mode, this wireless access point will connect to another AP671W Wireless N 300 Access Point which uses the same mode, and all wired Ethernet clients of both wireless access points will be connected together. - Page 27 Please input the MAC address of the wireless access point you wish to connect. Set Security Click this button to select an encryption mode for this wireless link, a new popup window will appear. Please refer to Section 2.5 for detailed descriptions.
-
Page 28: Ap Bridge - Point To Multi-Point Mode
Ethernet clients of every wireless access points will be connected together. You can use this mode to connect a network to other networks which is physically isolated. Please note that when you set your access point to this mode, it will not accept regular wireless clients anymore. ... - Page 29 Please input the MAC address of the wireless access point you wish to connect. Set Security Click this button to select an encryption mode for this wireless link, a new popup window will appear. Please refer to Section 2-7 for detailed descriptions.
-
Page 30: Ap Bridge - Wds Mode
2.4.5 AP Bridge - WDS Mode In this mode, this wireless access point will connect to up to four wireless access points which uses the same mode, and all wired Ethernet clients of every wireless access points will be connected together. - Page 31 Band Please select the wireless band you wish to use. By selecting different band setting, you’ll be able to allow or deny the wireless client of a certain band. If you select 2.4GHz (B), 2.4GHz (N), or 2.4GHz (G), only wireless clients using the wireless band you select (802.11b, 802.11 Draft-N,...
-
Page 32: Universal Repeater
2.4.6 Universal Repeater In this mode, the access point can act as a wireless repeater; it can be Station and AP at the same time. It can use Station function to connect to a Root AP and use AP function to service all wireless stations within its coverage. - Page 33 Diagram 5: Repeater mode application When you select ‘Universal Repeater, the following options will be displayed: Here are descriptions of every setup item: 32...
- Page 34 Band Please select the wireless band you wish to use. By selecting different band setting, you’ll be able to allow or deny the wireless client of a certain band. If you select 2.4GHz (B), 2.4GHz (N), or 2.4GHz (G), only wireless clients using the wireless band you select (802.11b, 802.11 Draft-N,...
-
Page 35: Configure Wireless Security
2.5 Configure Wireless Security This wireless access point provides many types of wireless security (wireless data encryption). When you use data encryption, data transferred by radio signals in the air will become unreadable for those people who don’t know correct encryption key (encryption password). -
Page 36: Wep
There are several things you can do to improve wireless security: 1. Always enable data encryption. Only disable it when you want to open your wireless access point to the public. - Page 37 Here are descriptions of every setup item: Key Length There are two types of WEP key length: 64-bit and 128-bit. Using ‘128-bit’ is safer than ’64-bit’, but will reduce some data transfer performance. Key Format There are two types of key format: ASCII and Hex. When you select a key format, the number of characters of key will be displayed.
-
Page 38: Wpa Pre-Shared Key
2.5.3 WPA Radius WPA Radius is the combination of WPA encryption method and RADIUS user authentication. If you have a RADIUS authentication server, you can check the identity of every wireless client by user database. When you select ‘WPA RADIUS’ as encryption type, the following page will be displayed:... -
Page 39: 802.1X Authentication
WPA Unicast Cipher You can select WPA encryption type here. AES is safer than TKIP, Suite but not every wireless client supports it. Please refer to the specification of your wireless client to decide which encryption type you should use. - Page 40 Here are descriptions of every setup item: Use internal Uses built-in RADIUS Server (refer to next Section) instead MD5/PEAP RADIUS of external RADIUS server. If you check this box, the value Server of internal RADIUS server fields will be ignored. Enable 802.1x Enable or disable the use of 802.1x user authentication.
-
Page 41: Set U Pmac Filtering
Another security measure you can use to keep hackers and intruders away is ‘MAC filtering’. You can pre-define a so-called ‘white-list’, which contains MAC addresses of the wireless clients you trust. All other wireless client with the MAC address which is not in your list will be denied by this wireless access point. - Page 42 When you see this message, the settings you made is successfully save. You can click ‘Continue’ button to back to previous page and continue on other setting items, or click ‘Apply’ button to restart the wireless access point and the changes will take effect after about 30 seconds.
-
Page 43: Configure Advanced Settings
2.7 Configure Advanced Settings This wireless access point has many advanced wireless features. Please note that all settings listed here are for experienced users only, if you’re not sure about the meaning and function of these settings, please don’t modify them, or the wireless performance might be reduced. - Page 44 When you see this message, the settings you made is successfully save. You can click ‘Continue’ button to back to previous page and continue on other setting items, or click ‘Apply’ button to restart the wireless access point and the changes will take effect after about 30 seconds.
-
Page 45: Configure Wps Setting
WPS will do the setup for you. This access point supports two types of WPS: Push-Button Configuration (PBC), and PIN code. - Page 46 WPS request. Start PIN Please input the PIN code of the wireless client you via client wish to connect, and click ‘Start PIN’ button. The ‘WLAN’ LED on the access point will be steady on when this access point is waiting for incoming WPS request.
-
Page 47: Configure Radius Server
Comparing to other wireless security measures, radius server provides user-based authentication. If your wireless client supports 802.1x user authentication, you can use the ‘Radius Server’ function to use the internal mini radius server to improve security and wireless user control. - Page 48 When you see this message, the settings you made is successfully save. You can click ‘Continue’ button to back to previous page and continue on other setting items, or click ‘Apply’ button to restart the wireless access point and the changes will take effect after about 30 seconds.
-
Page 49: Management
2.10.2 Change the IP Address of the AP You can change the IP address of this wireless access point, so it can become a part of your local network. Please remember this address or you will not be able to connect the configuration menu of this wireless access point. -
Page 50: Tools
Default IP address is: 192.168.2.250 / Subnet Mask 255.255.255.0, please configure the IP address to match your network setting and make sure this IP address is always unique on your network. You can press and hold ‘Reset/WPS’ button over 10 seconds to change the IP address back to default value if you forget the IP address you set. - Page 51 Here are descriptions of every buttons: Backup Settings Press ‘Save’ button, and you’ll be prompted to download the configuration as a file; default filename is ‘config.bin’, you can save it as another filename for different versions, and keep it on your local hard drive.
-
Page 52: Upgrade The Firmware For The Access Point
2.11.2 Upgrade the Firmware for the Access Point If there are new firmware versions of this wireless access point available, you can upgrade the firmware to the latest version to get extra functions or problem fixed. To perform firmware upgrade, please click ‘Tool’ on the left menu, and the following page will be displayed: Click ‘Browse’... -
Page 53: Reboot The Access Point
Please click ‘Reboot’ button, and a popup message will ask you again, to make sure you really want to reboot the access point: Click ‘OK’ to restart the access point, or click ‘Cancel’ to abort. Please remember all connections between wireless client and this access point will be disconnected. 52... -
Page 54: Chapter 3 Troubleshooting
Is Antenna properly installed and secured? Are you too far from your access point? Try to get closer. Please remember that you have to input ESSID on your wireless client manually, if ESSID broadcast is disabled. Try to reset the access point and see if it’s better after that. -
Page 55: Appendix A - Specification
6, 5.5, 2, 1Mbps auto fallback LEDs • Power, WLAN, LAN1~5 System Requirement • Computer or network devices with wired or wireless network interface. • Web Browser • Recommended use with Airlink101 ® Wireless N products Power • 12V / 1A Dimensions •... -
Page 56: Technical Support
Network conditions and environmental factors, including volume of network traffic, building materials and construction, mix of wireless products used, radio frequency interference (e.g., cordless telephones and microwaves) as well as network overhead lower actual data throughput rate.
Need help?
Do you have a question about the AP671W and is the answer not in the manual?
Questions and answers