
Related Manuals for Airlink101 AP431W


Summary of Contents for Airlink101 AP431W
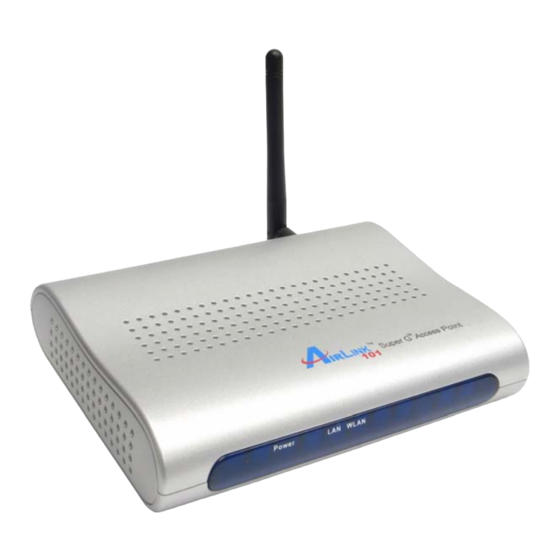
- Page 1 Super G™ Multi-Functional Wireless Access Point Model # AP431W User’s Manual Ver. 2A...
-
Page 2: Table Of Contents
1. Introduction... 3 2. Getting Started ... 4 3. Gathering Information ... 6 4. Configuring Network Address... 7 5. Using Web Configuration Utility... 14 6. Connecting to the Access Point ... 19 7. Web Configuration Utility ... 20 7.1 Primary Setup... 20 7.2 System... -
Page 3: Introduction
1. Introduction Congratulations on your purchase of this Super G™ Wireless Access Point. The Access Point features five operating modes. The Access Point mode connects your wireless clients with the wired part of your network. The AP client mode acts as a wireless network adapter for your PC or game console. -
Page 4: Getting Started
Please refer to the following diagrams to determine which operating mode you should use for your network. If you want to use the AP431W as an Access Point with minimal configuration, just connect it to your existing router or switch with a Cat. 5 network cable and then power it on. - Page 5 Step 1 Connect one end of a network cable to the Network port of the Access Point and connect the other end to one of the LAN ports of the router (See the diagram below). Step 2 Power on the Access Point by connecting one end of the supplied power adapter to the power jack of the Access Point and connecting the other end to an electrical outlet.
-
Page 6: Gathering Information
Write down the values for the IP Address, Subnet Mask, and Default Gateway on a piece of paper. Step 4 If you want to set the AP431W to a mode other than an Access Point, write down the following values for your existing wireless router or AP: 1. SSID (Network Name) 2. -
Page 7: Configuring Network Address
4. Configuring Network Address This section describes how to change your computer’s IP Address to access the Access Point’s Web Configuration Utility and then to change the Access Point’s IP Address to match your existing Network Address. Step 1 Go to Start > Settings > Control Panel > Network and Internet Connections. Step 2 Select Network Connections. - Page 8 Step 3 Right-click on Local Area Connection and select Properties. Step 4 Select Internet Protocol (TCP/IP) and click on Properties.
- Page 9 Step 5 Select Use the following IP address and enter the following: IP Address: 192.168.1.101 Subnet Mask 255.255.255.0 Click OK when done. Step 6 Click Close.
- Page 10 Step 7 Open your web browser (Internet Explorer or Netscape) and enter 192.168.1.250 in the Address Bar and press Enter. Step 8 Enter admin for both the User name and Password and click OK.
- Page 11 Step 9 Refer to the Network Settings you’ve written down from the previous section and change the first three numbers of the IP Address to match your local network address. For example: If your computer’s IP Address is 192.168.2.100, change the first three numbers to 192.168.2 as well but leave the last number...
- Page 12 Step 12 Return to Internet Protocol (TCP/IP) Properties and select Obtain an IP address automatically and Obtain DNS server address automatically and click OK. Step 13 Click Close.
- Page 13 Step 14 At the Command Prompt, type ipconfig /release and press Enter. You should see all 0’s as shown below. Step 15 Type ipconfig /renew and press Enter. You should receive a valid IP address as shown below. Step 16 Type ping 192.168.2.250 and press Enter.
-
Page 14: Using Web Configuration Utility
5. Using Web Configuration Utility You can use the Access Point’s built-in Web Configuration Utility to configure the encryption settings and operating modes. This section describes how to configure the Access Point’s wireless and security settings. Step 1 Open your Web Browser (Internet Explorer or Netscape), enter the IP Address of the Access Point (default: 192.168.1.250) in the address bar and press Enter. - Page 15 Step 3 At the Wireless section, enter the SSID (Network Name) for your wireless network and select a channel number. Step 4 You may enable encryption (authentication) for your wireless network for security purpose, or to match the encryption settings of your existing Access Point. Select an encryption mode from the Authentication drop-down list.
- Page 16 WEP (Wired Equivalent Privacy) Step 4a WEP is a basic encryption type for wireless network. • Open System and disabling encryption implies no encryption • Open System and enabling encryption implies WEP open system mode • Shared Key and enabling encryption implies WEP shared key mode •...
- Page 17 Step 4b Enable Encryption, select the same Key Type and Key Size (64-Bits / 128- Bits / 152 Bits) from the drop-down menus, as the WEP settings in your wireless network. Step 4c Enter the same key (password) of your wireless network in the First Key field and click Apply.
- Page 18 WPA-EAP Step 4d If your network uses a Radius Server, select WPA-EAP from the drop-down menu and enter all the applicable fields. Click Apply and proceed to.
-
Page 19: Connecting To The Access Point
WPA-PSK (WiFi Protected Access-Pre Shared Key) Step 4e WPA-PSK and WPA-2PSK are more secured than WEP and highly recommended. Select WPA-PSK from the drop-down menu and enter the key value in the PassPhrase. Click Apply. Step 5 For best result, place the Access Point at a central location where it is accessible to all the wireless computers. -
Page 20: Web Configuration Utility
7. Web Configuration Utility The Access Point comes with a built-in Web Configuration Utility that allows you to easily configure its various features. This section describes how to use the Web Configuration Utility. 7.1 Primary Setup Step 1 Open your Web Browser (Internet Explorer or Netscape), enter the default IP Address of the Access Point 192.168.1.250 in the Address Bar and press Enter. - Page 21 You can configure its IP Address and Wireless settings from this page.
- Page 22 MAC Address: Displays the Access Point’s MAC Address. Configuration Type: If you want the Access Point to obtain an IP address automatically from a DHCP server, then select Dynamic (DHCP). If you will assign the Access Point a static IP address, then select Static (Manual) and enter an IP Address, Subnet Mask, and Default Gateway address in the corresponding fields.
- Page 23 Super G Mode: Choose from Disable, Super G™ without Turbo or Super G™ with Dynamic Turbo as the wireless mode that your wireless network is using. Disable implies using 11b/11g. SSID: The SSID is the network name shared among all devices in a wireless network. It must be identical for all devices in the wireless network.
- Page 24 Wireless Encryption Settings Wired Equivalent Privacy (WEP) is an encryption method used to protect your data during wireless communications. These settings must be identical to your existing wireless network’s WEP settings. If your network supports WPA or WPA-PSK security, it is recommended that you use those encryptions for better security. Authentication Type: Choose between Open System or Shared Key.
- Page 25 WPA-EAP If your network uses a RADIUS server for authentication, you may select WPA-EAP as your encryption setting. Authentication Type: Choose between WPA-EAP. Cipher Type: Select the WPA Algorithm (AUTO, AES or TKIP) that your network uses. Group Key Update Interval: Enter the key renewal time in seconds. Default is 1800 seconds.
- Page 26 WPA-PSK / WPA2-PSK WPA-PSK and WPA-2PSK are more secured than WEP and highly recommended. Select WPA-PSK or WPA2-PSK from the drop-down menu and enter the key value in the PassPhrase. Click Apply. Authentication Type: Choose between WPA-PSK. Cipher Type: Select the WPA Algorithm (AUTO, AES or TKIP) that your network uses. Group Key Update Interval: Enter the desired key renewal time in seconds.
-
Page 27: System
7.2 System The System page allows you to change the Access Point’s login password as well as other administrative functions. AP Password: Enter the new login password and re-enter to confirm the new password. This is the password used for logging into the Access Point’s Web Configuration Utility. Restore Factory Defaults: Select Yes and click Apply to reset all of the settings to factory default. - Page 28 Firmware Upgrade: Click on the Firmware Upgrade button to update the firmware. You can download the updated firmware from our web site at Step 1 Unzip the new firmware. Step 2 Click on Browse to locate the new firmware and click on Firmware Upgrade to change the AP firmware.
-
Page 29: Operating Mode
7.3 Operating Mode The Operating Mode page allows you to select different functions according to your needs. Access Point: This mode allows your wireless computers to connect to your wired network. (Default mode) AP Client The AP Client mode converts the Access Point to a wireless network adapter, allowing the network device such as your computer or game console to become a wireless client. - Page 30 Step 4 Once the Access Point has restarted, you may disconnect it from the wireless router and connect it to the Ethernet port of your computer or game console, and the Access Point. AP Repeater The AP Repeater mode converts the Access Point to a wireless repeater. By extending the wireless signal of the source AP/wireless router, the wireless coverage is expanded.
- Page 31 The repeater mode may not be compatible with all routers due to the lack of a standard protocol for repeater mode. WDS (Bridge) The WDS mode converts the Access Point to a wireless bridge. It bridges the network clients from physically separate LANs into one virtual LAN. You will need to use ap431w...
- Page 32 access points throughout your network. This mode will not work if you try to use them with any other brand of access point. Step 1 Select WDS and enter the MAC address of the remote APs. Click Apply to save the changes. Step 2 Configure other Access Points in the same way.
- Page 33 LANs into one virtual LAN and allows wireless clients to connect to the network via the Access Point. You will need to use ap431w access points throughout your network. This mode will not work if you try to use them with any other brand of access point.
-
Page 34: Access Control
7.4 Access Control The Access Control page allows you to control which PCs may or may not communicate with the Access Point depending on their MAC address. Select Accept from the drop-down menu to enable Access Control. - Page 35 Enter a MAC Address, then the Save button to create a list of PCs that can communicate with the AP. Note: Each MAC address should be entered in this format: xxxxxxxxxxxx ("x" represents the actual characters of the MAC address). Click Apply to save the changes.
-
Page 36: Advanced Wireless
7.5 Advanced Wireless The Advanced Wireless page allows you to customize data transmission settings. In most cases, the advanced settings on this page should remain at their default values. Beacon Interval: The default value is 100. Enter a value between 20 and 1000 milliseconds. - Page 37 DTIM: The default value is 1. This value, between 1 and 255 milliseconds, indicates the interval of the Delivery Traffic Indication Message (DTIM). A DTIM field is a countdown field informing clients of the next window for listening to broadcast and multicast messages.
-
Page 38: Setting Status
7.6 Setting Status The Setting Status page displays the Access Point's current status and configuration. All information is read-only. -
Page 39: Help
7.7 Help The Help page provides links to online help files regarding each page of the Web Configuration Utility. - Page 40 Federal Communication Commission Interference Statement This equipment has been tested and found to comply with the limits for a Class B digital device, pursuant to Part 15 of the FCC Rules. These limits are designed to provide reasonable protection against harmful interference in a residential installation. This equipment generates, uses and can radiate radio frequency energy and, if not installed and used in accordance with the instructions, may cause harmful interference to radio communications.
-
Page 41: Industry Canada Statement
Industry Canada Statement This device complies with RSS-210 of the Industry Canada Rules. Operation is subject to the following two conditions: 1) this device may not cause interference and 2) this device must accept any interference, including interference that may cause undesired operation of the device This device has been designed to operate with an antenna having a maximum gain of 2dBi. -
Page 42: Technical Support
Technical Support E-mail: support@airlink101.com Toll Free: 1-888-746-3238 Web Site: www.airlink101.com * Super G™ technology (108Mbps) can only be obtained when using products with Atheron Super G™ chipset. * Theoretical maximum wireless signal rate based on Atheros™ Super G™ and IEEE standard 802.11g specifications. Actual data throughput will vary.
Need help?
Do you have a question about the AP431W and is the answer not in the manual?
Questions and answers