Advertisement
Quick Links
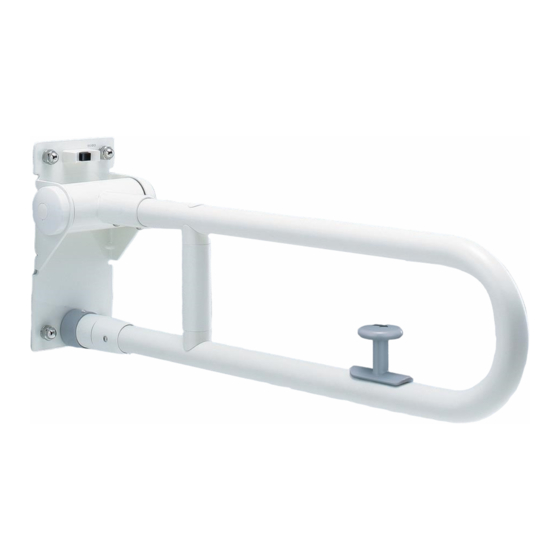
03B18SS T1
Handrail
Follow the instructions in this installation manual to fully ful ll the functions of this product. After installation, give full explanation on how to use this product to the customer.
1. Safety Precautions
Please read these "Safety Precautions" before installation, and install the product correctly.
● This instruction manual shows various symbols to
correctly install the product in order to prevent harm to
customers and other users, and damage to property.
Those symbols mean the following contents.
When this appears next a topic, this
indicates that ignoring this symbol
WARNING
and mishandling the product could
result in death or serious injury.
Do not install the product outdoor or in areas that
might be submerged.
Doing so could cause a user to fall due to the damage or coming-off
of the handrail and may result in injury.
Prohibit
Anyone other than service engineers must not
disassemble, repair, or modify the product.
Failure to observe this warning could cause a user to fall due to the
Do not
damage or coming-off of the handrail and may result in injury.
disassemble
Be sure to install this product on a strong wall or building structure.
If the product is installed directly on a wall that is not strong enough,
including a soil wall and a gypsum board wall, it may come off or the
wall may collapse, which could result in user's fall and injury.
When the product is used in wet areas such as a bathroom,
be sure to apply sealant around the mounting holes.
If sealant is not applied, water may enter the back of the wall and
cause the product to come off or the wall to collapse, which could
Required
result in user's fall and injury.
Be sure to use TOTO-designated xing brackets.
If TOTO-designated xing brackets are not used, the handrail may
come off or the wall may collapse, which could result in user's fall
and injury.
Installation manual
Resin Coating Type/Stainless Steel Type
(Be sure to observe these instructions.)
● The following symbols are used to classify and explain
instruction that must be followed.
The
symbol indicates something that is
"Prohibited." The symbol on the left indicates "Do
not disassemble."
The
symbol indicates something that "Must be
implemented." The symbol on the left indicates
"Required."
WARNING
Make sure that the base has suf cient thickness and is reinforced,
and install the handrail by the speci ed installation method.
If the base does not have suf cient thickness or is not reinforced, and if you
do not follow the speci ed installation method for each base, the handrail may
come off or the wall may collapse, which could result in user's fall and injury.
Make sure that the handrail has no backlash after the
installation is complete.
If the handrail has backlash, the handrail may come off or the wall
may collapse, which could result in user's fall and injury.
Check the installation orientation of the I type handrail for
Required
washing area in bathroom.
If the product is installed in the orientation not shown in the illustration, a part of the body
(neck, etc.) could get caught between the handrail and the wall and may result in injury.
Check the space between the handrail for Japanese-style toilet and its
surrounding xed objects and the installation position of the handrail.
Failure to do so could cause a part of the body (neck, etc.) to get caught
between the handrail and the xed object and may result in injury.
2
. Before Installation
-1
Precautions before installation
● Make sure that
the wall where the handrail is attached
● When installing the handrail in combination with a product with a photoelectric sensor,
make sure that the sensor does not detect the handrail
For the mounting positions of a product with photoelectric sensor and the handrail, see the manuals or
catalogs for products with photoelectric sensor.
● Select
an appropriate mounting method depending on the structure of the building
As the part number of the handrail and those of the wall- ( oor-) xing brackets are different, please place an
order for the xing brackets separately depending on the wall structure.
See "
3.
Fixing Brackets (Optional Parts)" for the required number of xing bracket sets.
*For installation methods not shown in this manual, contact TOTO's branch of ce, branch shop, or sales
of ce.
● See the catalogue, etc. for the handrail installation position.
1
T112 Type/T113 Type
WARNING
Reinforcement
Top
Bottom
is strong enough.
.
2021.4
No
backlash!
Wall
surface
.
Advertisement

Related Manuals for Toto T112


Summary of Contents for Toto T112
- Page 1 Fixing Brackets (Optional Parts)” for the required number of xing bracket sets. If TOTO-designated xing brackets are not used, the handrail may *For installation methods not shown in this manual, contact TOTO’s branch of ce, branch shop, or sales of ce.
-
Page 2: Before Installation
<Fixing bracket list> <Fixing bracket list> (Unit: mm) . Before Installation Part No. Shape Details of the set Name Clamping set Fixing position: 1 position M6×150 ・Continuous-thread stud: 4 pieces T110D43 About the resin coating type grip bar ・Washer: 8 pieces ・Nut: 12 pieces ●... - Page 3 . Fixing Brackets (Optional Parts) <List of the required numbers of xing brackets and those of parts to be procured in the eld> Note 6: Please place an order for T110D26 (resin plug: 20 pieces) depending on the required number of screws. The required number of screws is 8 for I type and 12 for L type. *●...
- Page 4 . Fixing Brackets (Optional Parts) T110D37×3,T110D45×3 . Completion Drawing *The drawings show resin coating type T112, and dimensions in ( ) indicate those for stainless steel type T113. (Unit: mm) Versatile I type handrail Versatile L type handrail Wall surface...
- Page 5 . Completion Drawing *The drawings show resin coating type T112, and dimensions in ( ) indicate those for stainless steel type T113. (Unit: mm) L type handrail for sitting toilet P type handrail for sitting toilet Resin coating Weight Stainless steel...
-
Page 6: Installation Workflow
5. Installation Work Flow ● Temporarily tighten T112CP21, CP22, CP23, CP28, CU22, and T113BP21, BP22, BP23 to the speci ed shape, assemble the product, and then fully tighten again. ● Make sure that the screws and bolts to be used to assemble the handrail are in the packing box. (Only for handrails to be assembled) *Fixing brackets for installing the handrail on the wall ( oor) are optional parts. - Page 7 [In the case of a custom-made product or a semi-custom-made Bolt handrail may become loose. product of T112 type/T113 type] (Washers are not used for Spring washer T112CU22.) ① Push the grip bar in such a way that the screw...
- Page 8 . Installing the Handrail Concrete base: Fixing with anchor bolts Concrete base, GL method: Fixing by embedding a mounting plate Fixing bracket part number T110D3R Fixing bracket part number T110D11,T110D62,T110D42 ① Carry out centering and then make ① Carry out centering and then make prepared holes of φ6 mm and 50 mm or more in depth for anchor prepared holes of φ6 mm and 85 mm Note 1 bolts.
- Page 9 . Installing the Handrail Concrete base/Concrete block base: Fixing with plugs (Unit: mm) <Concrete base> Fixing bracket part number T110D16,T110D26,T110D34 ・When xing with coach screws ・When xing with hanger bolts Finished wall surface Finished wall surface Concrete Note Concrete Coach screw Hanger bolt Mortar Mortar...
- Page 10 . Installing the Handrail Wooden base, Toilet booth: Fixing with coach screws and a hanger bolt (Unit: mm) Paper honeycomb Washer Wooden base: T110D15, T110D16, T110D34 Washer Finished wall surface Decorative Fixing bracket part number plywood sheet Toilet booth: T110D23, T110D35 Cover Cover Reinforcing...
- Page 11 . Installing the Handrail Wooden base: Fixing by clamping a mounting plate Concrete block base: Fixing by clamping a mounting plate Fixing bracket part number T110D11,T110D62,T110D43 Fixing bracket part number T110D11,T110D62,T110D43 ① Mount reinforcing wooden blocks of 45 to 60 ①...
- Page 12 . Installing the Handrail GL method: Fixing with anchor bolts + pipes Light-gauge steel base: Fixing a mounting plate by welding Part to be procured in the eld φ13.8 (t2) metal pipe Fixing bracket part number T110D18R Fixing bracket part number T110D11,T110D62,T110D41 ①...
- Page 13 . Installing the Handrail Light-gauge steel base: Fixing with drilling screws Light-gauge steel base: Fixing with bolts Fixing bracket part number T110D36,T110D37,T110D45 Fixing bracket part number T110D36,T110D37,T110D44 ① In the handrail mounting position, x the ① In the handrail mounting position, x the (Unit: mm) (Unit: mm) mounting bracket for light-gauge steel frames...
- Page 14 φ8-mm through holes for bolts, positions for the handrail (T114 type). to mount the handrail. *For installation methods not shown in this manual, please contact TOTO’s branch of ce, branch shop, or sales of ce.
-
Page 15: Inspection Items
8. Finishing the Connection Part 9. Inspection Items (When Using Bolts) ① After installing the handrail, fully tighten the bolt with a hexagonal wrench. After the installation is complete, con rm the following items: ② Attach the cap. Claw Claw orientation Claw Claw orientation... - Page 16 Prepared Hole Guide Precautions for use CAUTION Be sure to con rm that the prepared When you copy this sheet and use the copy, the *Cut this sheet according to the number of hole positions of the product match size of the illustration may change depending on xing positions on the walls.
Need help?
Do you have a question about the T112 and is the answer not in the manual?
Questions and answers