Table of Contents
Advertisement
Quick Links
Advertisement
Table of Contents

Subscribe to Our Youtube Channel
Related Manuals for Opus OP15


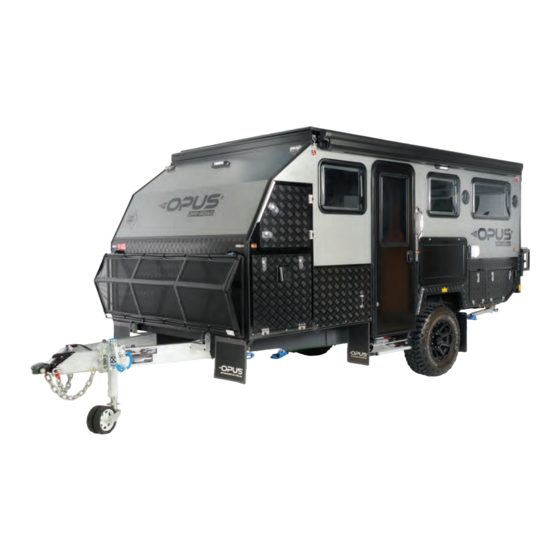
Summary of Contents for Opus OP15
- Page 1 USER MANUAL...
-
Page 2: Op15 User Manual
OP 15 USER MANUAL | version 1.0... -
Page 3: Table Of Contents
CONTENTS OP15 USER MANUAL Page 1 My OP15 Caravan Page 3 Vehicle Ide cation Number (VIN) Page 4 Spec cations Page 5 Hitching & Trailer Electrics Page 8 Brake Set Up Page 9 Setting Up your Caravan Page 10 Water System... -
Page 4: My Op15 Caravan
My OP15 Caravan OWNER: ADDRESS: MODEL: VIN: BUILD DATE: ATM: TARE: MAX PAY LOAD: TYRE SIZE: DEALER: opuscamper.com.au OP 15 USER MANUAL | version 1.0... -
Page 5: Vehicle Ide Cation Number (Vin)
VEHICLE IDENTIFICATION NUMBER (VIN) opuscamper.com.au OP 15 USER MANUAL | version 1.0... -
Page 6: Spec Cations
SPECIFICATIONS - OP15 Colour Metallic Grey Chassis 6" Hot dip galvanised chassis Construction Aluminium Frame. Aluminium composite body with checker plate. One piece walls, Floor & roof 1. King Bed 6. Bunks 2. Ensuite 7. Fridge Slide 3. Lounge Area 8. - Page 7 SPECIFICATIONS - OP15 External Suspension Heavy duty Ironman shock absorbers Jockey Wheel ARK XO750 Jockey Wheel Coupling DO35 3.5T articulated hitch Brake System 12” electric brakes, adjustable handbrake with breakaway unit Wheels/Tyres 2 x 16 inch alloy wheels with 265/75R16 mud terrain tyres & 2 x...
- Page 8 DIMENSIONS - OP15 120mm 2246mm WIDTH 6775mm LENGTH 7387mm LENGTH opuscamper.com.au OP 15 USER MANUAL | version 1.0...
-
Page 9: Hitching & Trailer Electrics
Wheel nuts should be checked after first 100km and then every 1000km. 7 PIN The OPUS® is fitted with a 7-pin flat plug that connects all the exterior trailer lighting and the electric brakes to the towing vehicle. A standard 7 pin plug is required on your tow vehicle for this to connect to. -
Page 10: Brake Set Up
BRAKE SET UP About your brakes The OPUS® is fitted with electric brakes. Your tow vehicle will need an electric brake controller fitted in order to tow the caravan and operate the electric brakes safely. Before towing, check that the caravan brakes are on. -
Page 11: Setting Up Your Caravan
Setting Up your Caravan Initial Steps Once you have positioned your OPUS® on level ground in the desired location, engage Raise or lower jockey wheel to level the handbrake. Levelling ramps may be your caravan lengthways. required (not supplied). Enter the caravan and push the lift arms... - Page 12 Setting Up Your Caravan Initial Steps Unlatch both jerry can holders and place them Unlatch the rear door from outside and as shown. lift the door outwards. Unlatch and unfold fully each side panel. Unfold the rear floor and wall fit into place. IMPORTANT Make sure to latch &...
- Page 13 Awning Setup Start unwinding the awning as Unwind the awning completely shown using winding stick located in as shown. the front tunnelboot. Adjust the awning height using thumb Take out awning legs from both sides. screw in the awning leg. Slideout hinge of the awning leg as shown in the second photo IMPORTANT before put them down in the floor...
-
Page 14: Water System
Water System The OPUS® is fitted with two freshwater tanks. Each tank has its own lockable fill point on the driver side of the van and is plumbed to a 12v switchable water pump located on the circuit board. The pump supplies water to the slide-out kitchen, internal sink and ensuite. -
Page 15: Hot Water Service
Hot Water Service The OPUS® is fitted with a hot water service IMPORTANT operated on gas or/and electricity. For faster heating up period the appliance can be Please refer to hot water system simultaneously operatedwith gas and user manual for instructions electrical power. - Page 16 Hot Water Service Electrical Operation (240V) Remove the cowl cover which is located in driver side of the OPUS®. Make sure pump switch turned on in the main switch board. Make sure hot water system plugged in and switch is turned on. Switch is located under bed next to battery compartment.
-
Page 17: Gas System
Keep pressing the button until the gas has had time to fill up the system and the burner will ignite. Ensure that the gas bottle valve is closed prior to packing up the OPUS® for transit or storage. The OPUS® has two gas outlet bayonet fittings. At each point there is an on/off valve located right behind the gas outlet. -
Page 18: 240 Volt Mains Power
The OPUS® comes fitted with a The main 15Amp power input is found on the 240-volt power system. driver’s side of the OPUS®. There are 4x internal and 1x External 240V power points. Under the bed The main circuit breaker and storage area there are 3 240V power points one for RCD is in the main switch board. -
Page 19: 12 Volt Power
12 Volt Power 12 Volt - Safe operating procedures The OPUS® has many 12V outlets - they are a combination of standard 12V sockets, mini 12V sockets, USB sockets and switches. IMPORTA You will find their location as follows: In the front toolbox / fridge compartment In the same area there is a small switch there is a standard 12V fridge socket. - Page 20 12 Volt Power Next to the picnic table there is Externally at the rear passage side next to the a twin 12V USB socket. kitchen slide-out there are two additional 12V mini sockets and a standard 12V socket. The two mini sockets are designed to operate the 12V LED light on the kitchen and a small annexe light.
- Page 21 It is recommended to have the mains 240V connected to a suitable supply if available, even if appliances are run on 12V only. The trailer lights and electric brakes are wired to a standard 7 pin trailer plug. The OPUS® is fitted with electric brakes.
-
Page 22: Care & Maintenance
BE STORED WET/DAMP STORAGE It is strongly advised that you purchase a storage cover for your OPUS® if it is to be stored in an uncovered location. The storage cover is advised for an extended period of storage to keep your caravan in pristine condition. -
Page 23: Internal Features
Internal Features Radio and speakers 12V CIG & USB sockets Fire extinguisher Ensuite opuscamper.com.au OP 15 USER MANUAL | version 1.0... - Page 24 Internal Features Toilet Jockey wheel Please refer to toilet user manual for instructions Batteries & charger Hot water service Please refer to battery & battery charger user manuals for instructions Please refer to hot water system user manual for instructions opuscamper.com.au OP 15 USER MANUAL | version 1.0...
-
Page 25: Storage
Storage Driver side storage Passenger side Fridge slide storage opuscamper.com.au OP 15 USER MANUAL | version 1.0... -
Page 26: Warranty
5 Year Suspension Warranty 3 Year Canvas & Tent Warranty 5 Year Structural Warranty OPUS warranties apply for the use of your OPUS on any road or track that is trafficable to normal four-wheel-drive vehicles. VALIDITY OF CLAIMS Warranties are valid to the original purchaser of the item in question and apply from the original date of purchase. - Page 27 Warranty OPUS® Caravans are designed for use on any road or track that is trafficable to normal four-wheel-drive vehicles. OPUS® Caravans can be exposed to water crossings where the water is below body floor level, but never where the water is at, or above, body floor level.
- Page 28 All warranty claims should be lodged by contacting your dealer directly. CONTACT If you have any further questions relating to warranties, or are unsure about any aspect of this section, please visit www.opuscamper.com.au/warranty or contact OPUS. Phone: (03) 9588 2959 Email: enquiries@opuscaravan.com.au Head to www.opuscamper.com.au/warranty for more information...
-
Page 29: Service Schedule
Service Schedule SERVICE INTERVAL 3 MONTHS 1 YEAR 2 YEARS 3 YEARS 5 YEARS 4 YEARS Check coupling moves freely and is lubricated Torque coupling bolts Check safety chain and drawbar for rust Check jockey wheel rotates, lifts and spins freely Test handbrake Check tyre wear and age... -
Page 30: Torque Guide
Torque guide LOCATION BOLT SIZE BOLT GRADE TORQUE Coupling 12 mm 80 Nm Hand Brake 12 mm 80 Nm Jockey Wheel 12 mm 80 Nm Stone Shield 10 mm 22 Nm Tool Box 10 mm 22 Nm Drop-down Legs 10 mm 22 Nm Suspension pivot 14 mm... -
Page 31: Notes
Notes opuscamper.com.au opuscamper.com.au OP 15 USER MANUAL | version 1.0... - Page 32 Notes opuscamper.com.au opuscamper.com.au OP 15 USER MANUAL | version 1.0...
- Page 33 SHARE YOUR FEEDBACK PURPLE LINE PTY LTD 13 INDIAN DRIVE KEYSBOROUGH VIC 3172 AUSTRALIA WEB: WWW.PURPLELINE.COM.AU TEL: 03 9588 2959 EMAIL: ENQUIRIES@PURPLELINE.COM.AU FIND US ON FACEBOOK INSTAGRAM & YOUTUBE...
Need help?
Do you have a question about the OP15 and is the answer not in the manual?
Questions and answers