
Subscribe to Our Youtube Channel
Related Manuals for Opus Air OPUS OP2


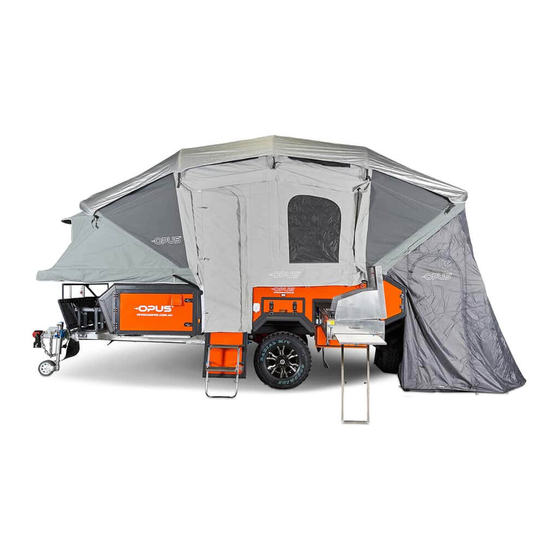
Summary of Contents for Opus Air OPUS OP2
- Page 1 PCT Patent Pending GB/2017/050391 & Australian Patent Pending 2017220045, 2018204104 Design registration No OWNERS 201714813, 201714812, 201714811, 201714810 HANDBOOK...
- Page 2 PCT Patent Pending GB/2017/050391 & Australian Patent Pending 2017220045, 2018204104 Design registration No 201714813, 201714812, 201714811, 201714810...
-
Page 3: Table Of Contents
Setting Up your Air OPUS® Camper Page 10 - 11 Understanding the Air OPUS® Switchboard Page 12 Understanding the air valves when setting up your Air OPUS® Camper Page 13 Air OPUS® Water System Page 14 -15 Air OPUS® Gas System Page 16 Air OPUS®... -
Page 4: Vehicle Identification Number (Vin)
Every Air OPUS® has a Vehicle Identification Number (VIN). The VIN Plate can be found on the exterior of your Air OPUS® to the left of the door secured, to the draw bar. We recommend making a note of your VIN in the template below. - Page 5 SPECIFICATIONS - 2 SLEEPER Body Work Baked enamel finish 2 Box Material Main body aluminium f rame & composite panel exterior, with galvanlized steel chassis and draw bar Dimension (Closed) 5695 x 2025 x 1730 Dimension (Open) 6580 x 2605 x 3500 Ground clearance 490mm Ride Height...
- Page 6 SPECIFICATIONS - 2 SLEEPER Electrical Power Supply 12V & 240V Towing 7 PIN flat plug & Anderson plug Stereo System Stereo System with 2x speakers, Radio, USB inputs, CD & DVD player Battery 2x 100Ah deep cycle AGM batteries with 240V charger Trailer Lights LED tail lights, clearance lights, internal lights, number plate light, tool box lights, kitchen light, annexe light...
-
Page 7: Dimensions
DIMENSIONS - 2 SLEEPER 2025mm with roof rack 1950mm 6580mm 5695mm opuscamper.com.au... - Page 8 11 QUICK TIPS TO SET UP AND PACK UP YOUR AIR OPUS® TIP 4 Invest in a cordless drill and When 19mm hex head bit to adjust operating stabiliser legs rather than the winches manually winding them. ensure that the winch strap remains flat when...
- Page 9 11 QUICK TIPS TO SET UP AND PACK UP YOUR AIR OPUS® During canopy inflation make sure During annexe inflation make sure the air valves all external air valves are closed off are closed off before turning air pump on BUT...
-
Page 10: Hitching & Trailer Electrics
first 100km and then 7 PIN FLAT PLUG every 1000km. The Air OPUS® is fitted with a 7-pin flat plug that connects all the exterior trailer lighting and the electric brakes to the towing vehicle. A standard 7 pin plug is required on your tow vehicle for this to connect to. -
Page 11: Air Opus® Brake Set Up
The Air OPUS® is fitted with electric trailer brakes. You need an electric brake controller fitted to your car in order to tow the Air OPUS® and operate the electric brakes safely. Before departing, place car in drive and check that the Air OPUS®... -
Page 12: Setting Up Your Air Opus® Camper
SETTING UP YOUR Air OPUS® CAMPER Initial Steps Once you have positioned & leveled your Air OPUS® on flat ground (leveling wedges may be required - not supplied), engage the handbrake & disconnect hitch, wiring & chains f rom tow vehicle. - Page 13 Once lid is fully open and resting against stone guard secure in place using latch provided At this stage walk around the Air OPUS® and inspect the tent to ensure that the canvas is properly located within the aluminium channels and that no part of the tent is caught or snagged.
-
Page 14: Understanding The Air Opus® Switchboard
UNDERSTANDING THE Air OPUS® SWITCHBOARD Main features of your switchboard 1 Main Power Key Switch 8 Air Pump Master Switch 2 Front Pump 9 Air Inflation Button 3 Rear Pump 10 Battery Level Indicator 4 Fridge Master Switch 11 Volt/amp Gauge... - Page 15 UNDERSTANDING THE AIR VALVES WHEN SETTING UP YOUR Air OPUS® CAMPER When inflating turn the Main Check all 5 outside valves Inflation valve switch (inside are closed. camper) to a Vertical OPEN position by rotating anticlockwise. Tube/ Air Valve /...
-
Page 16: Air Opus® Water System
Water System Set up The Air OPUS® is fitted with two f resh water tanks, with one unit mounted in f ront of the axle and the other unit mounted behind the axle. Each water tank has its own lockable fill point located on the driver side of the body of the Air OPUS®... - Page 17 The kitchen sink is connected with a short hose with fitting attached, this is to be plugged into the water outlet connection on the Air OPUS® and the water intake on the kitchen, which is only accessible when the kitchen is fully extended.
-
Page 18: Air Opus® Gas System
Follow safe operating procedures with gas at all times: • Ensure good ventilation throughout, at ALL times • Do not use any other gas systems than those provided with the Air OPUS® camper inside the tent • Always turn off the shut off valve IMMEDIATELY after use. -
Page 19: Air Opus® 240 Volt Mains Power
first 240V outlet and the second outlet is located in the f ront D/S storage. The external power point is located on the passenger side of the Air OPUS® in f ront of the wheel arch. Regular battery maintenance checks (charge every 2-3 weeks) will prolong the life of your batteries as AGM/Deep Cycle Batteries do not rejuvenate well f rom flat. - Page 20 Refer to your battery charger instruction manual for further details. TOWING WIRING The trailer lights and electric brakes are wired to a standard 7 pin trailer plug. The Air OPUS® is fitted with electric brakes. While in transit if the tow vehicle has the Anderson Plug connected this will also be topping up the batteries.
-
Page 21: Air Opus® Fridge Slide
Air OPUS® FRIDGE SLIDE Your Air OPUS® is supplied with a powered f ridge slide to mount your 12V travel f ridge. LIGHT The f ridge drawer has a sensor-activated light inside for ease of use at night time. This light will only run if the “Light”... -
Page 22: Setting Up The Additional Day Bed
SETTING UP THE ADDITIONAL DAY BED Seating moved to create additional bed The seating area inside the Air OPUS® can be reconfigured as shown. opuscamper.com.au... -
Page 23: Installing Your Air Opus® Annexe
Then connect left and right corners of the annexe to the corners of the OPUS camper. STEP 2B Connect roof air inflation point to the Opus tent. opuscamper.com.au... - Page 24 Spread annexe canvas out f rom the camper as shown Inflating the annexe when attached to canopy Make sure the 5 valves on the Opus camper tent are closed and inflate the main tent STEP 4 whilst the annexe attached.
- Page 25 INSTALLING YOUR Air OPUS® ANNEXE Inflating the annexe when attached to canopy continued... After main pump shuts off it has reached the desired pressure. Remember to turn the STEP 8 main inflation valve in the camper to the horizontal CLOSED position when inflation is complete.
-
Page 26: Installing Your Air Opus® Ensuite
INSTALLING YOUR Air OPUS® ENSUITE Attaching annexe to canopy Using the toggle provided, zip the ensuite top onto the end air beam over your spare wheel. Peg down each corner/base to tension the room. You may also wish to use the guide ropes provided to retain the shape of the room. - Page 27 INSTALLING YOUR Air OPUS® ANNEXE Changing a faulty bladder when product is not inflated/in use Locate the faulty air beam and check that STEP 1 all valves are closed on the beam. STEP 2 Remove linking air tube f rom faulty beam.
-
Page 28: Air Opus® Care & Maintenance
MUST be done within the next 24 hours. It is strongly advised that you purchase a storage cover for your Air OPUS® if it is to be stored in an uncovered location. A storage cover is advised if your camper is left exposed to the elements. - Page 29 CARING FOR YOUR CANVAS In order for the Air OPUS® to give you years of camping pleasure, the tent and annexe need to be cared for and MUST NOT be left wet/damp when packed away. If it is unavoidable that you will have to pack down your Air OPUS®...
- Page 30 AND MAINTENANCE EXTERNAL CARE FOR YOUR AIR OPUS® Inspect the outside panels of your Air OPUS® including the roof (bed lids) for any damage or cracks. Inspect the sealant around the panels to verify that there is adequate bonding around the body panels and exterior features such as the f ront storage box/f ridge cabinet.
- Page 31 If in storage for a long period of time such as 4 weeks or longer, its recommended to open and let it breathe for 24 hours. If the Air OPUS® is based in tropical warm areas eg. NSW, QLD, NT etc.
- Page 32 When cooking in the Air OPUS® Annexe it is crucial to ensure the ventilation vents located above and below kitchen slide out are clear and not covered.
-
Page 33: Air Opus® Warranty
fittings and fixtures, plus the following specific warranties: 5 Year Suspension Warranty 3 Year Canvas & Tent Warranty 5 Year Structural Warranty OPUS warranties apply for the use of your OPUS on any road or track that is trafficable to normal four-wheel-drive vehicles. IMPORTANT VALIDITY OF CLAIMS Warranties are valid to the original purchaser of the item in question and apply f rom the original date of purchase. - Page 34 OPUS Campers are designed for use on any road or track that is trafficable to normal four-wheel-drive vehicles. OPUS Campers can be exposed to water crossings where the water is below body floor level, but never where the water is at, or above, body floor level.
- Page 35 There are no warranties, refunds, credits, exchanges or similar associated with such items. In the sale of such items, OPUS will attempt to provide all relevant information regarding the item, including faults, defects, or similar, however, there may be instances where minor defects or imperfections have been overlooked.
- Page 36 OPUS® Service Schedule 1000 KM 10000 KM 20000 KM 30000 KM 50000 KM 40000 KM SERVICE INTERVAL 3 MONTHS 1 YEAR 2 YEARS 3 YEARS 5 YEARS 4 YEARS Check coupling moves f reely and is lubricated Torque coupling bolts...
- Page 37 OPUS® Bolt Torque Guide LOCATION BOLT SIZE BOLT GRADE TORQUE Coupling 12 mm 80 Nm Hand Brake 12 mm 80 Nm Jockey Wheel 12 mm 80 Nm Stone Shield 10 mm 22 Nm Tool Box 10 mm 22 Nm Drop-down Legs...
- Page 38 NOTES opuscamper.com.au...
-
Page 39: Pct Patent Pending Gb/2017/050391 & Australian Patent Pending 2017220045
PCT Patent Pending GB/2017/050391 & Australian Patent Pending 2017220045, 2018204104 Design registration No 201714813, 201714812, 201714811, 201714810 For further information please contact the Air OPUS® team 03 9588 2959 enquiries@opuscamper.com.au Find us on Facebook & Instagram opuscamper.com.au Photographs and diagrams are for illustration purposes only. Actual product may vary and any specifications are subject to change without prior notice.
Need help?
Do you have a question about the Air OPUS OP2 and is the answer not in the manual?
Questions and answers