Table of Contents
Advertisement
Quick Links
© 2004 Electronic Arts Inc. Need for Speed, EA GAMES, the EA GAMES logo and Electronic Arts are trademarks or registered trademarks of Electronic Arts
Inc. in the U.S. and/or other countries. All rights reserved. EA GAMES™ is an Electronic Arts™ brand. The trademarks Lamborghini, Diablo 6.0 VT,
Murciélago and all associated logos are used under license of Lamborghini ArtiMarca S.p.A., Italy. Aston Martin V12 Vanquish used under license from
Aston Martin Lagonda Limited, Ford Motor Company. The BMW logo, wordmark and model designations are trademarks of BMW AG and are used under
license. Dodge is a registered trademark of DaimlerChrysler Corporation. The Dodge® Viper GTS model and its trade dress is used under license from
DaimlerChrysler. © DaimlerChrysler Corporation 2004. Ford nameplates are registered trademarks owned and licensed by Ford Motor Company. General
Motors Trademarks are used under license to Electronic Arts Inc. The word "Jaguar", the leaping cat device and the characters "XKR" are trademarks of
JAGUAR CARS LTD, ENGLAND and are used under license. Elise, Lotus and Lotus Round Device are registered trade marks of Group Lotus plc. "Mercedes",
"Mercedes Benz", "CL" and "CLK" are trademarks of DaimlerChrysler. Licensed from Dr. Ing. h.c. F. Porsche AG under certain Patents. Porsche, 911, and
Carrera are registered trademarks of Dr. Ing. h.c. F. Porsche AG. McLaren, McLaren Cars Ltd., McLaren F1, McLaren F1LM are trademarks of McLaren Cars
Ltd. Global VR and the Global VR logo are trademarks of Global VR, Inc. All other trademarks are the property of their respective owners. U.S. Patent Nos.
5,269,687; 5,354,202; and 5,577,913 used under license from Midway Games West Inc.
GLOBAL VR IS AN AUTHORIZED ELECTRONIC ARTS DISTRIBUTOR.
Need For Speed™ GT
System Documentation
040-1201-01 Rev. C
Read this manual before use.
Keep this manual with the machine at all times.
www.globalvr.com
service.globalvr.com
techsupport@globalvr.com
408-597-3400
Advertisement
Table of Contents
Troubleshooting

Related Manuals for Global VR Need For Speed GT Standard


Summary of Contents for Global VR Need For Speed GT Standard
- Page 1 Carrera are registered trademarks of Dr. Ing. h.c. F. Porsche AG. McLaren, McLaren Cars Ltd., McLaren F1, McLaren F1LM are trademarks of McLaren Cars Ltd. Global VR and the Global VR logo are trademarks of Global VR, Inc. All other trademarks are the property of their respective owners. U.S. Patent Nos.
-
Page 2: Table Of Contents
Setting Game Options and Resets ....23 Computer Rear Panel Diagram ......56 Machine Menu ..........24 Technical Support ..........57 Game Options ..........25 Warranty Service........57 Game Resets ..........26 Warranty Information ........58 Coin Stats ............ 27 GLOBAL VR 040-1201-01 Rev. C 5/28/2004... -
Page 3: Chapter 1
Do not block cooling vents. Warnings To avoid electrical shock, unplug the cabinet before performing the installation procedures. GLOBAL VR assumes no liability for any damages or injuries incurred while setting up the cabinet. Only qualified service personnel should perform this installation! Environmental Conditions Cabinet is intended for indoor use only. -
Page 4: Regulatory Notices
Plug the computer into a different outlet so that the computer and the receiver are on different branch circuits. If necessary, consult a Regulatory EMC representative of GLOBAL VR or an experienced radio/television technician for additional suggestions. You may find the FCC Interference Handbook, to be helpful. It is available from the U.S. -
Page 5: Need For Speed™ Description
Need For Speed™ Description GLOBAL VR presents full-throttle driving action with Need For Speed™. Get behind the wheel of the world’s top high-performance cars, including the 450-horsepower Dodge Viper GTS, the nimble Lotus Elise, the BMW Z8 and the fastest production Corvette ever made, the Z06. With a mix of high-end American muscle and top European exotics, Need For Speed has cars that will appeal to all players. -
Page 6: Cabinet Models
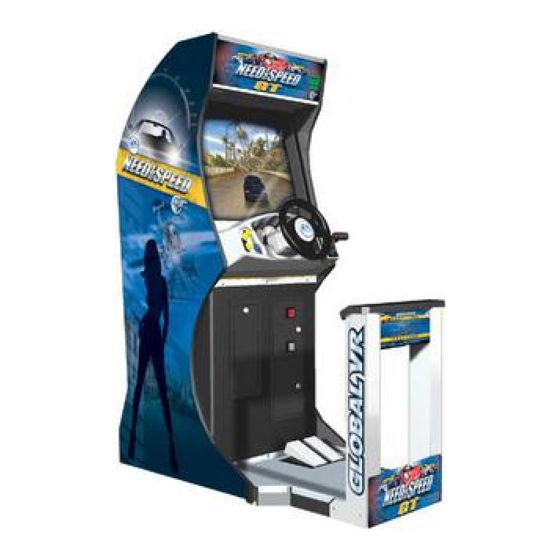
Width = 34" Depth = 62" Width = 27" UPRIGHT STANDARD Height = 82" Deluxe Monitor Console Deluxe Driving Console Driving Seat Depth = 84" Width = 40" DELUXE Figure 1 – Cabinet Styles GLOBAL VR 040-1201-01 Rev. C 5/28/2004... -
Page 7: Chapter 2
Figure 2 – Coin Door and Cash-Box Door 3. Open the cash-box door and remove the loose parts inside the cash box. You will find the following items (may vary with cabinet style): – GLOBAL VR Instruction Manual (this document) – 10/100 Base-T Network cable –... -
Page 8: Standard Cabinet Installation
(4x) ¼-20 T-25H Torx screws with lock washers and fender washers. Repeat for each side of the driving seat. See item B of Figure 4. Figure 4 – Attaching the Driving Seat to the Runners GLOBAL VR 040-1201-01 Rev. C 5/28/2004... -
Page 9: Standard Cabinet Marquee Setup
CHAPTER 2 – INSTALLING A NEW CABINET Standard Cabinet Marquee Setup 1. Rotate the marquee forward towards the front of the cabinet as shown in Figure 5. Figure 5 – Installing the Standard Cabinet Marquee 2. Install the marquee support bracket on the backside of the marquee using (6x) ¼-20 x 1" hex bolts. Install the bracket with the sharper angle towards the top of the marquee. -
Page 10: Deluxe Cabinet Installation
3. Slide the driving console onto the rails. Leave enough room between the two consoles so that you can get your hand in and connect the wiring harnesses between the 2 consoles. See the figure above. GLOBAL VR 040-1201-01 Rev. C 5/28/2004... - Page 11 CHAPTER 2 – INSTALLING A NEW CABINET 4. On the monitor console, there are 3 wires hanging out the right-side hole. See the figure below. These connect to separate PCB cards on the back of the driving console. – (1) is a 6-pin connector that runs to the monitor control panel behind the coin door. –...
-
Page 12: Deluxe Cabinet Driving Seat Installation
If the holes in the rail do not line up with the holes in the cabinet, insert a small screwdriver in the hole of the cabinet to slide the rails into place so the bolts will connect with the mounting holes. The deluxe cabinet is now ready for game play. GLOBAL VR 040-1201-01 Rev. C 5/28/2004... -
Page 13: Upright Cabinet Installation
CHAPTER 2 – INSTALLING A NEW CABINET Upright Cabinet Installation Standard Upright Installation When used in the standard configuration, without a driving seat, the upright cabinet requires no additional installation. The driving pedal components are shown in Figure 13. These components need to be removed and reconfigured if the optional seat assembly is installed. - Page 14 11. If desired, secure the sides of the tread-plate panel to the cabinet using (4x) 3/4" wood screws. The upright cabinet with seat assembly is now ready for game play. GLOBAL VR 040-1201-01 Rev. C 5/28/2004...
-
Page 15: Linking Cabinets
CHAPTER 2 – INSTALLING A NEW CABINET Linking Cabinets You can link up to 4 cabinets together for head to head competition. The necessary cables and hardware are provided with each game to link 2 cabinets together. A NFS Linking Kit is required to link more than 2 cabinets together. -
Page 16: Installing An External Monitor
6. Press the Tab key to move the highlight down to the box labeled Other Places. 7. When Other Places is highlighted, use the cursor keys to move the highlight to the item, Control Panel. The control panel will be displayed: Figure 18 – Selecting the Display Control Panel GLOBAL VR 040-1201-01 Rev. C 5/28/2004... - Page 17 CHAPTER 2 – INSTALLING A NEW CABINET 8. Move the highlight to the item Display and press Enter. This will show the Display control panel. 9. Use the Tab and cursor keys to highlight the Themes tab, and then use the left/right cursor keys to move to the Settings tab.
-
Page 18: Checking And Setting The Computer Clock
4. Type cmd into the dialog box and press Enter. This will launch a terminal window. 5. Type date and press Enter. The current date will display. 6. If the date is correct, type exit to close the window and return to the game. GLOBAL VR 040-1201-01 Rev. C 5/28/2004... -
Page 19: Checking Game Dongle
CHAPTER 2 – INSTALLING A NEW CABINET 7. If the date is not correct, type in a new date. The format is <month> / <day> / <year>. For example, you might type in 6/1/2004, and the press Enter. The date is now set. Type exit to close the window and return to the game. -
Page 20: Chapter 3
8. When the computer restarts, it will display the message “XP Embedded Install. Finalizing settings... Please wait for reboot.” Allow this process to finish. The computer will eventually reboot itself. DO NOT INTERRUPT THIS PROCESS OR PRESS ANY KEYS UNTIL COMPLETE. GLOBAL VR 040-1201-01 Rev. C 5/28/2004... - Page 21 CHAPTER 3 – UPGRADING AN OLDER CABINET 9. When the automatic reboot is complete, you will see a black screen with the Windows Start menu and taskbar. 10. Open the CD drive and insert Need For Speed Disk 1 of 2. The installer will automatically start (wait about 30 seconds).
-
Page 22: Upgrading The Marquee - Standard Cabinet
6. Tilt the hinged marquee cover plate back in place and reinstall the (9x) screws. Marquee Retainer Blocks Marquee Artwork Rear Hinged Marquee Cover (9x) Screws and Washers SWING OPEN Figure 26 – Deluxe Cabinet Marquee GLOBAL VR 040-1201-01 Rev. C 5/28/2004... -
Page 23: Chapter 4
CHAPTER 4 – GAME SETUP Chapter 4 --- - Game Setup This chapter describes how to use the Game Operator menu to perform basic cabinet set up. All game audits, game adjustments, and control diagnostics are options of the Game Operator Menu. Press the red operator button behind the coin mech door as shown in the figure below: Figure 27 –... -
Page 24: Machine Menu
The maximum allowed value is 3.97. • Cabinet Link ID#. Sets the Cabinet ID number for linked cabinets. Each cabinet you link must have a unique Cabinet ID number (1, 2, 3, or 4). GLOBAL VR 040-1201-01 Rev. C 5/28/2004... -
Page 25: Game Options
CHAPTER 4 – GAME SETUP Game Options Figure 30 – Setting Game Options The Game Options menu is used to set up the type of money or credits used at your location, the amount of coins that are needed to start a game, and game play difficulty. •... -
Page 26: Game Resets
Skill Level on All Racetracks • Reset Coin Stats. Resets the Coin Stats for the cabinet. • Reset Game Stats. Resets the Game Stats on the cabinet. • Reset Track Records. Resets the Track Records for the cabinet. GLOBAL VR 040-1201-01 Rev. C 5/28/2004... -
Page 27: Coin Stats
CHAPTER 4 – GAME SETUP Coin Stats Figure 32 – Checking Coin Statistics The Coin Stats menu shows the total number of coins collected for the cabinet, as well as the last date and time the stats were reset. The Coin Stats can be reset through the Game Resets menu. Game Stats Figure 33 –... -
Page 28: Controls Menu
Start Button, Leader Light and Brake Light. When you enter the Controls Menu, the Start button, Leader Light and Brake Lights on the cabinet will begin to blink. If you do not see these lights blinking, verify the bulb for that light is in working condition. GLOBAL VR 040-1201-01 Rev. C 5/28/2004... -
Page 29: Monitor Calibration Test
CHAPTER 4 – GAME SETUP Monitor Calibration Test When you begin the Monitor Calibration Test, use the Music button to start the test, and the View button to scroll through the screens. To exit the Monitor Calibration Test, press the Horn button or the Operator button. See below. -
Page 30: Sound Test
You should verify the audio connections on the computer to the u5.1AMP board if you find that sound is coming from the wrong speaker, or your speakers are not working properly. GLOBAL VR 040-1201-01 Rev. C 5/28/2004... -
Page 31: Chapter 5
CHAPTER 5 – PLAYING A GAME Chapter 5 --- - Playing a Game Starting a Game With the proper amount of coins inserted, press the red Start button next to the steering wheel. Begin by choosing the track. Each track is rated by difficulty of play: Easy, Medium, or Hard. Turn the Steering wheel to highlight the track you want to race, and use the gas pedal to select. - Page 32 Once you have selected the available options for the track and your car, the game will begin to load. The next screen shows the other players that are racing against you, and how each car is setup in the race: Figure 41 – Competitor List GLOBAL VR 040-1201-01 Rev. C 5/28/2004...
-
Page 33: Playing A Game
CHAPTER 5 – PLAYING A GAME Playing a Game Use the Steering Wheel, Gas, Brake and Shifter as in any driving game to control the car. The buttons can enhance the game play by allowing you to look behind the car, change the view from the inside the car to the front bumper, and honk at other cars. -
Page 34: Chapter 6
Figure 43 – Cabinet Dimensions Hardware Features – Pentium 4 computer – Nvidia GeForce 4 graphics – 1 Gigabyte DDR RAM – 32-bit color – Force-Feedback Steering – 800 x 600 Super VGA monitor GLOBAL VR 040-1201-01 Rev. C 5/28/2004... -
Page 35: Troubleshooting
CHAPTER 6 – SERVICE Troubleshooting Video Troubleshooting Problem Cause Possible Solution No picture on Power problem Verify the AC power connection to the monitor. You can monitor verify that the monitor has power by looking for a small glow in the neck of the CRT. Bad video cable Verify that the video cable is firmly connected from the monitor to the video card on the computer. -
Page 36: Audio Troubleshooting
Operator Menu to verify each speaker is working. Bad Wiring Turn off the cabinet. Verify that all the wires are firmly connected to each speaker. Verify that no wires are frayed or improperly shorting to ground. GLOBAL VR 040-1201-01 Rev. C 5/28/2004... -
Page 37: Computer Troubleshooting
CHAPTER 6 – SERVICE Computer Troubleshooting Cause Possible Solution Problem No video Loose or bad video Verify the video card is firmly plugged into the AGP slot on card the computer. When the computer is ON verify the fan on the video card is spinning and working properly. -
Page 38: Control Troubleshooting
Bad immersion board Verify that the immersion boards are getting 24 volts DC power. Verify the 25amp fuse on the immersion power board is not blown. Test the faulty immersion force feedback boards on a working cabinet. GLOBAL VR 040-1201-01 Rev. C 5/28/2004... -
Page 39: Cabinet Linking Troubleshooting
CHAPTER 6 – SERVICE Cabinet Linking Troubleshooting Problem Cause Possible Solution Cabinet will not Bad Wiring Verify that an Ethernet cable is connected between the Connect Ethernet port on the A/C power panel and the computer. While the cabinet is powered on and connected to another cabinet, check the green LED is lit to verify a good hardware connection. -
Page 40: Miscellaneous Troubleshooting
Faulty bill validator Verify the bill validator is powered on and working. If the bill validator is faulty it will usually blink an error code on the inside of the coin door. GLOBAL VR 040-1201-01 Rev. C 5/28/2004... -
Page 41: Cabinet Service
CHAPTER 6 – SERVICE Cabinet Service GLOBAL VR assumes no liability for any damages or injuries incurred while servicing the cabinet. As such, only qualified service personnel should perform service and installation of cabinet hardware! Always turn the cabinet off and unplug the power cord from wall before performing any repair work. -
Page 42: Driving Control Panel Service
(A) located on the Force Feedback motor frame. The 24 Volt DC Force Feedback power supply (B) connect directly to the Immersion Force Feedback Controller cards. Do not connect the Force Feedback power supply directly to the Force Feedback motor, as this will damage the motor and the power supply. GLOBAL VR 040-1201-01 Rev. C 5/28/2004... -
Page 43: Driving Control Panel Button Service
CHAPTER 6 – SERVICE You can remove the force feedback motor, sensor, or belt if they ever need repair. Always replace the belt between the motor and the steering column if it looks cracked or worn. See the figure below. Figure 47 –... -
Page 44: Monitor Service
At the top of the cabinet fold the Marquee forward and remove the two Phillips screws holding the top of the monitor cover to the cabinet. See the following figure: Figure 50 – Releasing the Driving Control Panel and Marquee GLOBAL VR 040-1201-01 Rev. C 5/28/2004... -
Page 45: Wells Monitor Chassis Pcb Removal
You can uninstall the monitor chassis PCB if you should have problems with just the PCB. Only a certified technician should perform the service steps to remove the PCA. GLOBAL VR assumes no responsibility for damage while removing the PCB. - Page 46 PCB. Be sure to remember the color alignment of this connector when installing the new monitor chassis PCB (Item 3 below). 4. You can now slide the monitor chassis PCB and other PCB’s out the side of the monitor as one unit. GLOBAL VR 040-1201-01 Rev. C 5/28/2004...
-
Page 47: U5.1 Amp And Speakers Service
CHAPTER 6 – SERVICE U5.1 AMP and Speakers Service The u5.1AMP supports 6-channel 5.1 Surround Sound. The u5.1AMP is powered by the external PC power supply and connects using two of the standard PC power supply connectors. A fuse has been installed on the board to help prevent any electrical damage to the board. -
Page 48: Computer Service
Figure 55 – Unbolting the Computer When shipping the computer, always use plenty of padding and protection. GLOBAL VR recommends shipping the computer with 3 inches of foam padding on all sides. Shipping the computer inside a box that has insufficient padding can void the warranty if the computer is visibly damaged from shipping. -
Page 49: Pedal Assembly
CHAPTER 6 – SERVICE Pedal Assembly The pedal assembly installs as one unit. To remove the pedal assembly you will need to unplug the pedal cable assembly from the wire harness from the backside of the cabinet, as shown by the arrow in the picture below. Then remove the (4x) 1/4-20H Security Torx bolts as shown by the arrows. -
Page 50: External Pc Power Supply
Torx bit for the screws. Remove the screws holding the artwork or speaker grills. The speaker wires can be removed from the speakers from the back side of the marquee sign. Figure 60 – Accessing the Marquee Light and Speakers GLOBAL VR 040-1201-01 Rev. C 5/28/2004... -
Page 51: Shifter
CHAPTER 6 – SERVICE Shifter You will need to remove the shifter from the seat to service the micro switches inside. To replace the shifter, remove the (4x) T-10H Security Torx screws, pull up on the shifter vertically, and unplug the shifter at the Molex connector. -
Page 52: Standard Cabinet Wiring Diagram
CHAPTER 6 – SERVICE Standard Cabinet Wiring Diagram Figure 62 – Cabinet Wiring Diagram GLOBAL VR 040-1201-01 Rev. C 5/28/2004... -
Page 53: Force Feedback Steering Wiring Diagram
CHAPTER 6 – SERVICE Force Feedback Steering Wiring Diagram Figure 63 – Force Feedback Steering Wheel Wiring Diagram Need For Speed™ GT System Documentation 040-1201-01 Rev. C 5/28/2004... -
Page 54: Cabinet Specifications
CHAPTER 6 – SERVICE Cabinet Specifications If you need replacement parts, use the part numbers listed below when you contact GLOBAL VR Tech Support. Table 2 – Cabinet Parts List Description Part Number DFI NFS Computer NFS-PS35-BL NVIDIA G4 TI 4200 128MB AGP... - Page 55 CHAPTER 6 – SERVICE Description Part Number ARTWORK, MONITOR BEZEL, SIDE AW-NFS-06 REV A ARTWORK, PEDESTAL, RIGHT SIDE, NFS AW-NFS-07 REV A ARTWORK, PEDISTAL LEFT SIDE, NFS AW-NFS-08 REV A ARTWORK, SEAT BACK, NFS AW-NFS-09 REV A ARTWORK, CARD READER AREA AW-NFS-10 REV A ARTWORK, PEDISTAL BACK, NFS AW-NFS-11 REV A...
-
Page 56: Computer Rear Panel Diagram
Modem Line Out phone line (for future use). The 15-pin video port connects to the Super VGA Monitor cable inside the Video Out cabinet. AC Power AC Power input must use a IEC 14 connector. GLOBAL VR 040-1201-01 Rev. C 5/28/2004... -
Page 57: Technical Support
Free telephone, e-mail and online support are provided for systems during the warranty period. In addition to helping with troubleshooting and diagnosing defective parts, GLOBAL VR technical support is prepared to help you with questions about the operation of your game. -
Page 58: Warranty Information
If repair or replacement fails to remedy the defect, then, and only in such event, shall GLOBAL VR refund to Purchaser the purchase price for said Product.
Need help?
Do you have a question about the Need For Speed GT Standard and is the answer not in the manual?
Questions and answers